
Mobile Testing Getting Started
Welcome to Testim's mobile testing tutorial!
In this tutorial you will learn how to test a mobile app using the Virtual Mobile Grid. As part of the tutorial you will learn how to create a new test, select a device from the Virtual Mobile Grid, select a native mobile app to be tested, record a test, and finally run it. The tutorial does not cover all the various options in the process, but rather a specific scenario that illustrates a process from beginning to end.
Video Course: A beginner level video course on Tricentis Testim Mobile
Before we begin
Before we begin, make sure you have the following:
- A mobile testing project - mobile testing requires a mobile testing project that is separate from the web testing project. If you do not have an existing mobile project, contact Tricentis support.
Note:
Each project is assigned to a single mobile operating system. A separate project is required to create/run tests on different operating systems. For example, you cannot create a test for an iOS device if the project was created for Android.
- Virtual Mobile Grid - The Virtual Mobile Grid does not require any special integration. It is included in the license for paying customers. However, for Community license, it is possible to enroll in a free trial as a Company Owner or Project Owner. During the free trial period, a variety of virtual devices (Android and iOS) will be available for you to use. For more information, see Virtual Mobile Grid.
- Native Application - in the current version only native apps are supported. For Android devices - Java or Kotlin apps. For iOS devices - Objective C or Swift.
Recording a Mobile Test
You can record a test on a mobile device to be run manually or automatically at a later time. During the test you can record only a single application from one device. However, when playing back the test, you will be able to run the same test on another device than the device used during the recording.
For iOS, tests that were recorded on a virtual device, such as the virtual devices provided on the Virtual Mobile Cloud, can be run on virtual devices only. And tests that were recorded on physical devices can be run on a physical device only.
To record a mobile test:
- From the Dashboard screen click the New Test button.
- To begin recording your test, click the Record button in the action menu.
- Select a device for your test. In this tutorial we are using a virtual device from the Virtual Mobile Grid. To select the device, click Virtual Mobile Grid option and then under Device, select the desired device, and under OS Version, select the desired operating system version. Click Next to continue.
- Select an Application to be tested. In this tutorial we will test one of the applications from the Virtual Library. Click From Library and then navigate and select the desired application. Click Done to finish.
When running the test on Virtual Mobile Grid it may take about 30 seconds up to a minute to initiate the test because the test is run on a clean device (with a cleared cache and without any apps).

Note:
Each test can only interact with a single application.
- An AUT Mirroring Viewer is displayed with the opened application under test. The viewer allows you to view the device and interact with the application under test, while Testim records the actions.
Note:
Test steps are only recorded by taking actions on the AUT Mirroring Viewer. Taking actions directly on the device will not record test steps.

Important Notice
When recording a test, try to choose text elements and avoid outer frames, images and icons for better stability.
.png")
- To stop recording, click the Stop Recording button or close the Viewer window.
.png")
-
Click the Setup step and enter a Test Name and Test Description.
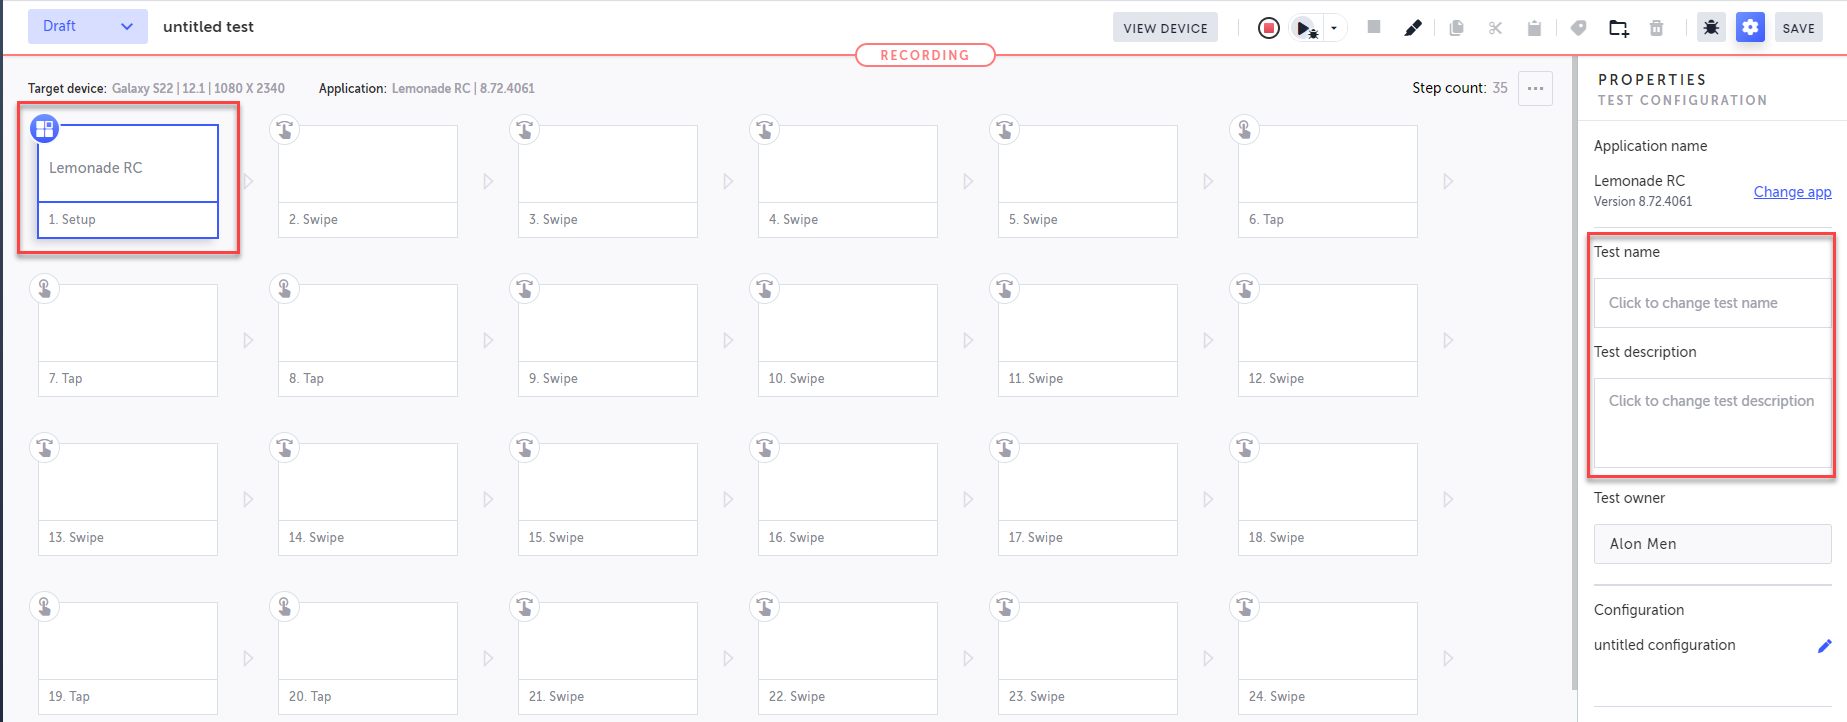
-
Click Save to save the test.
Supported Mobile Actions
The following actions are currently supported when using the AUT Viewer during the recording of the test:
- Tap - simulates a user tapping an element on the mobile device screen. To create this step, click the mouse on the AUT Viewer screen during recording.
- Swipe Vertical - simulates a user pressing and dragging their finger across the screen vertically. To create this step, click the mouse, drag the cursor in a vertical direction, and release the mouse button.
- Swipe Horizonal - simulates a user pressing and dragging their finger across the screen horizontally. To create this step, click the mouse, drag the cursor in a horizontal direction, and release the mouse button.
- Set Custom Text - simulates a user entering text into a text field in the app. When hovering your mouse on a text element, the element is highlighted in red. Clicking the text element open a Set Custom Text window. Enter the desired text in the field and click the Send button.
.png")
Running a Mobile Test
Once you have created a test, you can run the test and Testim will automatically repeat the recorded steps.
Run Mobile Test in Testim Editor
To run a mobile test in the test editor:
- Navigate to the Test List and select the test you want to run.

- Click the Run button in the action menu.
.png")
The device viewer window opens and runs the test actions. When the test is completed, a pop-up window indicates whether the test was successful.
.png")
Viewing Test Results
On the Test Editor screen, you can view the test results. The test result (Passed or Failed) is displayed at the top of the test. In addition, the colored icons at the top of each step indicate whether or not that action was successful.
.png")
If you would like to view detailed results for a specific action, double-click on the step. The action results screen is displayed for that action.
In case of a test failure, detailed info is shown about the cause of the failure.
.png")
Updated 5 months ago