
Xray Integration
Show tests run results in your Xray Jira project
What is Xray?
Xray allows you to plan, design, and execute tests, as well as generate test reports. Xray uses specific Jira issues types for this process.
Why do I need Xray integration?
The XRAY integration allows you to link a test in Testim to a test case in Xray. After running the test in Testim, the test results will be automatically displayed in Xray execution results, giving you a single view of the tests that were executed in Testim and in Xray.
Setting up Xray integration
Before using the Xray integration, you will need to connect Testim to the desired Xray project. This process is required only once.
To perform the integration you will need the following:
- Jira API token - to obtain the Jira API token, follow the instructions in https://support.atlassian.com/atlassian-account/docs/manage-api-tokens-for-your-atlassian-account/.
- Xray client ID and Xray client secret - to obtain the Xray client ID and Xray client secret, follow the instructions in https://docs.getxray.app/display/XRAYCLOUD/Global+Settings%3A+API+Keys.
To connect Testim to Xray:
- Go to Settings > Integrations tab. Under Test Management you will find various integration
modules. - In the Xray integration module, click login.

- In the Jira API token, Xray client ID, Xray client secret fields, paste the obtained credentials (see introduction above).
- Add the Jira username, and Jira URL.
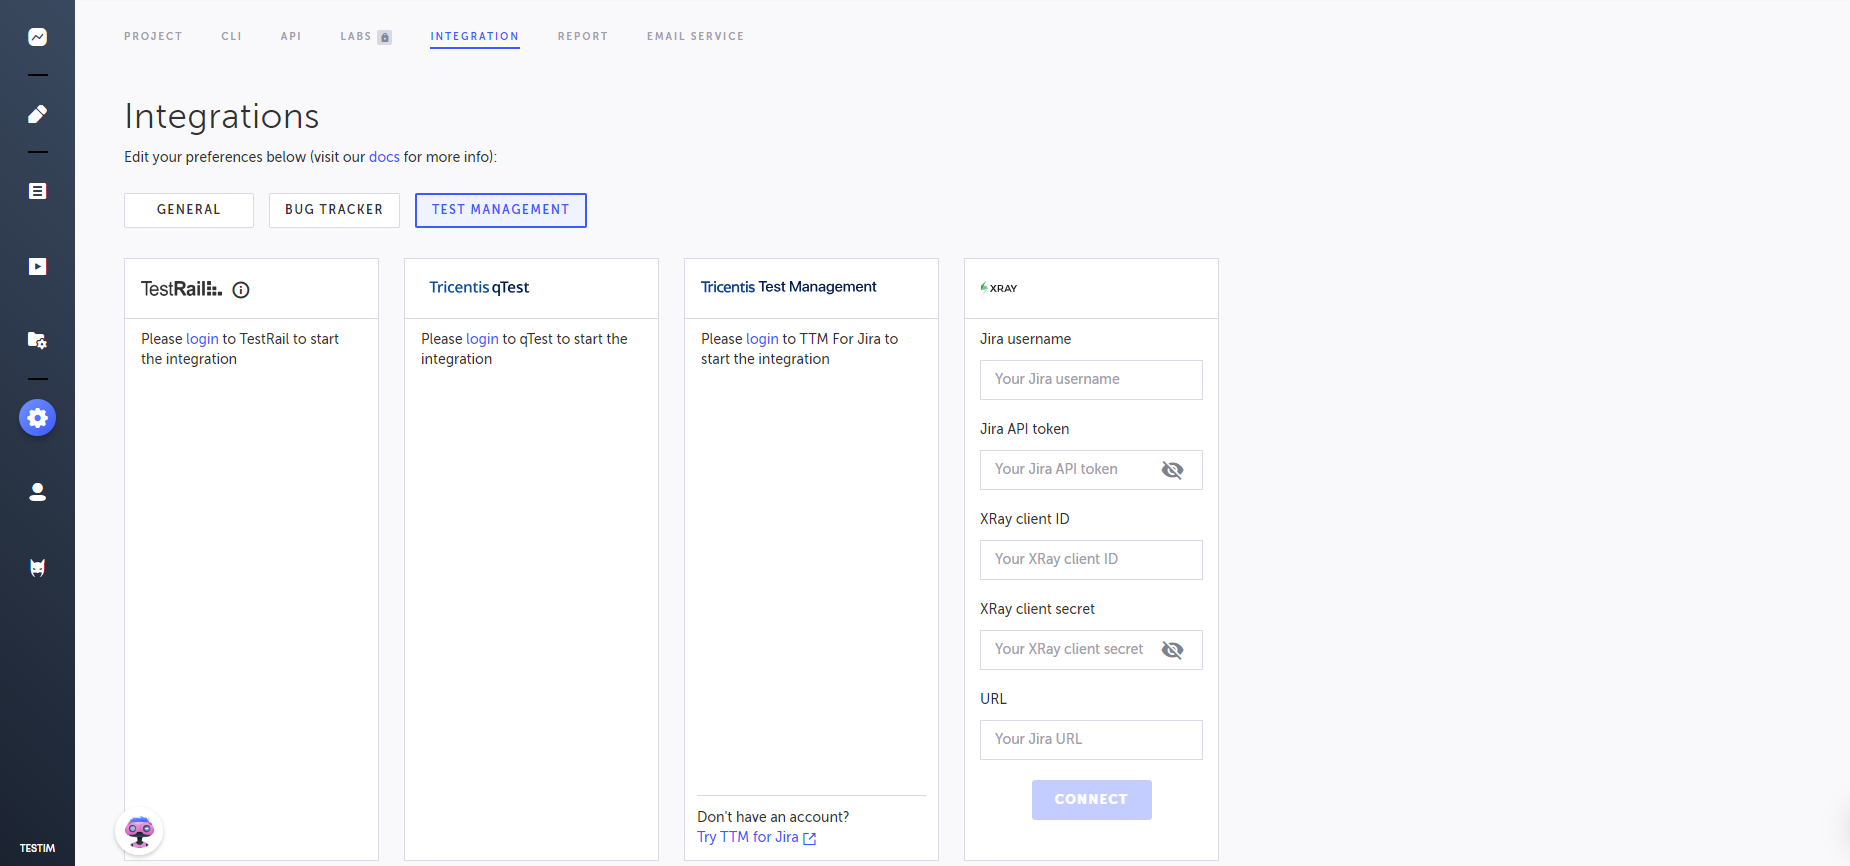
- Click Connect.
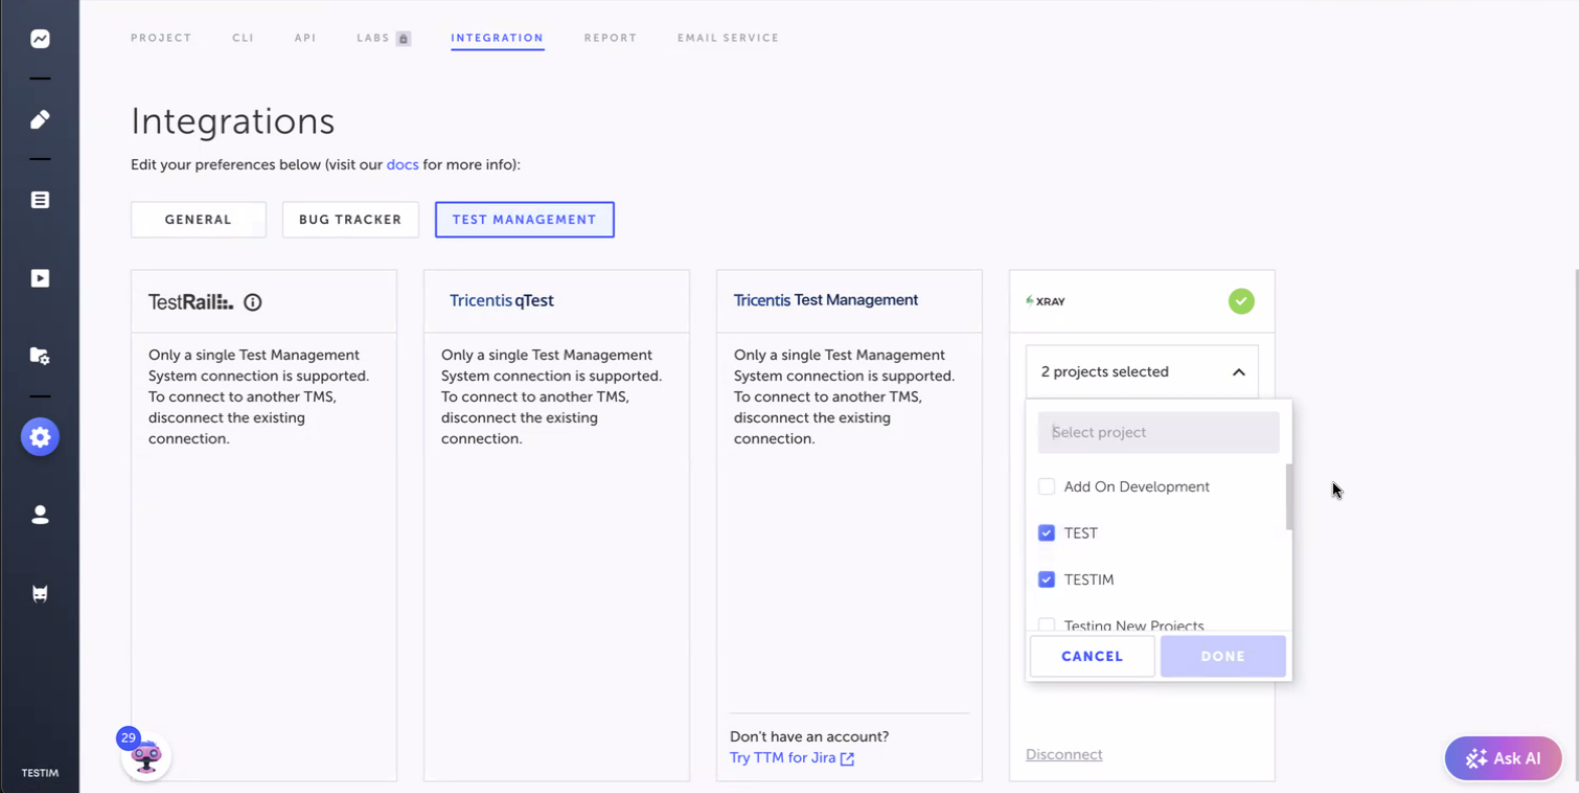
At this point Testim is associated to a project in Xray, but not mapped to a specific test.
You may connect one TMS (Test Management System) at a time. So, if your Testim system is already connected to another TMS, you will need to disconnect this TMS first and only then connect Xray. However, by disconnecting the TMS, you will remove the connections between the tests. So, if you want to connect to the previous TMS again you will have to recreate the connections as well.
-
In Testim, select the Xray project(s) from the list that you would like to associate.
Map a test in Testim to an Xray test case
After setting up the integration between Testim and Xray, you are ready to map a specific test in Testim to a test in Xray.
To map a test in Testim to a test in Xray:
- In Testim, open the test that you would like to be mapped.
- Inside the test in Testim, click the Properties icon on the Setup step (the first step).

- In the setup step's Properties panel, under Test in Xray, select the Xray project from the first drop-down menu and then the specific test from the second drop-down menu. There can be multiple mapped test cases

- Click Test Save.
Running a test and viewing the Testim test results in Xray
To view the result of a test execution in Xray, you will need to run the mapped test in Testim using a Remote Grid only. After running a mapped test in Testim, the test result will be displayed in the relevant Xray project under the appropriate test execution in the project board “to do” column.
The name of the execution is “<Testim execution name><UTC time>”
Click on the relevant execution and get execution details.
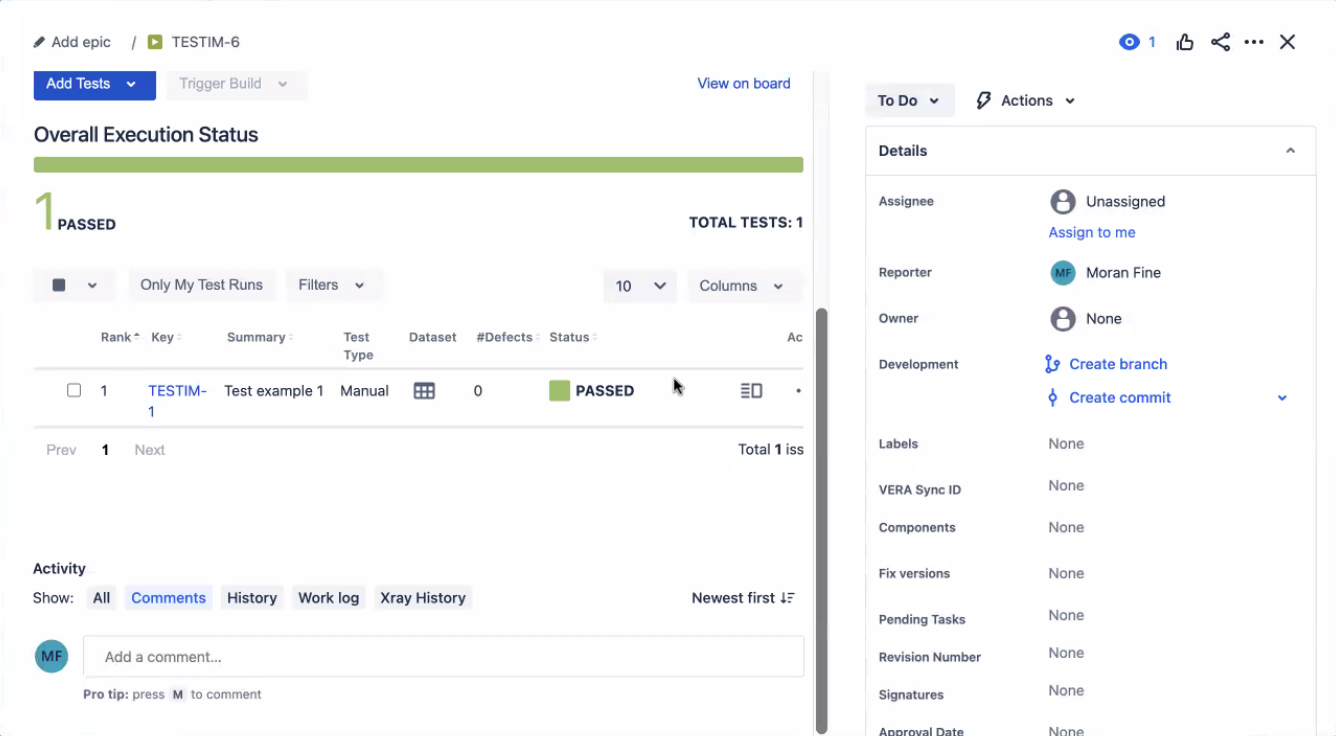
The following details are pushed from Testim to Xray:
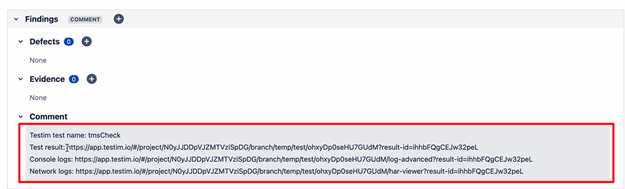
- Name - the name of the test in Testim.
- Link to test run in Testim
- URL for console logs for the test run in Testim (web only)
- URL for network log for the test run in Testim (web only)
- Status - the status of the execution. The status displayed is the Xray status, which was translated from the Testim status as follows (Testim > Xray):
| Testim | Xray |
|---|---|
| skipped | TODO |
| failed | FAIL |
| timeout | FAIL |
| aborted | TODO |
| passed | PASSED |
| no Testim equivalent | EXECUTING |
Changing these statuses in Xray may cause interruption in the integration.
Mandatory custom fields in Xray are not supported. Making a custom field on Xray mandatory may cause the integration to stop working.
Updated about 2 months ago