
Recording New Steps to Resolve Bugs
After running a test with debugging, you may find that your test is lacking some steps or that some steps are not updated and require re-recording. It is possible to add steps manually or record them through the AUT. Test recording is a feature that allows you to record a sequence of user actions as you interact with your application under test (AUT).
See Editing your Tests for more info.
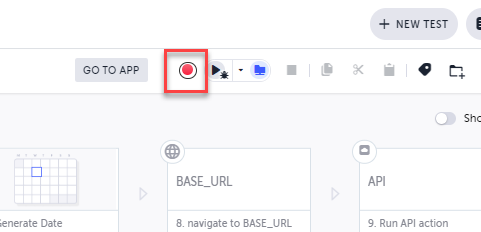
Start recording
If you need to add steps at the very end of the test, you can use the Start recording button. This option starts the test recording process. Once recording has started, the editor will track and record all the actions you take in the AUT.
To start recording:
- While the execution is stopped, click the Record button.
Start recording at this position
If you need to add steps somewhere in the middle of an existing test, you can use the Start recording at this position feature to specify a specific step where the recording should start. This can be useful if you want to focus the recording in a specific AUT state, rather than capturing all actions from the beginning of the session.
To start recording at this position:
- Run the test to the step where you want to add the new recorded steps. You can do that by placing a manual breakpoint ((See for more info). Make sure the AUT is showing the screen that you want to use to record the additional steps.
- Hover on an arrow between the two steps where you want to add the additional recorded steps and click the Start recording at this position button.
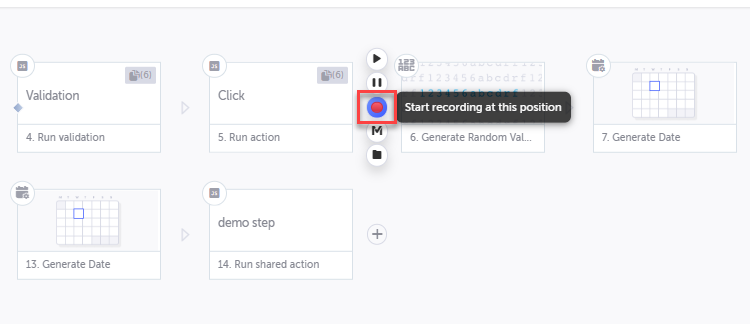
- On the AUT window, record the additional steps.
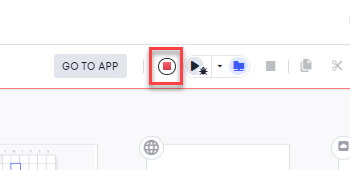
- Click the Stop recording button to stop the recording.
Updated 9 months ago