Tagging failed runs with failure types
Add failure types to failed runs to capture data and provide reporting insights
On remote runs, you can tag the failed tests with failure types tags. Tagging helps provide a historical record of why tests failed to identify trends and provide insights that aid process improvement.
Tagging a test failure from the test result screen
You can tag the failed test that ran remotely, add a description, and link it to a previously reported issue or create a new issue for it. If you want to publish new issues to your bug/issue tracking system, you will have to first configure the connection between Testim and your issue tracking system (a.k.a Bug Tracker). To learn more, see Bug Tracker Settings.
To add a test failure tag:
- After running a remote run test, if the test has failed, click the Tag Test Failure link.
Make sure you run the test using the "Run on grid" option (not "Run locally")

The following dialog is displayed:
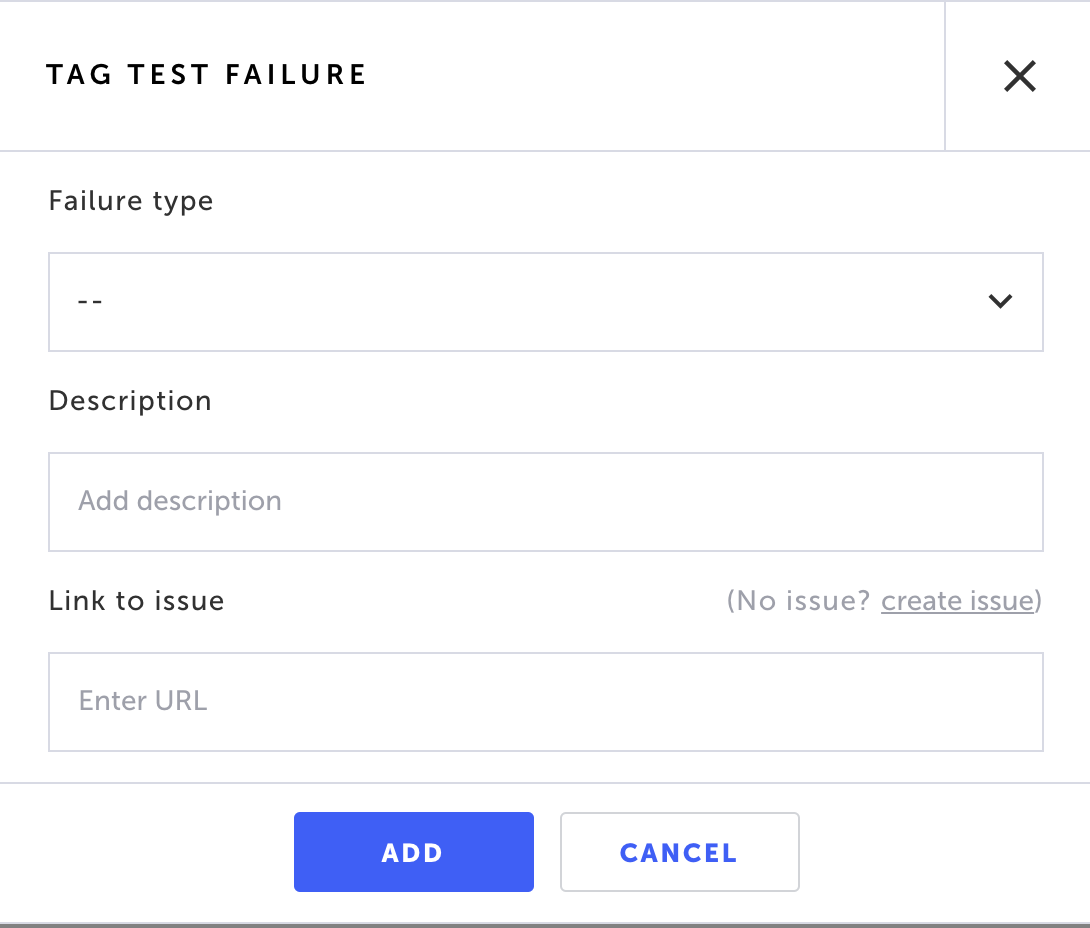
- In the Failure type field, select one of the following options:
- Bug in app
- Environment issue
- Invalid test data
- Test design
- Other
- In the Description field, enter a specific reason or context for the failure (optional).
- In the Link to issue field, submit a bug report by following the instructions in Creating a bug report for the failed test run
- Click Add to save.
Creating a bug report for the failed test run
As part of the tagging failed runs process, you can create a bug report, by either linking to an existing issue in your bug tracking system (e.g. Jira, Slack, Trello, etc.) or creating a new issue/bug report that will be added to the bug tracking system.
To link to an existing issue in your bug tracking system:
- Make sure your bug tracking system is integrated with Testim. For more information and detailed instructions, see - Bug Tracker Settings.
- In the Tag Test Failure dialog, in the Link to issue field, add the URL of the existing issue.
- Complete the tagging a test failure process.
To create a new bug report:
- Make sure your bug tracking system is integrated with Testim. For more information and detailed instructions, see - Bug Tracker Settings.
- In the Tag Test Failure dialog, click Create issue to create a new issue in your bug tracking system.
The bug details are automatically created and the Publish Bug screen is displayed:
- In the Summary field, fill in a descriptive summary.
- You can modify the Project and Type selection and edit the suggested texts.
- When finished, click Publish to publish the issue.
The Link to issue field will include the URL of the newly created issue or the existing issue.
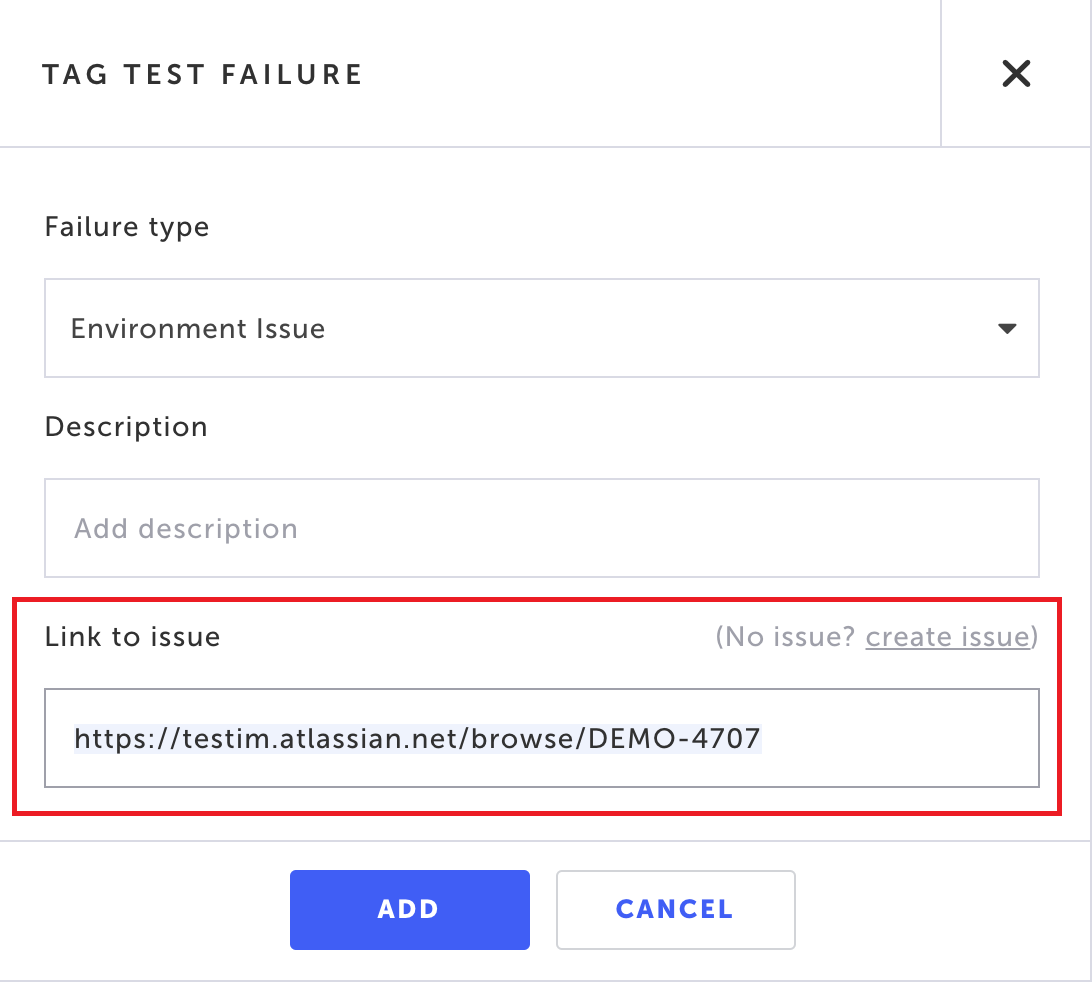
- Click Add to save.
Editing an existing test failure tag
After tagging a test failure, you can edit an existing test failure tag.
- From the Test List screen, click the relevant test.
On the test editor screen you will see your previously selected test failure tag.
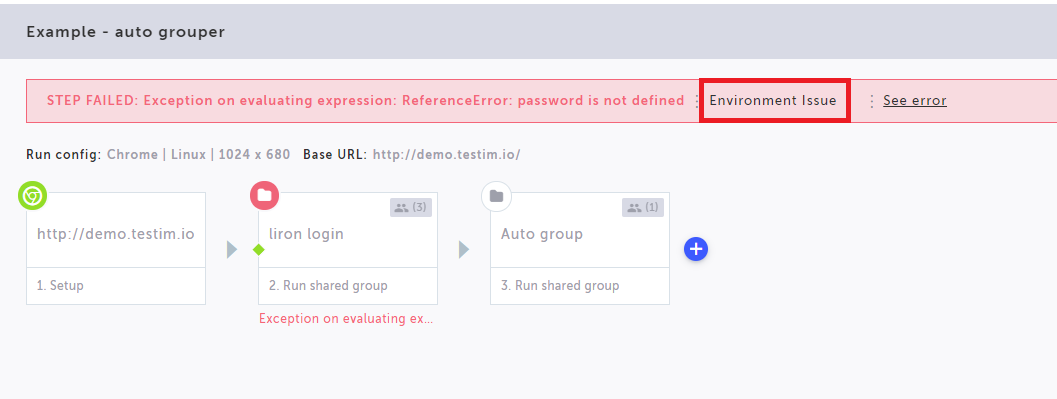
- Hover your mouse over the tag and click the Edit Tag icon
- Edit the existing test failure tag.
- Click ADD to save
Tagging multiple test failures from the Test Runs screen
To tag multiple tests on the Test Runs screen:
- Go to Runs -> Test Runs.
- Use the time-frame drop-down menu to set the relevant time-frame.
A list of test runs will appear at the bottom.
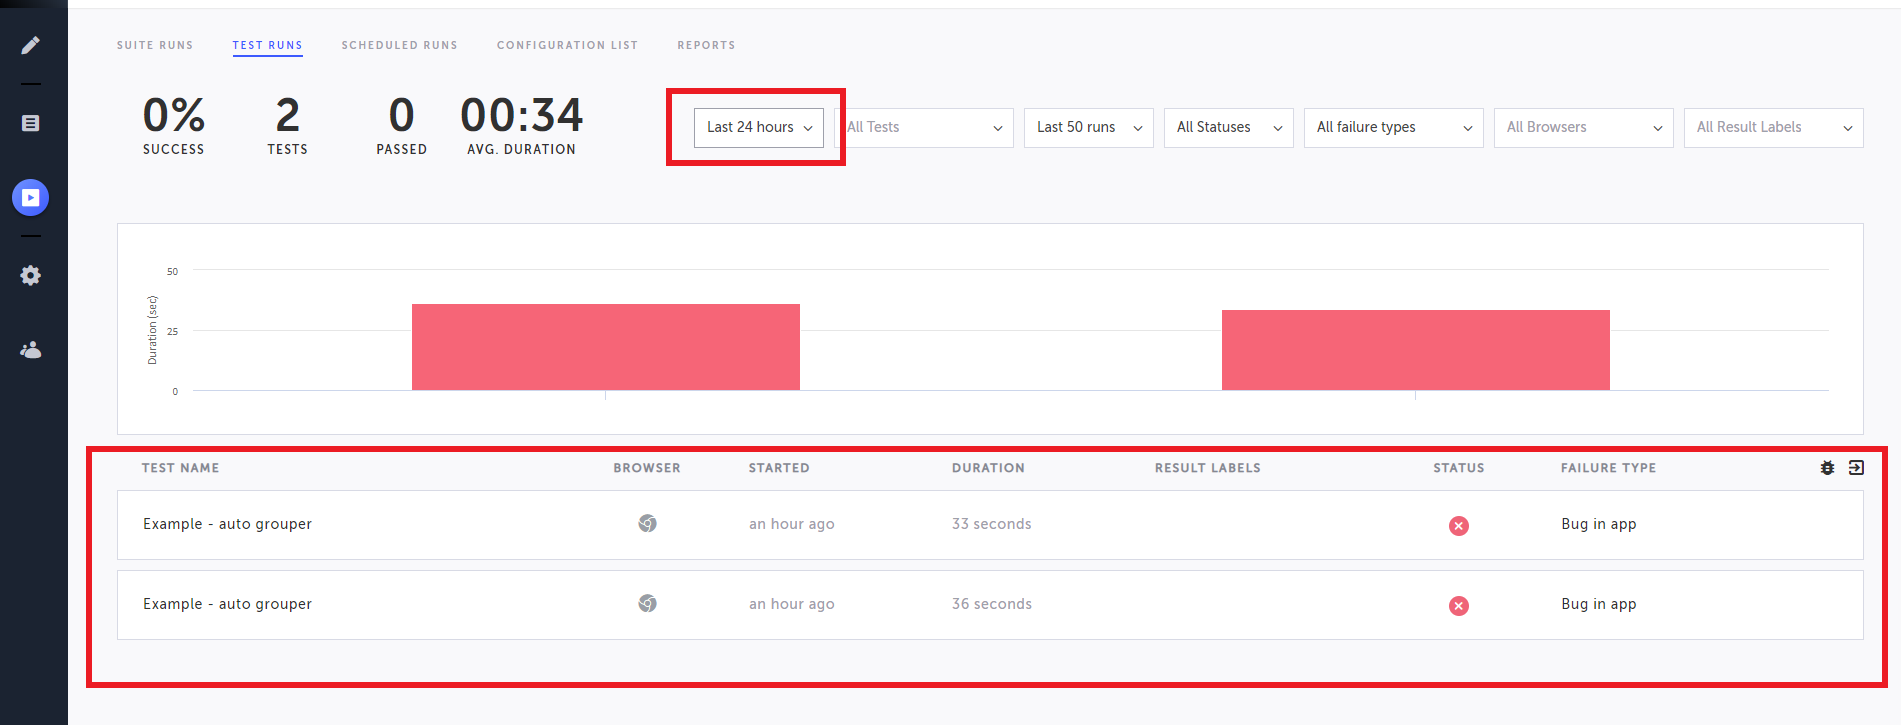
- Click the bug icon at the top of the list.
The following dialog is displayed:
- Select the Failure Type, add a description (optional) and Link to issue in your issue tracking system (e.g. Jira), by entering a URL of the issue.
- Click Add.
Suggested failure tags
After tagging multiple failed tests, if Testim recognizes a reoccurring issue, it will suggest a failure tag based on your previous selections. The suggested failure tag appears at the top of the test result screen.
To use the suggested failure tag from the test result screen:
- At the top of the test result screen, hover your mouse on the suggested failure tag.
The following dialog is displayed:
- Do one of the following:
- Click Confirm to accept the suggestion. Following the confirmation, the test will be tagged based on the suggest selection and will include the description and the link to the issue of the previous failure tags (the failure tags that were used as a basis for the suggestion).
- Click Edit to select another tag. The tagging screen is displayed. Follow the instructions in the Tagging a test failure from the test result screen section above.
To use the suggested failure tag from the Test Runs screen:
- Go to Runs -> Test Runs.
- Use the time-frame drop-down menu to set the relevant time-frame.
A list of test runs will appear at the bottom. - Tests that include a suggested failure tag will be labeled as "Suggested".
- Hover your mouse on the suggested failure tag.

- Do one of the following:
- Click Confirm to accept the suggestion. Following the confirmation, the test will be tagged based on the suggest selection and will include the description and the link to the issue of the previous failure tags (the failure tags that were used as a basis for the suggestion).
- Click Edit to select another tag. The tagging screen is displayed. Follow the instructions in the Tagging a test failure from the test result screen section.
Viewing Failure Reports
You can view statistics about failures by failure type in the reports view. As you build up data about your failures, you can identify trends, helping you target remediation or process improvement.
To view failure report:
- Go to Insights -> Reports.
The failure report is the third report from the top. - Click the drop-down menu to select the time-frame of the report.
- The report has two views – donut chart and line graph. Click the view modes to toggle between the views.
Failure by Type – Donut Chart
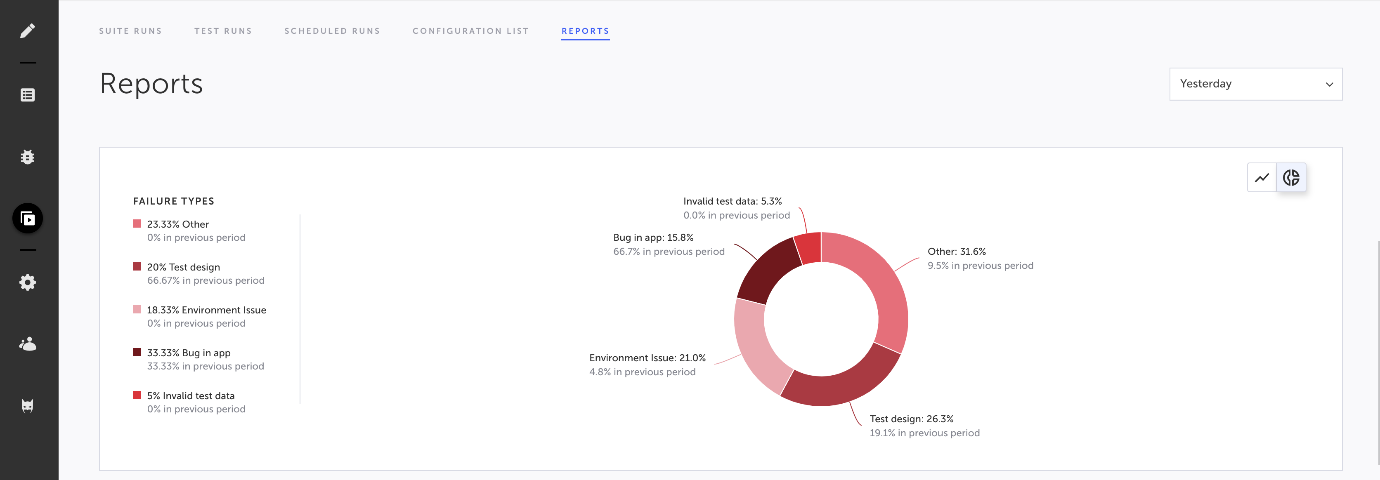
The donut chart displays the distribution of failure types by tag. Each tag includes the occurrence percentage out of the total number of runs and its percentage in the previous period. Clicking the failure tag takes you to the Test Runs screen, while listing all the runs that were tagged with this type.
Failure by Type – Line Graph
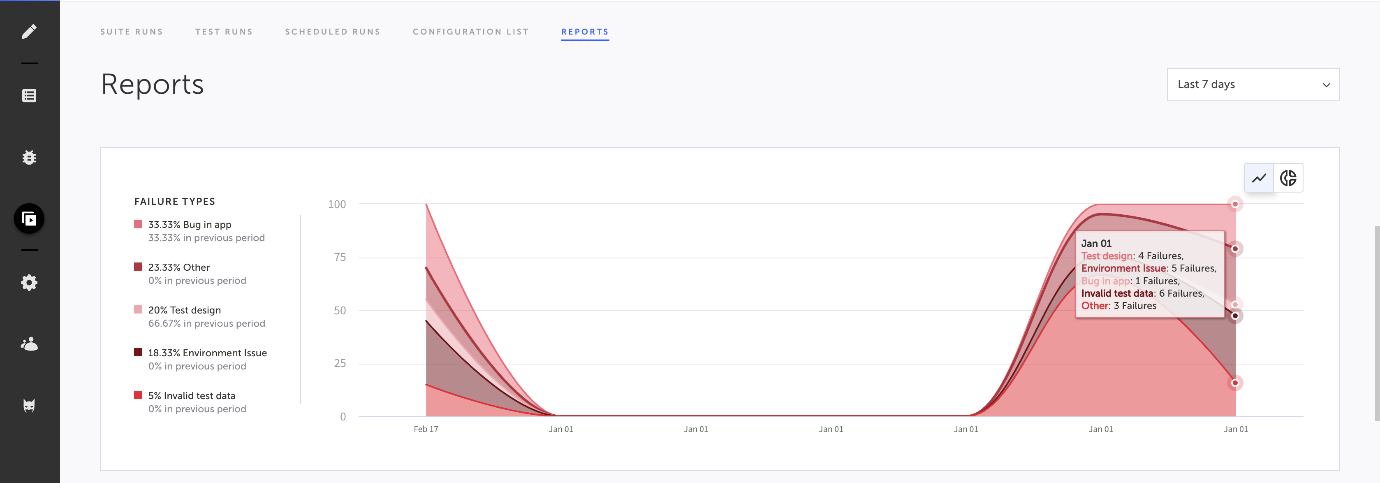
The line graph displays the number of occurrences of each type of failure throughout the specified period of time. Each tag is color coded according to the legend on the left. You can hover your mouse to see additional info.
Updated 5 months ago
