TeamCity integration

In order to integrate your tests with TeamCity, first you need to have node.js (12.13+ ,14.15+ and 16.13+) installed on the TeamCity machine or one of its slave machines.
Now, just follow these steps:
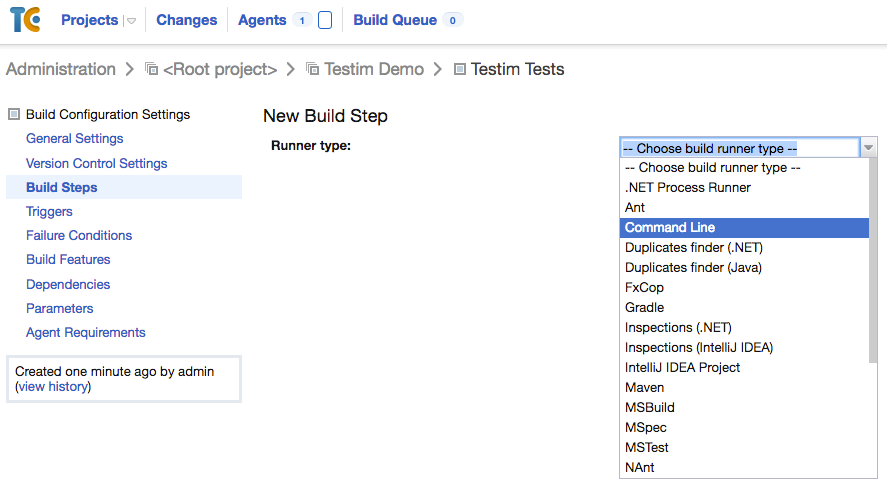
- Create a New Build Step in your project:

- Choose "Command Line" runner type:

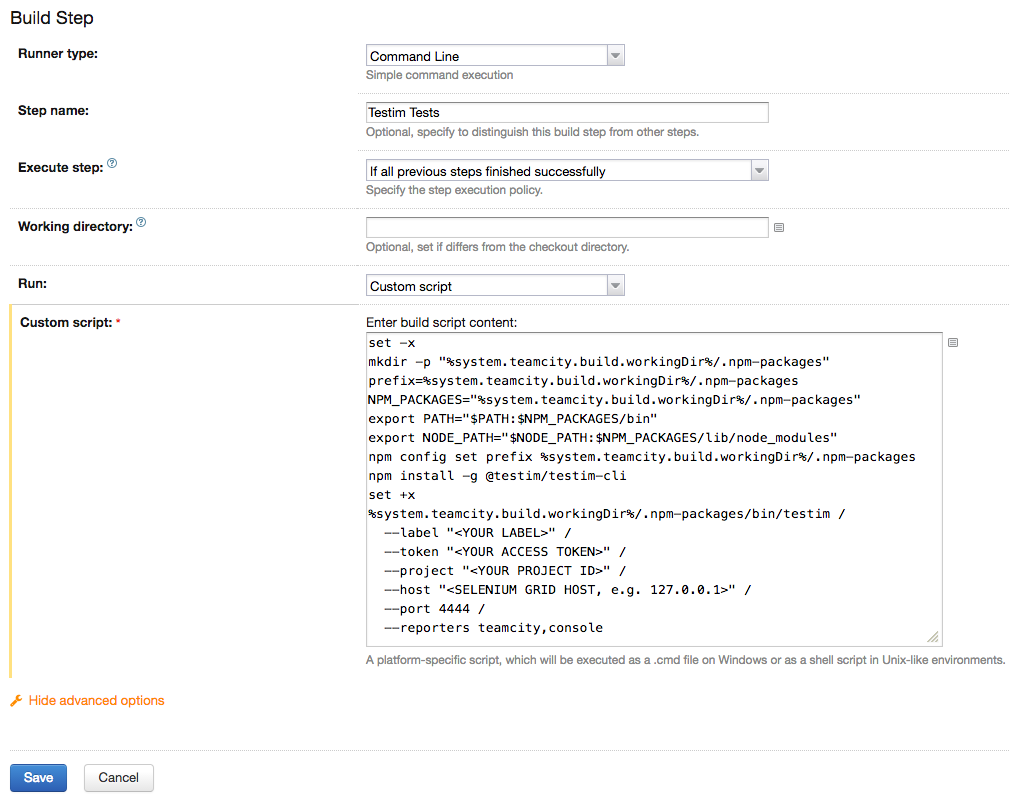
- Set the Custom Script with the appropriate parameters, as described in the CLI page.
Here is the basic script template, containing the first part that makes sure you have the latest npm package, and the CLI command itself:
set -x
mkdir -p "%system.teamcity.build.workingDir%/.npm-packages"
prefix=%system.teamcity.build.workingDir%/.npm-packages
NPM_PACKAGES="%system.teamcity.build.workingDir%/.npm-packages"
export PATH="$PATH:$NPM_PACKAGES/bin"
export NODE_PATH="$NODE_PATH:$NPM_PACKAGES/lib/node_modules"
npm config set prefix %system.teamcity.build.workingDir%/.npm-packages
npm install -g @testim/testim-cli
set +x
%system.teamcity.build.workingDir%/.npm-packages/bin/testim \
 --label "<YOUR LABEL>" \
 --token "<YOUR ACCESS TOKEN>" \
 --project "<YOUR PROJECT ID>" \
 --grid "<Your grid name>" \
 --reporters teamcity,console
In order for TeamCity to store, analyze and show the results, Testim generates a unique TeamCity report format which is automatically recognized:

Note:
- You can see its progress test-by-test as they are executed!
- For the grid name, read here how to set up your grid.
- When using the arguments --reporters teamcity, console --retries combined, even if a test passed on a retry, teamcity will record both the failed and passed executions and the build will be marked as failure even though the suite might pass.
Updated 5 months ago
What’s Next
