
Editing a Step’s Properties
You can edit the Properties of a step after the step has been created. The configurable Properties options vary depending on the type of step that you are editing.
To edit the properties of a step:
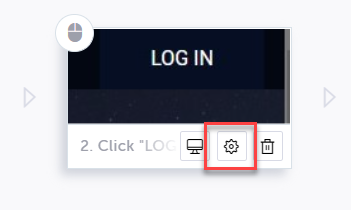
- Hover over the desired step and click on the Show Properties (:fa-cog:) icon.
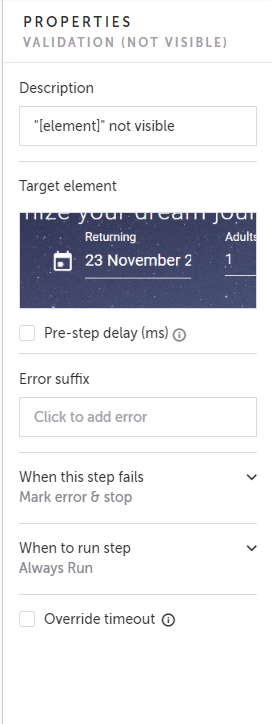
The Properties panel opens on the right-hand side.
- Make the desired changes.
The changes are automatically applied to the test.
Before closing the Editor screen, make sure to save all changes by clicking the Save button in the header bar.
Properties Configuration
The list of properties shown in the Properties panel varies depending on the type of step that is selected. There are several Properties that are relevant for most types of steps, while others are relevant only for certain specialized types of steps.
The following table describes how to configure the various Properties with links to more complete documentation of its related features.
Property | Related Step Types | Description | Additional Info |
|---|---|---|---|
General Properties | |||
Description | All | This is the editable name for the step. Try to give your steps informative names to make your tests more comprehensible. | |
Disable Auto-scroll | Recorded steps and validations | Finding the target element may require scrolling, even though it wasn’t required when the test was initially recorded. By default, Testim automatically scrolls to elements outside the viewport. Selecting this checkbox disables this feature for this step. Testim will only look within (and will not scroll outside) the viewport for the target element. | |
Element must be visible | Recorded steps and validations | There are times when the target element exists on a page, but is not visible to the user. For example, the element might not currently be in the viewport, or its visibility is set as “display: none”. If this box is checked (default), the step will only run if the target element is visible. | |
Error Suffix | All | Add a custom message as a suffix to the error message that is displayed when the step fails. You can enter a simple string (e.g., 'my custom error’) or you can enter a string that includes parameters (e.g., ‘my custom error’ + | |
Override timeout | All except Sleep and Generate Date | The “step timeout” is the time lapse (in milliseconds) which causes Testim to register a fail for a test step. The default time lapse for each step is initially set in the Setup step configuration. Selecting this checkbox allows you to override the default setting for this step and specify a different time lapse value (in milliseconds). | |
Target Element | Recorded Steps and validations | This is the element that was selected in the AUT (application under test) browser (represented by a thumbnail image of the element in the Properties panel) that will be clicked on when this step of the test is run. The target element is editable. The following options are shown when hovering over the thumbnail: Highlight, Reassign, Improve, and View locators. | |
When this step fails | All | When a step fails, the default behavior is to mark the step with an error and stop the test. You can override this default behavior. The options for this property are:
| |
When to run step | All | The "when to run step" feature lets you control when a step in your test runs or doesn’t run. The following options can be applied:
| |
Specialized Properties | |||
Add Prefix | Generate random value | Add a prefix string to the value. For example, "User", then all of the values would start with User: User47, User65, User32. | |
Add Suffix | Generate random value | Add a suffix string to the value. | |
Allow API request retry | Add API action, Validate API | Will retry the API request if it fails. | |
Attribute name | Validate HTML attribute | This is the Attribute name that was entered by the user when the step was initially created. To change the name, click inside the field, and edit the contents. | |
Cookie name | Get Cookie | The Get Cookie step allows you to get cookies in the context of a test directly from the UI. After creating the step, you need to edit the step and provide the name of the cookie you would like to get. To enter or change the name, click inside the field, and edit the contents. | |
Date format | Generate date | The default format that Testim uses for a Generate date step is 'YYYY-MM-DD'. To change this format, click inside the field, and edit the contents. The format can be any JS date format. | |
Expected status | Validate checkbox, Validate radio button | This property is applicable when you are validating the checked or unchecked state of a checkbox or radio button. The default setting is Checked. To change the setting, click the Uncheckedradio button. Note: Checkbox and radio button validations can be used only on native checkboxes or radio input elements. Custom checkbox implementations that don't use an underlaying input are not supported. | |
Expected value | Validate element text, Validate CSS property, Validate HTML attribute, Wait for element text | This is the value that Testim is looking for when this step is run. This value was initially set when the step was created. To change the value, click inside the field, and edit the contents. Note: Parameters, regular expressions, and JavaScript expressions can be used in the Expected value field. | |
Extract Mode | Add extract value step | Specifies which data type to extract. By default, the mode is to extract the entire string. You can modify the mode to either extract a number, date or use regular expression to extract just part of the text. Please note that even when extracting Number/Date/Regular Exp the extracted value will be a string. | |
Length | Generate random value | Specify the length of the generated value. | |
Native events | Click | The Click step is configured (at the project level) to translate it into either native or non-native events. | |
Pre-step delay (ms) | Validate element not visible, Wait for element not visible | In some cases, you want to set a delay time before checking that the element is not visible. For example, you want to make sure that the element does not suddenly appear on the page. By default, no delay is set. To set a delay, select the Pre-step delay checkbox, and then set the delay time in milliseconds. | |
Property name | Validate CSS property | This is the CSS Property name that was entered by the user when the step was initially created. To change the name, click inside the field, and edit the contents. | |
Replace with a clone | Add custom action, Add API action, Add custom validation, Validate API, Add network validation, Add custom wait for | If you are editing a shared step, changing it in one place will change it in all instances of the project. To modify the step for a specific test only, click Replace with a clone. | |
See old revisions | Add custom action, Add API action, Add custom validation, Validate API, Add network validation, Add custom wait for | Every time you save a test that includes a change, including changes to a shared step, the version of the test before the change is automatically stored. Each of these versions of the test is called a revision. The revision list contains the change message, the name of the user who made the change, and date in which it was made. Revisions gives you the power to always look back at your changes and revert back to an older revision. Click the See old revisions link to see the revision list. | |
Send via web page | Add API action, Validate API | This property is applicable when you are sending HTTP requests or validating values returned from API calls. Keep this option checked if you need the API to also send browser information such as cookies. (They are sent automatically.) Uncheck this option only if you want to send the API call outside the browser context, so that browser-restrictions do not apply to it. (For example, if your API doesn't support CORS.) | |
(Shared) step name | Add custom action, Add API action, Add custom validation, Validate API, Add network validation, Add custom wait for | This is the name that was entered by the user when the step was initially created. To change the name, click inside the field, and edit the contents. (If the step is a shared step, the property is labeled Shared step name. If the step is not a shared step, the property is labeled Step name.) | |
Sleep duration | Sleep | This property sets the amount of time that the test waits before proceeding to the next step. The default is 1 second (1,000 ms). To change this value, click inside the field, and edit the new sleep value (in ms). | |
String type | Generate random value | The type of string to be generated. Whether it will include letters only, numbers only, or a mix of the two. | |
Time difference | Generate date | The generated date/time can be set to before or after the browser time or UTC (if UTC was selected). | |
URL to assign | Add navigation action | Specify the URL to navigate to another page during the test. | |
Use UTC | Generate date | Select to use UTC instead of the browser's time zone. | |
Variable name | Add extract value step, Get cookie, Generate random value, Generate date | This is the default name that Testim uses for the variable that holds the data in each of these steps. To change the name, click inside the field, and edit the contents. Note: Variable names are subject to the name limitations in JavaScript. So, for example, spaces and special characters are not allowed. | |
Variable scope | Add extract value step, Get cookie, Generate random value, Generate date | You can choose the scope of the variables that Testim uses in these types of steps. By default, the variable scope is set to Test. If you would like to change it, click on the Variable scope dropdown, and select one of the following three options:
| |
| Add custom action, Add API action, Add custom validation, Validate API, Add network validation, and Add custom wait for | Parameters can be used in steps to test different scenarios without knowing the information ahead of time. If you click on the + next to PARAMS, Testim allows you to define HTML parameters and JS parameters to use in your step. |
Updated 5 months ago