Conditions
Add conditions to your tests
The "when to run step" feature lets you control when a step in your test runs or doesn’t run. You can specify a “when to run” condition for any type of step, including a group step.
There are 5 options for when to run a step:
- Always Run - There are no conditions for this step. This step will run whenever you run the test. This is the default setting for all test steps.
- Element - The Element condition enables you to specify whether or not to run a step in the test depending on whether or not the specified element exists (or does not exist) on the page. The element can be any DOM object, such as property ID, text, or class. See CONFIGURING AN ELEMENT CONDITION.
- Element text - The Element text condition is similar to the Element condition; however, this condition enables you to specify an expected text value for the specified element. The step in the test will run only if the specified text exists. See CONFIGURING AN ELEMENT TEXT CONDITION
- Custom - The Custom condition enables you to check for a specific value of an element on a page. The step in the test will run if the value exists. You can enable custom JavaScript code for the condition. See CONFIGURING A CUSTOM CONDITION
- Never (skip) – The step never runs as long as this option is selected. This options is used when you want to temporarily disable a step of the test. This allows you to preserve this step for future use. See CONFIGURING A NEVER RUN STEP CONDITION
Condition Indicator
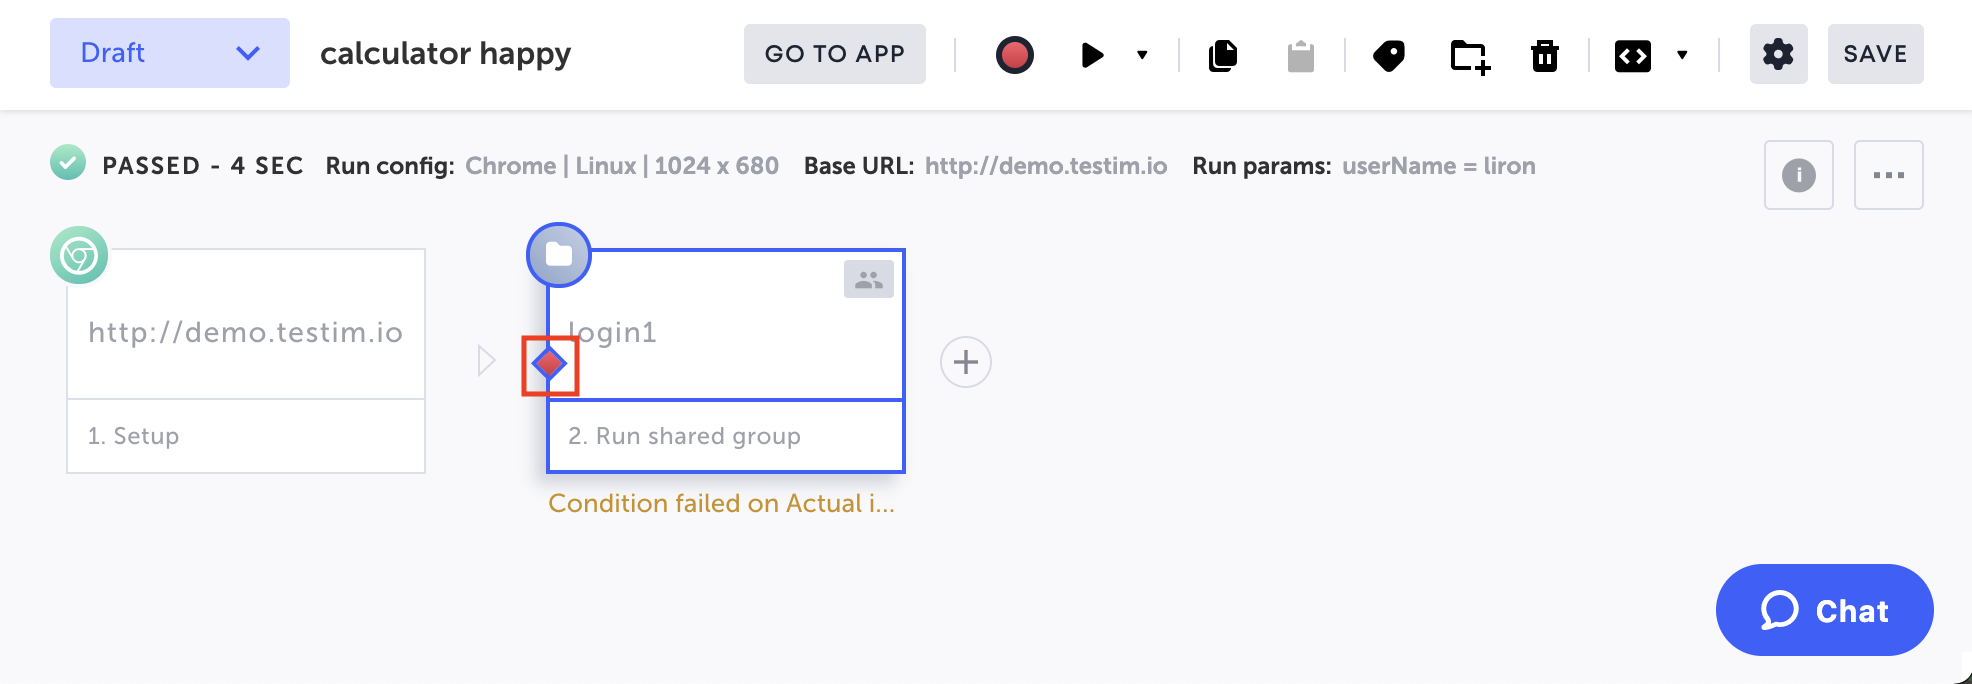
When you add a condition to a step, the rhombus icon is shown on the step tile.

When you run the test, if the condition returns a truthy value, the rhombus icon is shown in green, indicating that the step ran.

If the condition returns a falsy value, the rhombus is shown in red, indicating that the step was skipped.
Common Use Cases
Setting conditions enables you to include steps in a test even though they are only relevant under certain circumstances. You can specify a specific element to check for, which will determine whether or not the step should run.
For example-
- Running a login step if the user is logged out – If your test includes a login step it is important to check if you are already logged in or not. When you test using CI, for example, a fresh browser is opened and you'll probably need to log in first. If you are testing locally, you are may already be logged in. By using conditions, you can cause the login steps to run only when you are not already logged in.
- Populating a table with data only when it's empty – Before populating a table with data, it is important to check that the table is empty. If the table is empty, the populating table step will run. If it is already populated then the step will be skipped.
Configuring an Element Condition
The Element condition allows you to specify whether or not a step in the test will run, depending on whether or not the specified element exists on the page.
The Element condition runs the step based on an element’s visibility on the page. There are two conditions you can choose to check for when this step will run:
- Element visible: The step will run only if the element is visible on the page.
- Element not visible: The step will run only if the element is not visible on the page.
To configure an Element Condition:
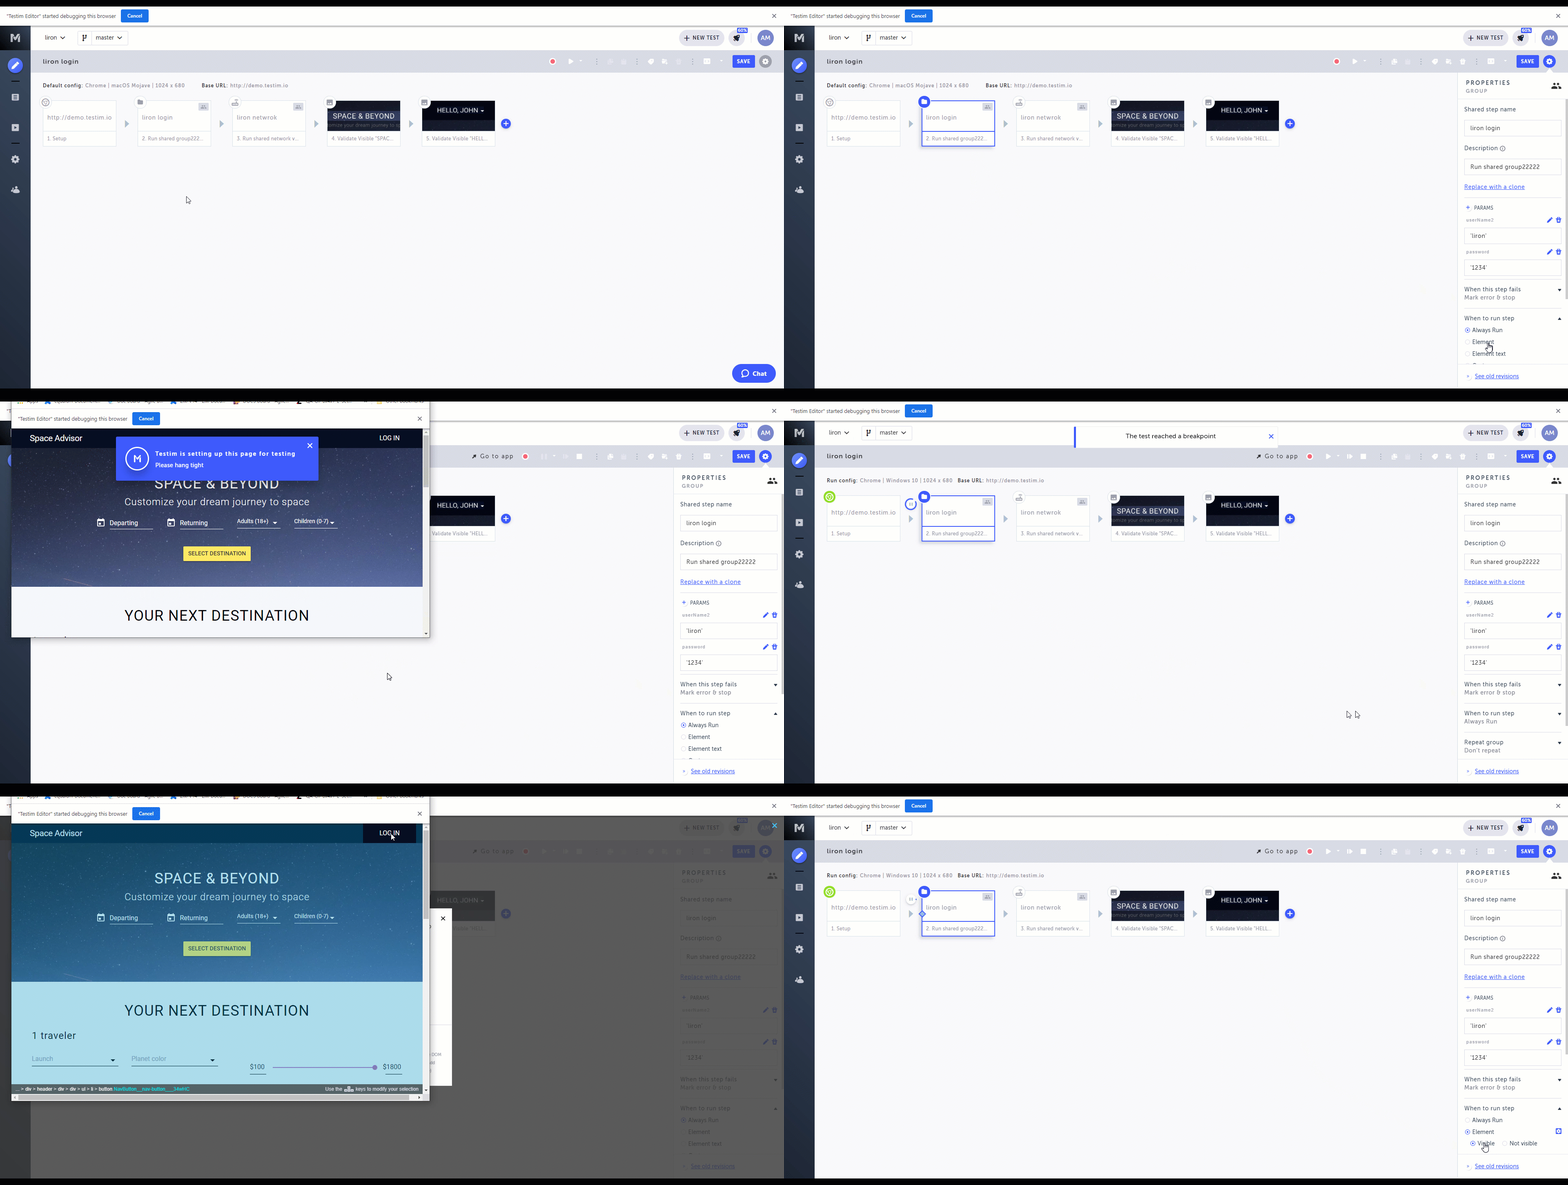
- Hover over the > (arrow symbol) to the left of the step to which you want to add a condition.

The action options are displayed.

- Click on the Toggle Breakpoint button.

- Click on the Play Scenario button, to run the test until the breakpoint.

- Hover over the step to which you want to add a condition, and then click on the Show Properties (:fa-cog:) icon.
The Properties panel opens on the right side. - In the Properties panel, click on When to run step.
The options are shown. - Select the Element radio button.
- In the AUT window, hover your mouse on the relevant element and then click on it to select it.
The selected element is shown in the Target Element box in the When to run step section.
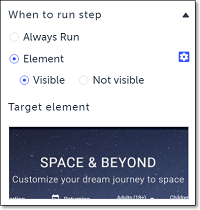
- If you would like to view, replace or adjust the settings for the selected element, use the procedures described in odifying the Test Using the Properties Panel] \ (doc:editing-your-tests#section-modifying-the-test-using-the-properties-panel).
- Specify the type of Element condition to apply. Options are:
- Visible – the step only runs if the element is visible on the page.
- Not visible – the step runs only if the element is not visible on the page.
- If you would like to adjust the settings for how long Testim checks before declaring a condition to be true or false, use the procedure described in Advanced Condition Settings.
- Click on the Toggle Breakpoint button after to remove the breakpoint.
The condition is added to the step as indicated by the rhombus icon shown on the step tile.
Try it yourself
Click here to open a sample test with a Login group step. Create an Element condition to only run the login step when the Login button is visible.
Configuring an Element Text Condition
An Element Text condition is similar to an Element condition in that it makes the step dependent on existence of a specific element. However, for an Element Text condition, you can also specify a particular text value that must appear in the specified element for the condition to be true. This can be given as a specific string or a range of values represented as a Regex expression, a short JS expression, or a parameter.
To configure an Element Text condition:
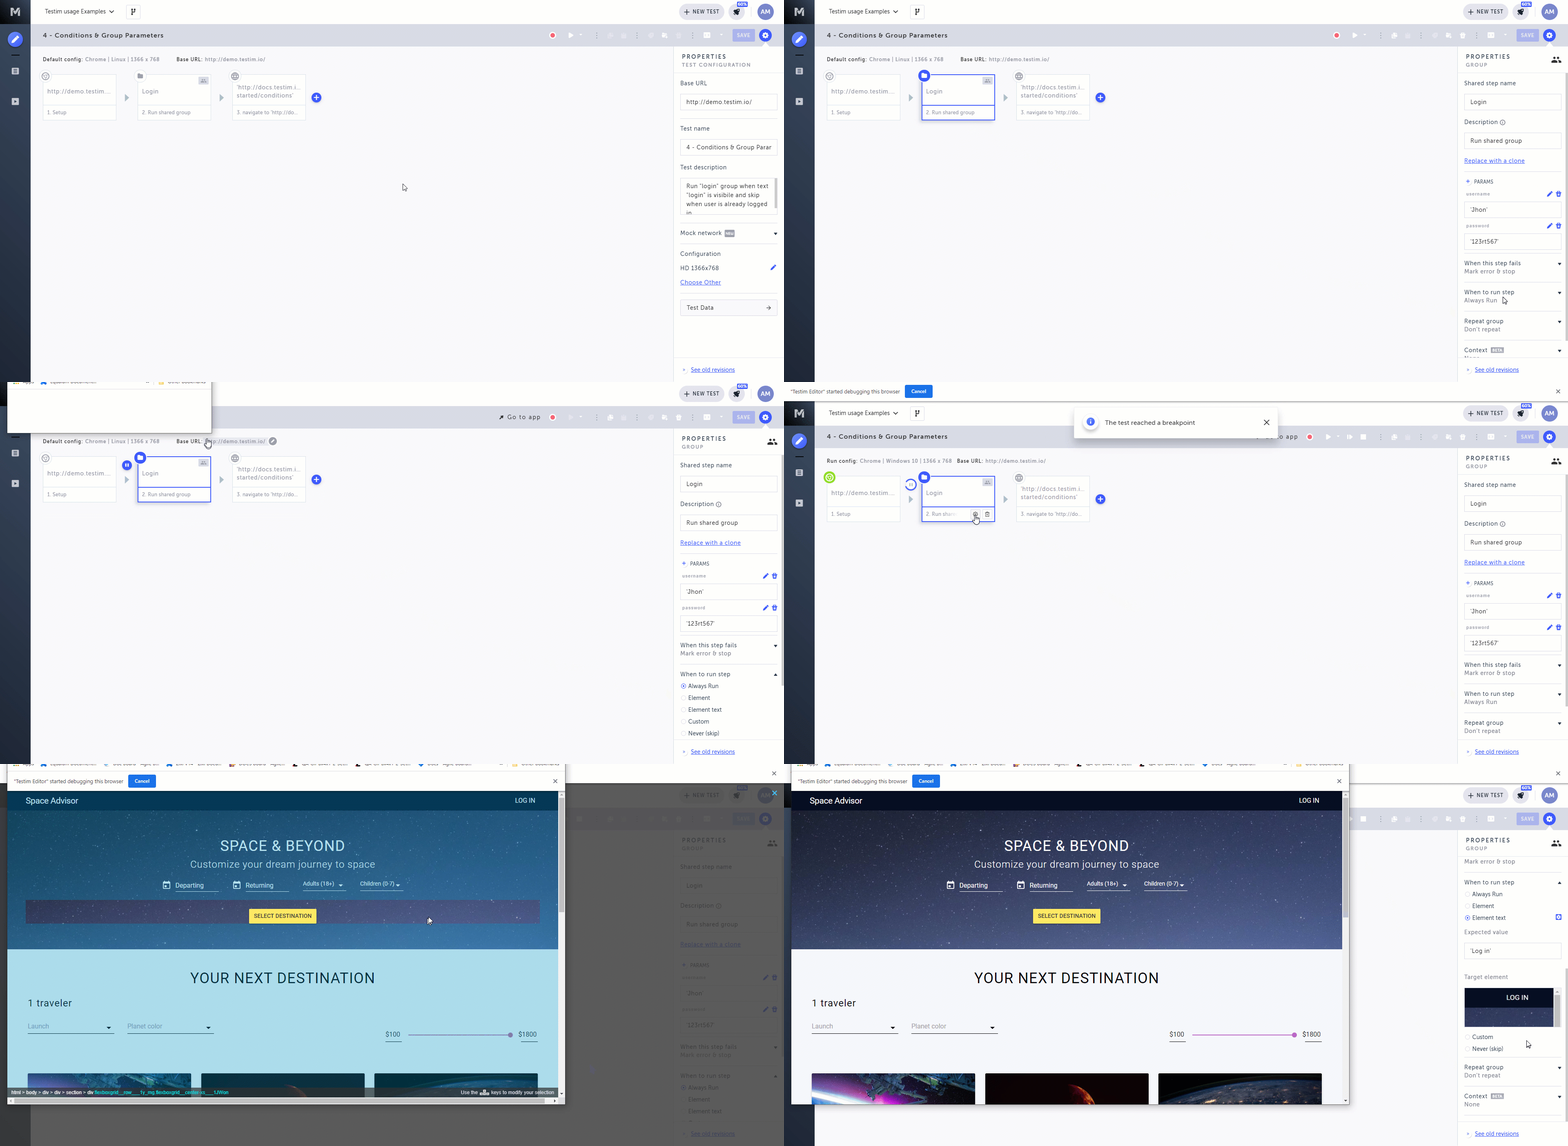
- Hover over the > (arrow symbol) to the left of the step to which you want to add a condition.

The action options are displayed.

- Click on the Toggle Breakpoint button.

- Click on the Play Scenario button, to run the test until the breakpoint.

- Hover over the step to which you want to add a condition and then click on the Show Properties (:fa-cog:) icon.
The Properties panel opens on the right side. - In the Properties panel, click on When to run step.
The options are shown. - Select the Element Text radio button.
- In the AUT window, hover your mouse on the relevant element and then click on it to select it.
The current value of the element is shown in the Expected value box. - The selected element is shown in the Target Element box in the When to run step section.
- If you would like to specify a value other than the current value, enter the value in the Expected value box. If you would like to set a range of values, enter a Regex expression, a short JS expression, or a parameter..
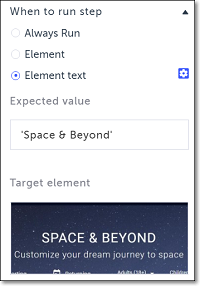
- If you would like to view, replace or adjust the settings for the selected element, use the procedures described in ifying the Test Using the Properties Panel] (d (doc:editing-your-tests#section-modifying-the-test-using-the-properties-panel).
- If you would like to adjust the settings for how long Testim checks before declaring a condition to be true or false, use the procedure described in Advanced Condition Settings.
- Click on the Toggle Breakpoint button after to remove the breakpoint.
The condition is added to the step as indicated by the rhombus icon shown on the step tile.
Try it yourself
Click here to open a sample test with a Login group step. Create an Element Text condition to only run the login step when the Login button is visible and showing the “Log in” text.
Configuring a Custom Condition
There are times that you may want to create conditions that include more than just validating that an element is visible or that specific text exists. You may want to check an element’s value or create more complex conditions. The Custom condition enables you to do this by creating conditions defined as JavaScript steps.
For example if you would like to check the URL in order to identify whether or not you are on the login page, you could use the following custom condition:
return loginButton.innerText === 'LOG IN';You can also define HTML or JavaScript parameters and then refer to these parameters in the step. For example, you can select an HTML element such as a button and then create a condition to check the text on that button.
Custom Condition steps should be written without a return value. They are meant to return a boolean value. Returning true causes the condition to succeed, while returning false causes it to fail.
To configure a Custom condition:
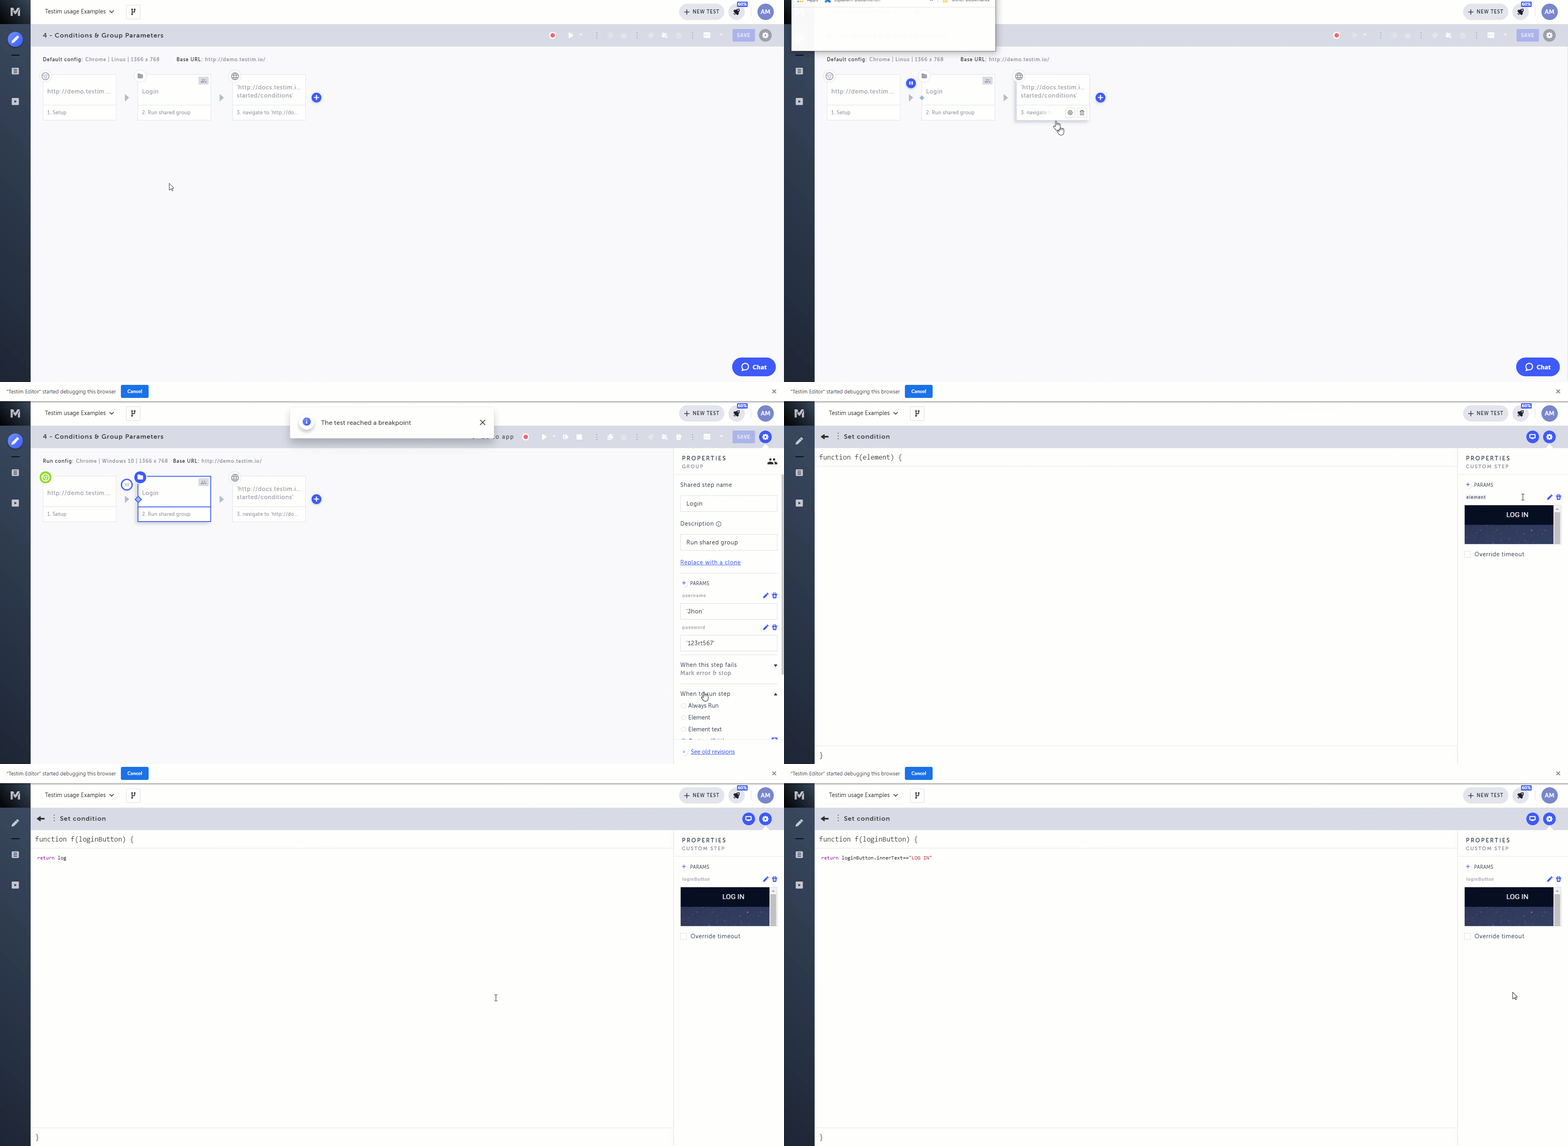
If you will be defining an HTML element as a parameter in Step 5 (below), you first must open your AUT by doing the following:
- Hover over the > (arrow symbol) to the left of your group step.
- Click on the Toggle Breakpoint button.
- Click on the Play Scenario button, to run the test until the breakpoint.
- Hover over the step to which you want to add a condition and then click on the Show Properties (:fa-cog:) icon.
The Properties panel opens on the right side. - In the Properties panel, click on When to run step.
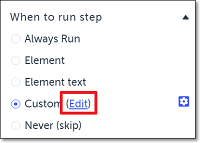
The options are shown. - Select the Custom radio button.
- The Set condition window opens.

- If you would like to use parameters for your custom condition, define the parameters as follows:
- In the right hand pane, click the + PARAMS button.
- JS parameter: If you would like to add a JavaScript parameter, select JS from the dropdown list and type in the JavaScript parameter.
- HTML parameter: If you would like to define an HTML element as a parameter, select HTML from the dropdown list. The browser opens, displaying the relevant webpage for this step. Do the following:
- In the AUT window, hover your mouse on the relevant element and then click on it to select it. The selected element is shown in the Target Element box in the Properties pane. If you would like to view, replace or adjust the settings for the selected element, use the procedures described in Modifying the Test Using the Properties Panel.
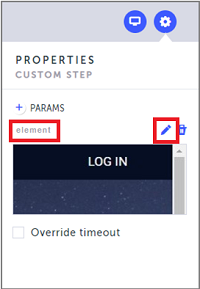
- The selected element is automatically named “element”. To assign a relevant name to the element, click on the edit icon and enter the desired name.
- In the function text box, type in the desired JavaScript condition. If you have defined parameters, you can refer to those parameters in your JavaScript condition.
NoteIf you are using DOM selectors other than HTML parameters (e.g. jQuery), then empty arrays are truthy, so you need to use
$(<query>).lengthinstead of$(<query>).
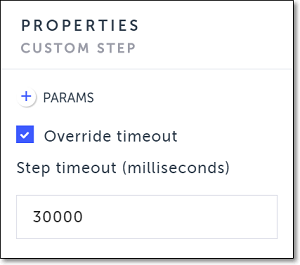
- If you would like to override the default timeout setting (30000ms), click on the Override timeout button in the Custom Step Properties pane, and enter the desired timeout limit.
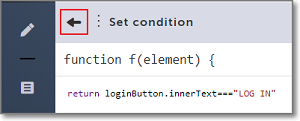
- Click the back arrow to return to the main Editor window
- If you would like to adjust the settings for how long Testim checks before declaring a condition to be true or false, use the procedure described in Advanced Condition Settings.
If you opened your AUT to define an HTML element as a parameter, click on the Toggle Breakpoint button before your group step to remove the breakpoint.
The condition is added to the step as indicated by the rhombus icon shown on the step tile.
Try it yourself
Click here to open a sample test with a Login group step. Create a custom condition to only run the login step when the Login button is visible and showing the “Log in” text. First, create an HTML parameter and select the Log in button. Then, enter the condition “return loginButton.innerText === 'LOG IN';”.
Configuring a Never Run Step Condition
If you would like to temporarily disable a step of the test but preserve the step for future use, you can use the Never (skip) option in the “When to run step” settings.
To configure a Never Run Step Condition:
- Click on the step for which you want to add a condition.
The step is highlighted with a blue box. - Click the Show Properties (:fa-cog:) icon.
The Properties panel opens on the right side. - In the Properties panel, click on When to run step.
The options are shown. - Select the Never (skip) radio button.
The step will be skipped whenever the test is run (until you change the “When to run step” configuration). The rhombus icon is shown in the step tile indicating that a When to run step” option has been configured.
Updated 5 months ago
