
Sealights Integration
Sealights is a quality intelligence platform that assesses and quantifies code coverage for individual tests. You can integrate Sealights with Testim, enabling you to create and run tests in Testim while using Sealights to perform test optimization. During the execution of the tests, Testim sends the list of tests that will be executed to Sealights and Sealights returns its test optimization recommendations for tests that should be skipped in the application build. These tests are then automatically excluded for the execution in Testim.
Native mobile apps and Salesforce environments are currently not supported. However, mobile apps are supported for services that use the Web frameworks.
Prerequisites
Before running a test in Testim with Sealights integration, you first need to:
-
Create a Sealights account
-
Setup and configure the Sealights Agents based on your AUT's (Application Under Test) framework - see, Agents: Setup and configuration.
Setting the Sealights integration
Before using the Sealights and Testim integration, you will need to connect Testim to Sealights through the Sealights Agent Token. This process is required only once.
Sealights integration is not available to free tier customers.
To connect Testim to Sealights:
-
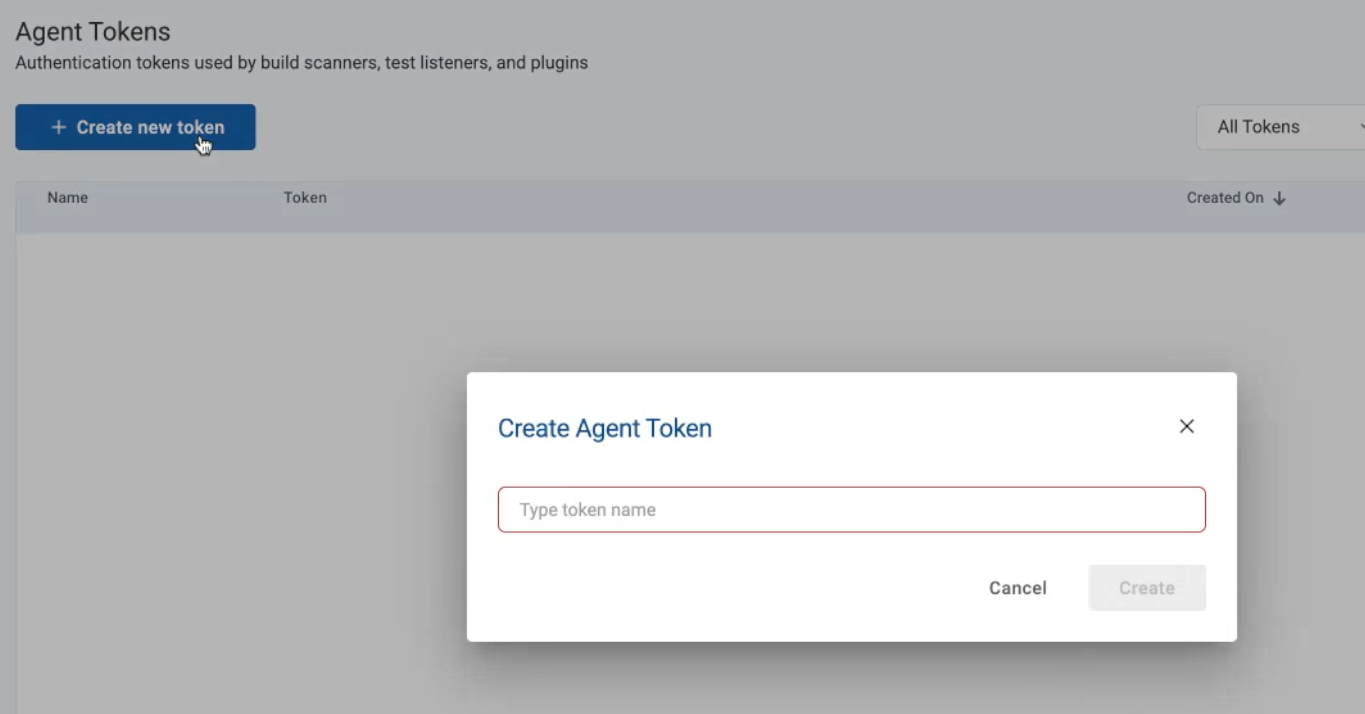
In Sealights, go to Settings > Agent Tokens and click Create new token.
-
In the empty field, enter a name for the token and click Create.
-
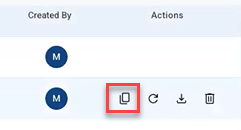
Copy the newly created token by clicking the Copy button under Actions.
-
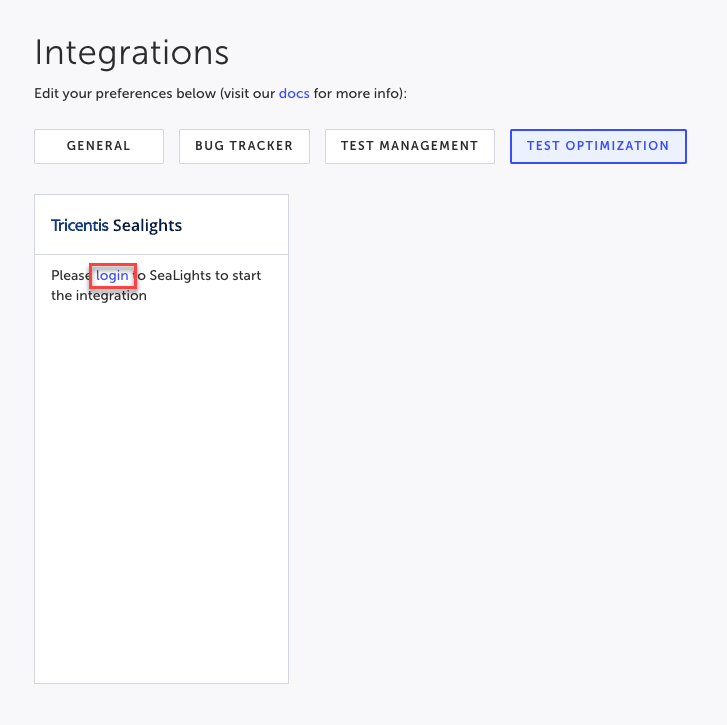
In Testim, go to Settings > Integration > Test Optimization tab.
-
Click login.
-
In the Sealights Agent Token, paste the Sealights Agent Token that was obtained.
The Sealights URL field is populate automatically based on the Sealights Agent Token. -
Click Connect.
Running a Test with Sealights Integration
Tests with Sealights integration can be executed using the following methods:
- CLI - by adding a CLI option that includes either the Sealights
buildSessionIdor the SealightslabId. - Scheduler - by entering the Sealights
labIdto the Lab ID field in the Advanced section. - API (coming soon)
Using the CLI to run tests with Sealights integration
When running a test with the Sealights Integration using the CLI, you need to add one of the following IDs from Sealights as options in the Testim CLI execution command:
- Sealights buildSessionId - this ID relates to the specific build that was executed. Typically this is related to a specific component in an application. This means that this option is recommended if you want to test a specific component.
- Sealights labId - typically multiple components that are hosted on the same environment may share the same LabId. So if you want to test multiple components, it is recommended to use the LabId instead of the buildSessionId.
- Sealights test-stage - typically your test stage name in Sealights is Testim Automation. If you want to use a different test stage name, this option is recommended.
When the tests are executed using the CLI, Sealights returns a list of tests in this command that should be skipped and these are automatically skipped.
If
labIdCLI option is not used, Testim will use thebulidSessionIdvalue for bothlabIdandbuildSessionIdoptions.
buildSessionId option
Obtaining the buildSessionId from Sealights
For every component build that is being tested, you will have to obtain its Session ID from Sealights, by following the relevant instructions for the framework that you are using:
- Using Node.js Agent - Generating a session ID
- Using Java Agents - Generating a session ID
- Using Python Agent - Generating a session ID
- Using Go Agent - Initializing agent and Generating a session ID
- SeaLights .NET Core agent - Scanning the build binaries
Executing test(s) in Testing using the Sealights buildSessionId
In Testim, run the test(s) using the Command line interface (CLI), while adding the following option to the execution:
-
--sealights-build-session-id [sealights-suid-session-id]
labId option
In Sealights, the labId is an identifier that you can assign to various components that share the same characteristics, such as components that are hosted on the same environment. You can assign a labId to the components when running them using the Sealights agent.
For example, in the following Sealights command, which uses the Node.js test listener agent, you can assign a labId as part of the command:
npx slnodejs run --tokenfile ./path/to/sltoken.txt --buildsessionidfile buildSessionId [--labid <Lab ID>] --workspacepath "." --useinitialcolor true -- /your/backend/server/command In Testim, this labId can be used as the CLI option when running a test with the Sealights Integration using the CLI.
Obtaining the labId from Sealights
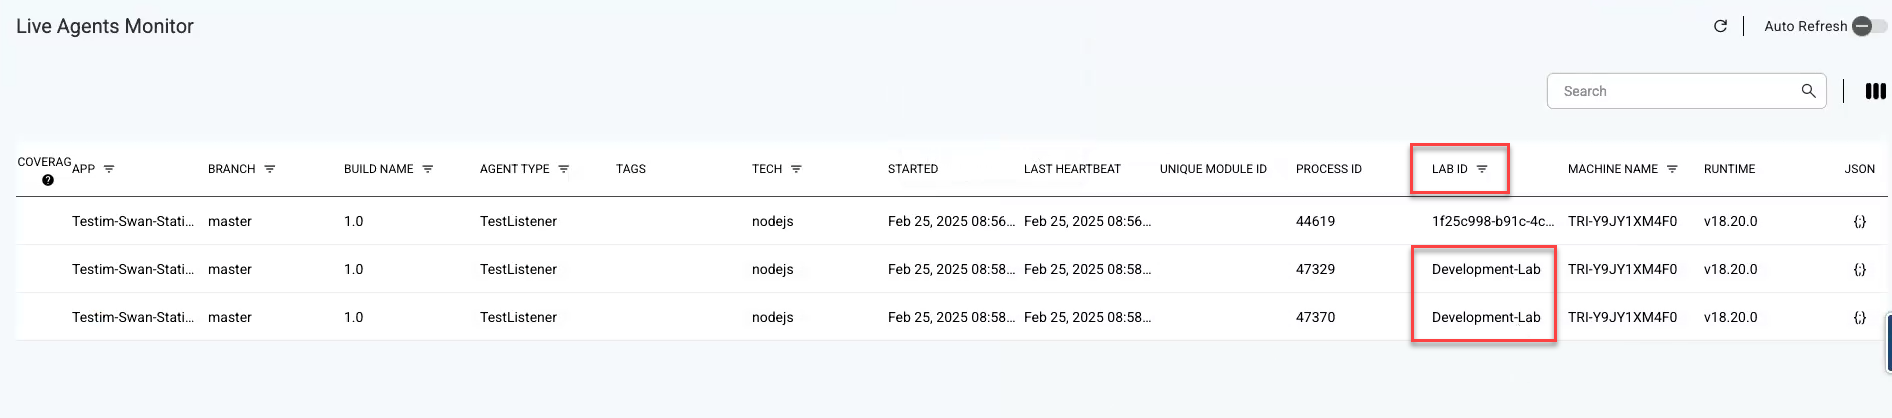
In Sealights, once the labId has been assigned, you may find it in the following screen:
-
In Sealights, go to Cockpit > Live Agents Monitor - this screen displays all the running processes that are instrumented in Sealights. Some of these processes will include an assigned labId as showed below:
Executing test(s) in Testing using the Sealights labId
In Testim, run the test(s) using the Command line interface (CLI), while adding the following option to the execution:
-
--sealights-lab-id [sealights-lab-id]
test-stage option
Typically, the Sealights integration uses the test stage name Testim Automation. But you can override this and use a custom name.
We recommend that you always send Testim in the tag sections during any CLI run. This best practice identifies the origins of your tests.
If you want to use a custom test stage name, you can use the Command line interface (CLI) while adding the following option to the execution:
-
--sealights-test-stage [sealights-test-stage-name]
Using the Scheduler to run tests with Sealights integration
You can run tests with Sealights by entering the Sealights labId to the Lab ID field in the Advanced section. When the tests are executed by the Scheduler, Sealights returns a list of tests in this batch that should be skipped and these are automatically skipped.
To run tests with Scheduler and Sealights integration:
-
In Sealights, obtain the Lab ID, by following the instructions in the labId option section.
-
In Testim, configure the Scheduler, by following the instructions in the Scheduler - Web section.
-
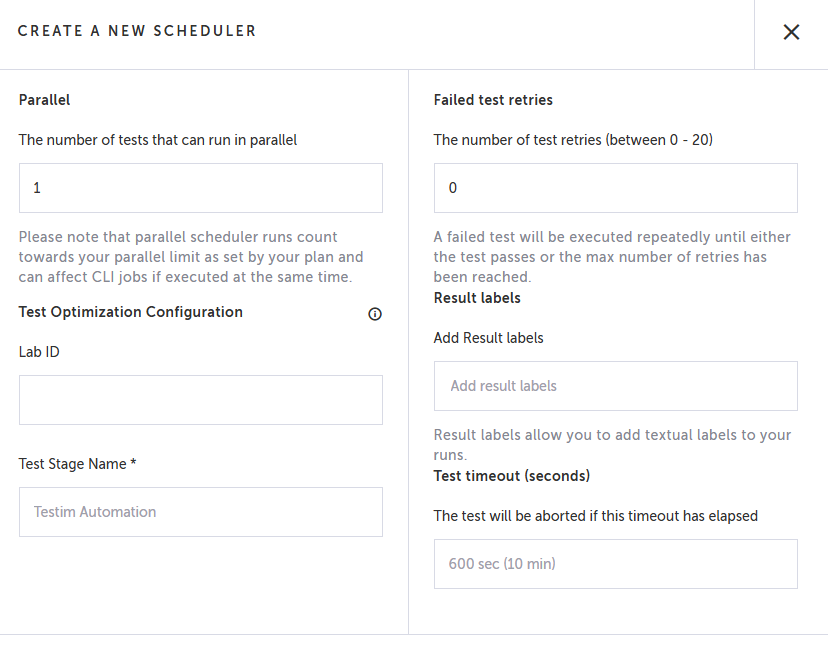
In the Scheduler configuration screen, click Advanced.
-
Under Test Optimization Configuration, in the Lab ID field, paste the Lab ID that you have obtained from Sealights.
-
Optionally, if you use custom Test stage name, enter it in the Test stage name field
-
Configure addition settings as needed.
Viewing Executed Test List and Skipped Tests
Viewing the Executed Test List in the CLI
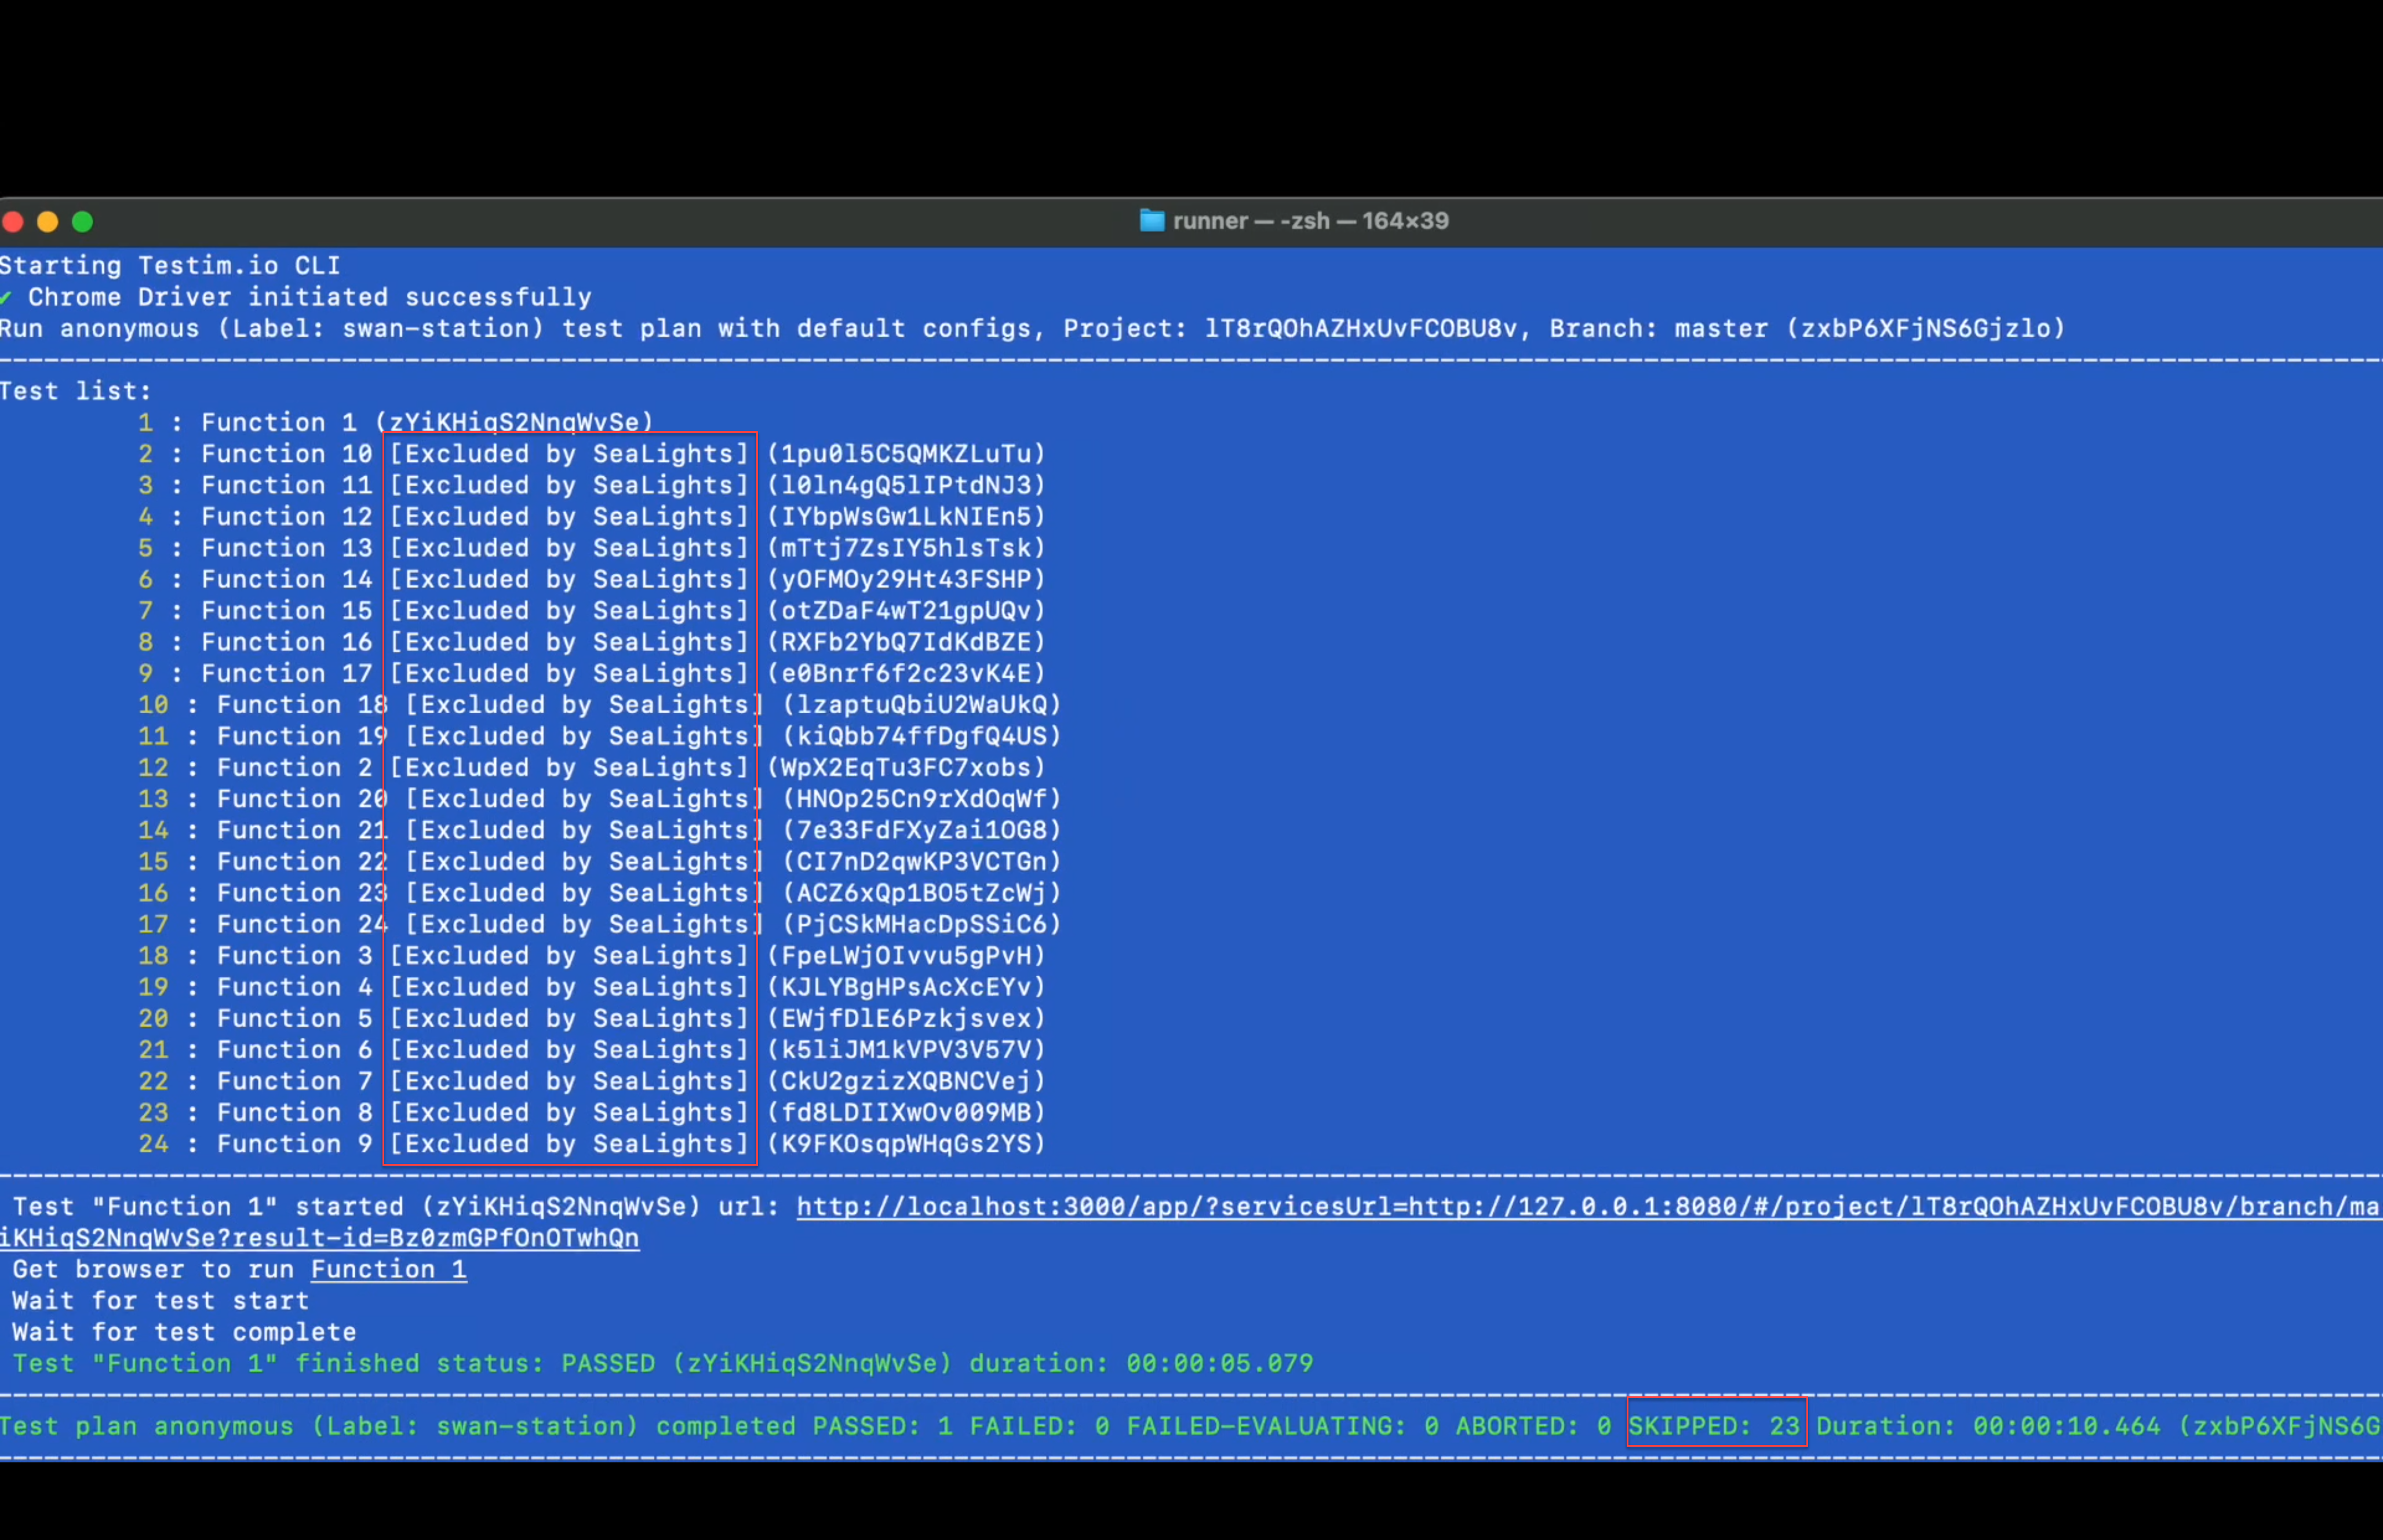
After executing the tests using the CLI, you can view the test list, which includes the test execution status and an indication of whether the test has been excluded/skipped.
In the example below we can see that only the Function 1 test was executed and the other tests were "excluded by Sealights". The execution summary at the bottom of the screen also indicates that 23 tests were skipped.
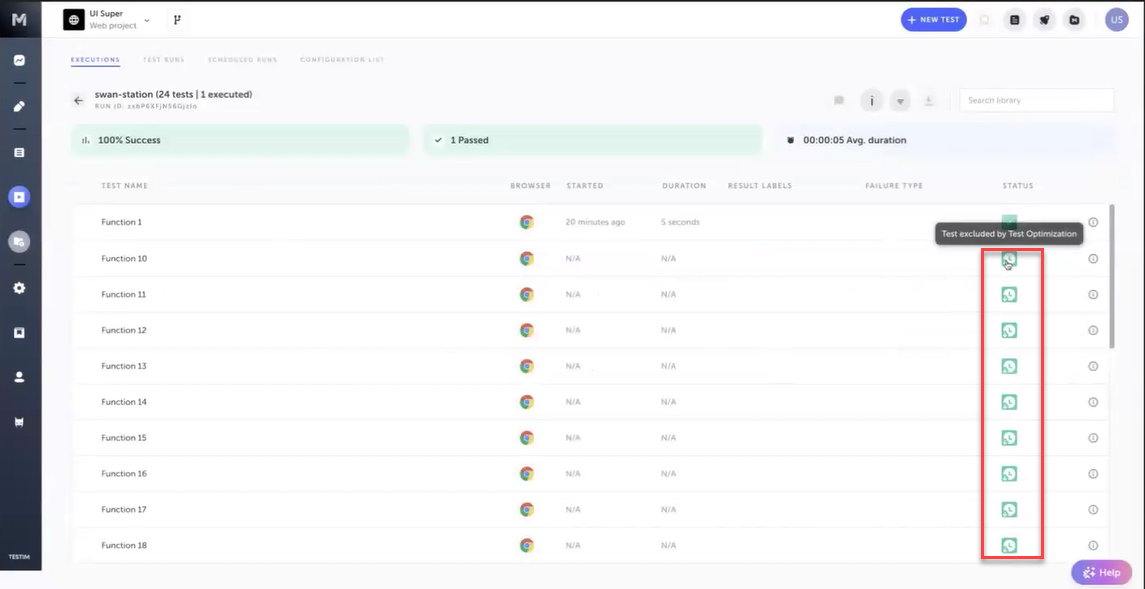
Viewing the Executed List in the Testim UI
In the Execution Runs Screen, you can view the executed tests list. Under the Status column, you will see an indicator of tests that the test was excluded by Test Optimization.
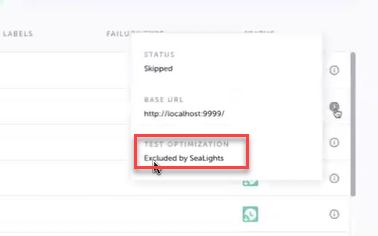
Hovering over the i icon reveals a notice that the test was excluded by Sealights.
Updated 6 months ago