Visual Validation (element, viewport, full-page)
Validate visual details down to the pixel level
The visual validation and wait-for steps allow you to compare visual differences between your baseline and your current test run with precision. This functionality is provided as a service by Applitools, and requires integration with their Applitools Eyes app.
Before you begin, you first need to integrate the Applitools Eyes app with Testim. For more information see Applitools integration.
For more information, see the following resources:
- https://applitools.com/docs/topics/test-manager/viewers/tm-baseline-viewer.html
- https://applitools.com/docs/topics/test-manager/viewers/tm-compare-baselines-viewer.html
- https://applitools.com/docs/topics/test-manager/viewers/tm-compare-baselines-editor.html
The RCA and Ultrafast Test Cloud (i.e. adding extra environments) features will be rejected by Applitools without appropriate licensing. Contact your Applitools representative for more information.
This is a PRO featureThis feature is only open to projects on our professional plan. To learn more about our professional plan, click here.
You can perform the following visual validations:
- Validate Element Visualization step – compares visual differences of a specific element between your baseline and your current test run. See - Validate Element Visualization
- Wait For Element Visualization step - forces your test to pause and wait for the element to be visible on the page and then validates the element on a visual level. See - Wait For Element Visualization
- Viewport Visualization step – compares the visual difference between your baseline and your current test run of your viewport. See - Validate Viewport Visualization
- Full-page Visualization step – compares the visual difference between your baseline and your current test run of your full page. See - Validate Full-page Visualization
If you change the configuration of your test, a new baseline will be created in Applitools but not in Testim. If you want a new baseline for each configuration, you need to create different tests for each one.
Visual Validation Parameters
There are four visual validation parameters that you can modify within Testim:
- Add Environment – add one or more simulated environment configurations (including advanced environments) for your test to run on. This feature requires additional Applitools licensing for Ultrafast Test Cloud. Environments added on accounts without this feature license will be rejected by Applitools.
- Match level – Sometimes you will want to change the comparison method between your baseline and your test, especially when dealing with applications that consist of dynamic content. Testim supports the following Applitools Eyes match levels: Exact, Strict (default), Content, and Layout. For more information about these levels, see Match Levels. In addition to editing the Match Level in Testim, in Applitools Eyes, you can mark a region of your element, viewport, or page, and define it with a different match level.
- Enable RCA – The Enable RCA (Root Cause Analysis) feature enables root cause analysis insights into the causes of visual mismatches. The system gathers information from the DOM in order to understand why there was a mismatch. The results can be viewed in Applitools Eyes. This feature requires additional Applitools licensing. RCA enabling in projects with accounts that don’t have this feature license will be rejected by Applitools.
- Ignore displacement diffs – Sometimes an element on a page shifts to a new location, but doesn’t change in any other way. The Ignore displacement diffs feature enables the system to ignore visual differences caused by this type of displacement. When implementing this feature, it is recommended to enable the feature on the step level and not on the configuration/test level.
These visual validation parameters can be modified in the following places:
Modified in | Applies to | Additional information |
|---|---|---|
Configuration Library | Applies to all visual validation steps run in a test that is set with that configuration (including tests run via CLI or Scheduler). | For more information on test configuration, see Create a shared configuration. For more information about the CLI, see Command line interface: Test Config. For more information about the Scheduler, see Scheduler. |
Setup Step in the Test Editor | Applies to each step within the test unless:
| |
Step level | Applies to the test level and will override test-level visual validation parameters. |
Modifying visual validation settings in the test Configuration
To modify visual validation settings in the test Configuration:
- In the left menu, navigate to Runs > Configuration List.
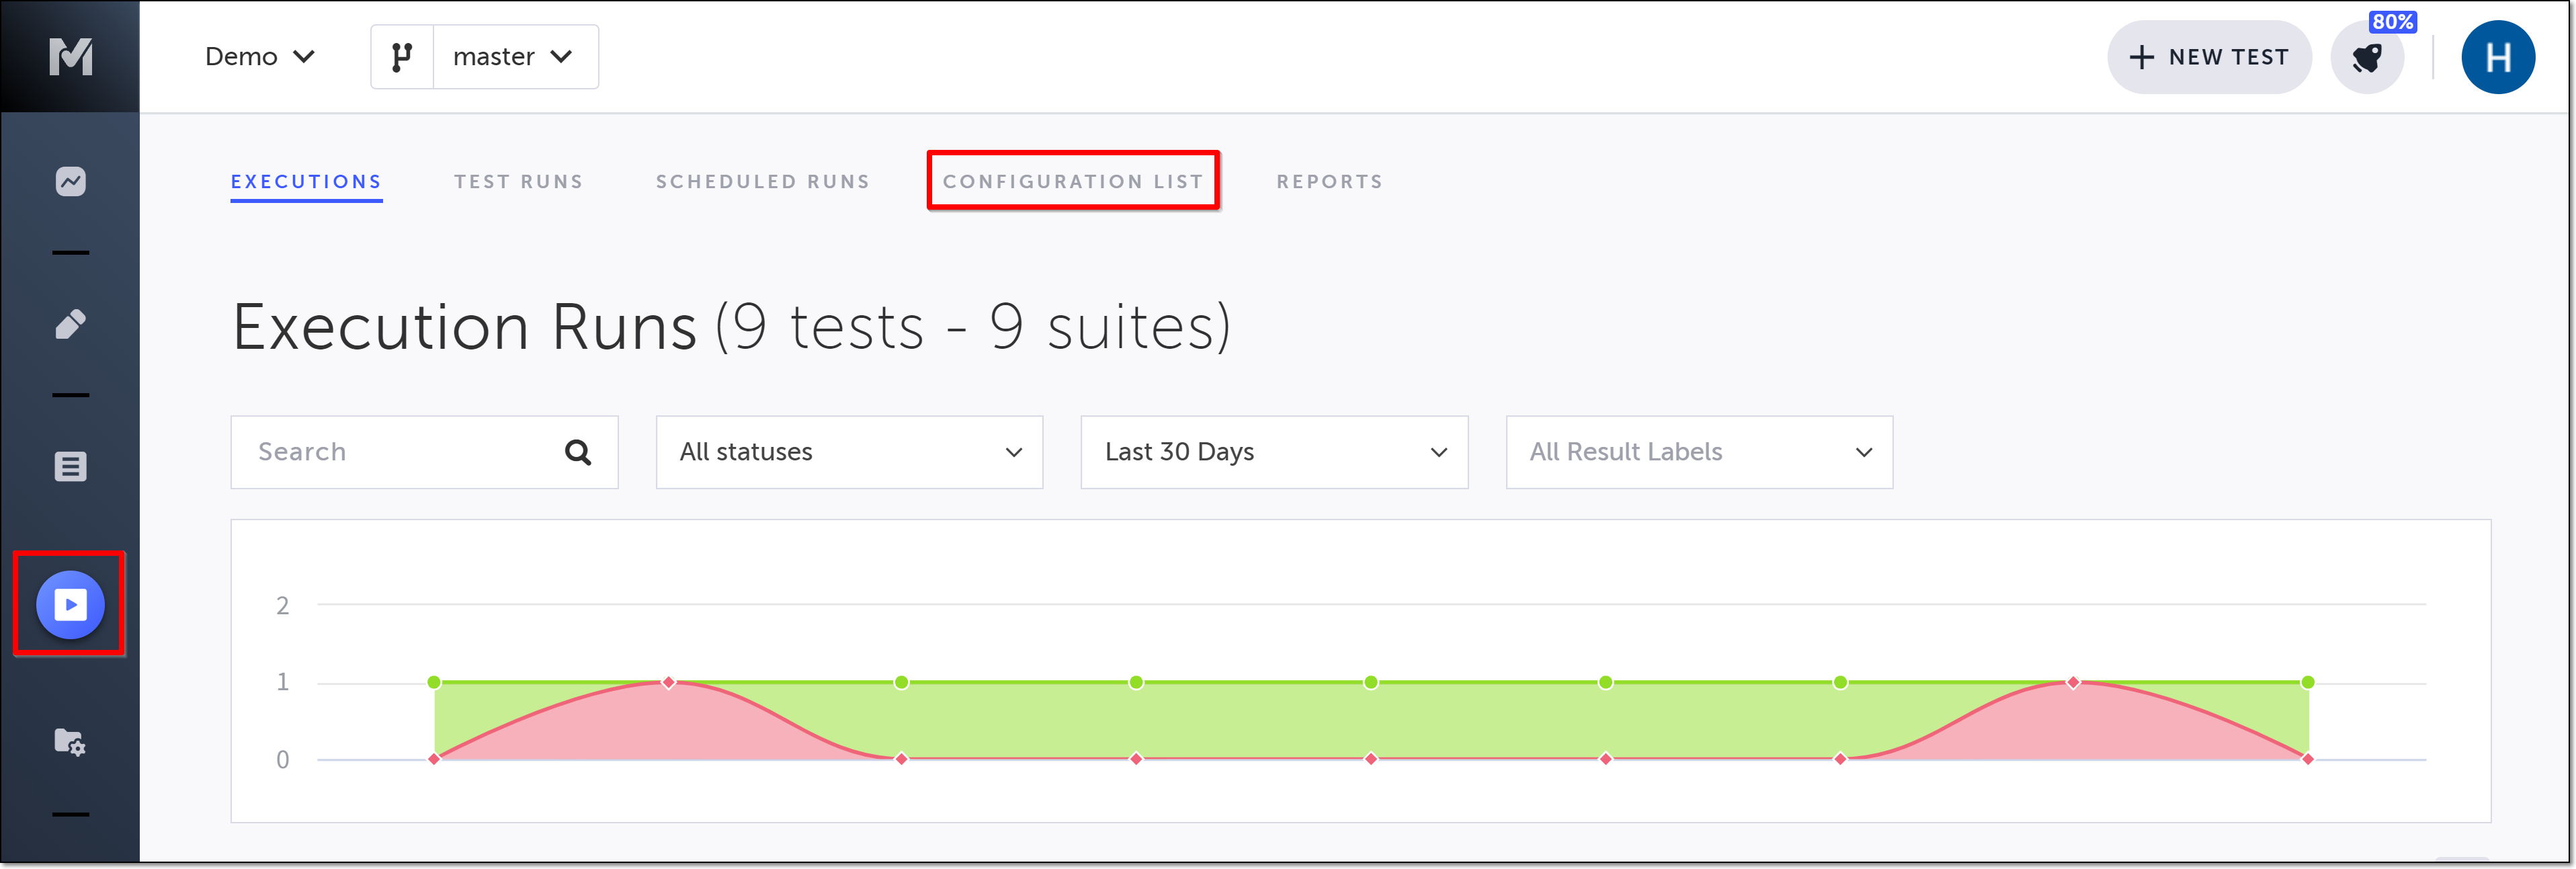
The Configuration Library is shown.
- Click the + Create New button.

- Enter the basic configuration, as described in Configuration List
- Click Advanced and enter advanced settings as explained in Test Configuration.
The advanced configuration options are shown.
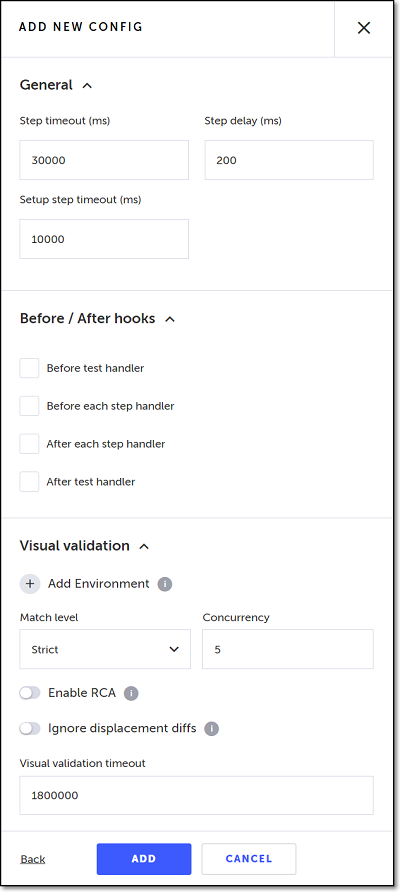
- In the Visual validation section, click Add Environment and enter the desired environment settings
- In the Visual validation section, modify the settings as follows:
- Match Level- click the down arrow and choose one of the following Applitools Eyes options: Exact, Strict, Content, or Layout.
- Concurrency - specify the maximum number of Eyes test that can be executed concurrently.
- Enable RCA - the Enable RCA (Root Cause Analysis) feature enables root cause analysis insights into the causes of visual mismatches.
- Ignore displacement diffs - enables the system to ignore visual differences caused by this type of displacement.
- Visual validation timeout - modifies the time lapse (in milliseconds) which causes the test to register a fail for visual validation steps.
- Click Add.
The configuration is created and added to the Configuration Library.
Modifying test-level visual validation settings in the Editor
To modify test-level visual validation settings in the Editor:
- Hover over the test’s setup step, and click the Show Properties (:fa-cog:) icon.

The Properties panel opens on the right-hand side.
- Click the Edit Configuration icon.

- Under Visual Validation settings, click Add Environment and enter the desired environment settings.
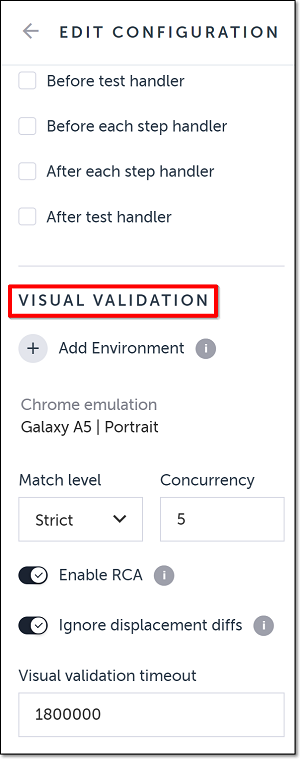
- In the Visual validation section, modify the settings as follows:
- Match Level- click the down arrow and choose one of the following Applitools Eyes options: Exact, Strict, Content, or Layout.
- Concurrency - specify the maximum number of Eyes test that can be executed concurrently.
- Enable RCA - the Enable RCA (Root Cause Analysis) feature enables root cause analysis insights into the causes of visual mismatches.
- Ignore displacement diffs - enables the system to ignore visual differences caused by this type of displacement.
- Visual validation timeout - modifies the time lapse (in milliseconds) which causes the test to register a fail for visual validation steps.
Modifying step-level visual validation settings
To access step-level visual validation settings:
- Hover over the visual validation step for which you want to modify the settings, and click the Show Properties (:fa-cog:) icon.

The Properties panel opens on the right-hand side.
- Toggle the Override test settings switch to the right.
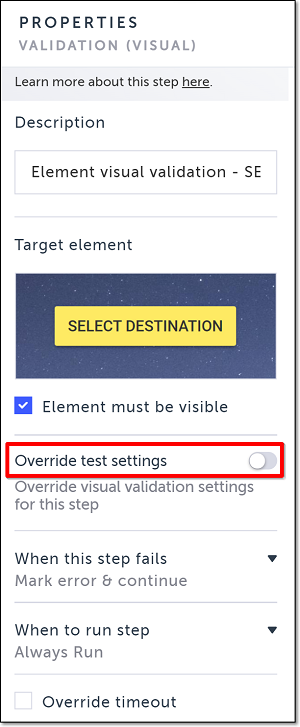
The Override test settings options are shown.
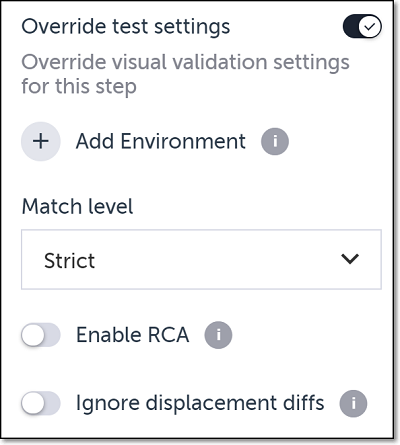
- In the Override test settings section, click Add Environment and enter the desired environment settings.
- In the Override test settings section, modify the remaining settings as follows:
- Match Level- click the down arrow and choose one of the following Applitools Eyes options: Exact, Strict, Content, or Layout.
- Concurrency - specify the maximum number of Eyes test that can be executed concurrently.
- Enable RCA - the Enable RCA (Root Cause Analysis) feature enables root cause analysis insights into the causes of visual mismatches.
- Ignore displacement diffs - enables the system to ignore visual differences caused by this type of displacement.
The visual validation parameters are modified for this step, and will override any test-level visual validation parameters currently set.
Updated 5 months ago
