Record tests with Salesforce
When a predefined Salesforce step is not available, you can record your desired to bridge the gap. Tests can be created using a combination of predefined and recorded steps. This means that you can add predefined steps and then start recording additional steps after these predefined steps.
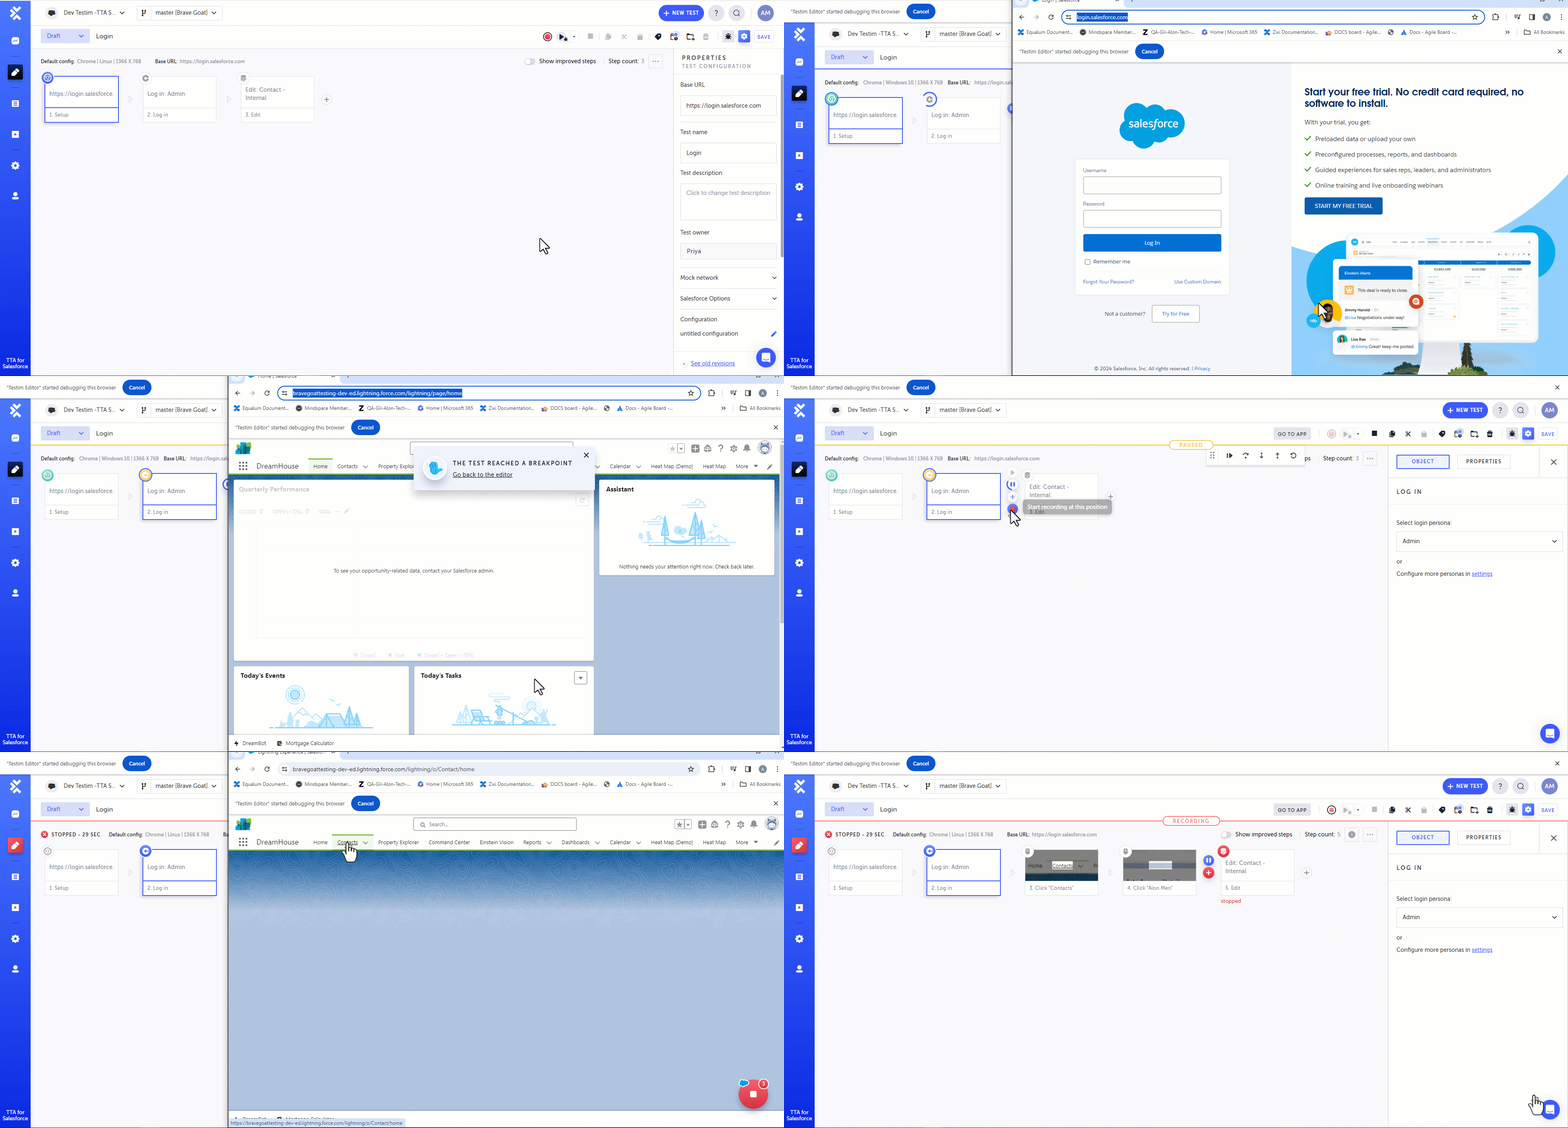
To record steps in the middle of the test:
-
Add predefined steps to get to the section in your workflow where you want to record the steps.
-
Hover your mouse over the arrow between the steps where you want to add the recorded steps and select Toggle Breakpoint.
-
Run the test.
The test will pause at the breakpoint. -
Hover your mouse over the breakpoint and select Start recording at this position.
-
In the AUT/Salesforce browser perform the actions you want to record.
-
Click the Stop Recording button.
The steps are added to the test and you may continue adding more steps.
To record steps at the end of the test:
- Add predefined steps to get to the section in your workflow where you want to record the steps.
- Hover your mouse over the the end of the test and select Start recording at this position.
- In the AUT/Salesforce browser perform the actions you want to record.
- Click the Stop Recording button.
The steps are added to the test and you may continue adding more steps.
Validating Values
The Recorder can be used to create steps that validate values. After entering the validate mode in the Recorder, Windows Alt + V / Mac Option + V, you can highlight the Fields and Values to be validated. The Recorder is aware of the Field name and the Values, this includes compound Fields such as Addresses, where the Street and City are separate Fields that can be validated independently.
Updated 5 months ago
