Configuring a Data-driven Test From The Visual Editor
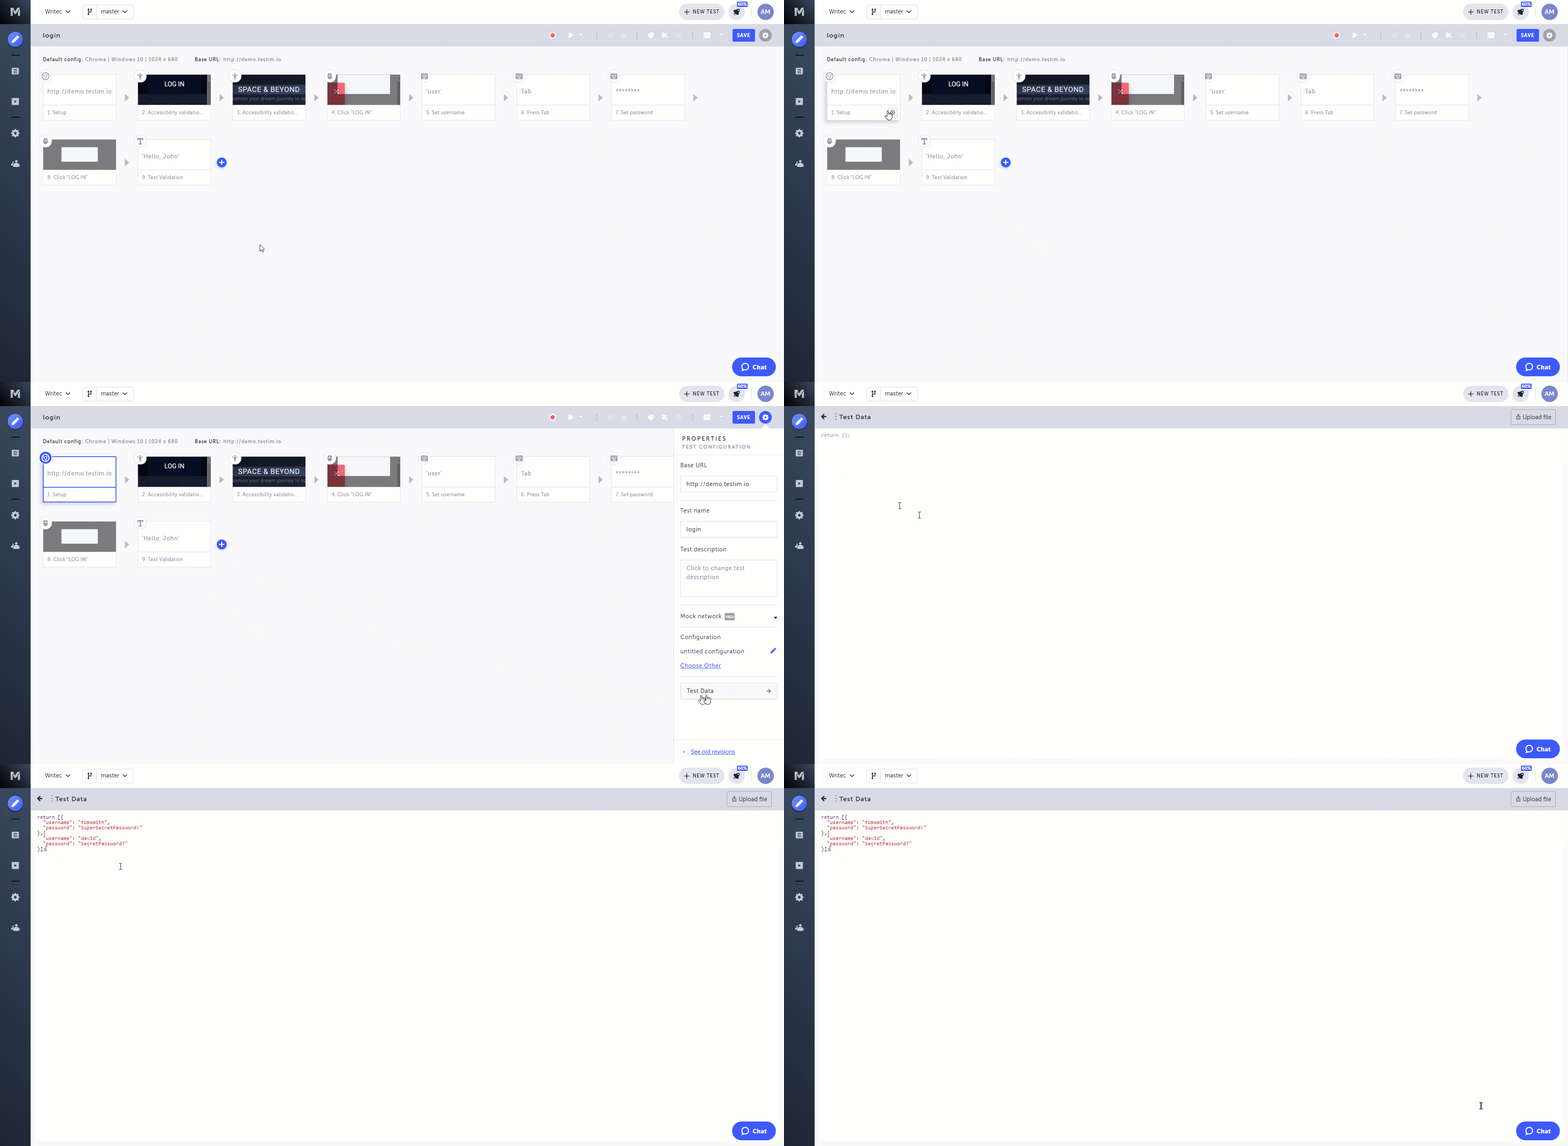
Test Data can be added to a specific test in the UI by choosing "Test Data" in the Setup step's properties panel.
To add Test Data to a test:
- In the test's Setup step (the first step), click the Show properties button (:fa-cog:).
- Click on Test Data.
- Define the data set in the JS editor
This is a simple single data set example:This is the dataset we defined in the example:return { "username" : "Matan", "password" : "123" }
return [{
  "username": "tomsmith",
  "password": "SuperSecretPassword!"
},{
  "username": "david",
  "password": "SecretPassword?"
}];The brackets must remain in the return line.
Only when you run your test from Testim CLI, scheduler or local suite run, the test will run multiple times, in order, each time with a different Data Set.

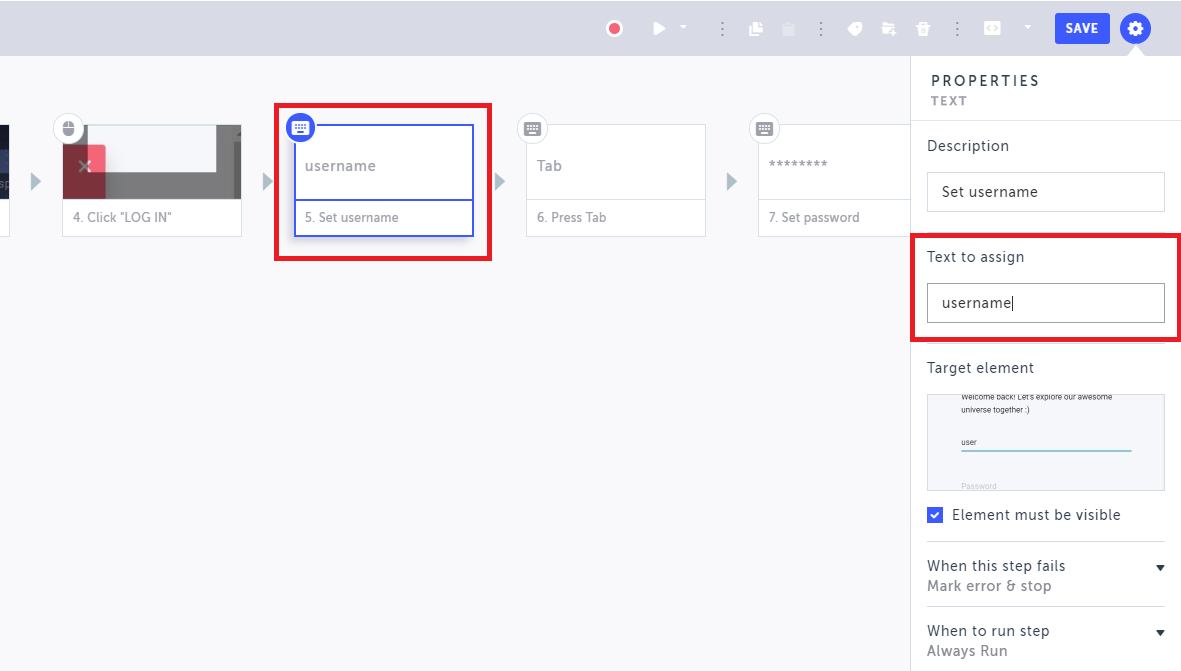
- Click the Show Properties button (:fa-cog:) on the the step(s) that you want to add the data set to. For example, in the "set username" and "set password" steps.
- In the Text to assign field, replace the existing text with the name of the parameter. For example, in the Set username step, enter the
usernameparameter.

- Run your test.
The test will run with the first Data Set:

"username": "tomsmith", "password": "SuperSecretPassword!"
Running the test from the editor will only run the first data set. When you want to run additional data sets, you will need to use the CLI, which includes the beforeSuite hook that overrides test data provided in the UI, or the Scheduler.
Adding test data by uploading a CSV/Excel file
It is also possible to upload the test data using a CSV or Excel file. After the file is uploaded its data will be added as the test data according to the following structure:
- First row - parameter name (==>Key name)
- Consequent rows - each row is converted to a single data set (==>Key values). Maximum 1200 rows.
As part of this method the uploaded data will not be updated if the file has changed. Every update will require uploading the file again. In contrast, when using the config file method (see, Data Driven tests using data from an external source), the file will be automatically parsed on every run.
To add test data by uploading a file:
- Prepare an Excel/CSV file according to the structure mentioned above.
- In the test's Setup step (the first step), click the Show properties button (:fa-cog:).
- Click on Test Data.
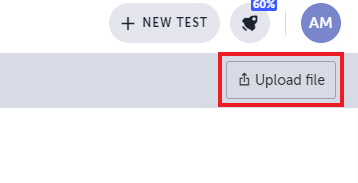
- Click Upload File and select the file you have created.

- The uploaded data is displayed. You can modify this data if needed.
- Use the parameters in the test steps as explained above.
Only when you run your test from Testim CLI, scheduler or local suite run, the test will run multiple times, in order, each time with a different Data Set.
When updating the test data in the editor You can revert back to previously saved test data through the revisions history. When changing the test data in a branch, while merging you will need to decide if you want to apply the change on the merge as well.
Updated 5 months ago
