
Recording a Web Test
Creating a test with Testim starts with going to the relevant webpage/application and recording the user journey that you would like to base your test on. Later you will be able to edit the properties for each of the steps and add validations.
Tests are created within a particular Project folder. When you create a new test, it is automatically included in whichever project is currently open.
When you record the test, Testim converts each action into a test step which is shown on the Testim Visual Editor screen. The test can now be run as is, simply verifying that the same series of actions can be repeated effectively. You can also use the Visual Editor to take the following actions to finalize your test:
Testim supports testing across a wide range of web technologies to provide comprehensive coverage.
However, due to the fast-paced nature of web technology, there could be cases where some new technologies aren't yet integrated into our testing framework.
We're committed to constant improvement, actively working to broaden the array of supported technologies.The subsequent technologies are not officially supported by Testim:
- Lit - https://lit.dev/
Before recording a test, make sure you have the Testim Extension installed. For more information, see Why do you need Testim extension?.
Step 1 - Create a New Test
To create a new test:
- Navigate to Test List > Tests.
- Click the Plus (+) icon and select New Test.

Alternatively, you can click on the New Test button (which is shown in the header bar on all screens).

A new test opens in the Visual Editor. This is where you record the test, add validations and edit the test steps.

Step 2 - Setting the Base URL
The Base URL specifies the initial site that opens when you begin recording the test, see Base URL.
You can record tests that include steps that open additional windows and perform actions in those windows, see Recording in multiple windows.
There are two ways to set the Base URL:
- Setting a default Base URL - You can set a default Base URL for a Project. This URL is automatically applied to all new tests that you create within the Project.
- Setting the Base URL manually - If no default Base URL has been configured, then you need to manually enter the Base URL for each new test. If a default Base URL has been configured, then the default URL is used unless you manually edit the URL.
Changing the Default URL
When you initially setup your project, you were required to select a Base URL for your testing application. You can change the default URL for your project at any time. All new tests will automatically use the default URL.
To change the default URL for a project:
- Navigate to Settings > Project from the main navigation menu.
- Click the Edit button next to the Default Base URL field.

- Enter the new default URL and click OK.

Testim will save the new default URL and this URL will be used as the Base URL for all new tests.
Setting the Base URL manually
When you first create a test, the Base URL will always be set to the default URL for the project. You can edit the Base URL for a single test manually.
To set the Base URL for a single test manually:
- After creating a new test, in the Visual Editor click Step 1 or the Base URL link.

This will display the Test Configuration properties panel.

- In the Base URL field, enter the new Base URL for your test.

You don't need to save the new Base URL. The Base URL will automatically save as you type.
Step 3 – Setting the Test Configuration
The Test Configuration determines the system specifications used to run the test. If you intend to run the test locally then the configuration should match your local environment. If you intend to run the test on the Testim Grid, then Testim simulates whichever environment is specified.
When the test is run in the CLI, you can override the default configuration by specifying a new Test Configuration in the run command, see Command line interface.
If you run a test locally on a system that doesn’t correspond with the Test Configuration, then the Test will run with the available configuration and a warning message will be shown.
Test Configuration Parameters
The following table describes the Test Configuration parameters.
| Parameter | Description |
|---|---|
| Name | The name of the configuration. |
| Browser | The browser on which the test runs. Supported browsers are: Chrome, Firefox, Safari, and Edge Chromium. We exclusively support stable browser versions and do not provide support for Beta, Dev, or Canary versions. |
| OS | The OS on which the test runs. Supported OSs are Linux, Windows 11 (relevant only for Selenium & custom grids, not to Testim grid), Windows 10, Windows 8, Windows 8.1, Windows 7, Windows XP, macOS Sierra, macOS High Sierra, macOS Mojave, OS X El Capitan, OS X Yosemite, OS X Mavericks, OS X Mountain Lion, OS X, Snow Leopard. |
| Resolution | The screen resolution used for the test. |
| Advanced | |
| Step Timeout (milliseconds) | The time lapse which causes Testim to register a fail for a test step. |
| Step Delay (milliseconds) | The delay between implementing test steps. |
| Setup step timeout (milliseconds) | The delay before implementing the initial (Base URL) step of the test. |
| Visual Validation | The Visual Validation parameters (below) are only visible for projects for which integration with Applitools is defined. |
| Add Environment | Add additional environments (browser, resolution, device emulation, etc.) to run your test under. |
| Match level | Change the comparison method between your baseline and your element’s visualization. |
| Enable RCA | Enable root cause analysis insights into the cause of mismatches. |
| Ignore displacement diffs | Ignore visual differences caused by elements that have moved on the page, but haven’t inherently changed. |
Adjusting the Test Configuration
When you create a new test, the default Test Configuration is automatically applied.
You can change the Test Configuration using one of the following methods:
- Edit – Edit the current Test Configuration. The new configuration applies only to the current test (it does not affect the Configuration profile).
- Choose Other – apply a different Test Configuration from the list of available configurations.
- Custom (create new) – Create a new custom configuration and apply it to the current test.
Edit the Test Configuration
To edit the Test Configuration for the current test only:
- After creating a new test, in the Visual Editor, hover over the Base URL step and click on the button.

The Properties window opens alongside the main window.
Alternatively, you can select the step and then click on the button in the header bar.
- Scroll down to the Configuration section and click on the **Edit **button.

The Edit Configuration pane opens.

- Edit the configuration parameters as desired.
The new configuration is applied to the current test.
Choose a different Test Configuration
You can apply a test configuration from a list of preset/shared test configurations.
To apply a different Test Configuration to this test:
- After creating a new test, in the Visual Editor, hover over the **Base URL **step and click on the button.

The Properties window opens alongside the main window.
Alternatively, you can select the step and then click on the button in the header bar.
- Scroll down to the Configuration section and Click on Choose Other.

The Choose New Configuration pane opens, showing a list of available configurations and highlights the currently applied configuration.

- Hover over the desired configuration and select Choose.

The new configuration is applied to the current test.
Create a custom Test Configuration
To create a new custom configuration follow the instructions here
Step 4 - Recording the test
When you begin recording a test, a new browser opens to the Base URL. This is the Application Under Test (AUT) window, actions that you take in this window are recorded by Testim and configured as steps in your test.
The following actions are identified as separate test steps:
- Click
- Double click
- Right click
- Scroll
- Set (enter text)
- Scroll on page
- Scroll to element
- Drag
- Resize window
To record a new test:
- After creating a new test, on the Visual Editor screen, click on the red record button in the header bar.

The AUT browser opens to the Base URL.
- In the AUT browser, take the actions that you would like to include in the test.
- Click the Stop Test button when finished recording.

The test is recorded. Each action is identified by Testim and shown as a step in the Visual Editor.

Pausing/Restarting a recording
You can pause and restart the recording. Only actions taken in the AUT browser while you are in recording mode are included in the test. Actions taken while recording is paused are not included.
While the recording is paused you can set up your test scenario and then resume recording.
To pause/restart recording:
- On the Visual Editor screen, while you are recording a test, the pause button is shown in the header bar. Click on the Pause button to pause the recording.

- While recording is paused, the red record button is shown in the header bar. Click on the **record **button to resume recording.

- Navigate back to the AUT browser window and resume recording. You can jump to the window by clicking on the Go to app button in the header bar.

Using the above method continues recording the steps sequentially from where you left off. You can also insert additional recorded tests in between existing steps. This is done by clicking on the button at the point where you would like to make the insertion and then clicking Record action here from the dropdown list.
Step 5 - Saving a Test
Whenever you create a new test or make changes to an existing test, you need to save the test. If you haven't yet saved all your changes, the following message is displayed:
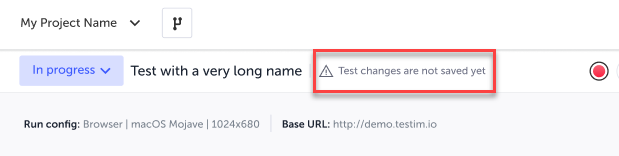
Auto RecoveryWhenever you create a new test or make changes to an existing test, make sure to save the test. But don't worry, if you close your browser before saving your test, it will be stored in your browser's cache and you should be able to resume your work. See Recovering a test that was not saved for more details.
To save a new test:
- From the Visual Editor screen, click the Save button.

- Provide a Name and Description for your test and click OK.
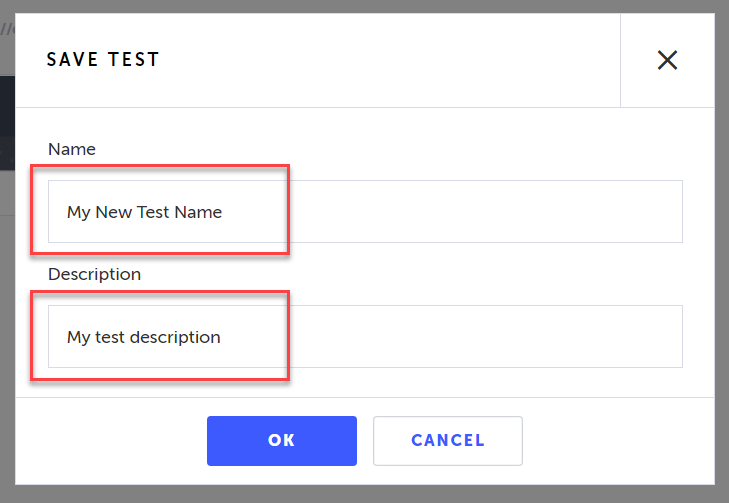
The test is saved and added to the test library.

Saving an edited test
When you edit an existing test, e.g. record additional steps, adjust properties, add validations etc. you need to save the changes. See Editing Tests for more information.
Updated 6 months ago