Create and merge branches from different test environments
Each Test Environment in Testim for Salesforce is configured with the following settings:
- The URL of the related Salesforce environment
- The branches that the Test Environment is available on.

If you want to run your test on a different Test Environment, you will need to create a new branch and select a different Test Environment.
Tests are run on a single Test Environment for each branch. Several branches can have access to the same Test Environment. All branches extend from one trunk or main branch, called the master. After creating your test on a branch, you can merge it to the master branch.
Creating a branch
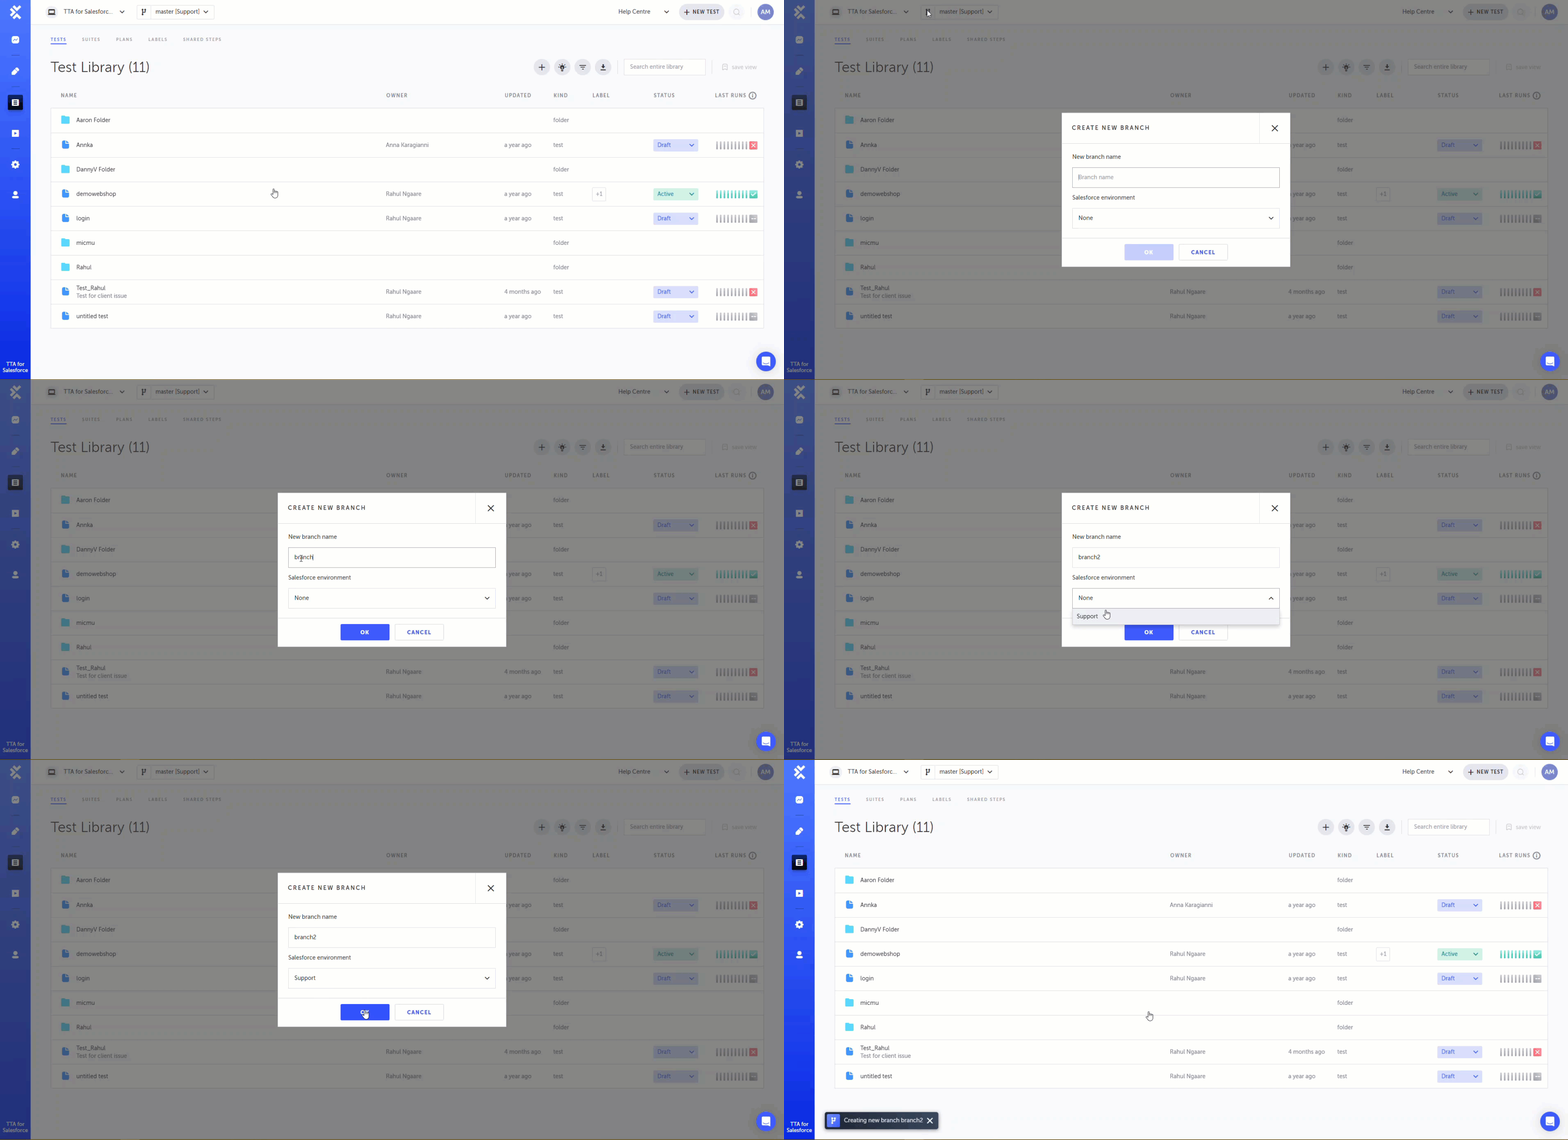
To create a new branch:

- In your Testim for Salesforce, select the New Branch icon.
- In the New branch name field, enter a name for the branch.
- In the Salesforce environment field, select a Salesforce environment from the drop down menu
- Click OK.
You can see all branches under Salesforce > Environments. They're also available in the branch search drop-down at the top of the screen.
Merging a Branch
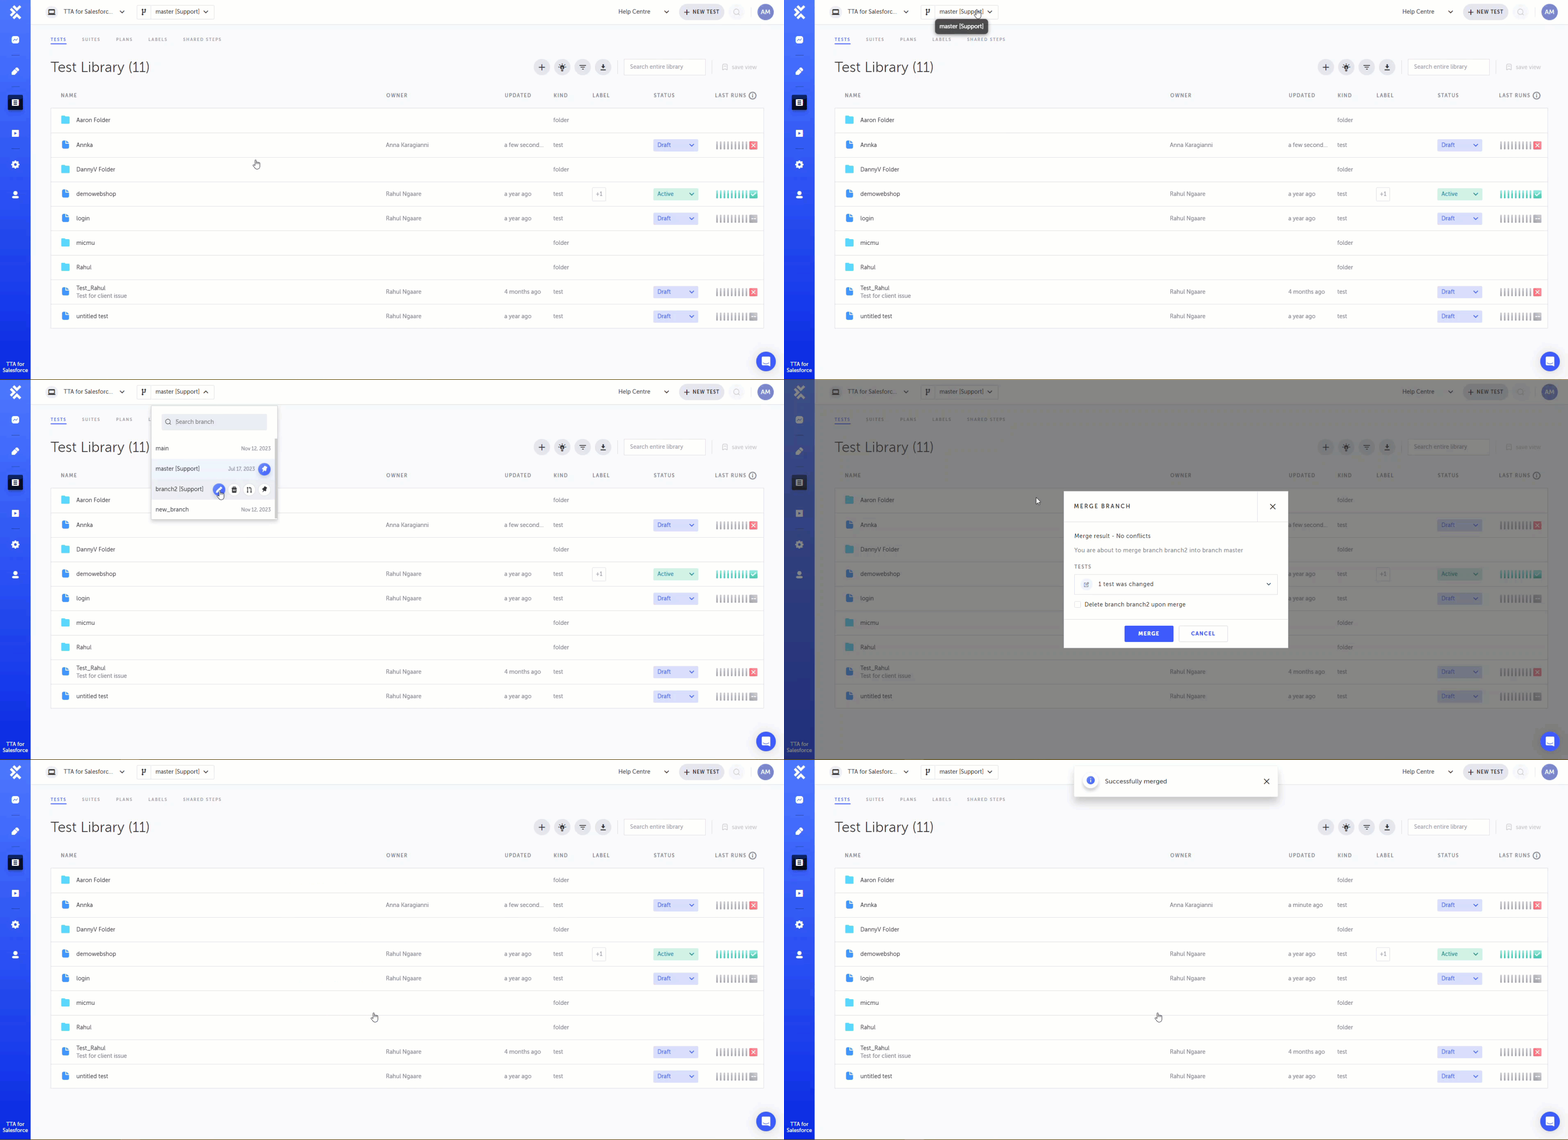
To merge a branch:

- In Testim for Salesforce, in the branch search dropdown, select the branch you want to merge.
- Click the merge icon.
The Merge Branch dialog is displayed. - Review the changes before merging.
- If you want to delete the branch after the merge, select the Delete branch<branch_name> upon merge checkbox.
- Click Merge.
Updated 5 months ago
