
Hooks
A Hook is an object that runs an existing Shared Step or a Shared Group before/after each step, or before/after a test. Following the creation of the hooks, the tests can be run as usual. The hooks are run as any other steps in the test. After the test is run, it is possible to visualize the hooks and their results, as described below.
Common usage examples for hooks
Before test hook usage examples:
The before test hook is used to execute a certain logic before a test.
- Initialization of variables: can be used to initialize variables that will be used in each test.
- Preparation of test environment: can be used to prepare the test environment by setting up a database connection, creating necessary directories, or starting a server.
- Cleaning up after previous tests: can be used to clean up after previous tests and ensure that each test starts with a fresh environment.
- Sharing setup between tests: can be used to setup shared resources that will be used by multiple tests, reducing duplication of logic.
After test hook usage examples:
The after test hook is used to execute a certain logic after a test.
- Cleaning up test environment: can be used to clean up the test environment by closing database connections, removing temporary files, or stopping a server.
- Verifying results: can be used to verify the results of a test, such as checking the contents of a file, or the state of a database.
- Restoring original state: can be used to restore the original state of the environment, ensuring that the next test starts with a clean slate.
- Sharing cleanup between tests: can be used to clean up shared resources that were used by multiple tests, reducing duplication of logic.
Before and after each step hook usage examples:
The before and after each step hooks allow you to execute logic before and after each step in a test.
- Debugging: The before and after step hooks can be used to add 'debugging' statements or to understand the state of the application before and after each step in a test.
- Verifying intermediate results: The after step hook can be used to verify the intermediate results of a test, such as checking the values of variables after each step.
- Sharing setup between steps: The before step hook can be used to set up shared resources that will be used by multiple steps, reducing duplication of logic.
- Monitoring progress: The after step hook can be used to monitor the progress of a test, such as logging the results of each step.
Before step hook and After step hooks will run even if the related step(s) is configured with a condition that causes it not to run.
Creating Before/After Hooks
Hooks are configured within the Test Configuration settings and/or through the Config File.
The following options are available for setting the hooks by creating a new Test Configuration or editing an existing Test Configuration:
- Creating hooks via the Properties panel - this option is performed by editing the selected configuration from the test itself.
- **Creating hooks via the Configuration List screen **- this option is performed by creating a new configuration or editing an existing one from the Configuration List screen. The configuration will then have to be applied to the relevant test.
- Creating hooks via the Default Configuration setting - this option is performed by editing the test’s default configuration setting. As part of this process, it is possible to edit an existing configuration or create a new one.
It is not possible to copy/cut and paste a hook.
The following table summarizes which type of hook can be configured through each of the methods mentioned above:
| Hook Type | Test Configuration | Config File | Comments |
|---|---|---|---|
| Before each step | V | ||
| After each step | V | ||
| Before test | V | V | |
| After test | V | V | |
| Before suite | V | Not presented in the editor | |
| After suite | V | Not presented in the editor |
Creating Hooks Via the Test Configuration
Test Configuration Hooks can be created via the Properties panel, via the Configuration list screen, or via the test's default configuration settings.
The Some Test Configuration Hooks
Creating hooks via the Properties panel
The following hooks can be created via the **Properties panel ** in a test:
- Before test handler - will run before the test.
- Before each step handler - will run before each step in the test
- After each step handler - will run after each step in the test
- **After test handler **- will run after the test
To create a hook via the properties panel:
- In the test click the Show Test Properties button.

- In the Properties panel, in the Configuration section, click the Edit button.

The **Edit Configuration ** pane is displayed.
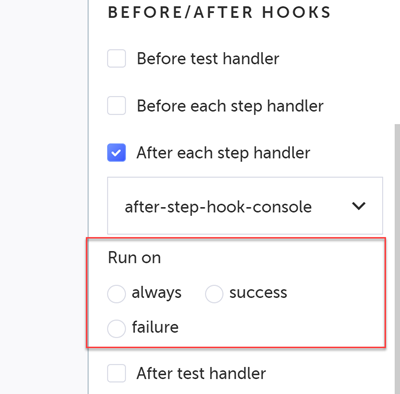
- In the Before/After Hooks section, select the checkbox of the hook type you wish to create:
_ Before test handler - will run before the test.
_ Before each step handler - will run before each step in the test
_ After each step handler - will run after each step in the test
_ After test handler - will run after the test

- Select the shared step or group from the drop-down menu.

- If you have selected After each step handler or After test handler options, select one of the following options under Run on:
- Always - specifies that the hook will always run.
- Success - specifies that the hook will run if the step/test was successful.
- Failure - specifies that the hook will run if the step/test has failed.
- Click Save to save the test.
The hooks are added to the specific test.

Creating hooks via the Configuration List screen
The following hooks can be created via the Configuration List screen:
- Before test handler - will run before the test.
- Before each step handler - will run before each step in the test
- After each step handler - will run after each step in the test
- After test handler - will run after the test
To create a hook via the Configuration List screen:
- Go to Runs > Configuration List.
- Click Create New.

- In the Add New Configuration screen click Advanced.

- In the Before/After Hooks section, select the checkbox of the hook type you wish to create:
- Before test handler - will run before the test.
- Before each step handler - will run before each step in the test
- After each step handler - will run after each step in the test
- After test handler - will run after the test

- Select the shared step or group from the drop-down menu.
- If you have selected After each step handler or After test handler options, select one of the following options under Run on:
- **Always **- specifies that the hook will always run.
- **Success **- specifies that the hook will run if the step/test was successful.
- **Failure **- specifies that the hook will run if the step/test has failed.
- Click Add.
At this point the configuration with the Hooks will be available to be used in the relevant tests.

Creating hooks via the Default Configuration setting
To create a hook via the Default Configuration setting:
- In the test, in the Default Configuration setting, click the Edit button.

- To create a new configuration, click the** Custom (create new) +** option from the drop-down menu.

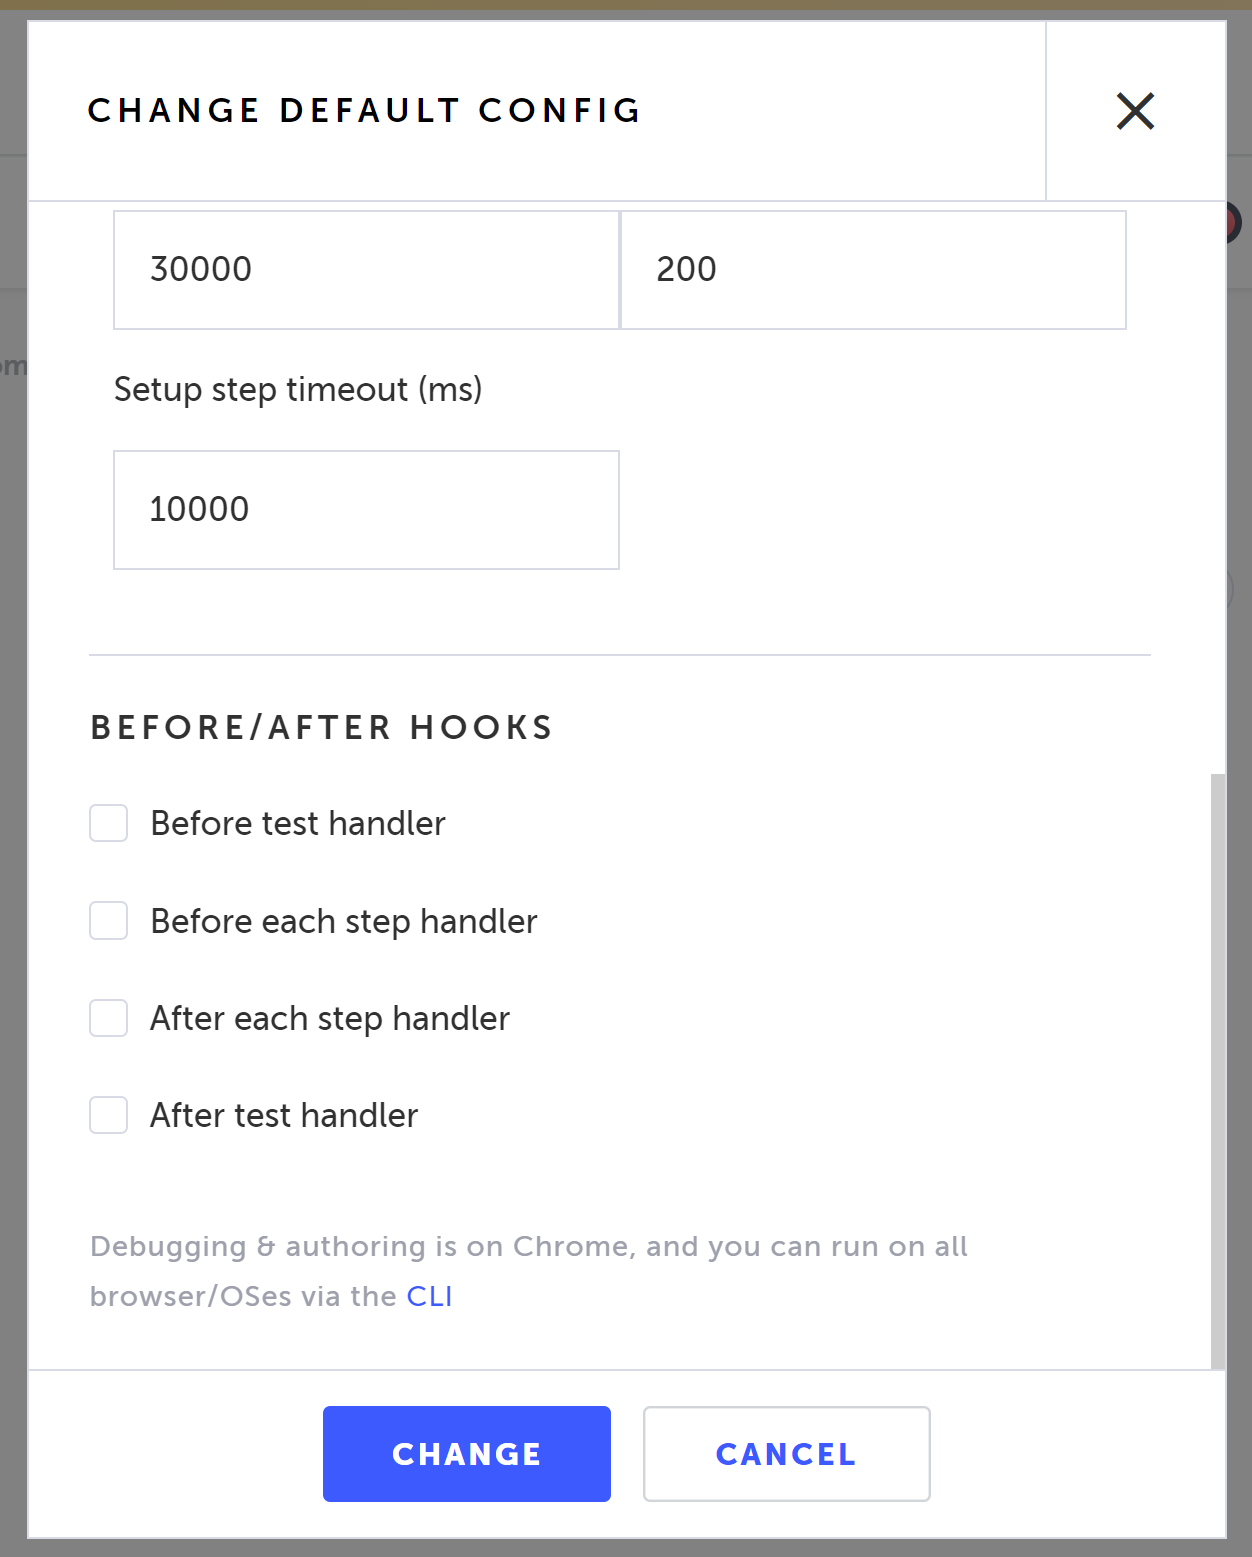
The Change Default Configuration dialog is displayed.
- In the Before/After Hooks section, select the checkbox of the hook type you wish to create:
- Before test handler - will run before the test.
- Before each step handler - will run before each step in the test
- After each step handler - will run after each step in the test
- After test handler - will run after the test
- Select the shared step or group from the drop-down menu.
- If you have selected **After each step handler **or **After test handler **options, select one of the following options under Run on:
- Always - specifies that the hook will always run.
- Success - specifies that the hook will run if the step/test was successful.
- Failure - specifies that the hook will run if the step/test has failed.
- Click Change to save.
The test will include the new default configuration.

Test Configuration Hooks Run Parameters
The following Test Configuration Hooks have additional run parameters available only to them that can help gather more information on the test. This information is available in the step/test itself, so, for example, you can a custom step with code that will use the data in these parameters:
- After each step handler parameters - the after step test configuration hook includes the following objects and parameters:
- _stepData
- testName - the name of the test.
- name - the name of the step.
- _stepInternalData
- hookType - the type of hook (e.g., afterStep)
- path - the URL of the step.
- stepId - the ID of the step.
- projectId - the ID of the project.
- branch - the name of the branch.
- testId - the ID of the test.
- testResultId - the ID of the test result.
- type - the type of step (e.g., action-code-step).
- failureReason - the reason for failure if failed.
- errorType - the type of error if there is an error.
- _stepData
- After test handler parameters - the after test test configuration hook includes the following objects and parameters:
- _stepData
- testName - the name of the test.
- _stepInternalData
- hookType - the type of hook (e.g., afterTest)
- projectId - the ID of the project.
- branch - the name of the branch.
- testId - the ID of the test.
- testResultId - the ID of the test result.
- failureReason - the reason for failure if failed.
- errorType - the type of error if there is an error.
- _stepData
Creating Hooks via the Config File
The Configuration File is a common JS containing all the required parameters to run your test and/or test suite. It includes run hooks which can be used to setup the application backend and define parameters before/after a single test or all tests.
Through the Config File it is possible to set the following hook types:
- Before test - will run before the test
- After test - will run after the test
- Before Suite - will run before the suite
- After Suite - will run after the suite
The following guides provides detailed instructions on how to configure before/after hooks through the Config File -
For general information about Config file - https://help.testim.io/docs/configuration-file-run-hooks
For instruction on how to add config file parameters via hooks - https://help.testim.io/docs/configuration-file-parameters#defining-parameters-in-a-configuration-file
Hooks Visualizations
After running the test that includes hooks the following visualizations will be displayed.
When running tests in Turbo Mode, hooks presentation will not be available to avoid saving unnecessary data. However, hooks will be available only for failed runs in turbo mode.
Viewing before/after each step hooks
Following the execution, steps that include before/after step hooks have a “Hook” button that is displayed when hovering over the step.
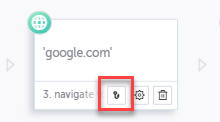
To view the shared steps/group inside the hook, click the **Hook **button. The hook steps will appear before or after the step as follows:

To close, click the Hook button again.
To open the hooks for multiple steps at the same time, select the desired steps and click the Hook button on the editor toolbar.

If the hook is a shared group, double-clicking the hook step will open the shared group, displaying its steps.

If you have selected to use a shared group, the before/after each step hooks will not appear in the group level, but rather in the group’s internal steps.
The step is connected to the related hook step, which it is configured to run before/after, and the connection is indicated with a circle and dotted arrow.

The hook step itself is indicated by a gray bottom with the hook icon and a thicker border. Just like a regular step, you can double click the hook step to view its details. The number at the top right corner indicates the number of tests that are using this shared step (the hook step is actually a shared step that is currently used as a hook).
The hook step itself can be viewed but cannot be edited. However, it is possible to edit it by adding it to a test and editing it from there, as any other shared step.
When clicking on the View Screenshot of a hook step to view the side-by-side view, the Baseline side will not be displayed, only the result will be displayed.
Viewing before/after test hooks
The before/after test hooks run once before/after the test. Following the execution, the first step (setup step) will include a “Hook” button that is displayed when hovering over the step.

To view the shared steps/group inside the hook, click the Hook button. The hook steps will appear before the step as follows:

The step is connected to the related hook step (before it), which it is configured to run before the test. The connection is indicated with a circle and dotted arrow.

The hook step itself is indicated by a gray bottom with the hook icon and thicker border. Just like a regular step, you can double click the hook step to view its details. The number at the top right corner indicates the number of tests that are using this shared step (the hook step is actually a shared step that is currently used as a hook). On the right side of the Setup step there is an arrow indicating that there is also an after test hook. Click on the arrow to shift to the "after test hook", which is located after the last step.
The hook step itself can be viewed but cannot be edited. However, it is possible to edit it by adding it to a test and editing it from there, as any other shared step.
When clicking on the View Screenshot of a hook step to view the side-by-side view, the Baseline side will not be displayed, only the result will be displayed.
Viewing hooks that did not run due to success/failure conditions
When creating the hook, it is possible to configure that the hook step will run only on success/failure of the step/group. Hook steps that didn’t run due to a success/failure condition, will be marked with a blue dot, as seen below.

The hook step itself will include a blue ‘info’ indication and the connecting arrow will be marked in blue, as seen below.

Hover your mouse over the “info” to view the reason the step did not run.

Viewing errors related to hooks
Following the test execution, you may encounter error(s) in your test.
If the error is on a hook step, a red dot on the step indicates that there is an error in the related hook step. On the left side of step (for both ‘before each step’ hook error & ‘before test’ hook error) and on the right side of step (for both ‘after each step’ hook error & ‘after test’ hook error).

Click the hook button to view the hook step.

It is possible to view the erred steps, even if they are inside a group, with a single click.
**To drill directly down to the error: **
- Click the See Error link.

The shared group/step that includes the error is displayed and the specific error step is highlighted.

Updated 6 months ago