
Editing Target Element Properties
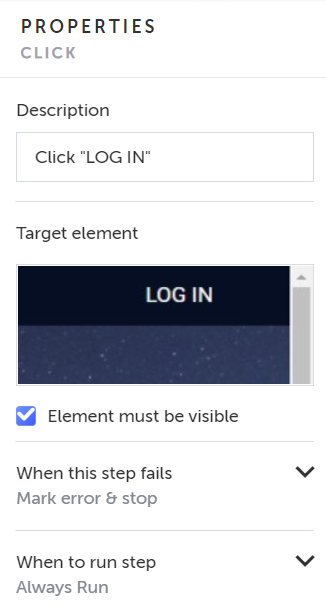
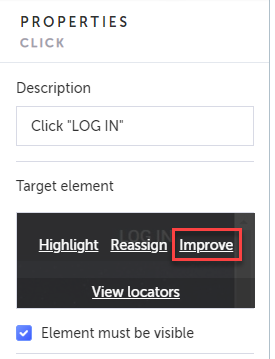
The target element is the element that was selected in the AUT (application under test) browser as the main element for this step. The target element is editable. The element itself appears as a thumbnail image in the Properties panel.
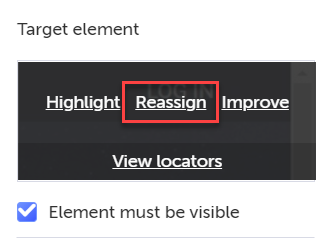
The following options are shown when hovering over the thumbnail: Highlight, Reassign, Improve, and View locators.
- Highlight – Clicking on Highlight opens the AUT browser with the target element momentarily highlighted in pink. This can be helpful because it allows you to visually confirm in the AUT browser what the target element is.
- Reassign – This option allows you to replace your target element with a different target element from your AUT. In this case, the system removes and overrides all the locators for the target element of a step. This option is relevant when you want to select a completely different element as the target. For example, your target element was a blue button that says "login", but now this button doesn’t exist anymore. In this case you will need to use the Reassign feature to select a new target element. See Reassigning the target element.
- Improve – If the target element still exists but the DOM around it has changed, you can use the Improve feature. In this case, the system will compare the existing locators of the target element to the newly collected locators and update (instead of override) the locators in order to assist in locating the target element of a step. The system examines which selectors were updated, which remained the same, and which don’t exist anymore and updates the target element’s selectors. For example, your target element was a blue button that says "login", but the SAME button has since changed to become green button that says “LOG-In”. In this case, you should use the improve feature. See Improving the target element
- View locators – When an element is selected during a recording (click, hover, enter, etc.), Testim's algorithm analyzes potentially hundreds of attributes associated with the element. It then assigns weights to the attributes to uniquely identify the element. These attributes are known as Locators. Testim’s Smart Locators learn with each test run. If some attributes change, the Smart Locator will use other attributes to identify the element. This way, if the element is changed but is still functioning, Testim's Smart Locators will find it and keep the test from failing.
This option allows you to see how a Smart Locator is identifying an element. To learn more about viewing Locators, see Viewing Smart Locators.
Highlight Target Element
Before making changes to a target element, you can highlight the element in the AUT browser to visually confirm which element is the current target element.
To highlight the target element:
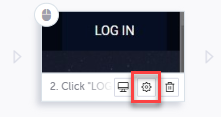
- Hover over the step for which you want to highlight the target element and click the Show Properties button.

The Properties panel opens on the right-hand side.

- Hover over the target element thumbnail and click the "Highlight** link.

Testim will highlight the target element in the AUT browser window.

Reassigning the Target Element
This option allows you to replace your target element with a different target element from your AUT. In this case, the system removes and overrides all the locators for the target element of a step. This option is relevant when you want to select a completely different element as the target. For example, your target element was a blue button that says "login", but now this button doesn’t exist anymore. In this case you will need to use the Reassign feature to select a new target element.
To reassign the target element in a “click” step:
- Hover over the step you want to reassign and click the Show Properties button.

The Properties panel opens on the right-hand side.
- Hover over the Target element thumbnail and click the Reassign link.
- If you don't already have the Base URL open in the AUT browser window, Testim will display a notification. Click the Open base URL link in the notification and try to reassign the target element again.

- Testim will go into standby mode. In the AUT browser, hover your mouse on the the new target element and click on it to select it.
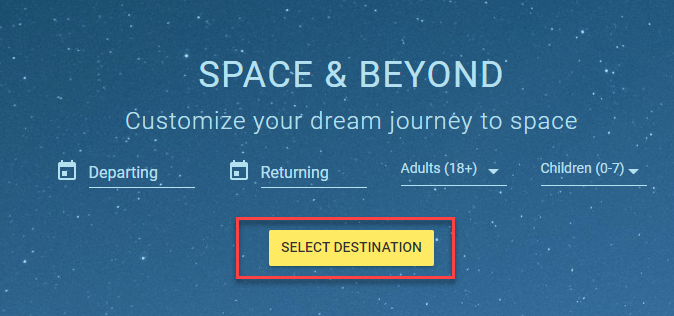
The target element is updated in the Target element box in the Properties panel.

Improving the Target Element
If the target element still exists but the DOM around it has changed, you can use the Improve feature. In this case, the system will compare the existing locators of the target element to the newly collected locators and update (instead of override) the locators in order to assist in locating the target element of a step. The system examines which selectors were updated, which remained the same, and which don’t exist anymore and updates the target element’s selectors. For example, your target element was a blue button that says "login", but the SAME button has since changed to become green button that says “LOG-In”. In this case, you should use the improve feature.
To improve the target element in a “click” step:
- Hover over the step you want to reassign and click the Show Properties button.
The Properties panel opens on the right-hand side.
- Hover over the Target element thumbnail and click the Improve link.
- If you don't already have the Base URL open in the AUT browser window, Testim will display a notification. Click the Open base URL link or Run test to relevant step in the notification and try to improve the target element.
- Testim will go into standby mode. In the AUT browser, hover your mouse on the target element and click on it to select it.

The target element is updated in the Target element box in the Properties panel.
Viewing Smart Locators
Smart Locators are how Testim uniquely identifies each element on the page. Testim inspects the entire DOM and determines the attributes that are most useful in identifying the target element. These attributes include aspects of the target element itself as well as parent elements. You can view the attributes used to locate the target element on the Locators panel. You can also visually identify the target element and its parent elements.
Editing the attributes of Smart Locators is generally not recommended. Before editing the Locators, please consult support. Also note that once Smart Locators are edited, features like the Auto Improved Locators will not be applied in the future in order to avoid overriding a manual edit.
To view the locators of a target element in a step:
- Hover over the step for which you want to view the Smart Locators and click the Show Properties button.

The Properties panel opens on the right-hand side.

- Hover over the Target element thumbnail and click the View locators link.
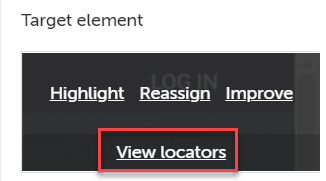
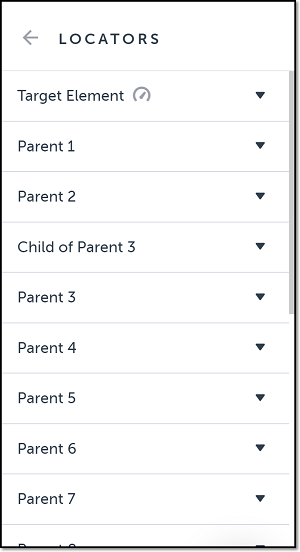
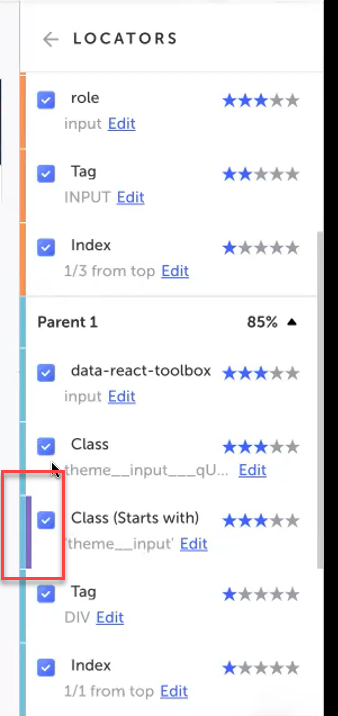
The Locators panel opens, showing the Target Element and the relevant parent elements as determined by Testim’s AI.
- Click on the down-arrow next to an element to view the Smart Locators and the weights the AI assigned to them.
A list of attributes/selectors that define the element are displayed. A checkmark indicates that the locator is active. The number of filled-in stars next to each attribute represent the relative weight that the AI assigned to that attribute. The higher the weight, the more the AI takes it into account.
You can select/de-select different locators or edit the content. Keep in mind, that Testim's algorithm has determined these ratings automatically. Sometimes, an application will behave in an unexpected way, and manually selecting specific attributes to identify the element can be advantageous to improving stability. However, we recommend consulting with Testim Support before making such changes.

After running the test, if the Locators panel is opened, in addition to the star weighting, you will see percentage scores based on the results of the run.

- While viewing an element, you can visually identify the element by hovering over the element you wish to show and clicking on the target icon.
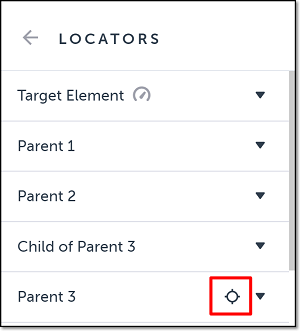
The AUT browser opens with the chosen element momentarily highlighted.

Understanding the color coding
Smart locators also use color coding to help understand the uniqueness of the element/selector.
To view the color coding:
- Run the test.
- Select a step and open its Locators panel (see above).
- Click the drop-down arrow of the desired locator(s).

The locator's related elements/selectors are displayed with the color coding results.

The colors vary between the different locators and the coloring (i.e. red vs. blue, vs. purple) does not have any meaning, however the following logic is applied:
- Same color within a locator - elements/selectors that share the same color within an element indicate that they are unique to this selector within the page..
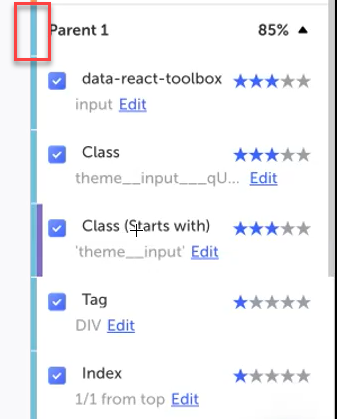
- Multiple parallel colors - multiple parallel colors indicate that the selector was found in additional elements within the page, which may result in lower confidence. The number of parallel colors indicates the number of occurrences. For example, the element marked below has two two colors, indicating two elements with the same selector on the page.
- Different color within a locator - elements that include a different color than the one used in the locator indicate that the element/selector has changed from the one that was captured during the recording. The following example shows that the Index element has a different color, however since its weight was very low it did not have an substantial impact on the overall confidence level of the locator.

- Locator color - after considering all the elements and their weights, the system decides what would be the top color for the locator (usually most elements will share the same color. This color is displayed on the locator level, as indicated below.
Auto Improved Locators
If Testim replaced the original locator with an auto-improved locator, the “Locator auto improved” message is shown at the top of the Locators panel. For more information, see Locators: Auto Improve.

Updated 6 months ago