Test Library
Keep track of your tests
The Test Library screen (Test List -> Tests) is where you will manage your tests. Tests can be arranged in folders. All folders and tests within the current project are listed on this screen and you can perform a variety of actions on each of these tests, as described below.
Viewing the Test Library
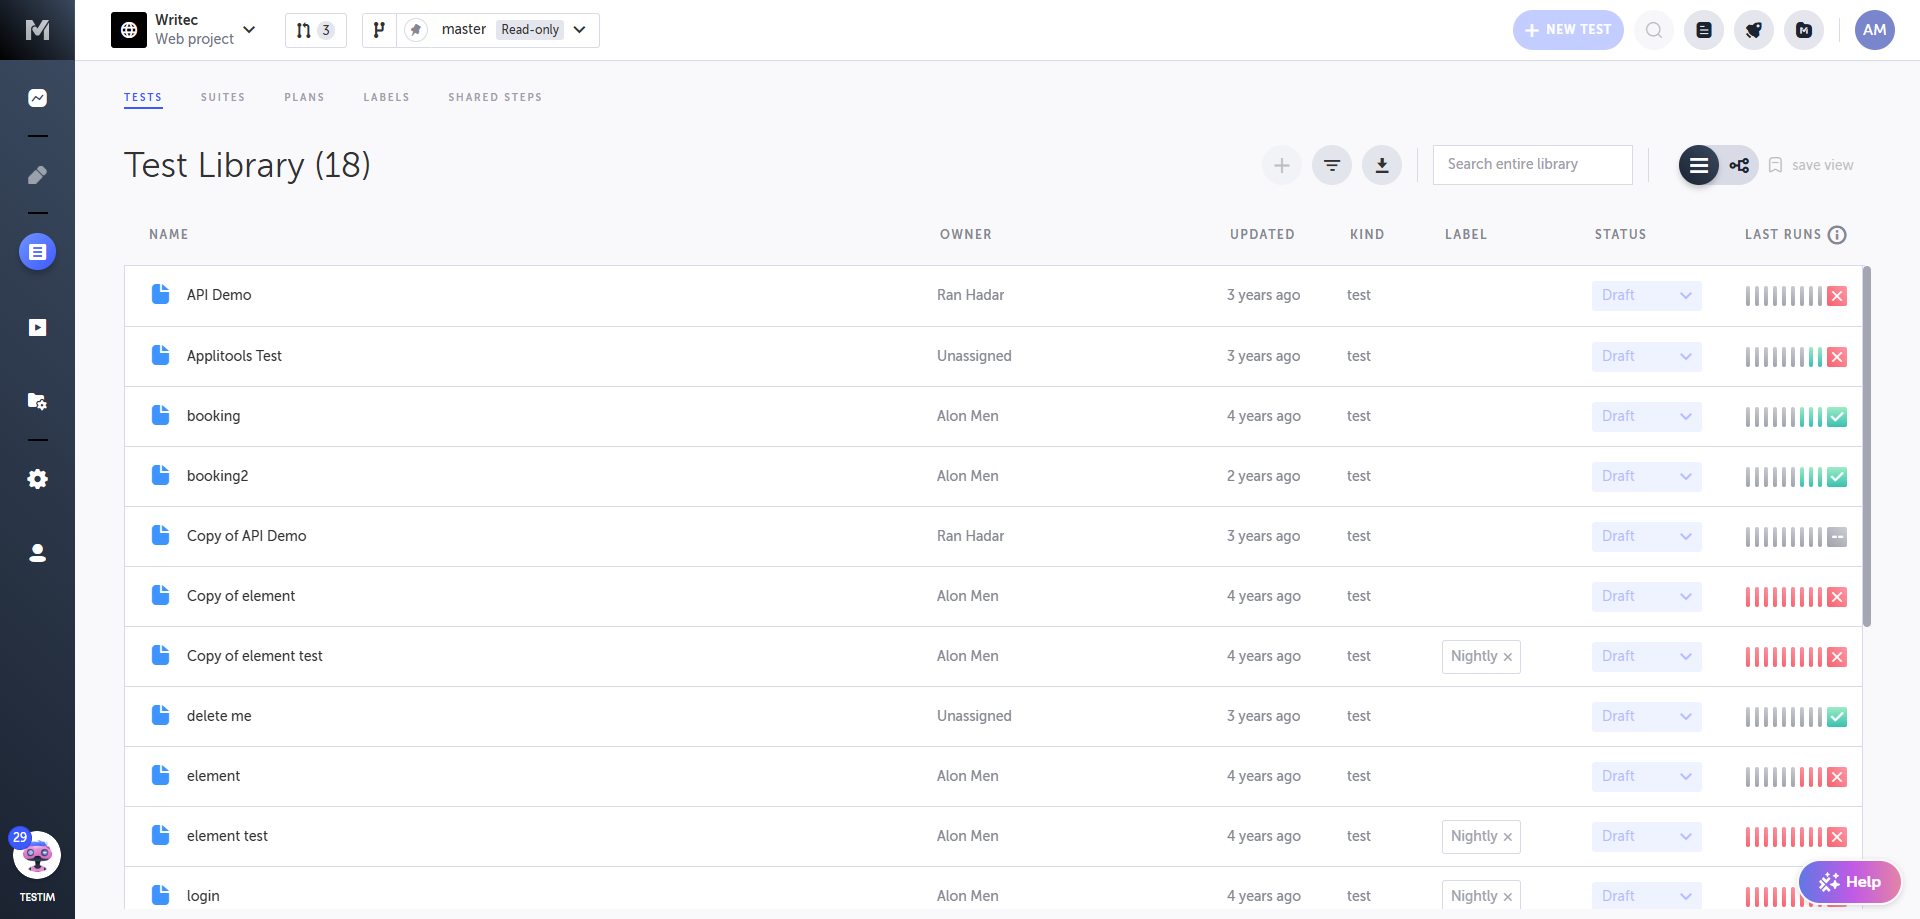
Web Test Library
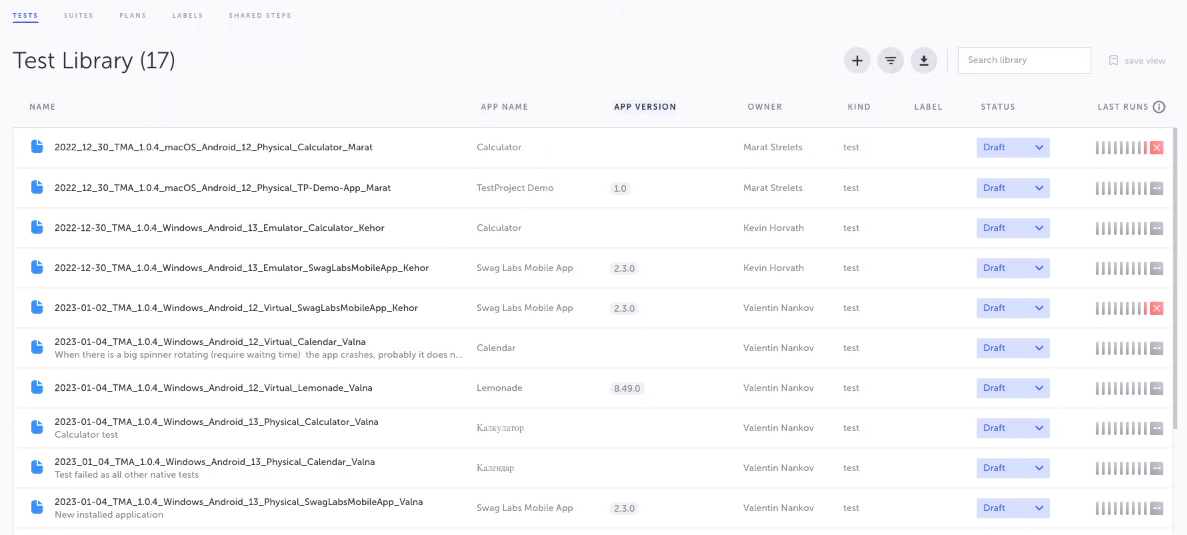
Mobile Test Library
The Test Library screen displays a list of tests and folders with the following information:
- Name - the name of the test or folder. If Testim replaced a degraded locator for one or more of the elements in the test with an auto-improved locator, an “Ai” icon is shown after the test name for approximately two weeks. For more information, see Locators: Auto Improve.
- Owner - the owner of the test or folder.
- App Name (mobile) - name of the mobile app used to record the test.
- App Version (mobile) - version of the mobile app used to record the test.
- Updated - displays the time, indicating the last update made to the test.
- Kind - indicates whether the item is a test_or _folder.
- Label - a list of labels that were added to the test. For more information, see Labels.
- Status - the status of the test. For more information see Test Statuses.
- Last Runs - indicates the status of the last 10 remote runs. Each vertical line represents a test run. Green lines indicate passed tests. Red lines indicate failed tests. Yellow lines indicate passed tests that only passed after a retry. If less than ten tests have been run, the remaining lines will be grey. The or icon indicates the status of the most recent test. indicates failed; indicates passed. Click the indicator to access the Test runs screen. For more information, see Test runs.
Filtering the Test Library
You can filter your tests by status, label, owner, the shared steps that they contain, and tests that have been auto-improved. Tests in accounts integrated with Applitools can also filter by tests which contain Visual Validation steps.
To filter the Test Library:
- Click the Advanced filters icon.

The Filter Tests pane opens on the right hand side.
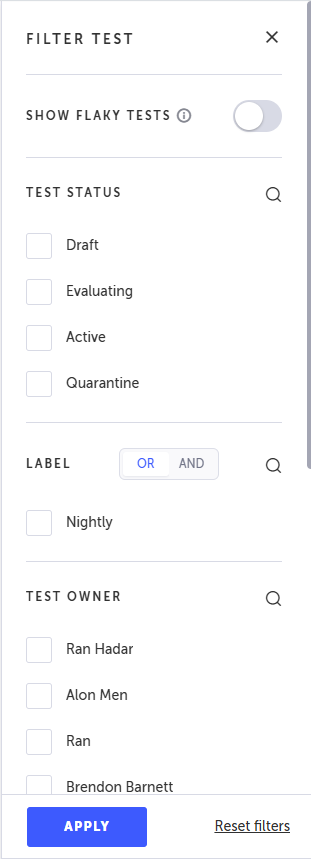
- In the Filter Test pane select one or more filter criteria:
- Show Flaky Tests - enable this toggle to display flaky tests only. A test is considered flaky if it passed after a retry. For more information, see Flaky tests.
- Test Status - Statuses are manually added to help manage which test needs to be worked on. For more information, see Test Status. Select one or more of the following statuses:
- Draft - Test is still in-progress
- Evaluating - Test ready, but its stability should be validated
- Active - Test is ready and stable
- Quarantine - The test doesn’t conform to the definition of a stable test and is waiting to be fixed
- Label - Labels are used to associate tests with one or more characteristics without the need to place them in a specific Suite or Test Plan. For more information, see Labels. Select one or more of the following labels and then select one of the following operands:
- OR - will return tests that include one or more of the selected labels.
- AND - will only return tests that include ALL the selected labels.
- Test Owner - Test Owners are users that have been selected as the “owner” for each test. For more information, see Test Owner. Select one or more of the test owners in the list.
You can also search for criteria within each section of the Filter Test pane by clicking on the Search (magnifying glass) icon and entering your search criteria in the search box that opens.
- Click Apply.
The filter is applied, and only those tests that meet the criteria are shown. To learn more about saving this filtered view, see Saving a Filtered View.
You can remove the filters by clicking on Reset filters and then Apply in the bottom of the Filter Test pane.
- Click the "X" in the upper right of the Filter Test pane to close it.
Closing the Filter Test pane without resetting the filters will not reset them, and only the tests that meet the filter criteria will be shown. To view all of your tests and folders again, you will need to reopen the Filter Test pane and click Reset filters.
Search text box
You can use the search text box to find tests or folders based on their names, descriptions, and labels. The process for searching based on labels is slightly different than searching based on names and descriptions. In both cases, you enter your search criteria in the Search library box.
Examples of Special Syntax:
- AND Searches: Adding a second search term (separated by a space) will act as an AND search. In the case of labels, your second term needs to be preceded by the term label:.
- Exclusion Searches: Preceding a search term with a minus sign (without a space) will act a NOT search. If you have more than one term, be sure to add a space between the terms. In the case of labels, your second term needs to be preceded by the term label.

To search by names and descriptions:
- In the Search library text box, enter any text from the name or description of the tests or folders you want to find.
The resulting list is filtered immediately as you type each character.
To search by labels:
- In the Search library text box, enter the text label: followed by the complete name of the label (without a space between them).
The filtered list is shown after you enter the complete name of the label.
Label search example:
If you've labeled all the tests that still fail with the "Failed" label, you can filter as follows:
label:Failed- Exclusion - use the
-modifier to exclude a specific label or name/string. For example, if you want to get all the tests in the label "sanity" that didn't fail:
label:sanity -label:failedWhether you search by names/descriptions or labels, the resulting list includes results in a flat view, so all tests or folders that are nested within folders that match the search criteria will also be shown. To view the location of any of the results, click on its row. The location is shown on the bottom of the screen.
Opening a test
You can open a test in the Editor by double-clicking on the desired test. If the test is inside a folder or sub-folder, you need to drill-down by double clicking on each folder and sub-folder until you reach the desired test and then double-click on the test to open it.
When you open a folder, a breadcrumbs navigation appears at the top of the page, enabling you to navigate back to the root folder.
Running Tests (Web)
You can run a test or multiple tests directly from the Test Library.
To run tests:
- Click on the test name to select it.
You can select multiple tests by holding down the ctrl/cmd key and then clicking on each of the desired tests.
If there are no folders in your Test Library, you can also select all of your tests by holding down the ctrl/cmd key + A on the keyboard.
- Click the Play icon (or right-click on the test name and choose Play from the right-click menu).

The Run Test Locally window opens.
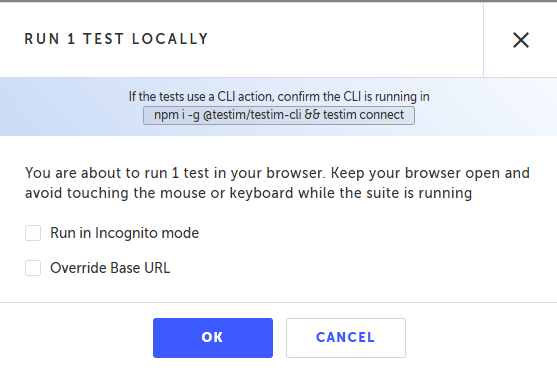
- If you would like to run the test in Incognito mode, select Run in Incognito mode.
- If you would like the test to use a different base URL than the one originally configured in the test, select Override Base URL and enter the URL in the field that is shown. For more information, see Base URL.
- Click OK.
Avoid touching your mouse and keyboard while the test is running.
The Suite Runs tab of the Runs_screen opens at the same time as the _AUT (application under test) browser. The test is run in the AUT_browser, and you can view the results in the _Suite Runs tab.
Exporting to CSV
You can export a list of your tests to a csv file. The following information is included for each test: name, description, labels, last run status, author, app name (mobile), app version (mobile), and path.
To export test information to csv:
- Click on the Export to CSV icon.

The csv file is downloaded to your local machine.
Note: when searching/filtering the CSV will only contain the matching items.
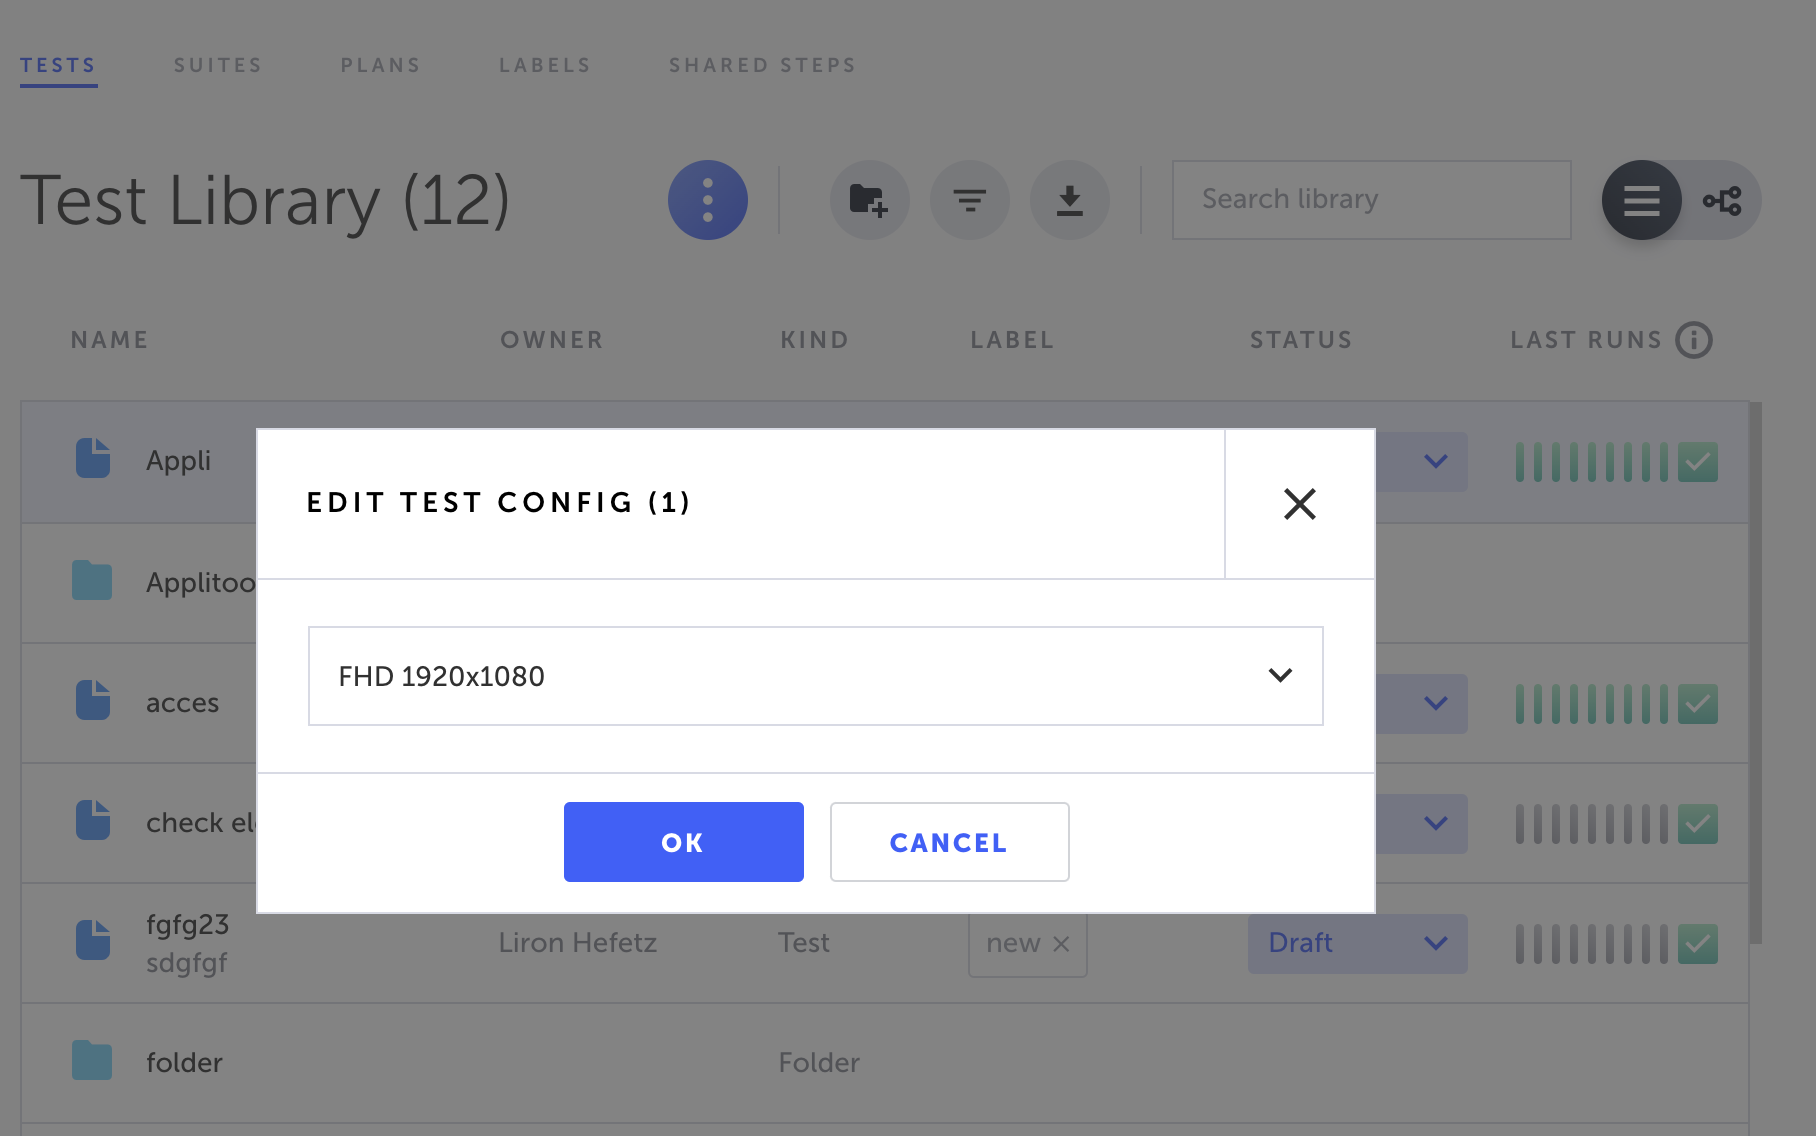
Changing Tests' Configuration (Web)
You can change tests' configuration directly from the test library.
To edit tests' configuration:
- Select the test/s you would like to change their configuration
- Click on the "Edit test config" either from the top menu, or from the context menu

- Select the configuration to apply
- Click "OK"
Updated 5 months ago
