Virtual Mobile Grid
The Virtual Mobile Grid (VMG) enables testing across a wide variety of iOS simulators and Android emulators. Enjoy a cloud based grid which allows you to:
- Simplify connectivity and configuration and improve quality through the use of a range of available virtual devices.
- Scale testability through the use of parallel runs across different devices.
The Virtual Mobile Grid can be used to record tests as well as to run them. It is connected to your Mobile Apps Library. This means that if the test that you are running uses a mobile app, this app needs to be added to the Mobile Apps Library before running the test on the Virtual Mobile Grid.
The Virtual Mobile Grid does not require any special integration. It is included in the license for paying customers. However, for Community license, it is possible to enroll in a free trial as a Company Owner or Project Owner. Once the free trial is started, the Virtual Mobile Grid is immediately available under Device Management. During the free trial period, a variety of virtual devices (Android and iOS) will be available for you to use.
Test CompatibilityOnly iOS applications that were compiled to work with virtual devices can be executed on the "Virtual Mobile Grid".
OS CompatibilityVirtual mobile grid supports x86_64 Android builds only.
How to Start a Free Virtual Mobile Grid Trial
If you are using a Community license, as the Company Owner or Project Owner, you can start a free trial of Virtual Mobile Grid. The trial duration is 14 days. During the trial period you will be able to run a single execution at a time for all projects (iOS and Android). If you want to skip the free trial and move directly to the paid version, contact us.
To start a free trial of Virtual Mobile Grid:
- Go to the Device Management screen and on the click the Virtual Mobile Grid tab, click Start A Trial.
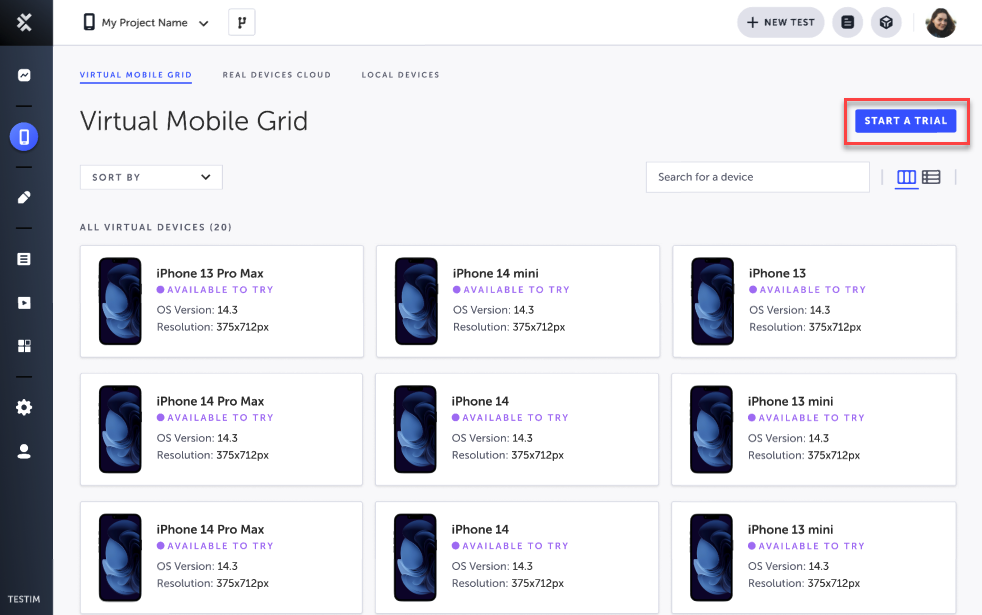
After a few seconds your trial is activated and the following notice is displayed.
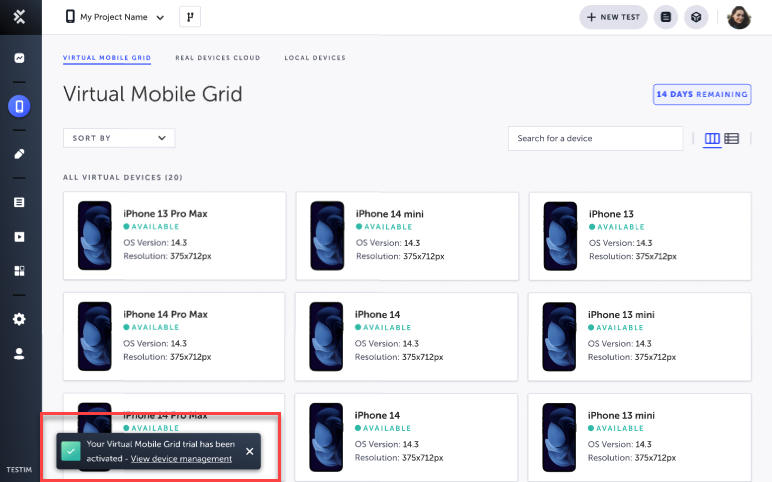
On the Virtual Mobile Grid screen, you will see the devices available for you during the trial period.
How to Run Tests on Virtual Mobile Grid
Before running a test on Virtual Mobile Grid, make sure you have done the following:
- Mobile Configuration: make sure you have created a mobile configuration that is compatible with Virtual Mobile Grid: Configuration Library - Mobile. This configuration can be used to run tests through the CLI/CI, Scheduler, or a Test Plan.
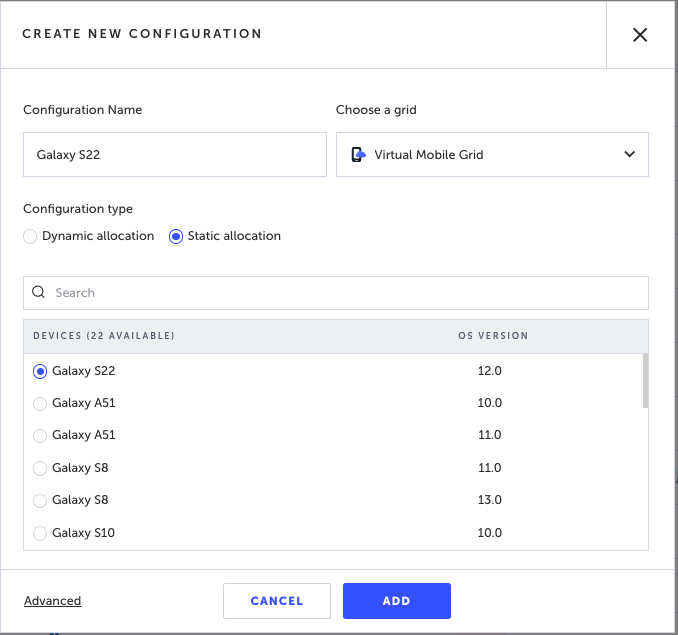
- Apps Library - make sure that you have added the app under test to the Apps Library: Mobile Apps. If the test has already been recorded with an app that was selected using the "From Device" option, in the Setup step of the test, in the Properties pane, click the change app link and select the From Library option.
Running the test remotely
Using the configuration that is configured with the Virtual Mobile Grid, you can run your tests remotely using one of the following methods:
Make sure you have the relevant mobile app in your Mobile Apps Library.
Add --grid parameter with the grid name.
Use Grid field to choose on which grid to run your tests.
Use Grid field to choose on which grid to run your tests.
Under the Run on a grid option, select Virtual Mobile Grid and the relevant configuration.
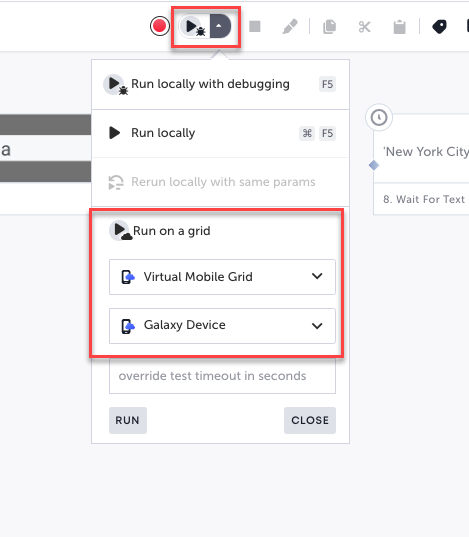
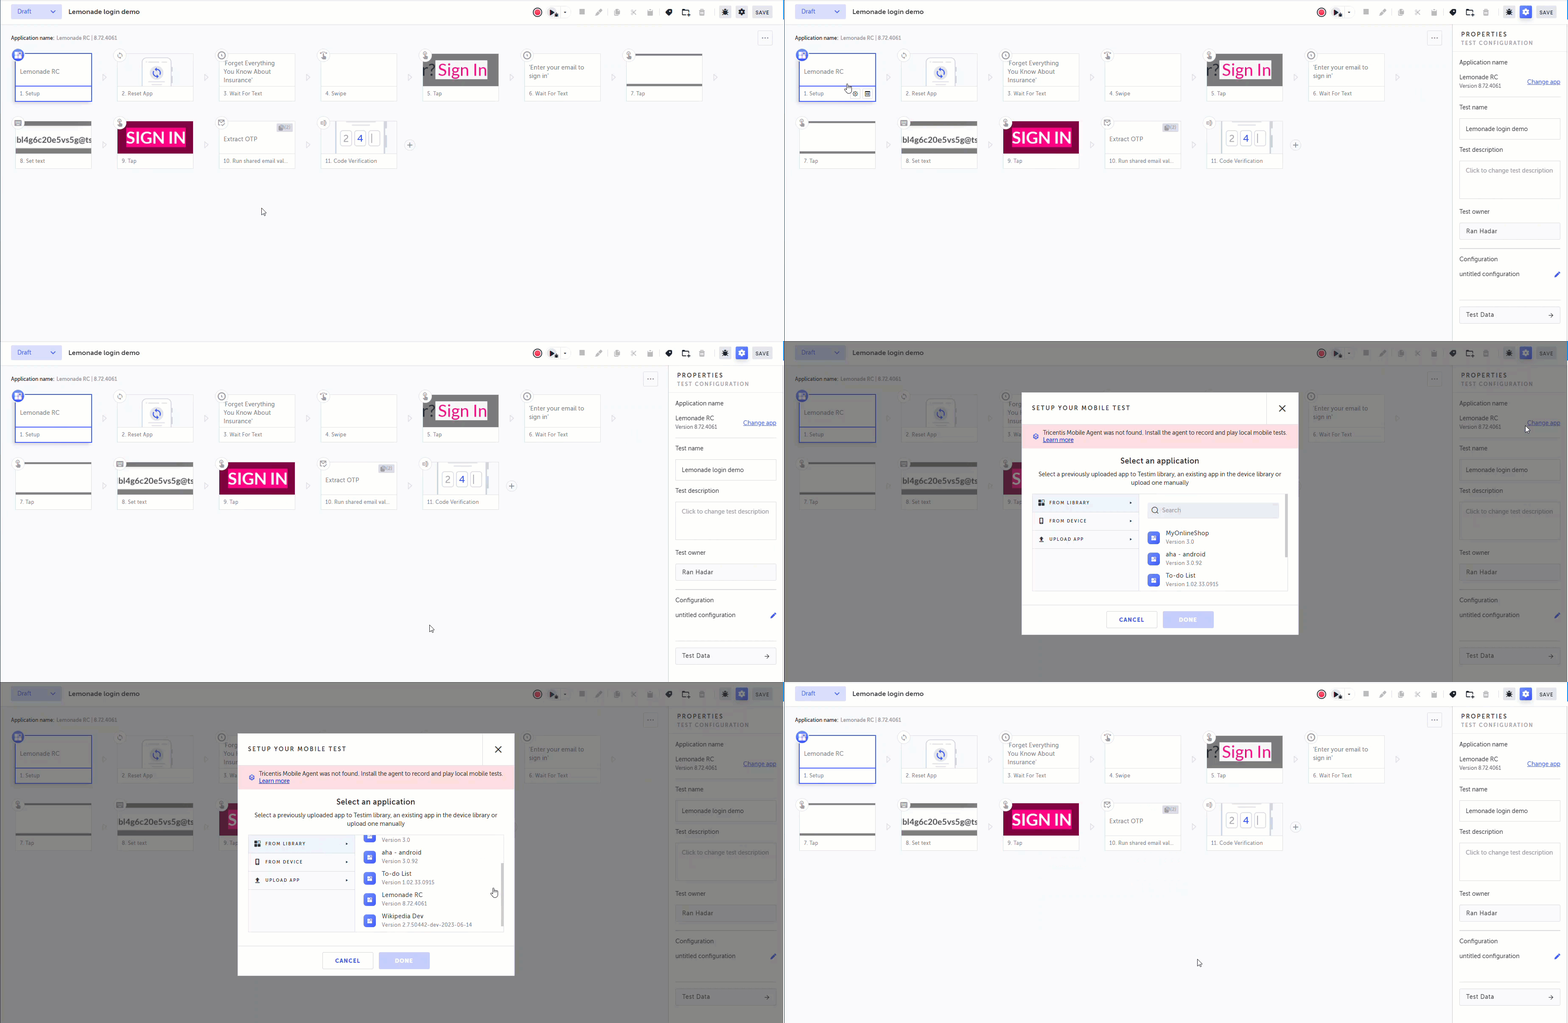
Changing the app when recorded from device
If the test has already been recorded with an app that was selected using the "From Device" option, do the following:
From the Editor
To change the app from the Editor:
- In the Setup Step click Show Properties.
- In the Properties pane, under Application name, click the Change app link.
- Select the From Library option and then select the relevant app from the list.
- Click Done.
From the CLI
When running the test through the CLI, it is possible to override the default app Id, which was used in the recording of the test, with an app Id of the app in the Mobile Apps Library.
To override the default app ID:
- Go to Settings > CLI.
- In the Grid drop-down menu, select Virtual Mobile Grid.
- Copy the command example to your command prompt.
- Go to Mobile Apps Library.
- Select the relevant app and then click the Copy ID button.
- In the command prompt add the
--app-idflag followed by the copied ID. - Run the CLI command.
From the scheduler
To override the default app in the scheduler:
- Go to Runs > Scheduled Runs
- Open the relevant scheduler.
- Under What to run on, select the Override application checkbox.
- Under Select from library, select the relevant application.
- Click Save.
From the test plan
To override the default app in the scheduler:
- Go to Test List > Plans
- Open the relevant test plan.
- Under What to run on, select the Override application checkbox.
- Under Select from library, select the relevant application.
- Click Save.
Updated 5 months ago
