
Configuration Library - Mobile
A Mobile Configuration determines the system specifications used to run the test. If you intend to run the test locally then the configuration should match your local environment. If you intend to run the test on a remote (grid) environment, then you will need to select a relevant Mobile Configuration, which specifies the attributes of the mobile device that will be used/simulates during the test run.
View Existing Configurations
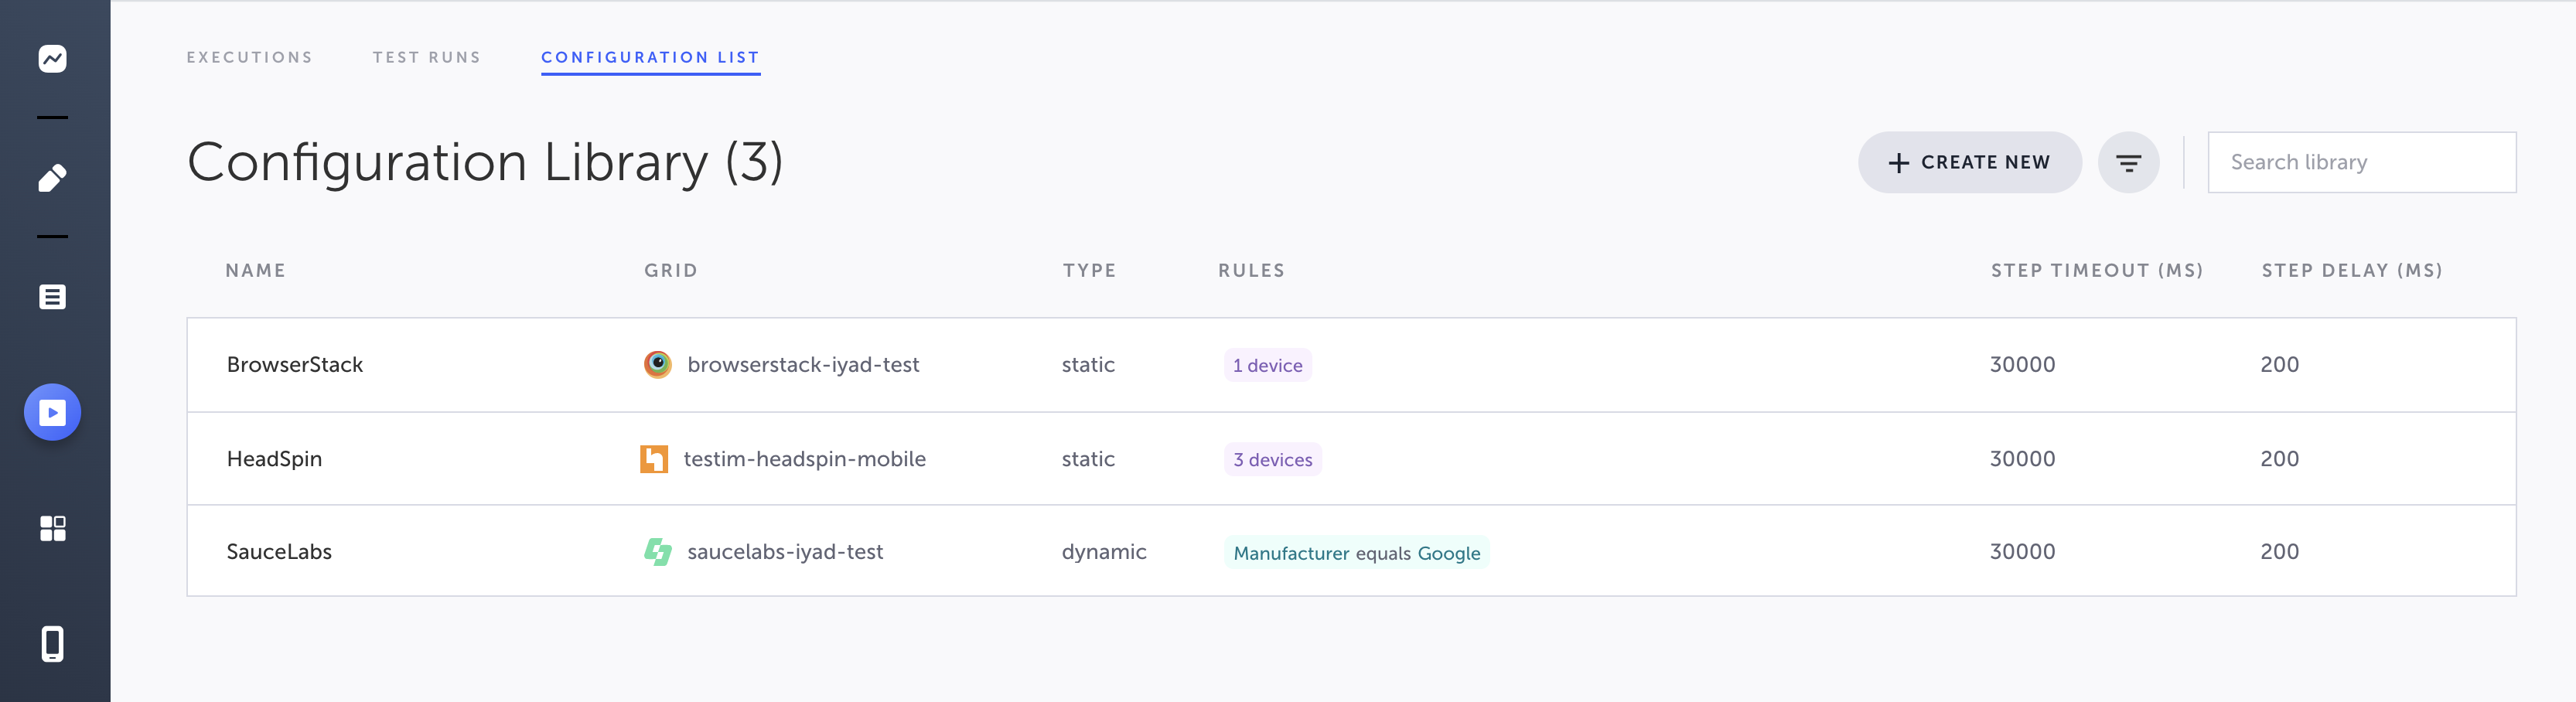
Within a mobile project all mobile configurations are stored within the Configuration Library. The following information is displayed for each configuration:
- Name - name given to identify the configuration
- Grid - the grid used for the configuration
- Type - the configuration type used (static/dynamic)
- Rules - the rules set for the configuration:
- For static allocation configurations - the number of devices selected.
- For dynamic allocation configurations - the device selection rules that have been set.
- Step Timeout - The time laps which causes Testim to register a fail for a test step.
- Step Delay - the delay between executing test steps.
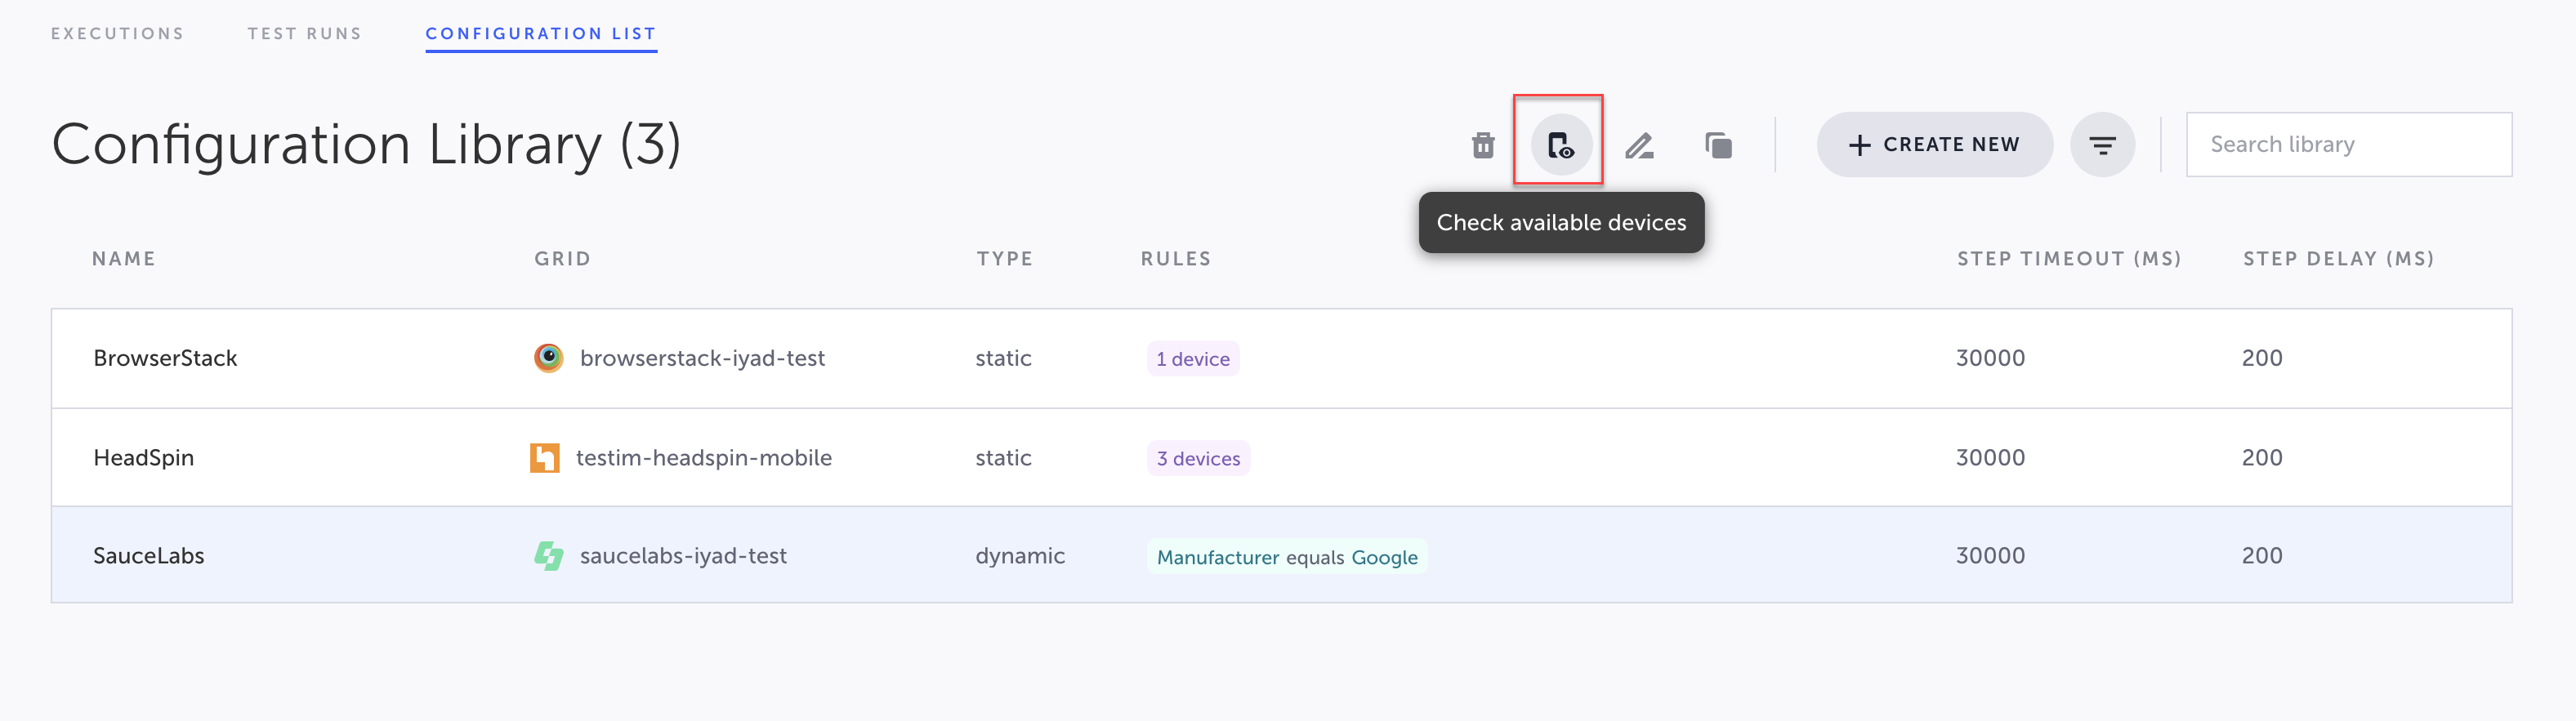
Checking available devices for a specific configuration
You can view which specific devices have been allocated to a mobile configuration without opening the configuration details.
To view available devices in a saved mobile configuration:
-
Select the specific mobile configuration in the Configuration Library. Click the Check available devices button from the action menu.
-
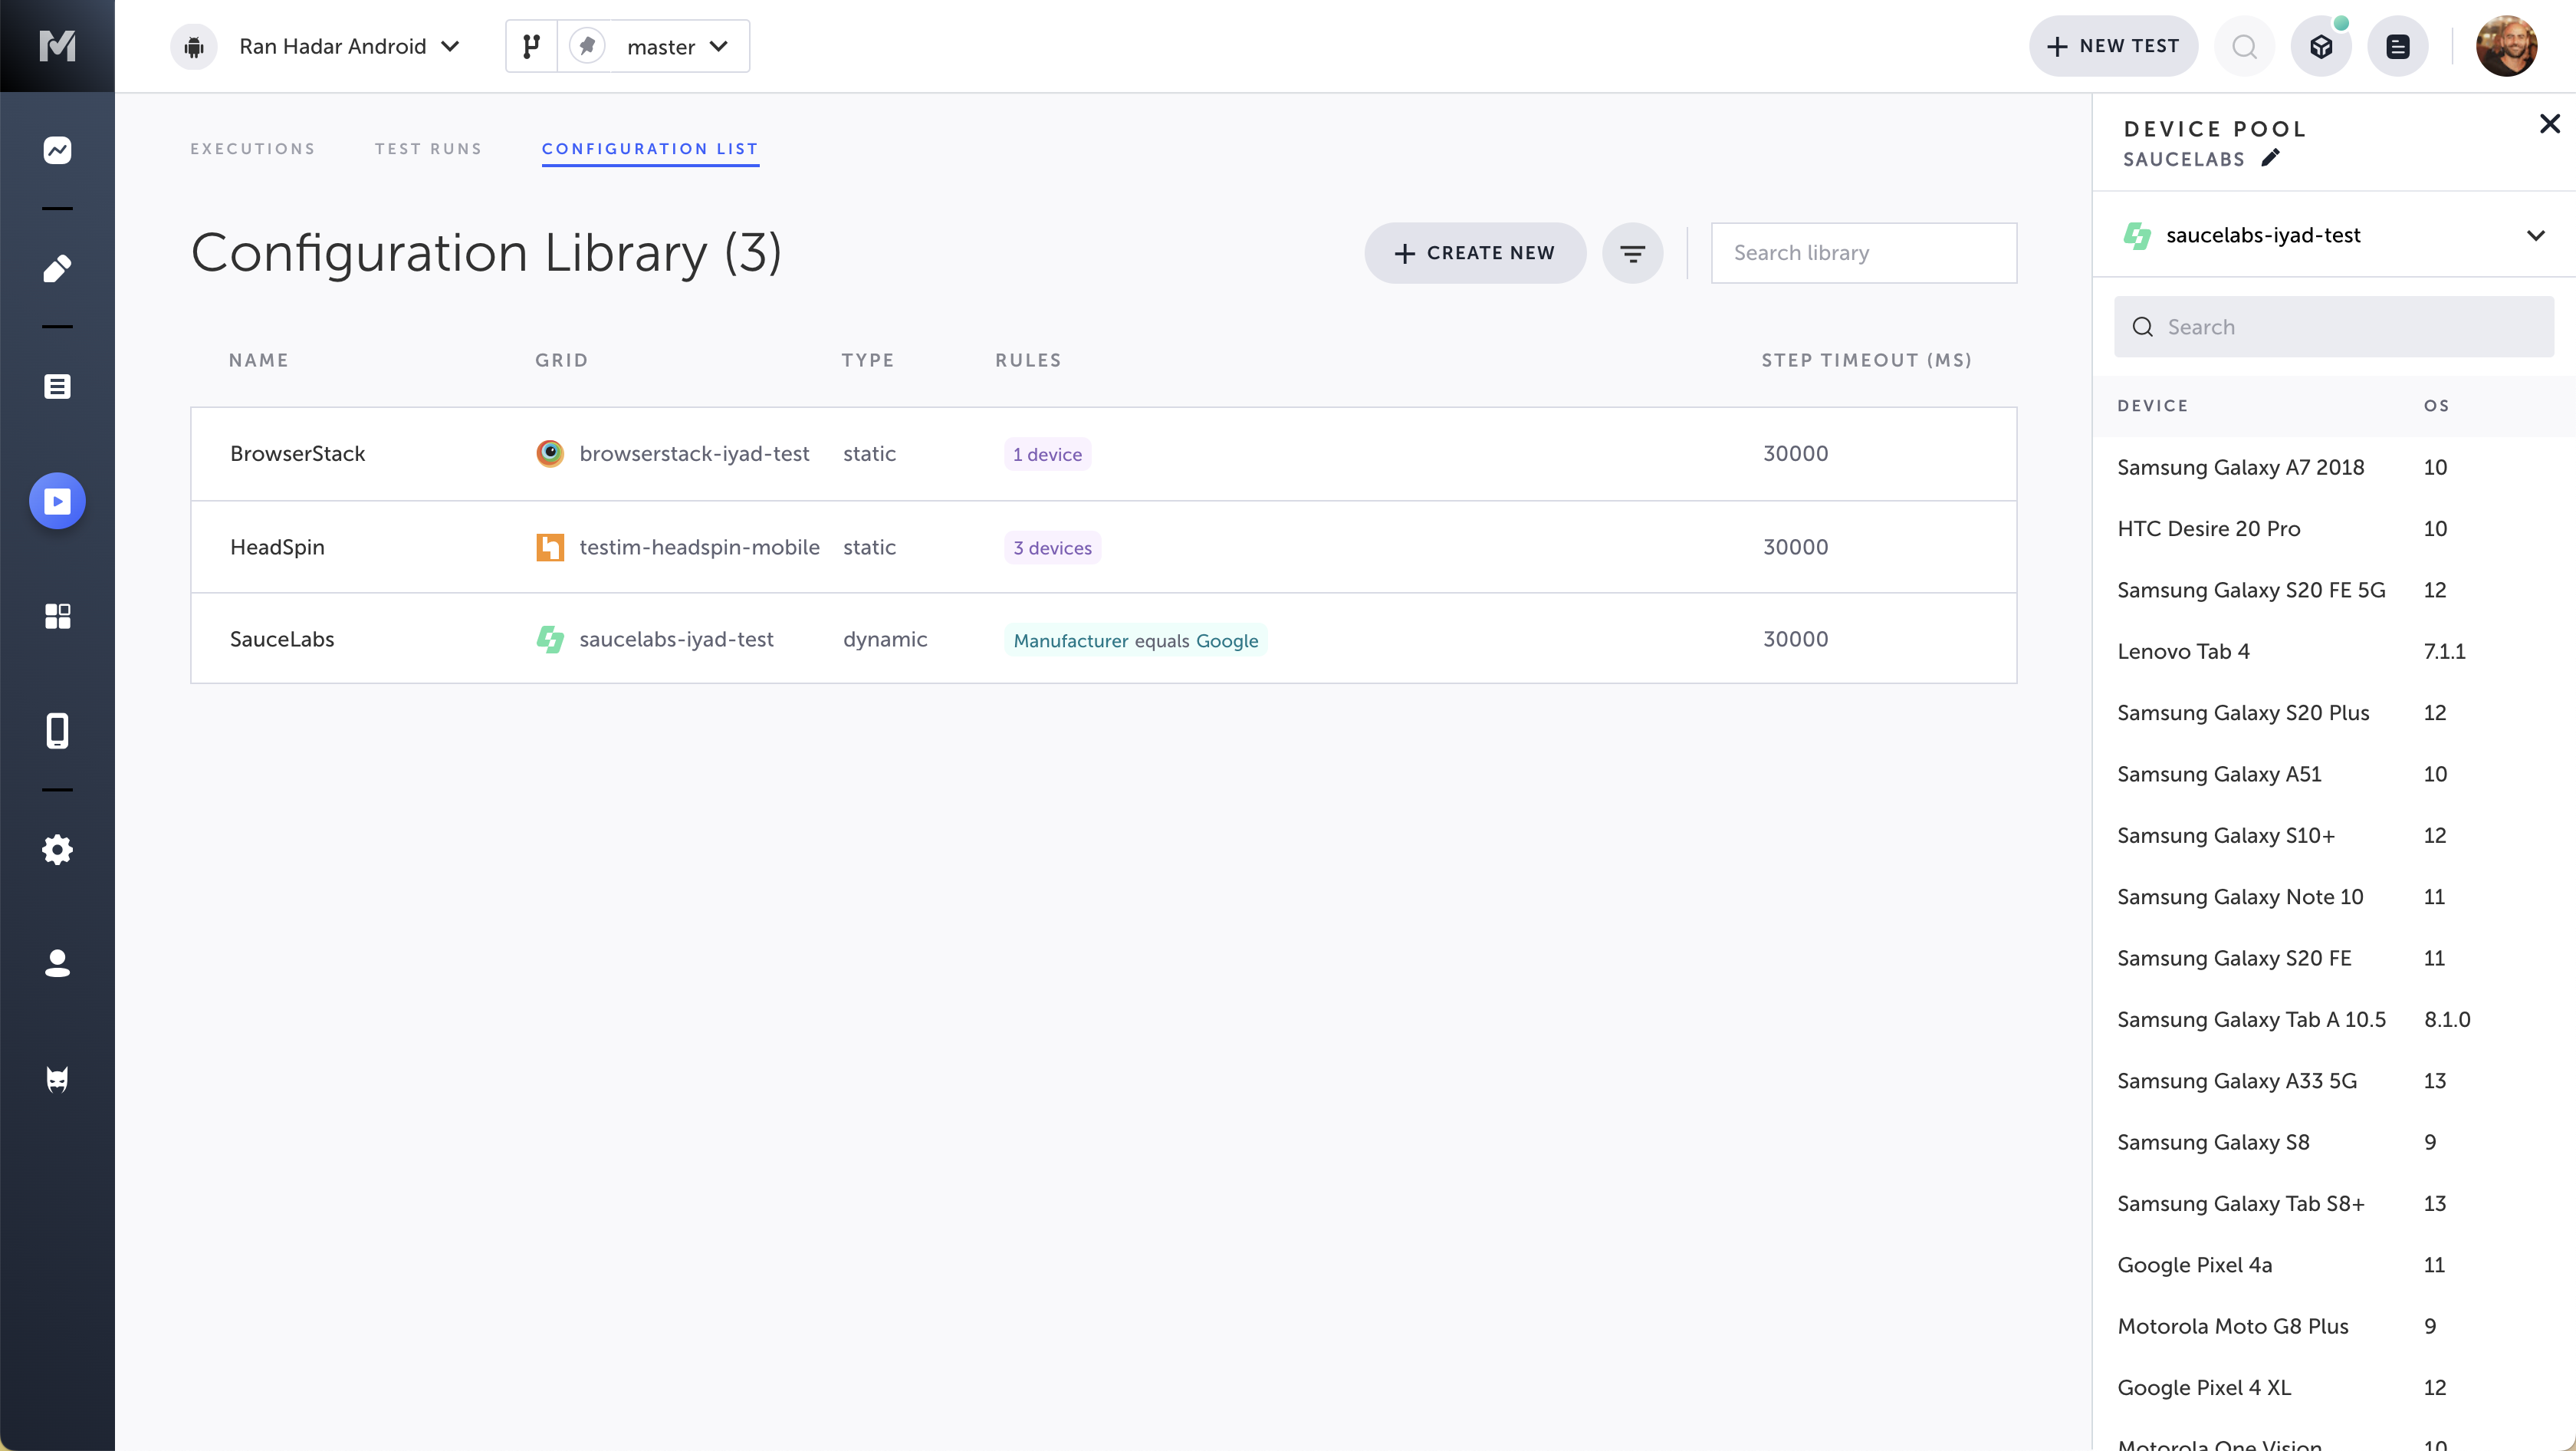
Testim will display the list of devices allocated to that configuration.
Adding a New Configuration
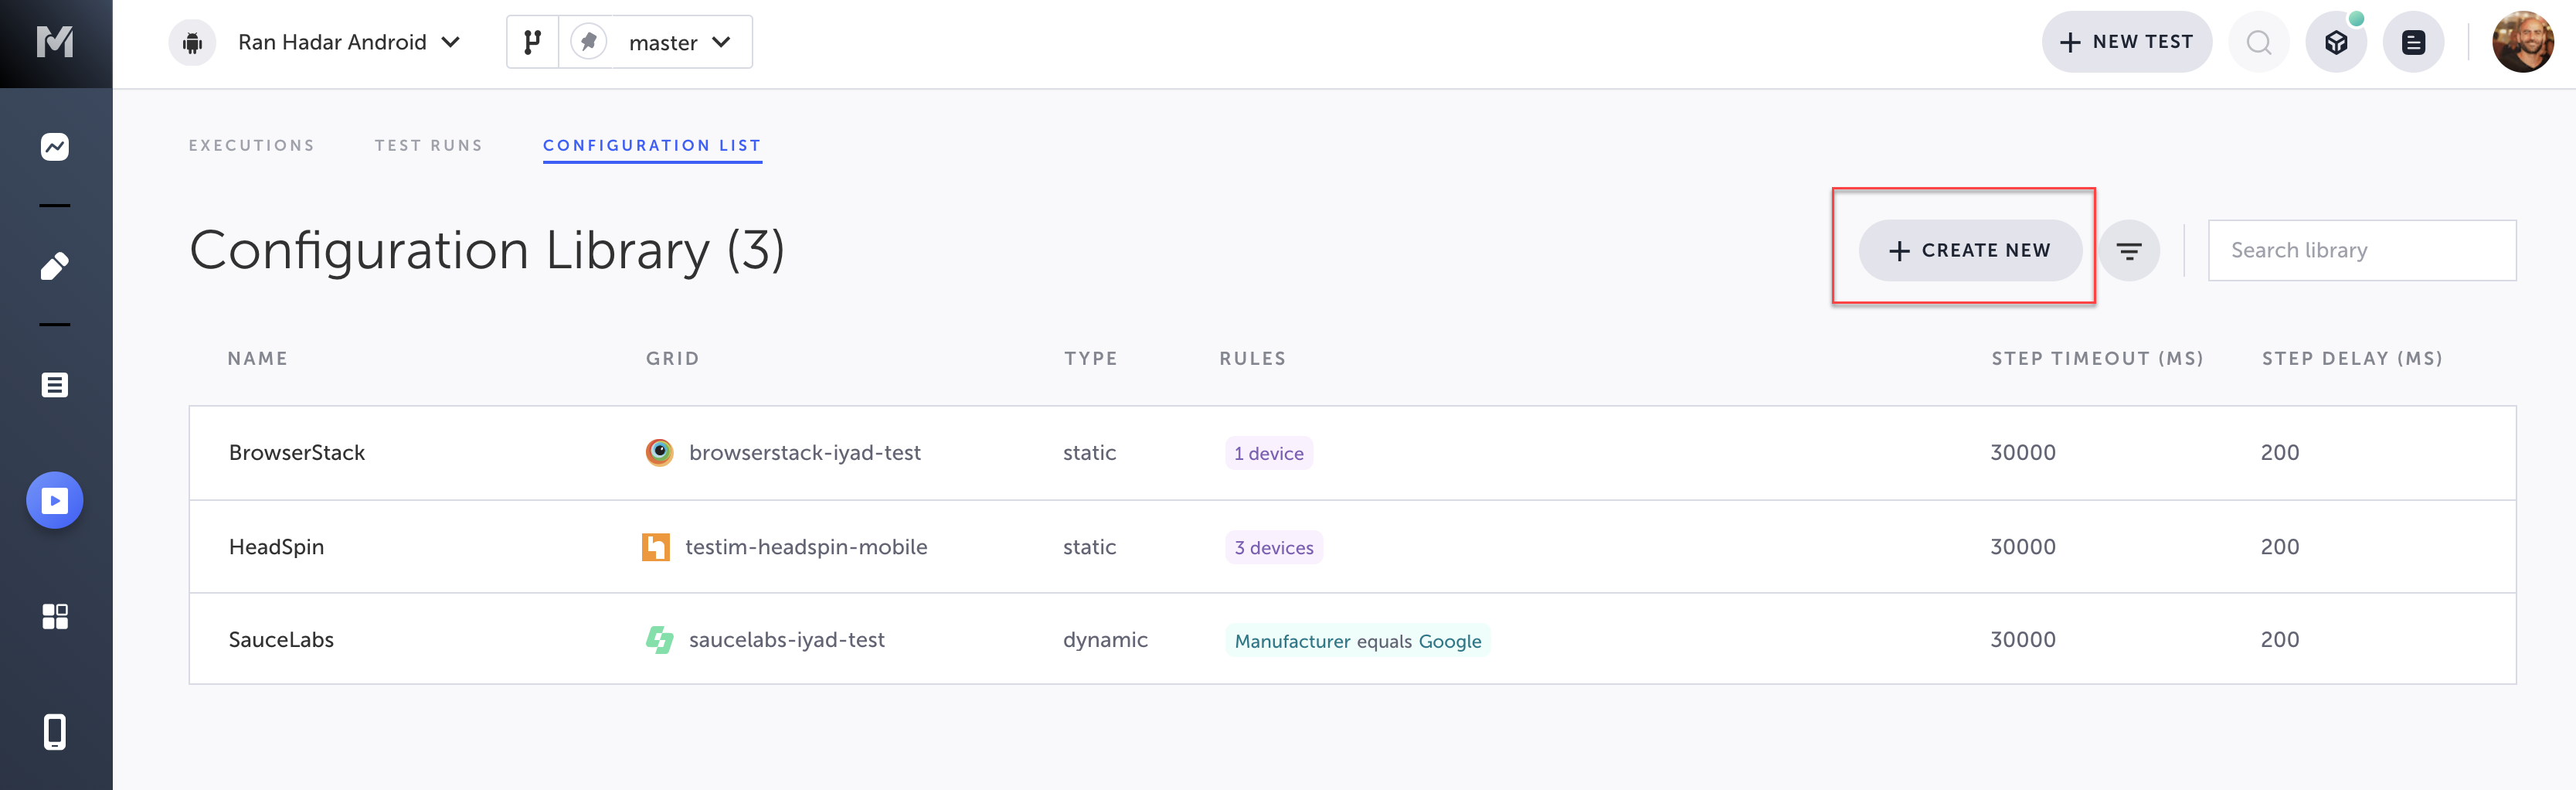
To add a new configuration:
- Navigate to the Runs > Configuration Library and click the Create New button.
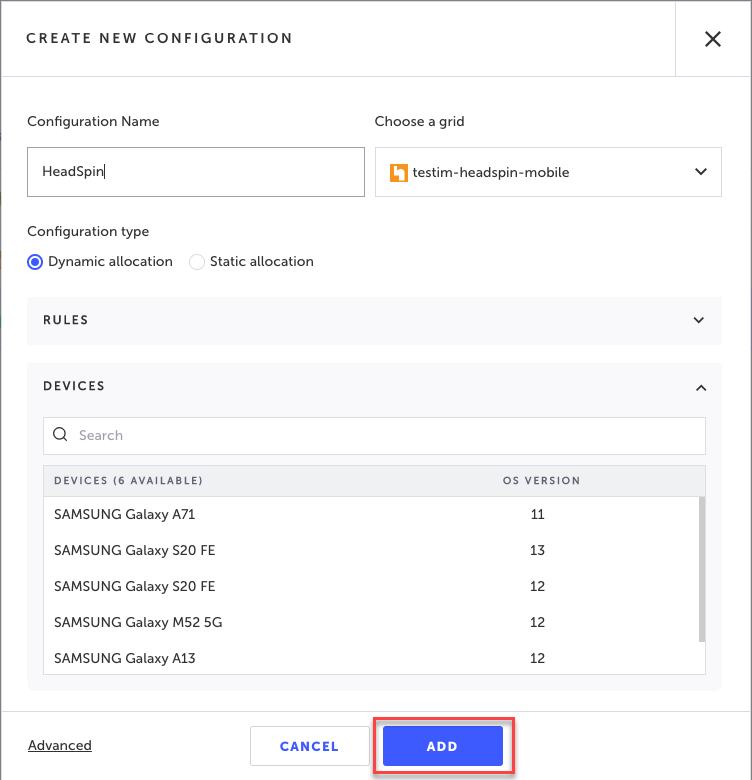
- In the Configuration Name field, enter a name for the configuration,.
- Under Choose a grid, select a grid from the drop-down menu. If you don't see your desired grid, you may need to add your grid to Testim, See Grid management for more information.
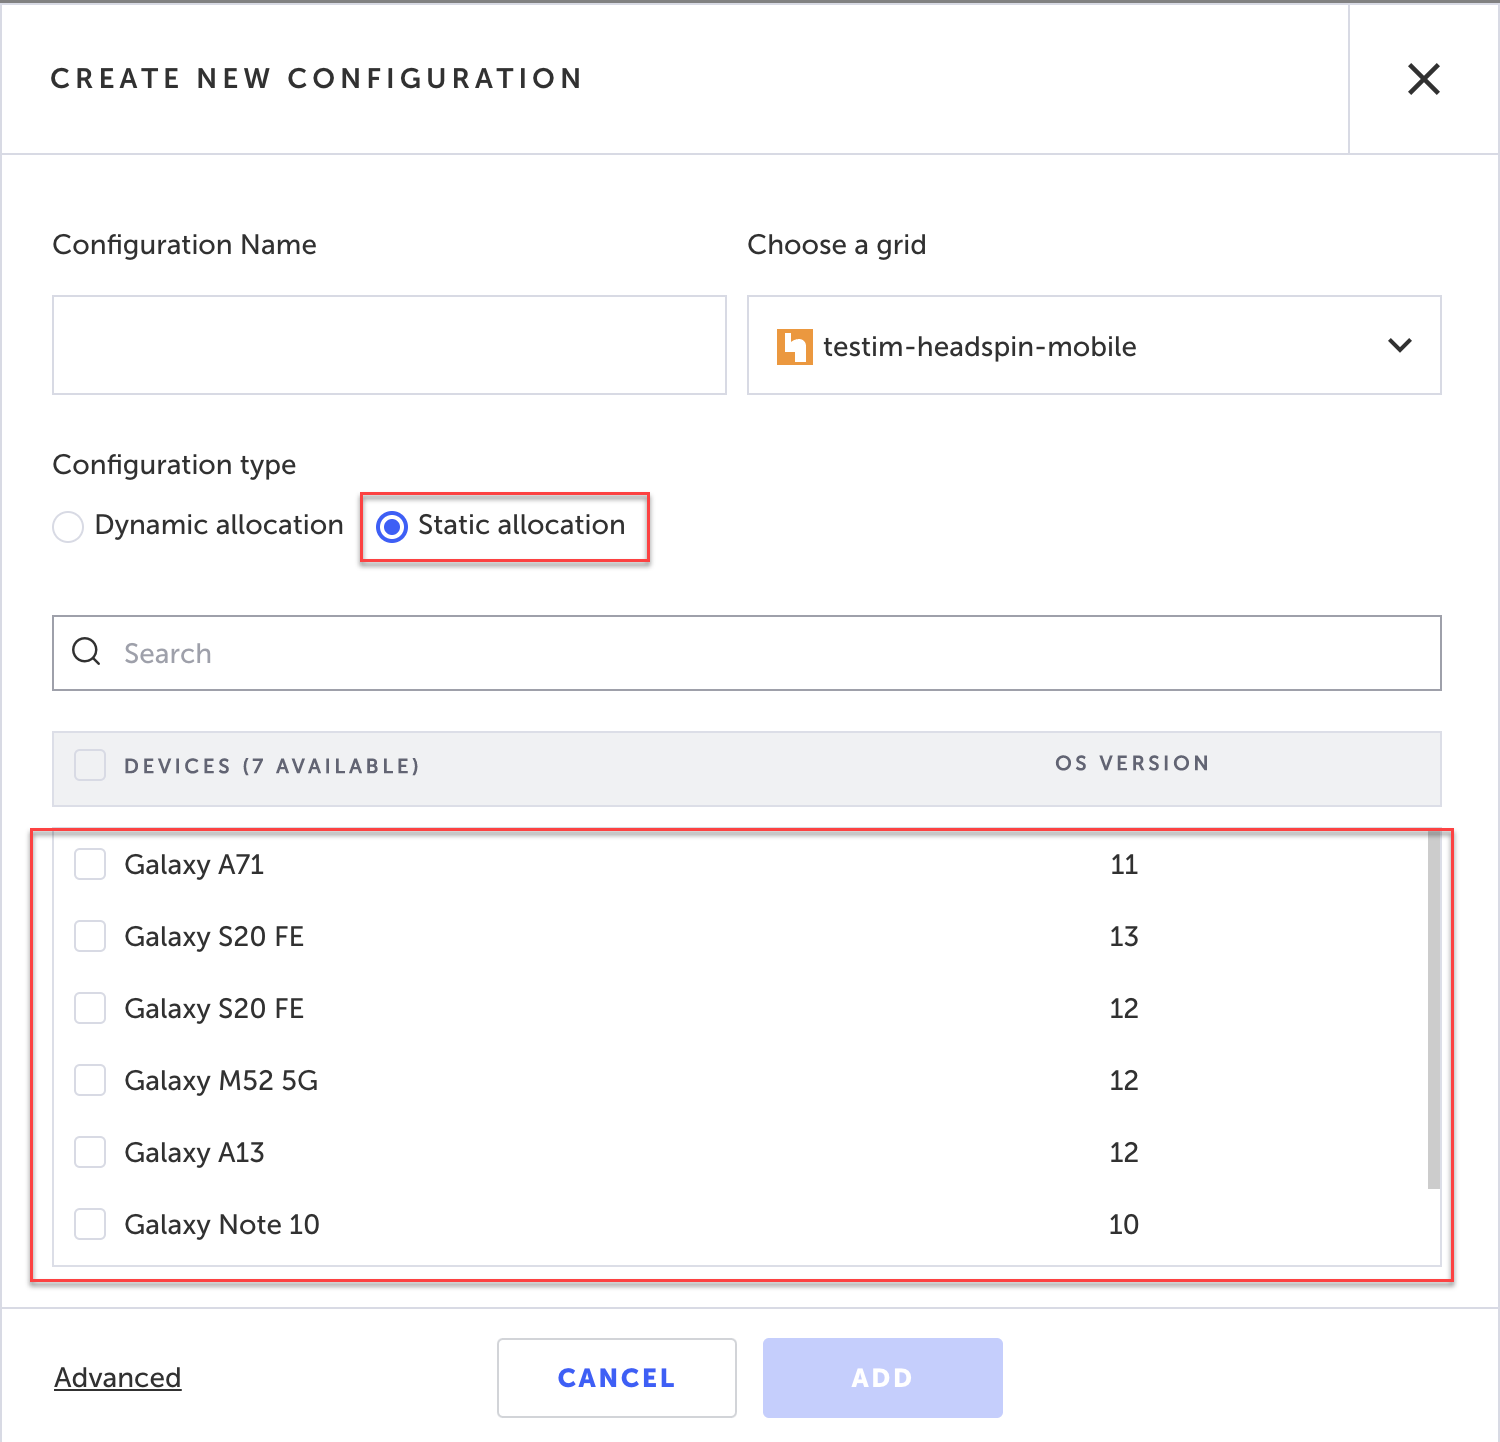
- Select a Configuration Type:
- static allocation - manually select from the list of available devices (from the selected grid), which are displayed at the bottom.
- static allocation - manually select from the list of available devices (from the selected grid), which are displayed at the bottom.
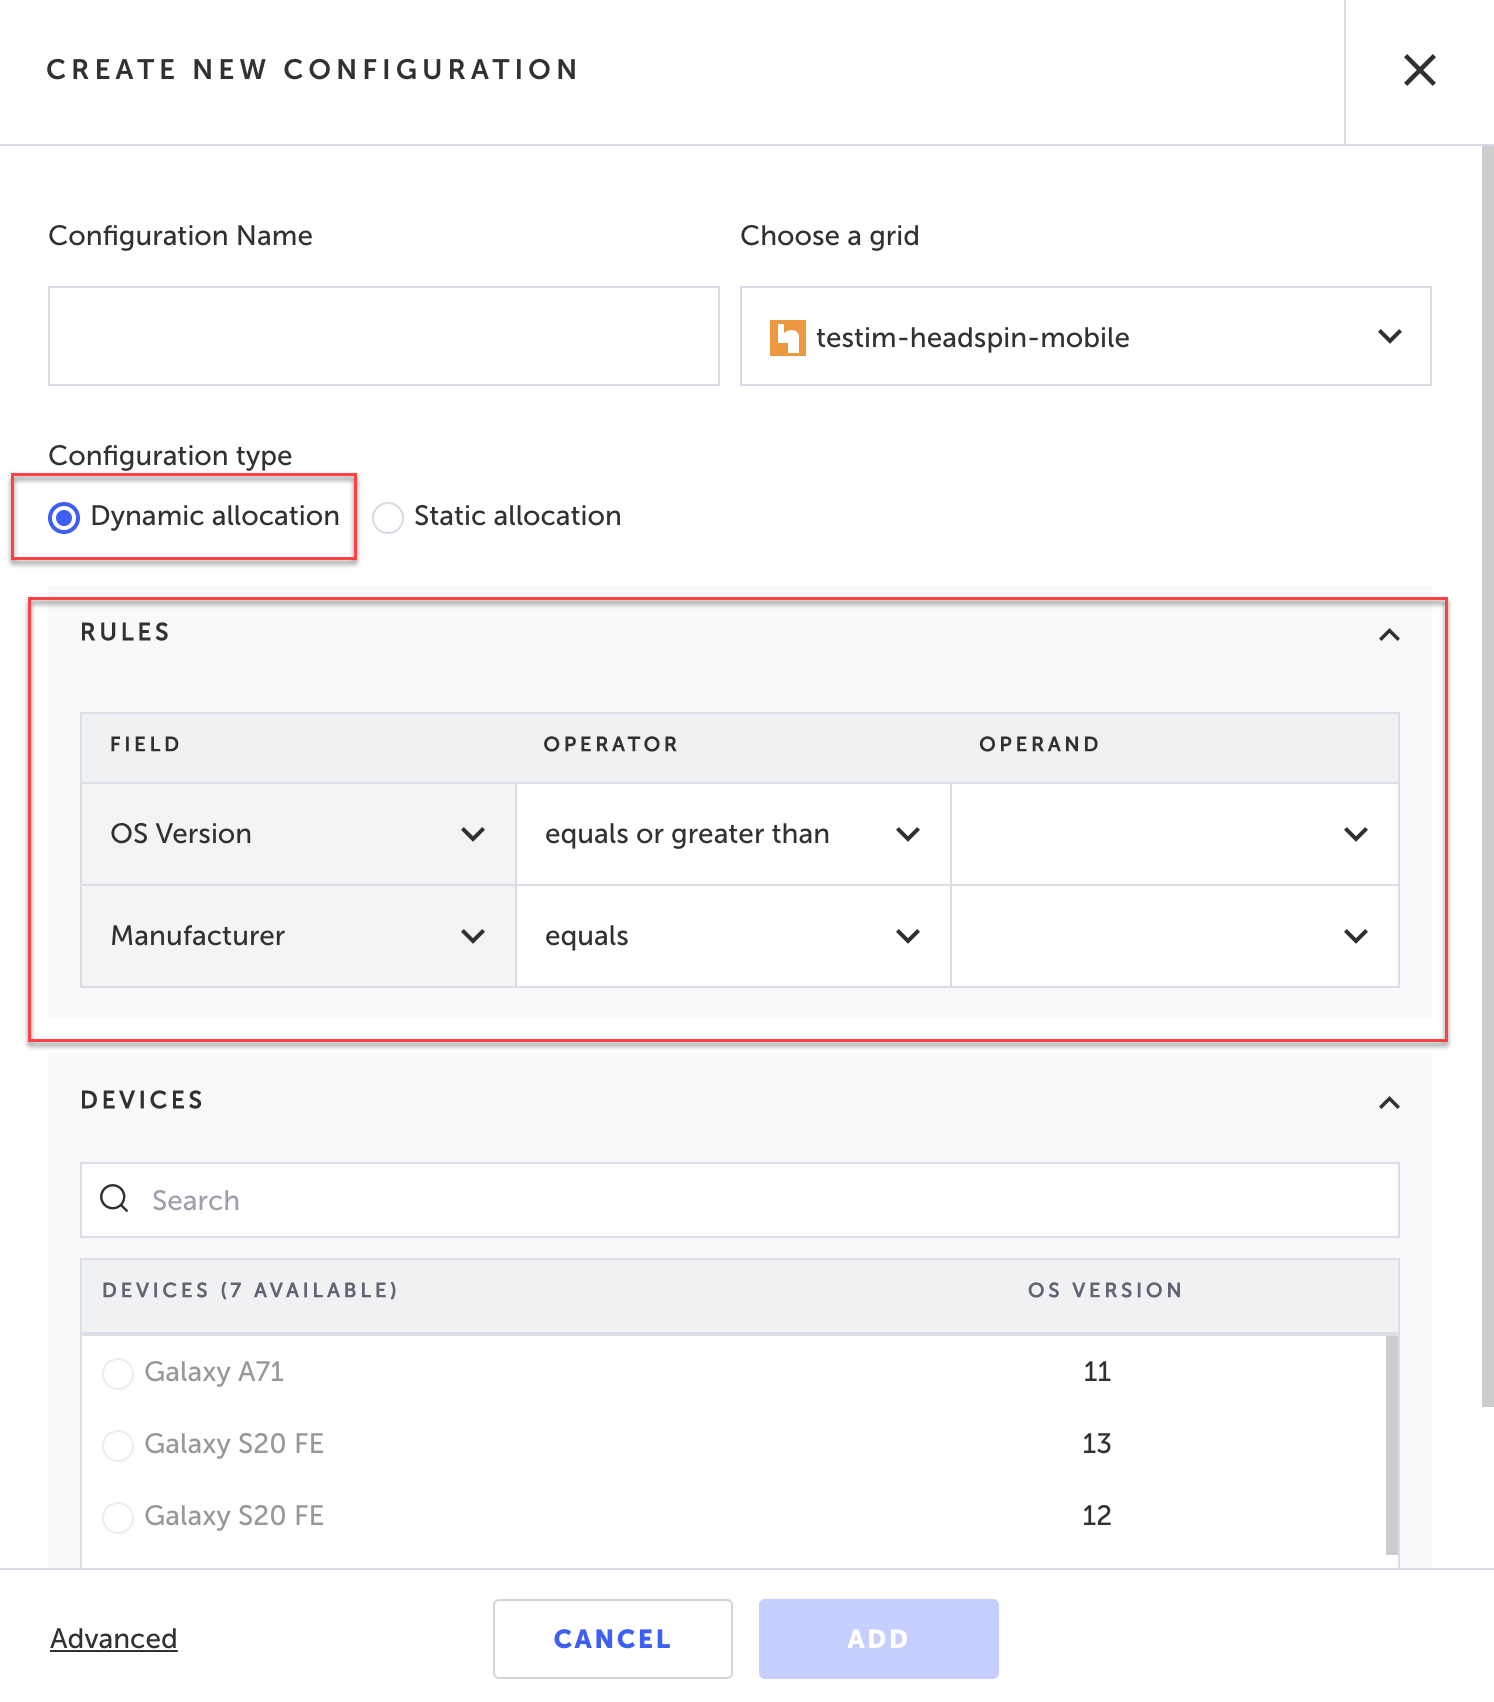
- dynamic allocation - create rules that allow Testim to dynamically select mobile devices from your selected grid account to be used in the configuration based on the rules criteria defined in the Rules section below. After selecting this option, skip to step 6 below.
- If you have selected the Static Allocation option, under the Devices section, select the checkboxes of the specific devices that you want to use in your tests. From this list of devices Testim will select the first device that is made available by the grid provider from the pool of devices that were selected.
NoteEven if you have selected multiple devices, Testim will select only one device to be used during the test execution. This device is the first device that is made available by the grid provider from the pool of devices that were selected.
In BrowserStack and SauceLabs it is possible to select one device only.
- If you selected the Dynamic Allocation option, under Rules, define a rule to dynamically select devices that match the criteria by doing the following:
- Under Field, select the criteria to filter the devices. For example, select OS Version to filter by the operating system version. The list of criteria may slightly differ for different grid providers, based on the features provided by that specific provider.
- Under Operator, select the operator used to filter the devices. For example, select "greater than" to select devices whose OS version is greater than the value in the operand (e.g., greater than 10). In some cases regex filter can be applied by selecting the regex option when available.
- Under Operand, enter the operand value of the rule. For regex rules, enter the regex expression.
The list of devices from the selected grid that currently match the rules will be displayed in the Devices section below. When running tests with a dynamic allocation configuration, Testim will search for the first available device from the set of devices that meet the rule criteria and use that device for the test. If the grid provider updates a device on the grid, the device will automatically become available or unavailable in the configuration based on whether it continues to meet the rule.
Note:For more information on SauceLabs specific rules, see SauceLabs Test Configuration Options and Sause Labs Platform Configurator.
For more inforamtion on BrowserStack specifc rules, see BrowserStack Select Device Using Regex.
NoteEven if the rule matches multiple devices, Testim will select only one device to be used during the test execution. This device is the first available device from the set of devices that meet the rule criteria.
-
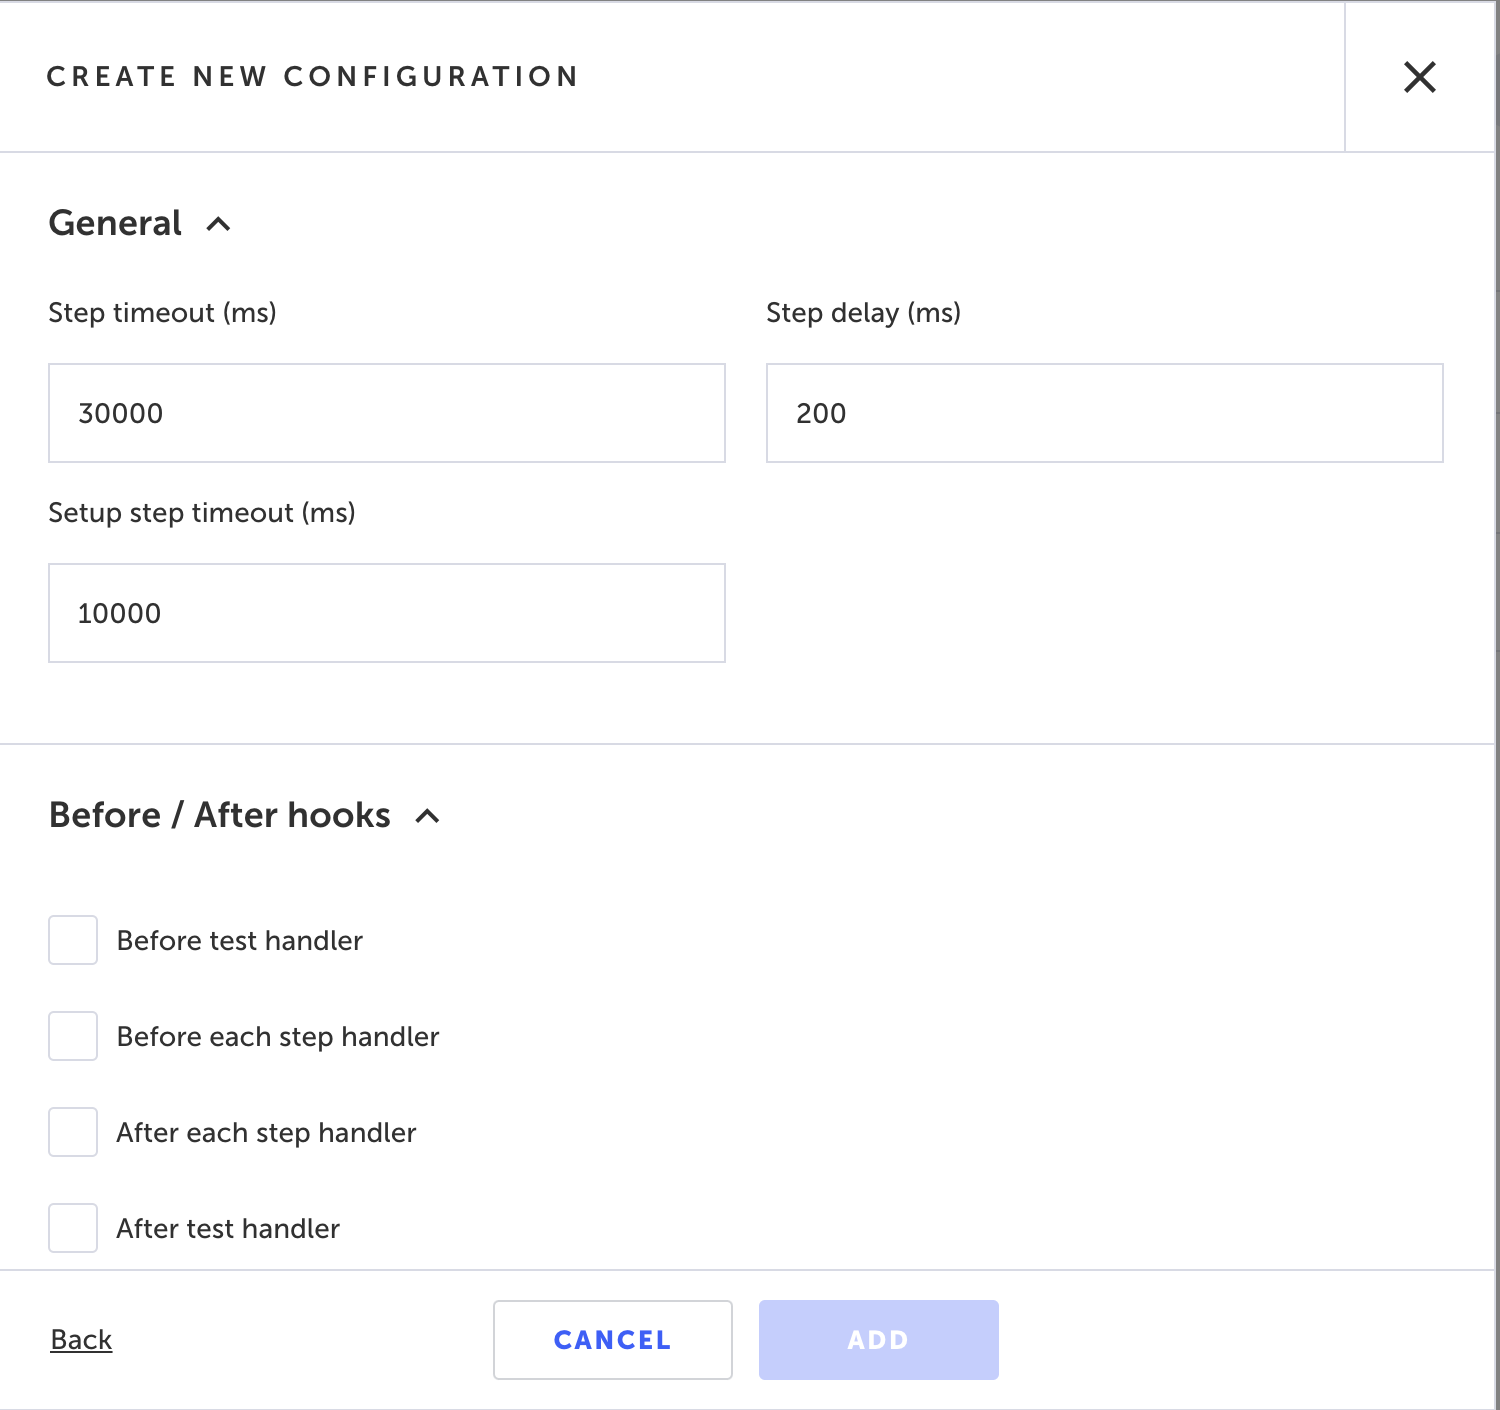
Click the Advanced link near the bottom to define additional advanced parameters to your configuration. Click the Back button to return to the main configuration settings.
-
In the General section, optionally modify the following settings:
- Step timeout - the time lapse in milliseconds which causes Testim to register a fail for a test step.
- Step delay - the delay in milliseconds between executing test steps.
- Setup step timeout - the delay in milliseconds before executing the Setup step of the test.
-
In the Before/After hooks section, modify the settings as desired. For more information, see Hooks.
-
Click the Add button to create the new mobile configuration.
Using a Mobile Configuration to Execute a Test
Every test has its own default configuration accessible from the Properties panel of the test's Setup step. By default, the Device Name setting will be "Any device" and the OS Version setting will be "Any version". According to this settings, Testim will pick the first available device on the selected grid. The configuration parameters that are set in the test's default configuration will apply unless the test is run with a different test configuration.
When the test is run in the CLI, you can override the default configuration by specifying a new test configuration in the run command, see Command Line Interface.
Cloning, renaming, modifying and deleting test configurations
Cloning a test configuration
To clone a test configuration:
- In the left menu, navigate to Runs > Configuration List.
The Configuration Library is shown. - Click on the row of the test configuration you wish to clone.
Context tools are shown. - Click the Clone icon.
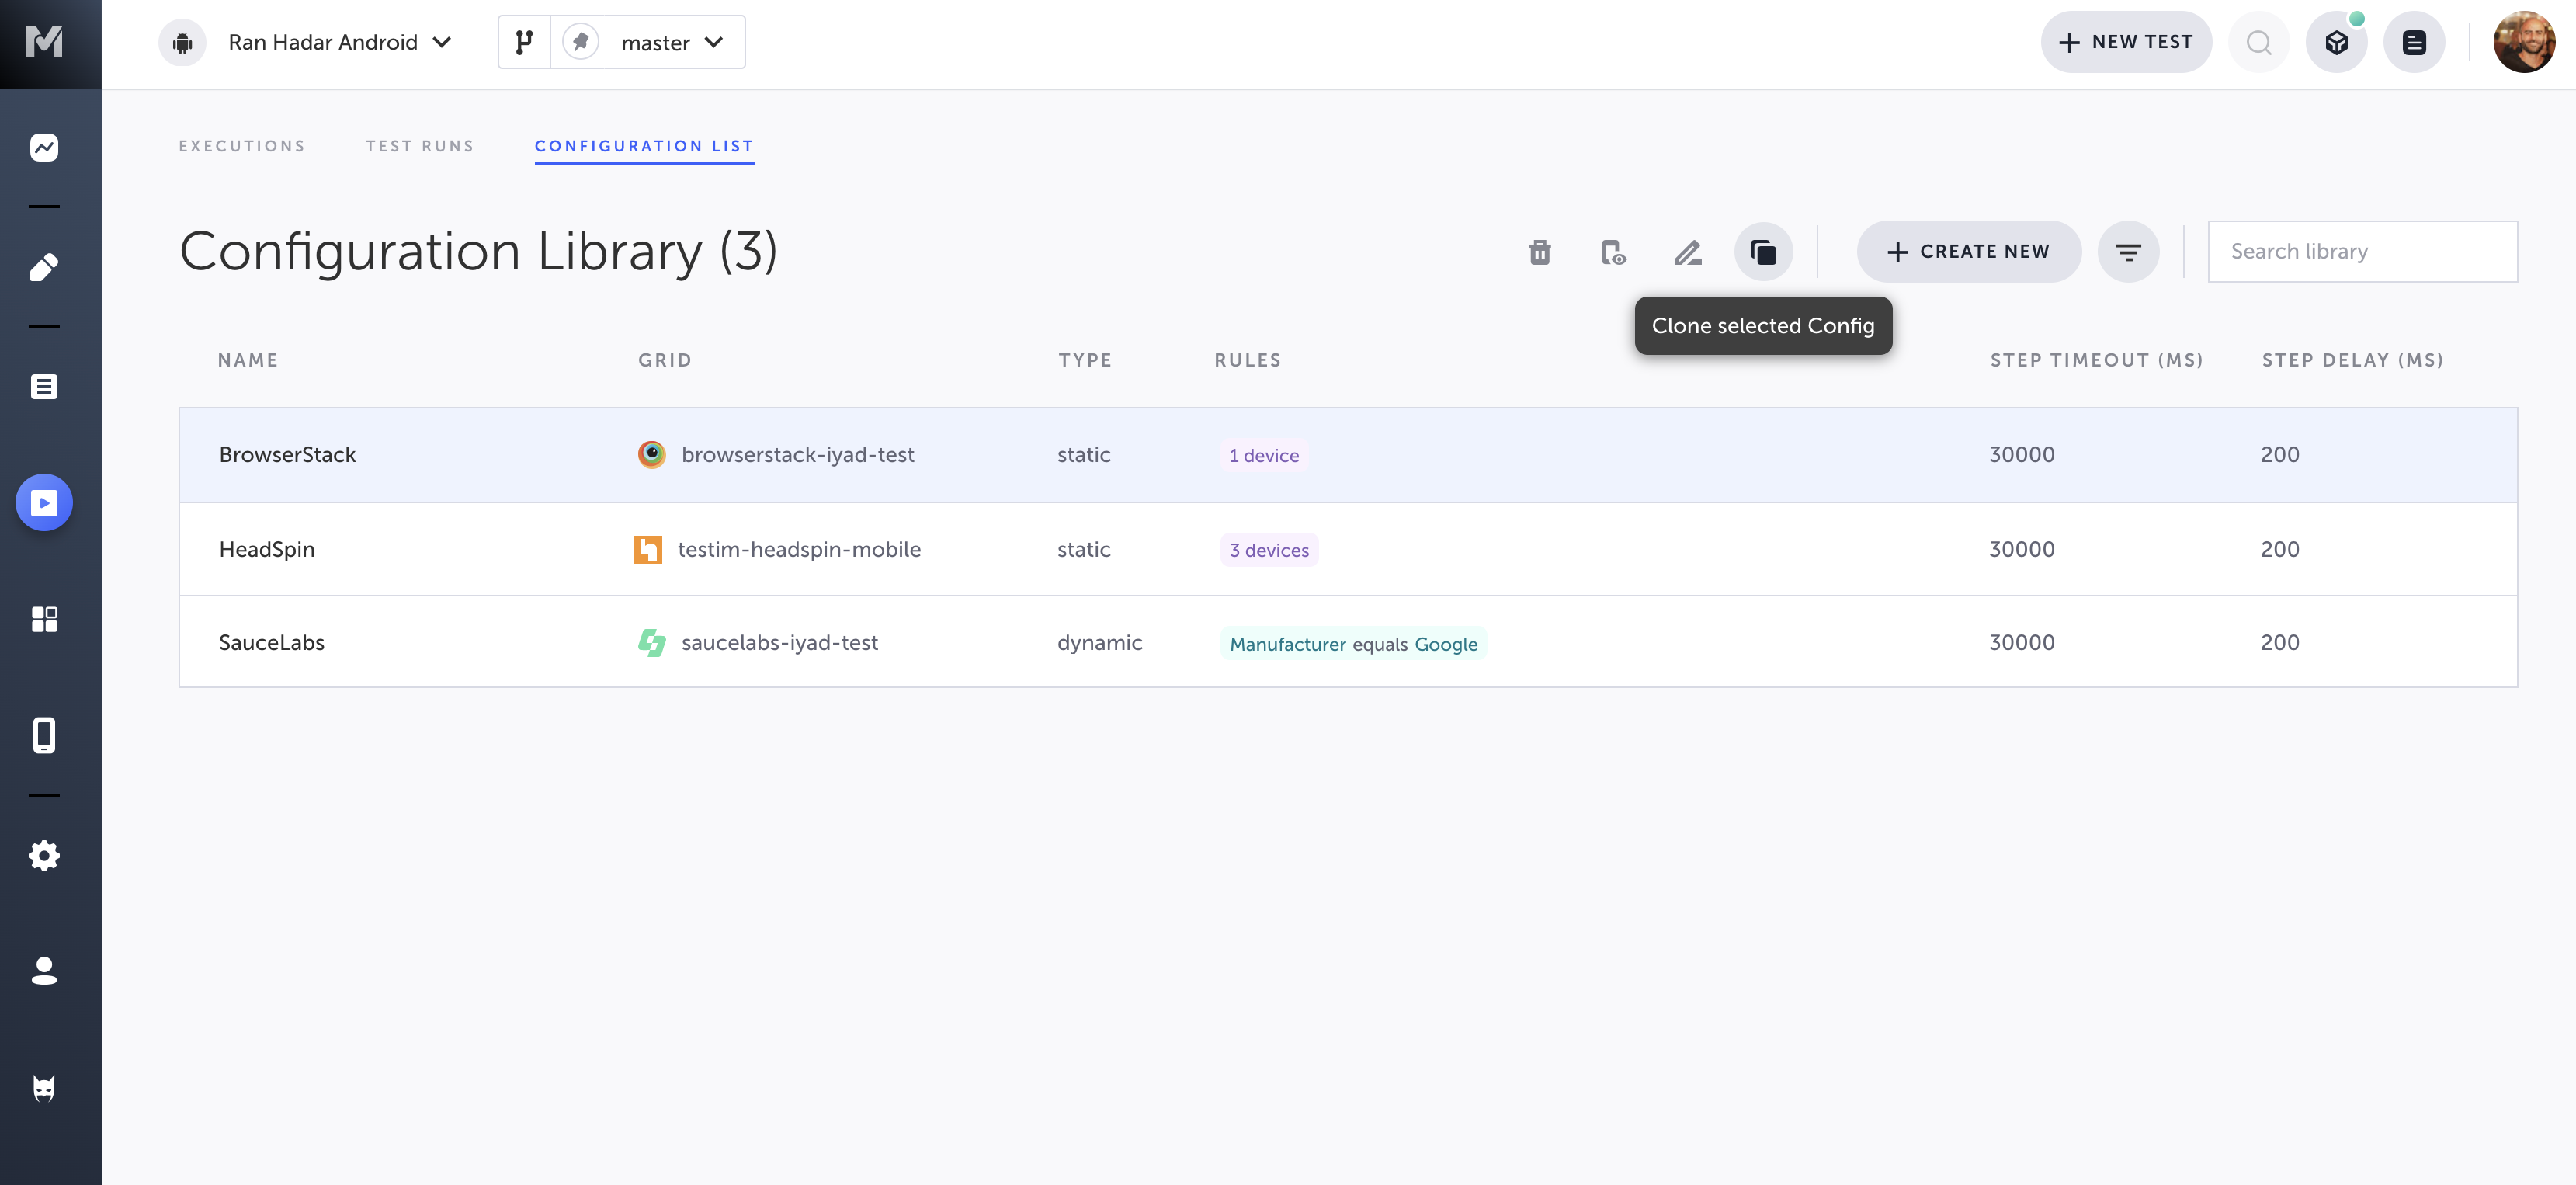
Alternatively, you can right-click the row, and select Clone.
- In the Name field, enter a name for the cloned configuration.
- Click Clone.
The configuration is cloned and is shown in the Configuration Library.
Renaming a test configuration
To rename a test configuration:
- In the main menu, navigate to Runs > Configuration List.
The Configuration Library is shown.
- Click on the row of the test configuration you wish to rename.
Context tools are shown. - Click the Rename icon.
Alternatively, you can right-click the row, and select Rename.
The Edit Name settings are shown.
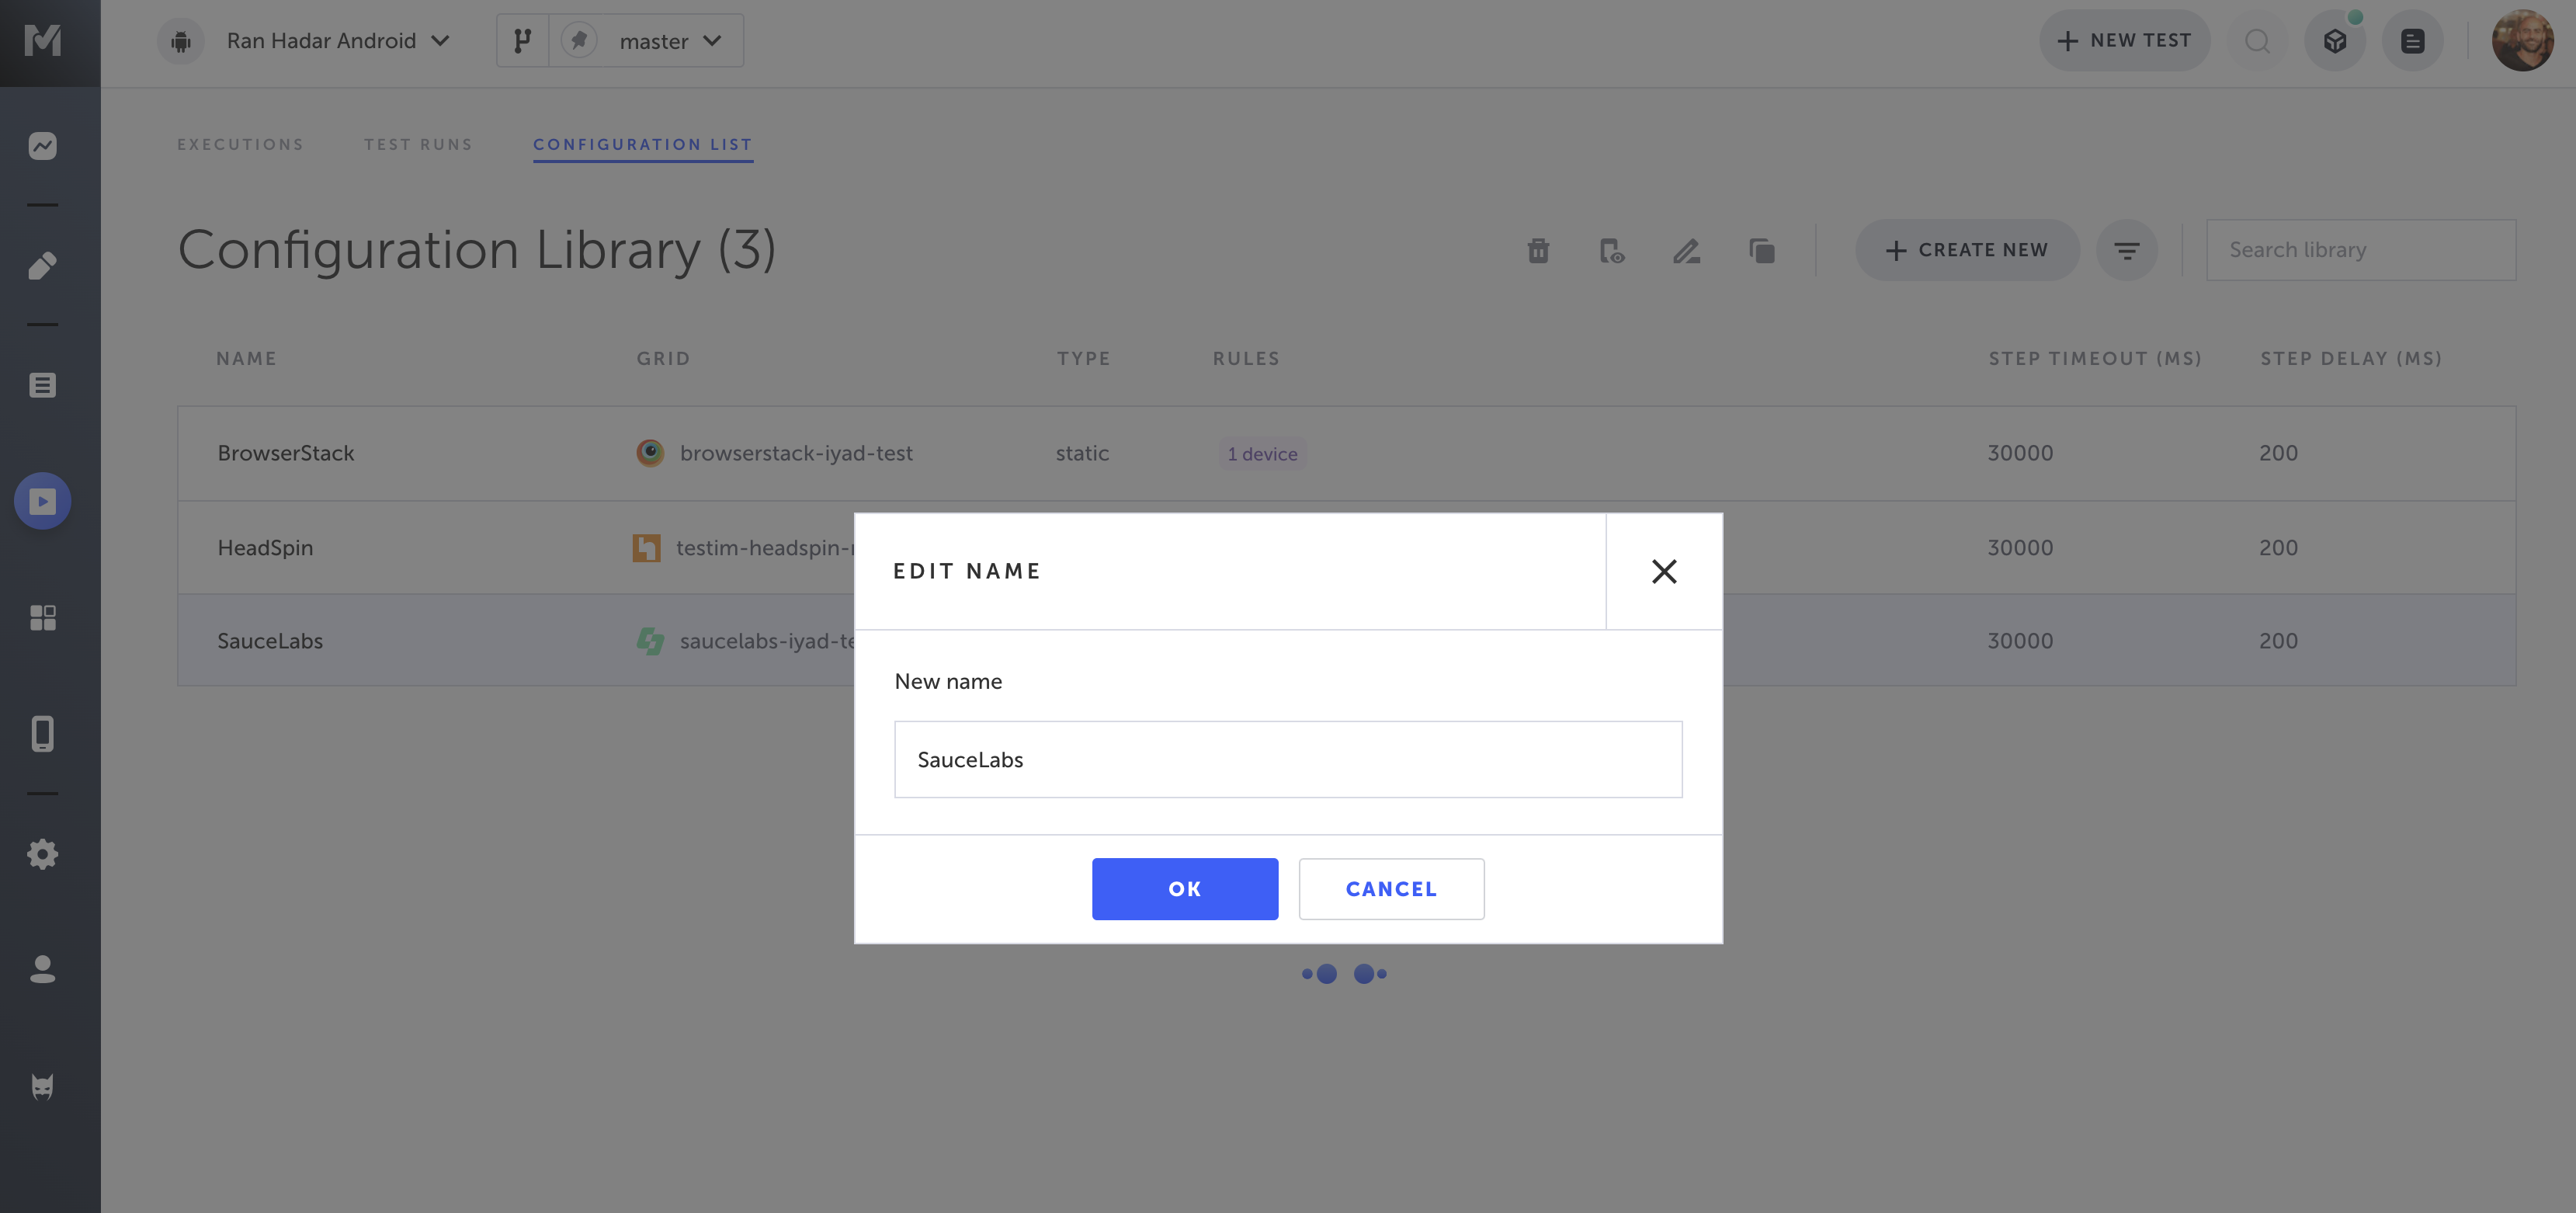
- In the New name field, enter a new name for this configuration.
- Click OK.
The configuration is renamed.
Modifying a test configuration
To modify a test configuration:
- In the main menu, navigate to Runs > Configuration List.
The Configuration Library is shown.
- Double-click on the row of the test configuration you wish to modify.
The Edit Config settings are shown.

- Modify the basic and advanced settings based on the instructions in the Adding a new configuration section above.
- Click Change.
The configuration is modified.
Deleting a test configuration
To delete a test configuration:
- In the left menu, navigate to Runs > Configuration List.
The Configuration Library is shown.
- Click on the row of the test configuration you wish to delete.
Context tools are shown. - Click the Delete icon.
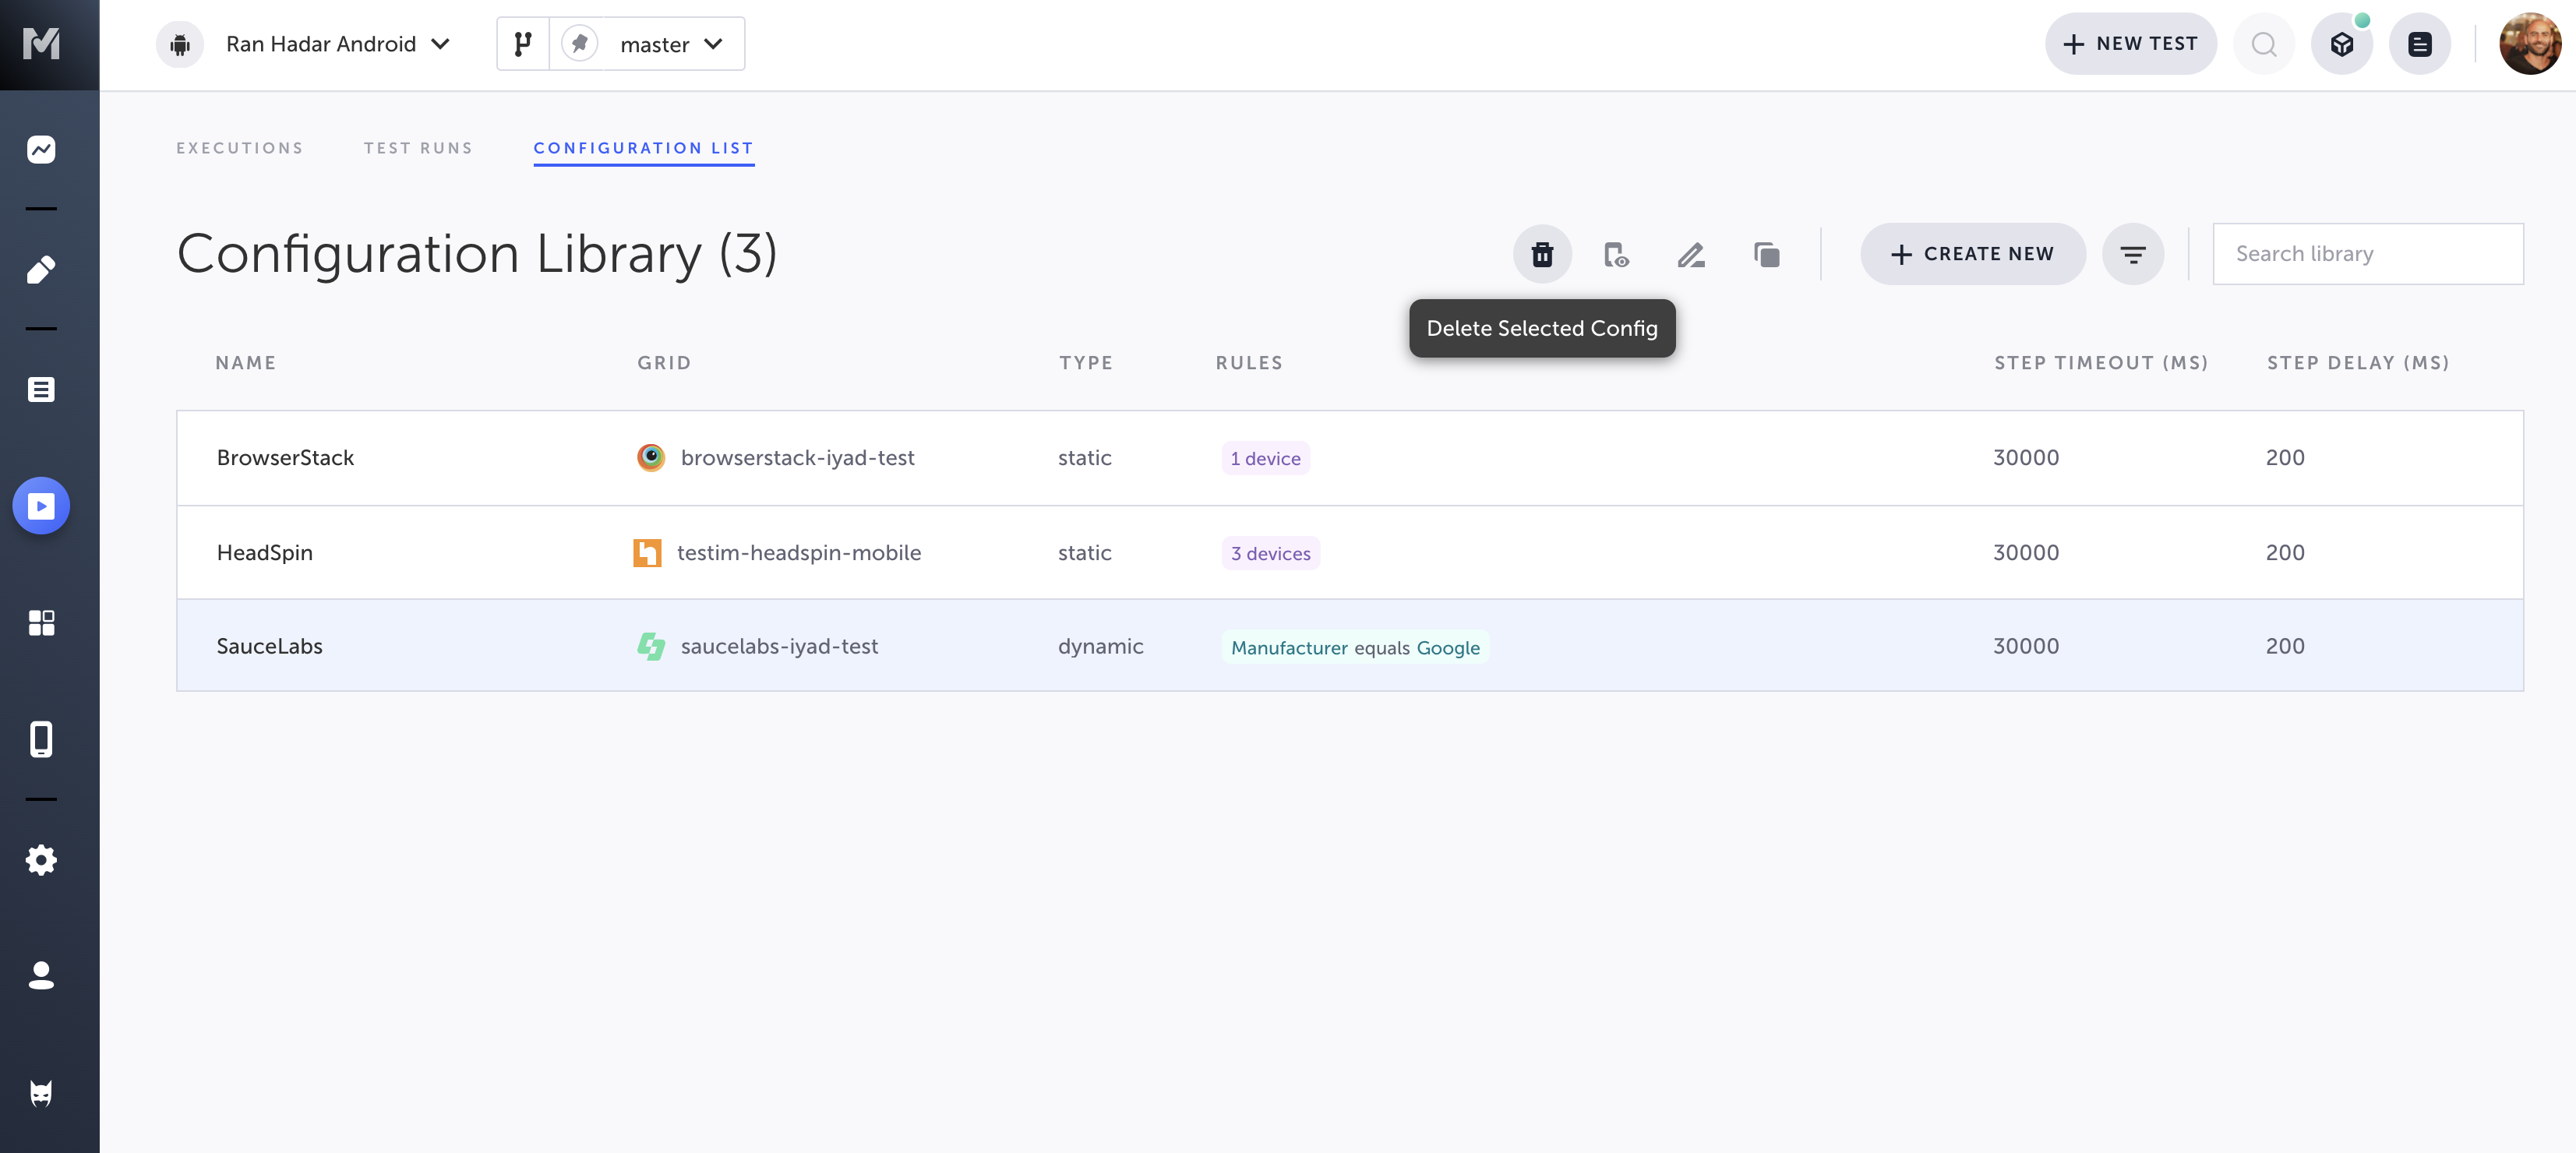
Alternatively, you can right-click the row, and select Delete.
A confirmation dialogue is shown.
- Click Delete.
The configuration is removed from the Configuration Library.
Updated 6 months ago