
Test Data
Learn how to reuse your test data for different test runs.
A test data file in Testim helps you manage data used across multiple tests. Instead of copying the same data into every test, you can store it once under the Test Data tab in Resources and reuse it whenever you need. You can also use it to override values during a test run. This keeps your tests cleaner, easier to manage, and faster to update.
You'll find reusable test data especially helpful when:
- You want to run multiple iterations of the the same test.
- You run the same test with different users or products.
- You're working in a team that needs a consistent source of test data that everyone can use.
How to use Test Data in Testim
There are three ways to use test data files in your tests:
- Upload your test data file
You can upload your local test data files in CSV, JSON and Excel format to Testim. If you don't have any test data files prepared, you can download samples. All available test data files are listed in your Test Data Library and are ready to be used in your tests.
- Override default test data with scheduler
In the scheduler, you can use the Override test data property to replace your default test data with test data files. With this property activated, you can not only override but also add new values to your default test data.
- Assign a test data file to your test
You can assign either your existing test data or a test data file to a test. If you choose to use existing test data, you must first convert it into a test data file in the Testim Editor. Once the file is created, it will be added to your Test Data Library and you can assign it to your test in the Testim Editor. You can also prioritize this test data file to ensure it is used first, even if another test data is available at the test execution level.
Upload your test data file
To upload your test data file, follow these steps:
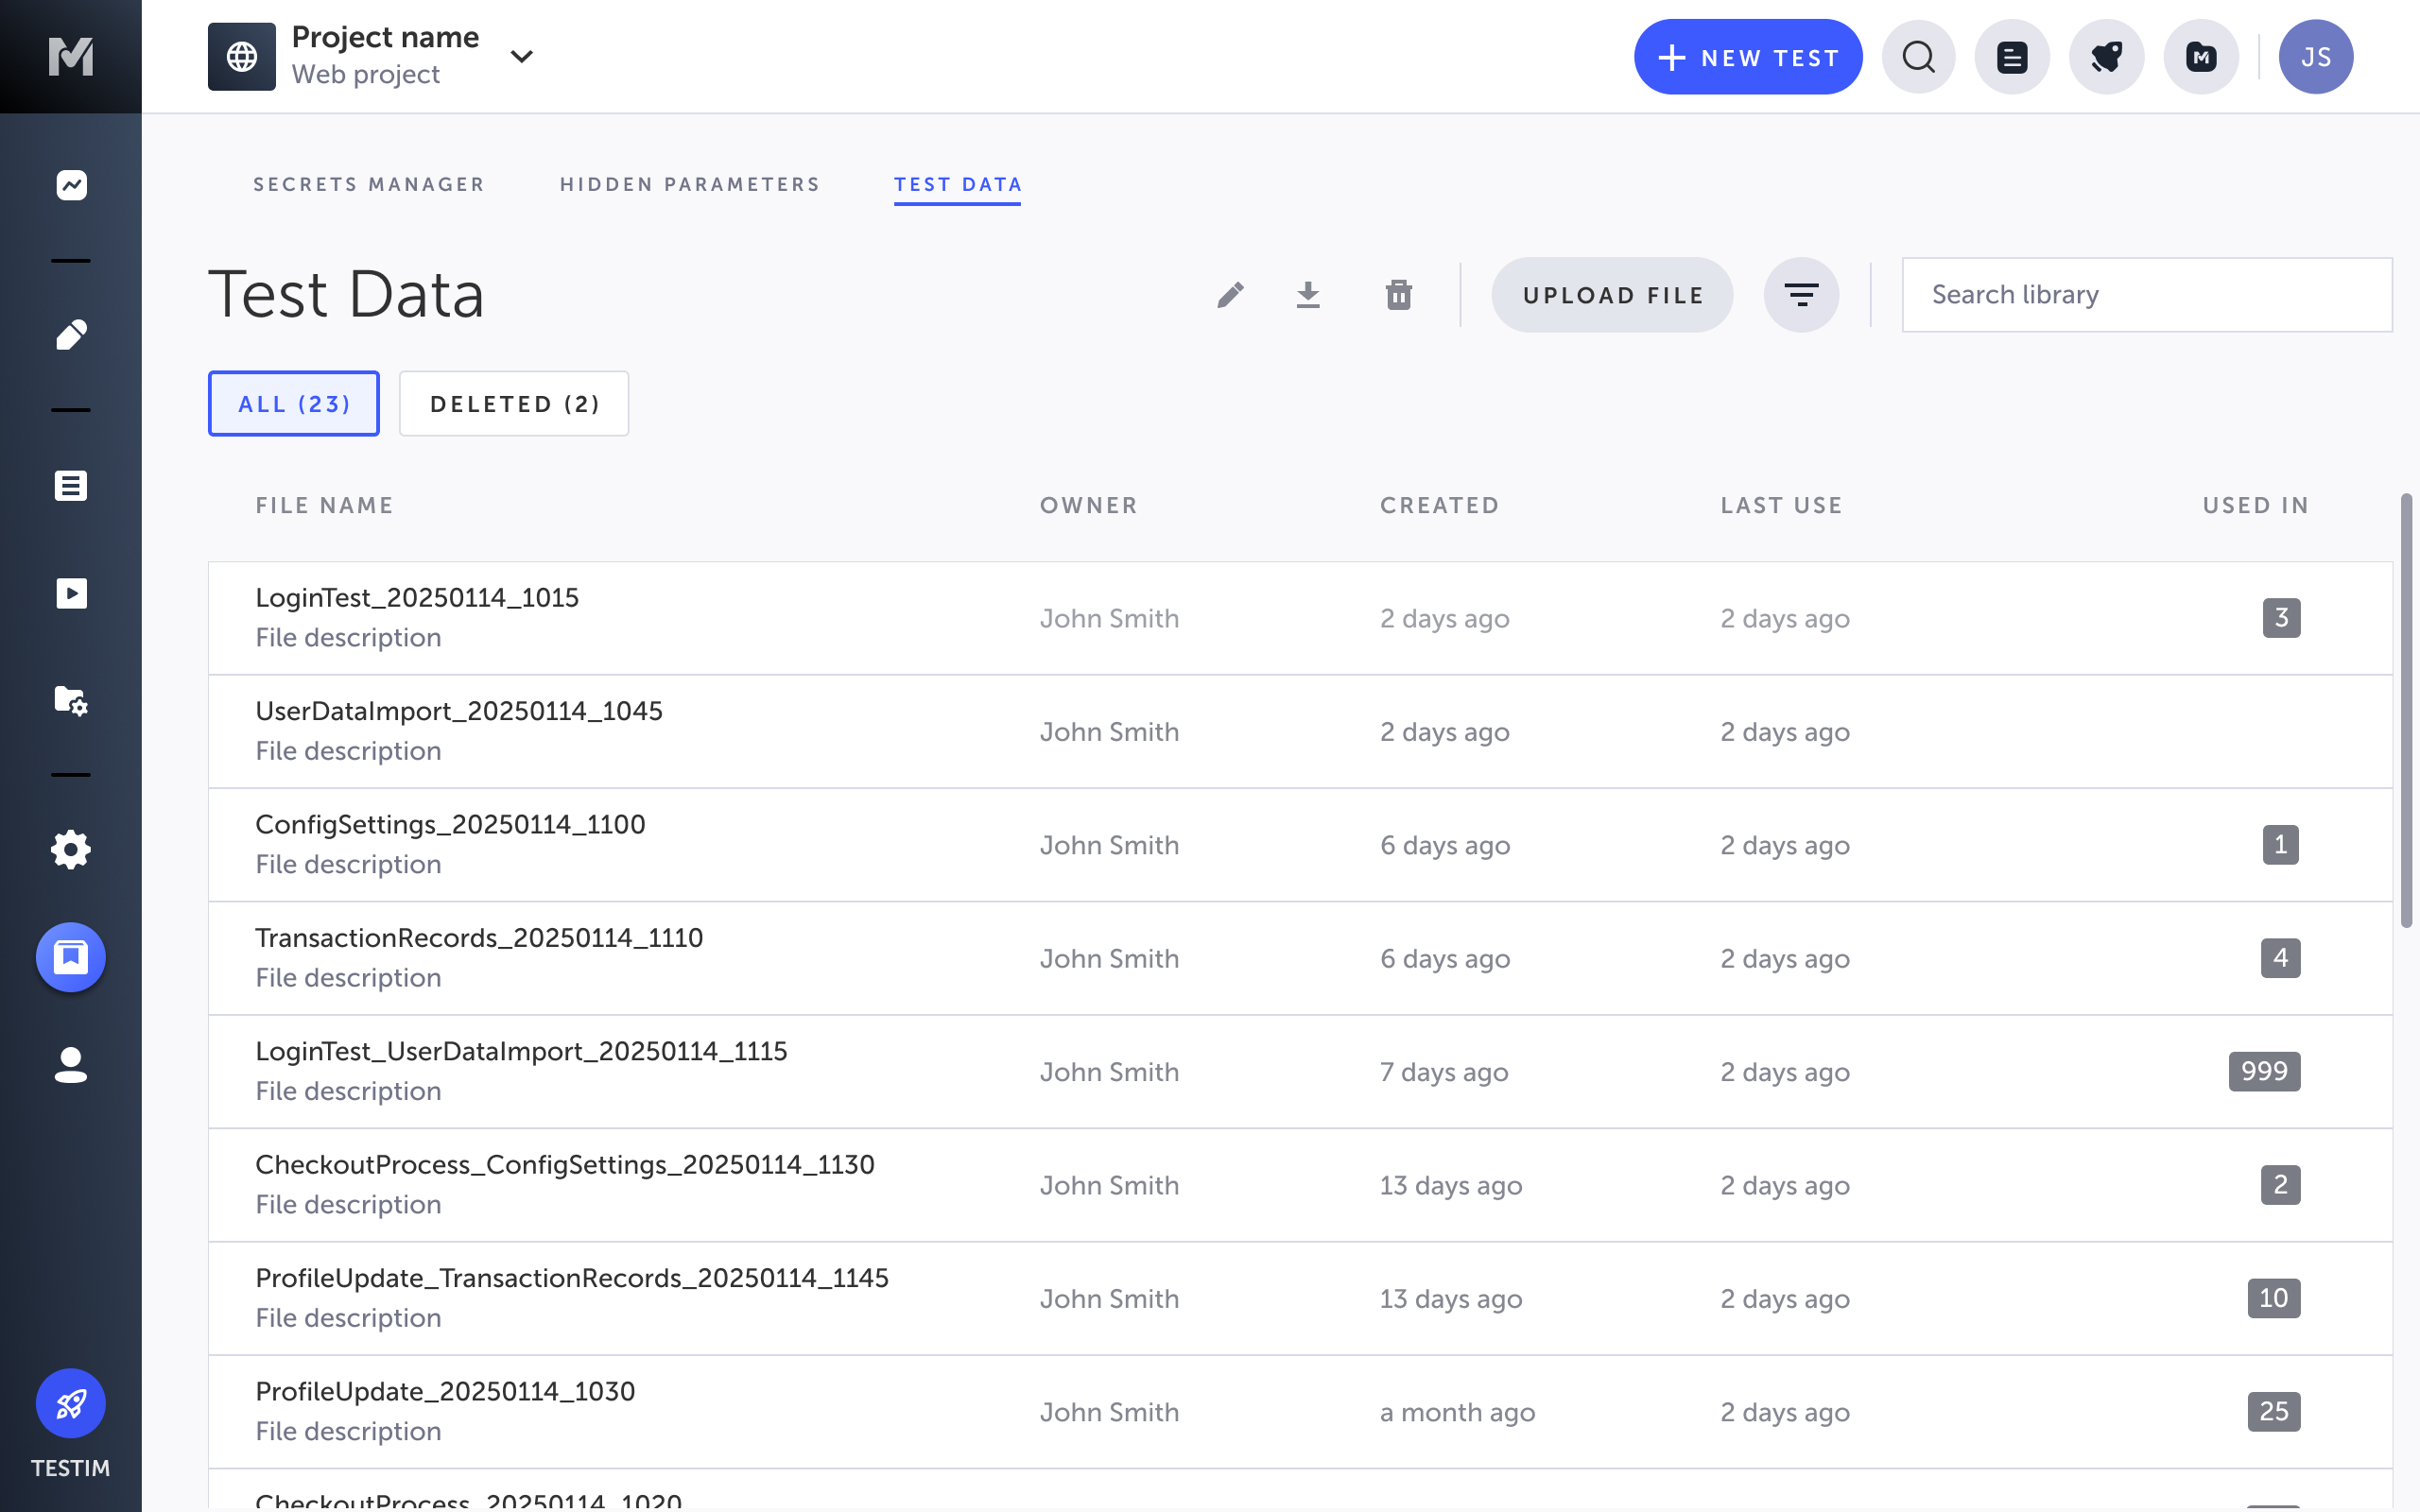
- Go to Resources > Test Data .
- Select Upload Test Data.
- In the dialog, enter a name and upload your test data file, then select OK.
Once the upload is complete, you'll find your test data files listed in the Test Data tab.
Manage your test data file
Right-click on any row to use the following options:
- Edit – Opens a new window, where you can upload a new test data file to replace the existing data.
- Download csv file – Exports the current data row as a CSV file.
- Delete – Archives the test data file in the Deleted section, where it can be restored.
Restore deleted test data files
You can restore deleted test data files within 30 days.
To do so, follow this steps:
- Go to Resources > Test Data.
- Select Deleted.
- Right-click the desired test data file and select Restore.
The test data file, with all its values, is restored and available in the Test Data tab.
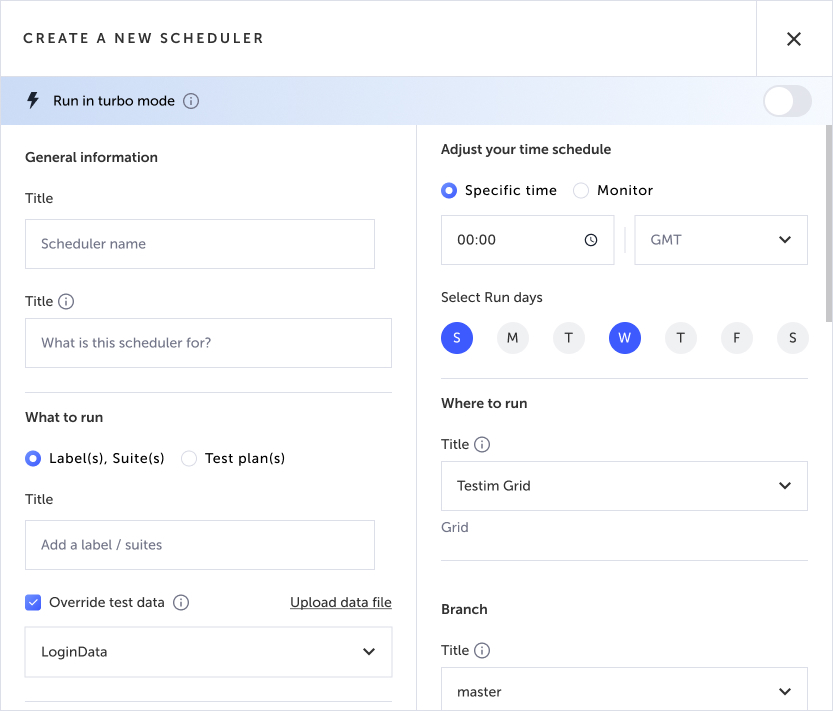
Override default test data with scheduler
When you create or edit a scheduler, you have the option to apply the Override test data property. This replaces or adds to your default test data.
To override default test data with a test data file, follow these steps:
- Go to Runs > Scheduled Runs.
- Select New scheduler.
- Toggle Override test data.
This override only replaces the default test data – it does not affect any override values defined within the test itself.
- Select a test data file from the dropdown menu, or Upload data file to add a new one. You can upload test data files in CSV, JSON or Excel. Note that each file can be up to 2 MB.
- Select Create.
Your default test data values will be overwritten with your selected test data file.
Assign a test data file to your test
You can use your test data files in a local test run by either converting existing test data or adding a reusable test data file. You can either do this by uploading a new one or selecting one from your library. Note that you also have the option to prioritize test data for your test.
Prioritize test dataIf you chose to prioritize the selected test data file, it will take precedence over any data configured at the test execution level. If there are overlapping values, they won't be overwritten. Instead, the data will be combined.
Convert your existing test data to a test data file
To convert existing test data, follow these steps:
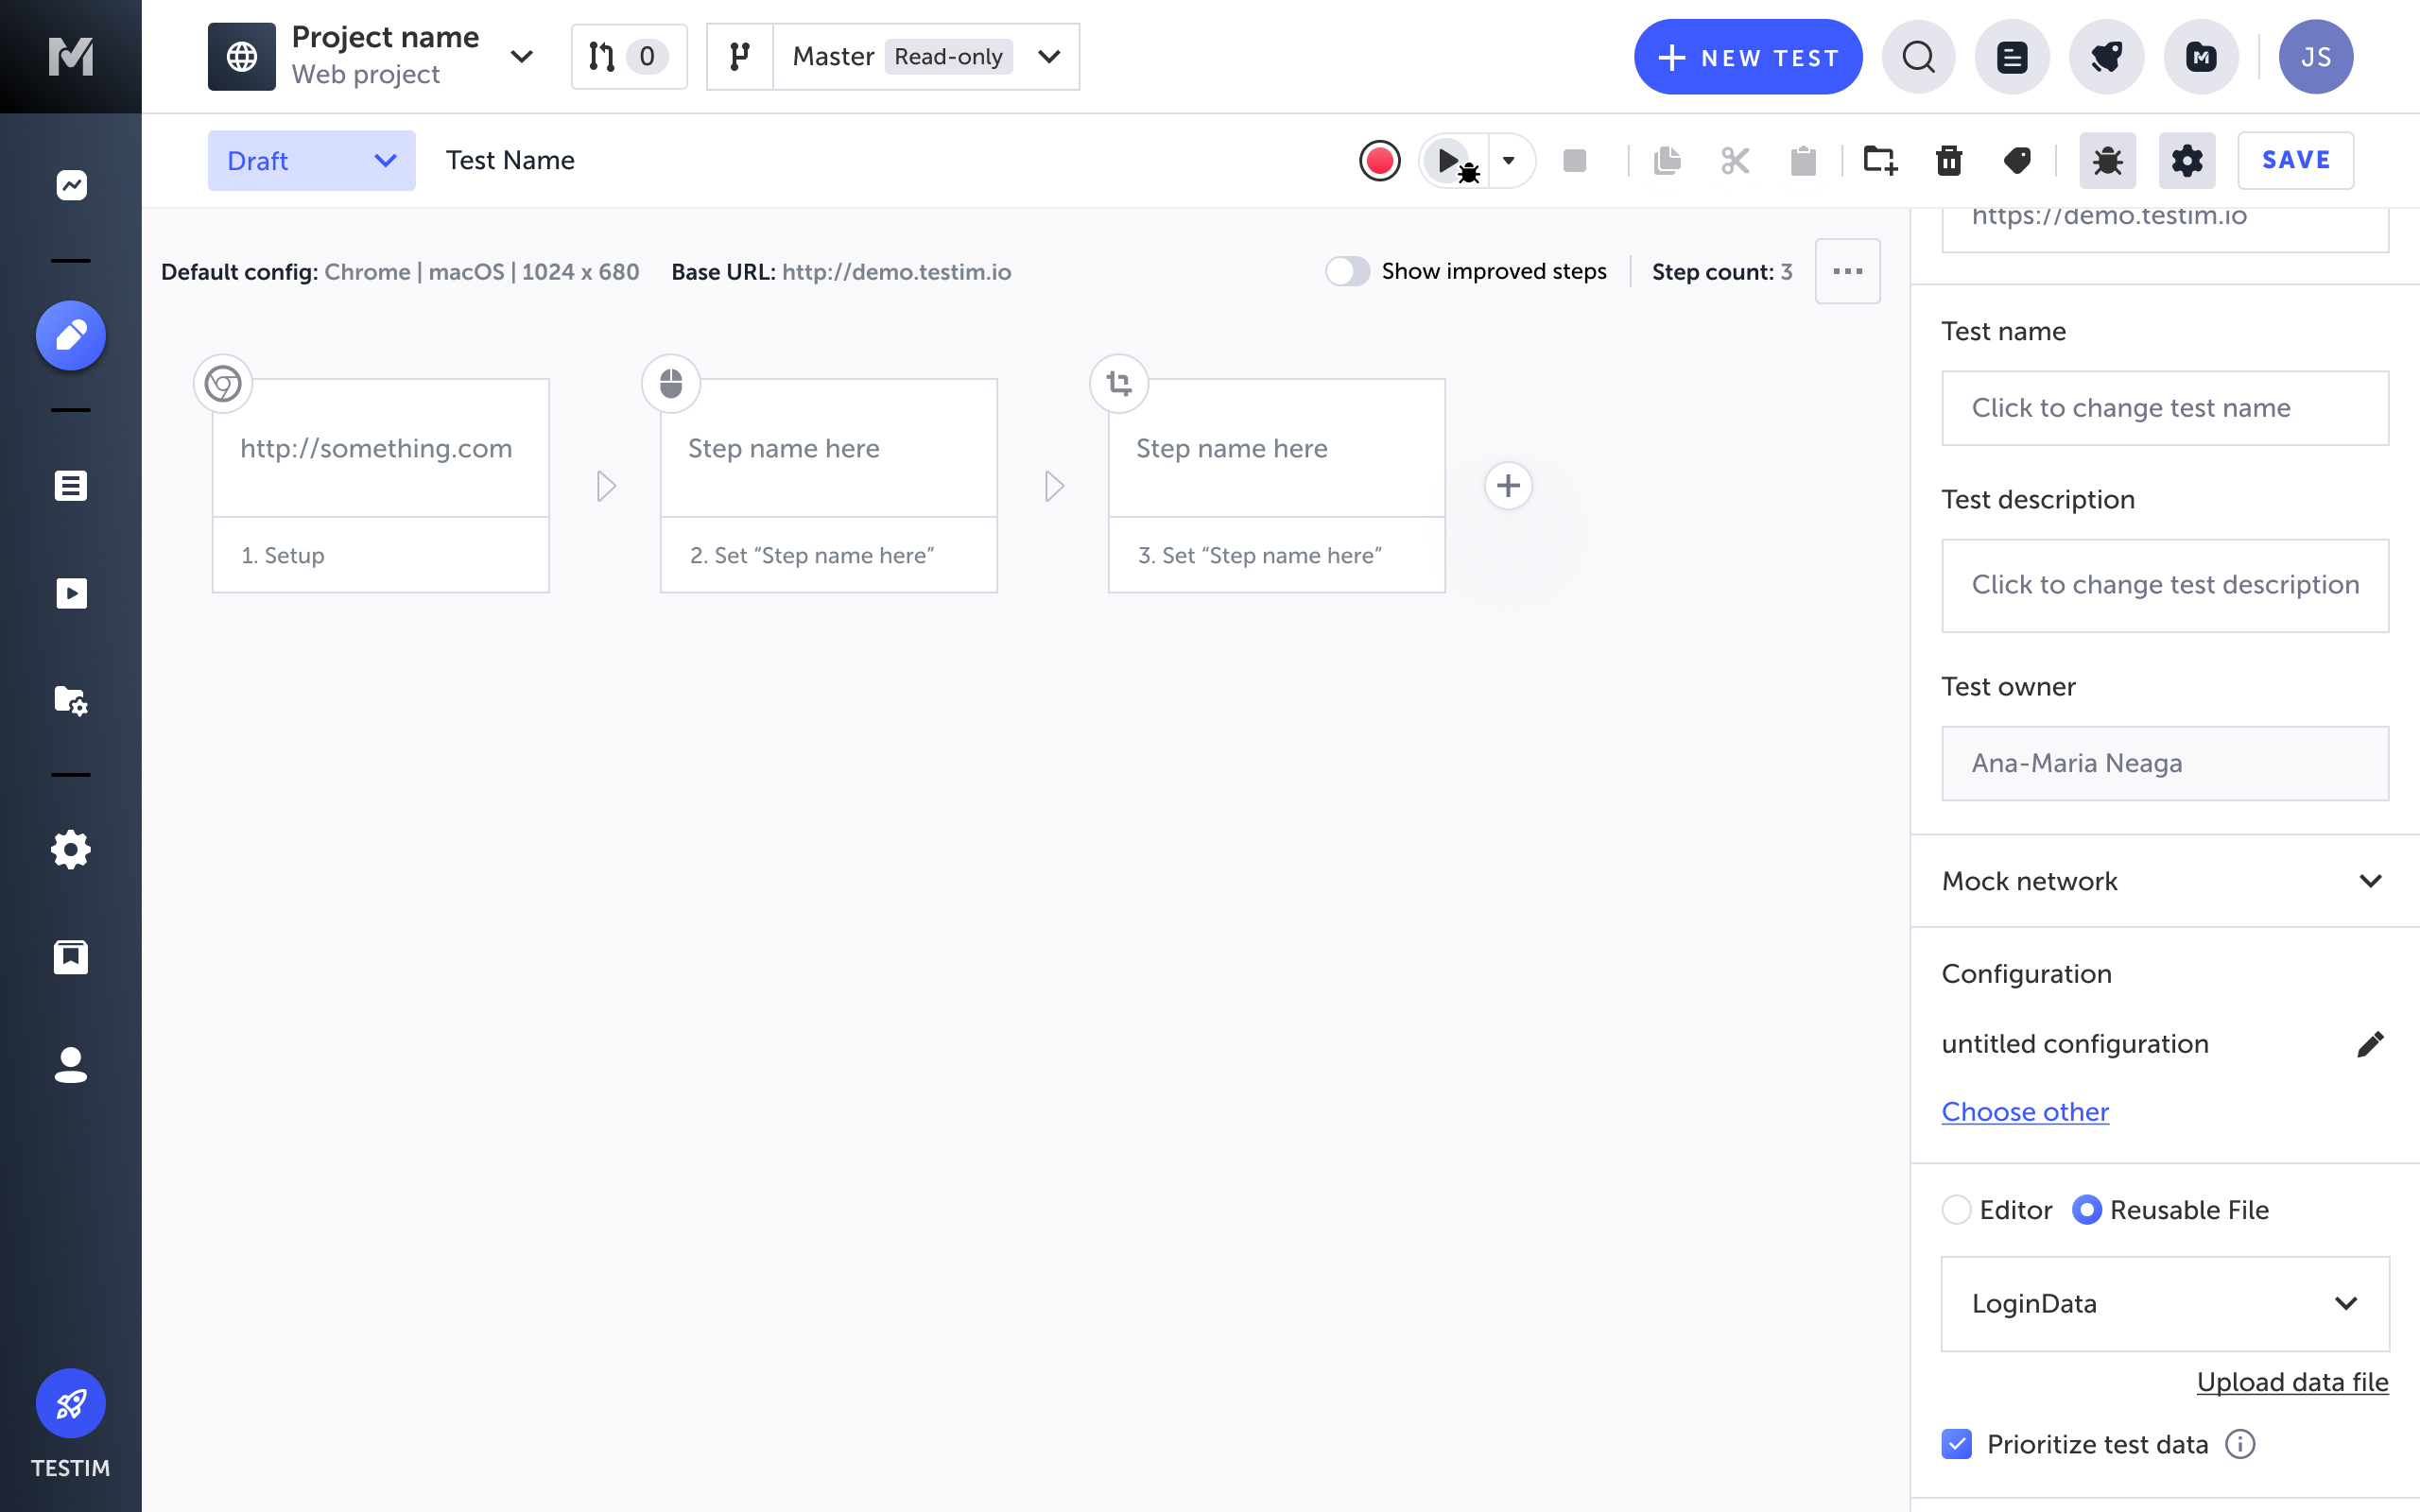
- In Testim, select a test and open it in Editor.
- Select the Show step properties icon to open the Test Configuration Properties panel.
- Select Editor > Test Data.
- Select Convert to file above the test data preview.
- In the input field, enter a name for the new test data file, then select Convert.
The existing test data will convert into a new, reusable test data file. This file replaces the embedded test data; it is automatically saved to the test data library and can be reused across tests.
- If you want to prioritize your test data file, select the Prioritize test data checkbox.
The converted test data file will be assigned to this test and added to the Test Data Library. The new values will be used for your next test execution.
Reuse a test data file
To reuse a test data file, follow these steps:
- In Testim, select a test and open it in Editor.
- Select the Show step properties icon to open the Test Configuration Properties panel.
- Select Editor > Reusable File.
- Choose a test data file from the dropdown menu, or select Upload data file to add a new one.
- If you want to prioritize your test data file, select the Prioritize test data checkbox.
The selected test data file will be added to this test and the new values will be used for your next test execution.
CLI
To provide a custom test data set using the CLI, you can define a value for --test-data-set.
Updated 6 months ago