Validate download
Validate that the download contents are as expected by executing Node.js scripts from within your tests
The Validate download step is a specialized CLI step which allows you to validate that the download content of various file types are as expected. You can check the relevant parameters for each type of file. For example: for csv files, you can check the number of rows and the content; for image files, you can check image type and dimensions; for MS PowerPoint, you can check the number of slides and their content.
This is a pro featureThis feature is only open to projects on our professional plan. To learn more about our professional plan, click here.
Prerequisites
This step can run only on either Chrome or Edge Chromium.
- In order to locally run tests which contain CLI action steps, the following command needs to be executed: npm i -g @testim/testim-cli && testim connect (see below).
- Tests which include a Validate download step require access to file URLs. In order to run these tests, you will need to enable the Allow access to file URLs permission in the Testim Editor Chrome extension (see below).
- For tests which include a Validate download step for a PDF file, there are two additional prerequisites:
- Ensure that you are running Chrome version 67 or above.
- Ensure that your Chrome browser PDF settings are set to the following: Download PDF files instead of automatically opening them in Chrome (see below).
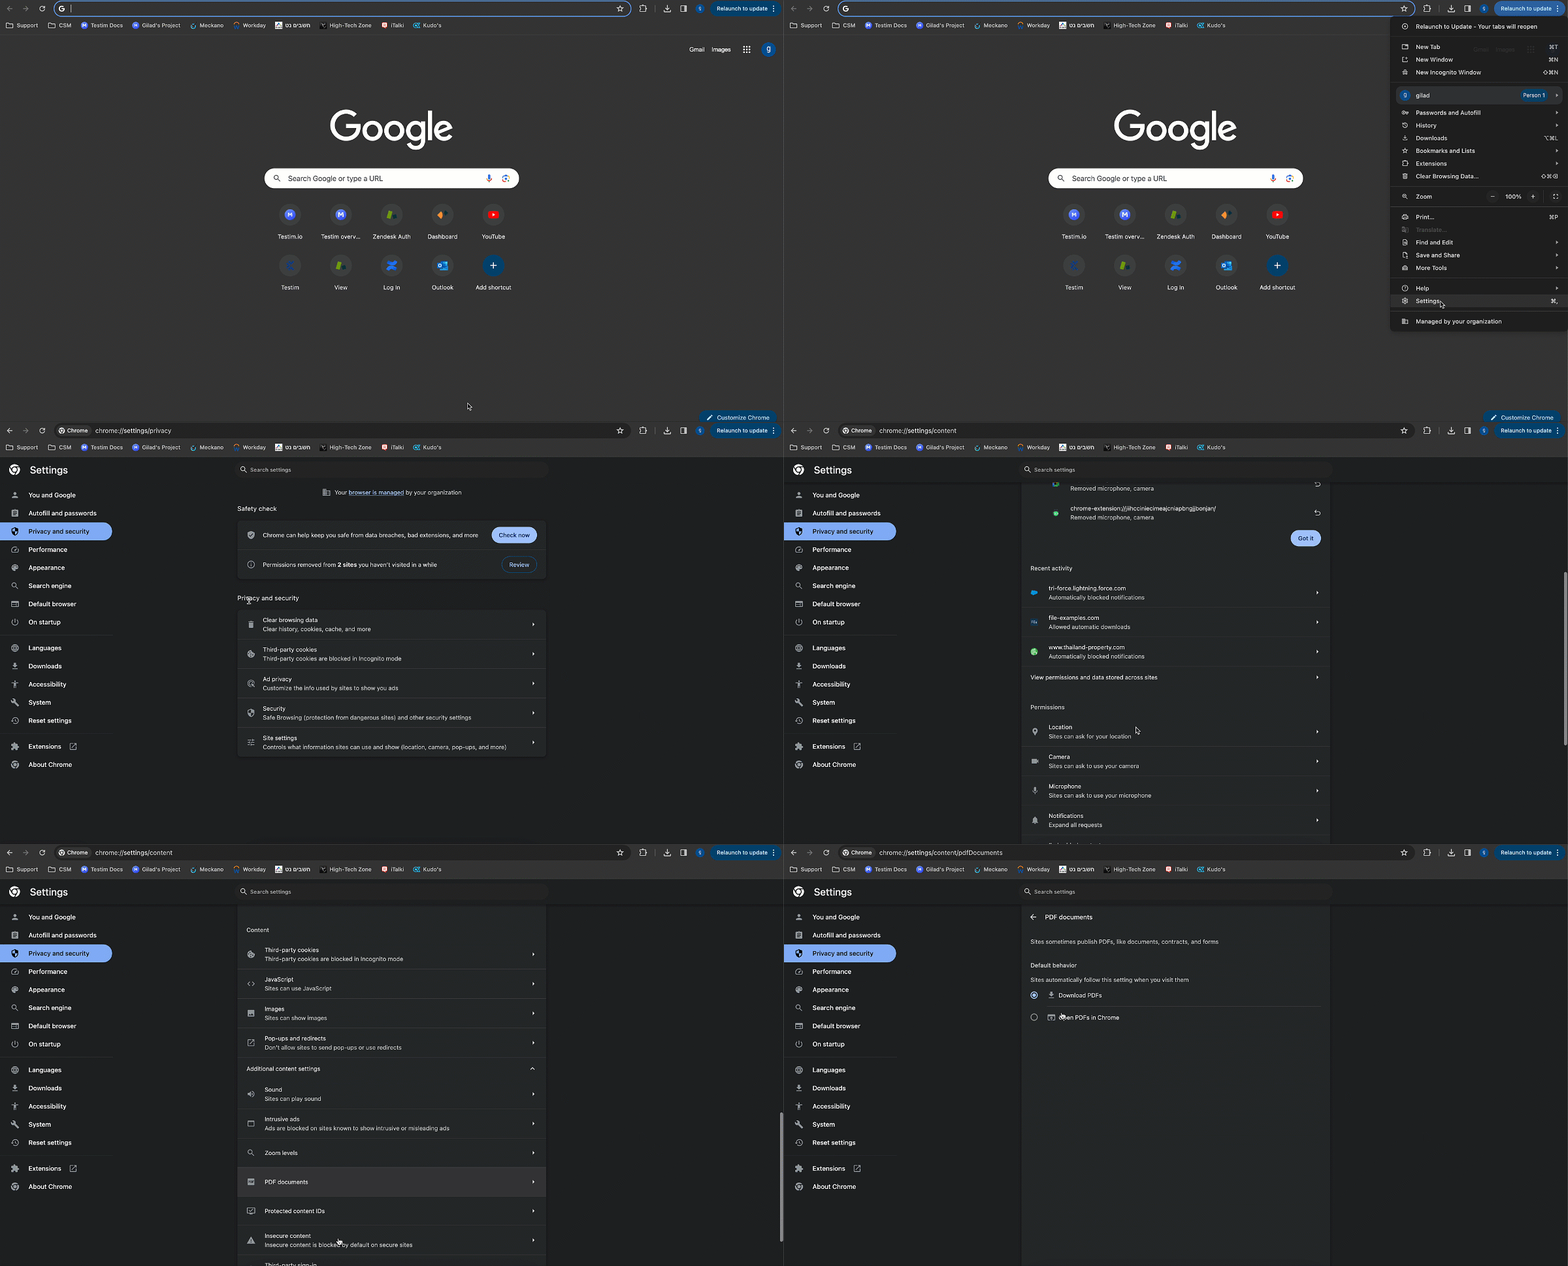
To enable the “Download PDFs” permission:
- In the Chrome browser, click on the Chrome menu (three dots at the top right).
- Click on Settings.
- Click on Privacy and security.
- Click Site settings.
- Click Additional content settings.
- Click PDF documents.
- Under default behavior, make sure Download PDFs option is selected.
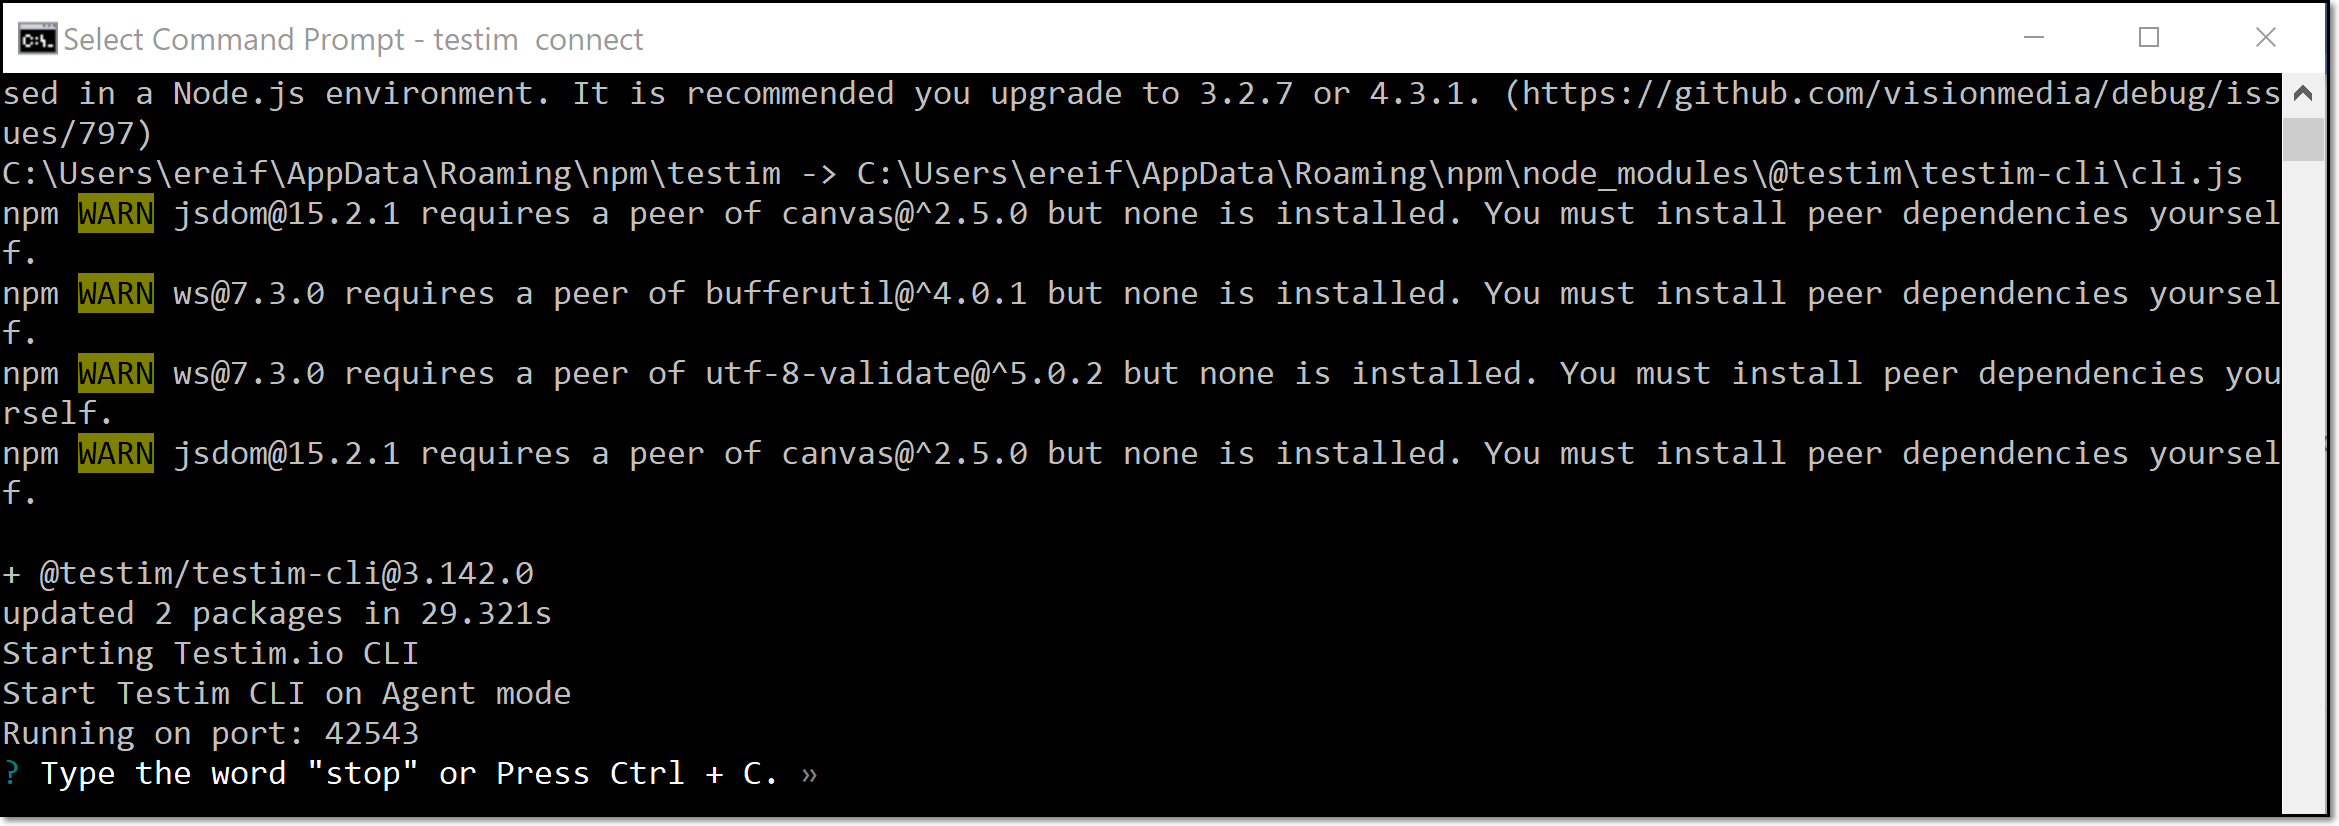
To locally run tests which contain CLI action steps:
- Open the Command Prompt window for your operating system.
- In the command prompt, enter the following command: npm i -g @testim/testim-cli && testim connect

- Wait for the process to execute.
To set your Chrome browser to automatically download PDF files (instead of opening them):
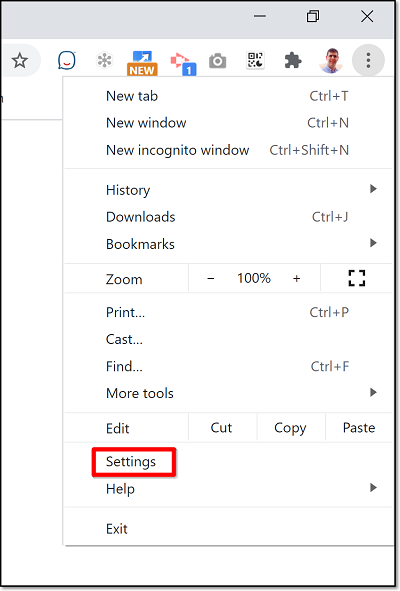
- In the Chrome browser, click on the Chrome menu (three dots at the top right).

The Chrome menu options are shown.
- Click on Settings.
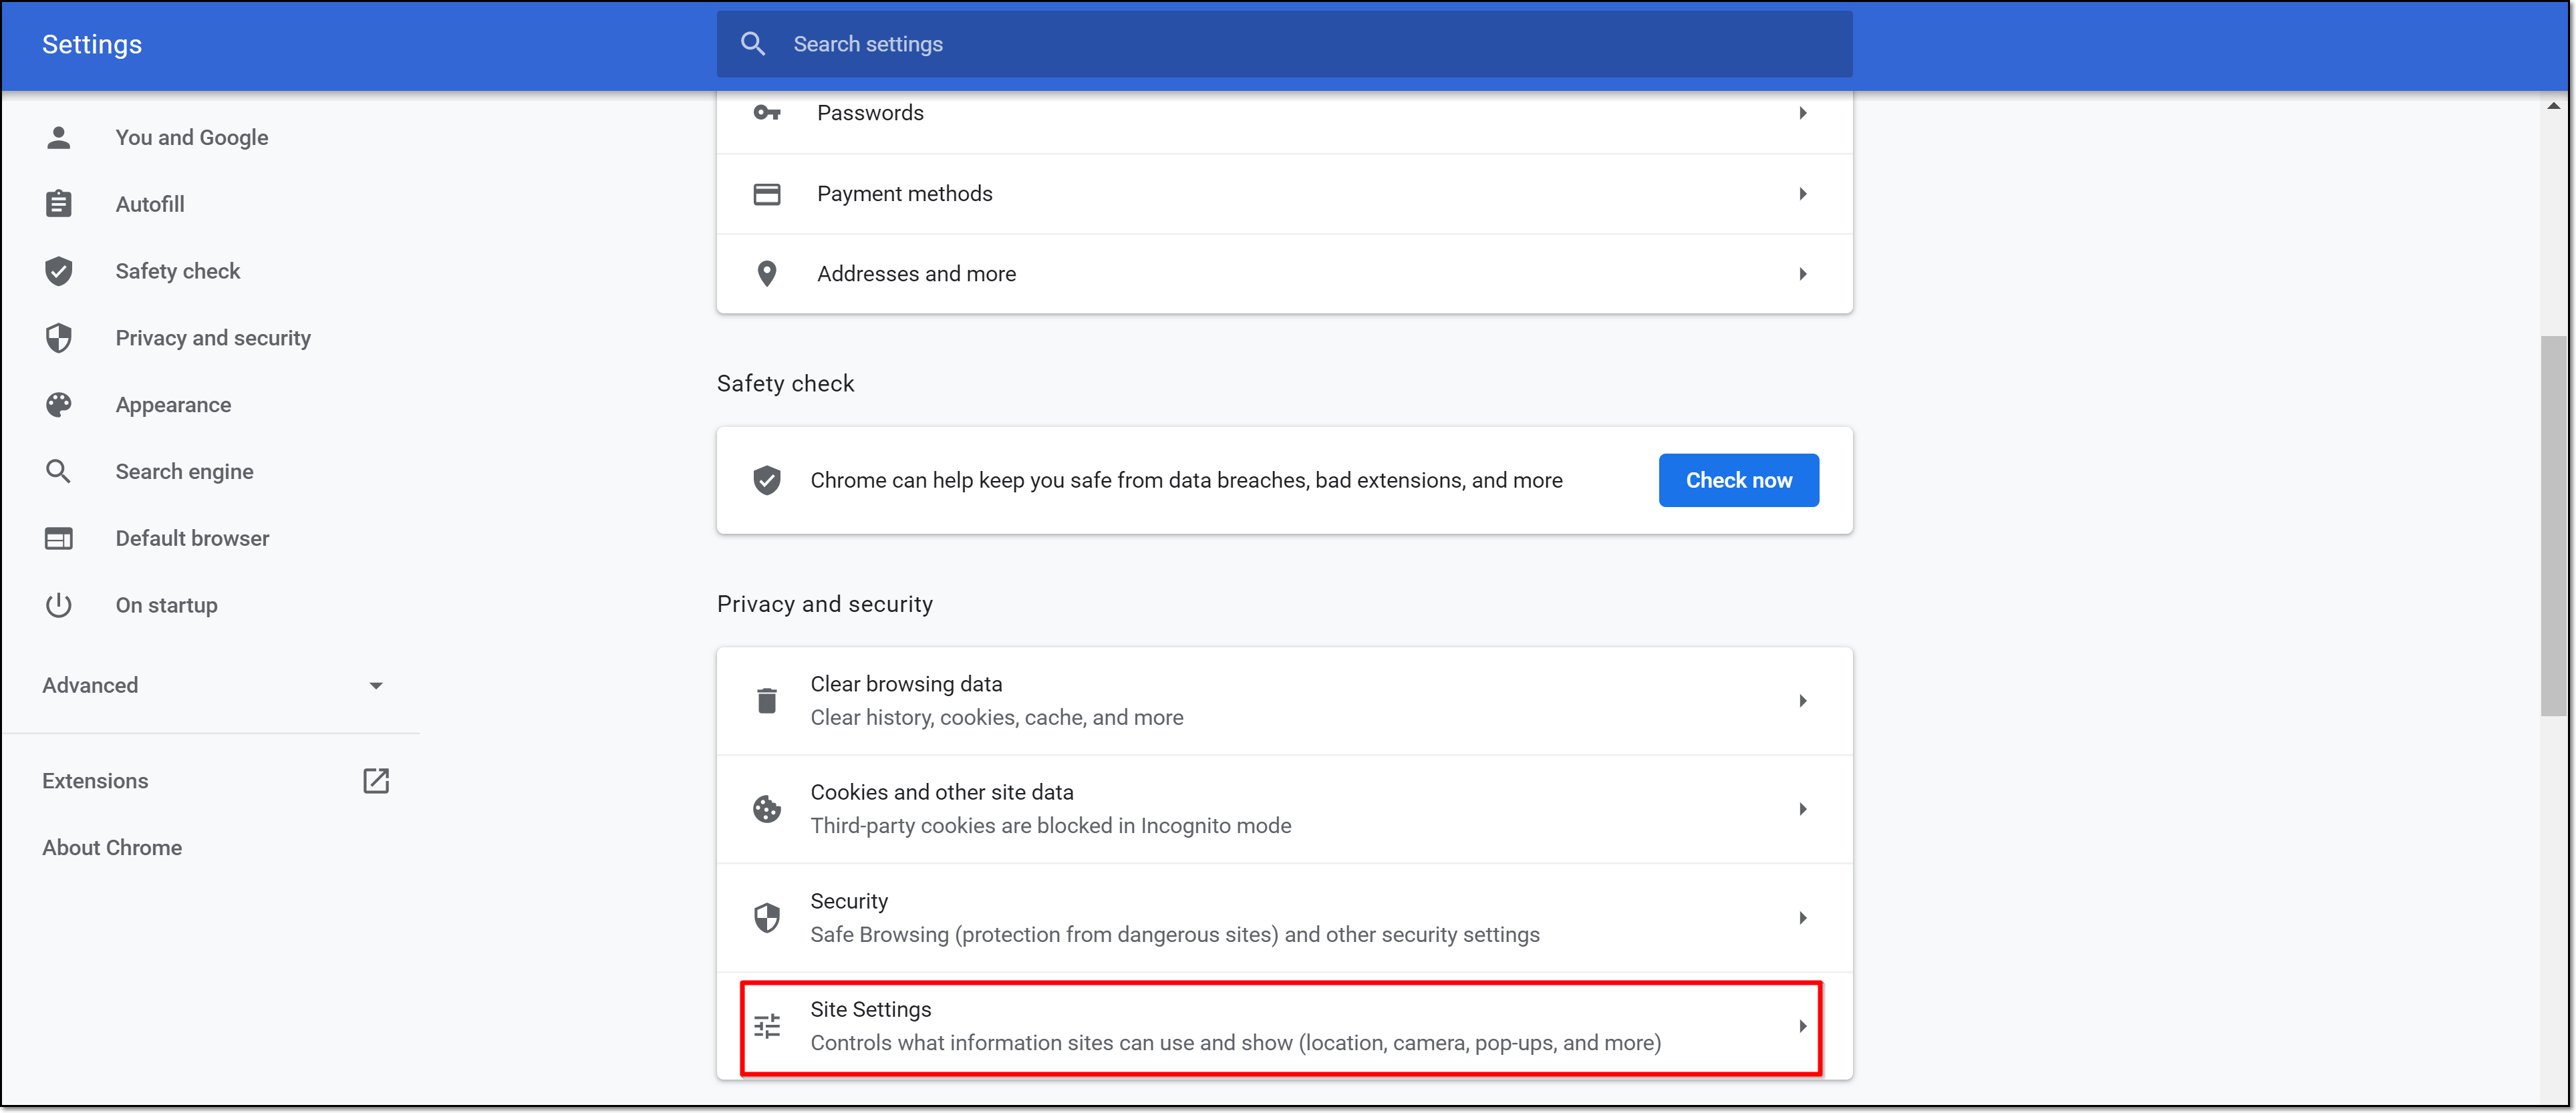
The Chrome Settings page opens.
- Scroll down to the Privacy and security section and click on Site Settings.
- Scroll down to the Additional content settings section. If the section is not expanded, click on it to expand it.
- In the Additional content settings section, scroll down to PDF documents and click on it.
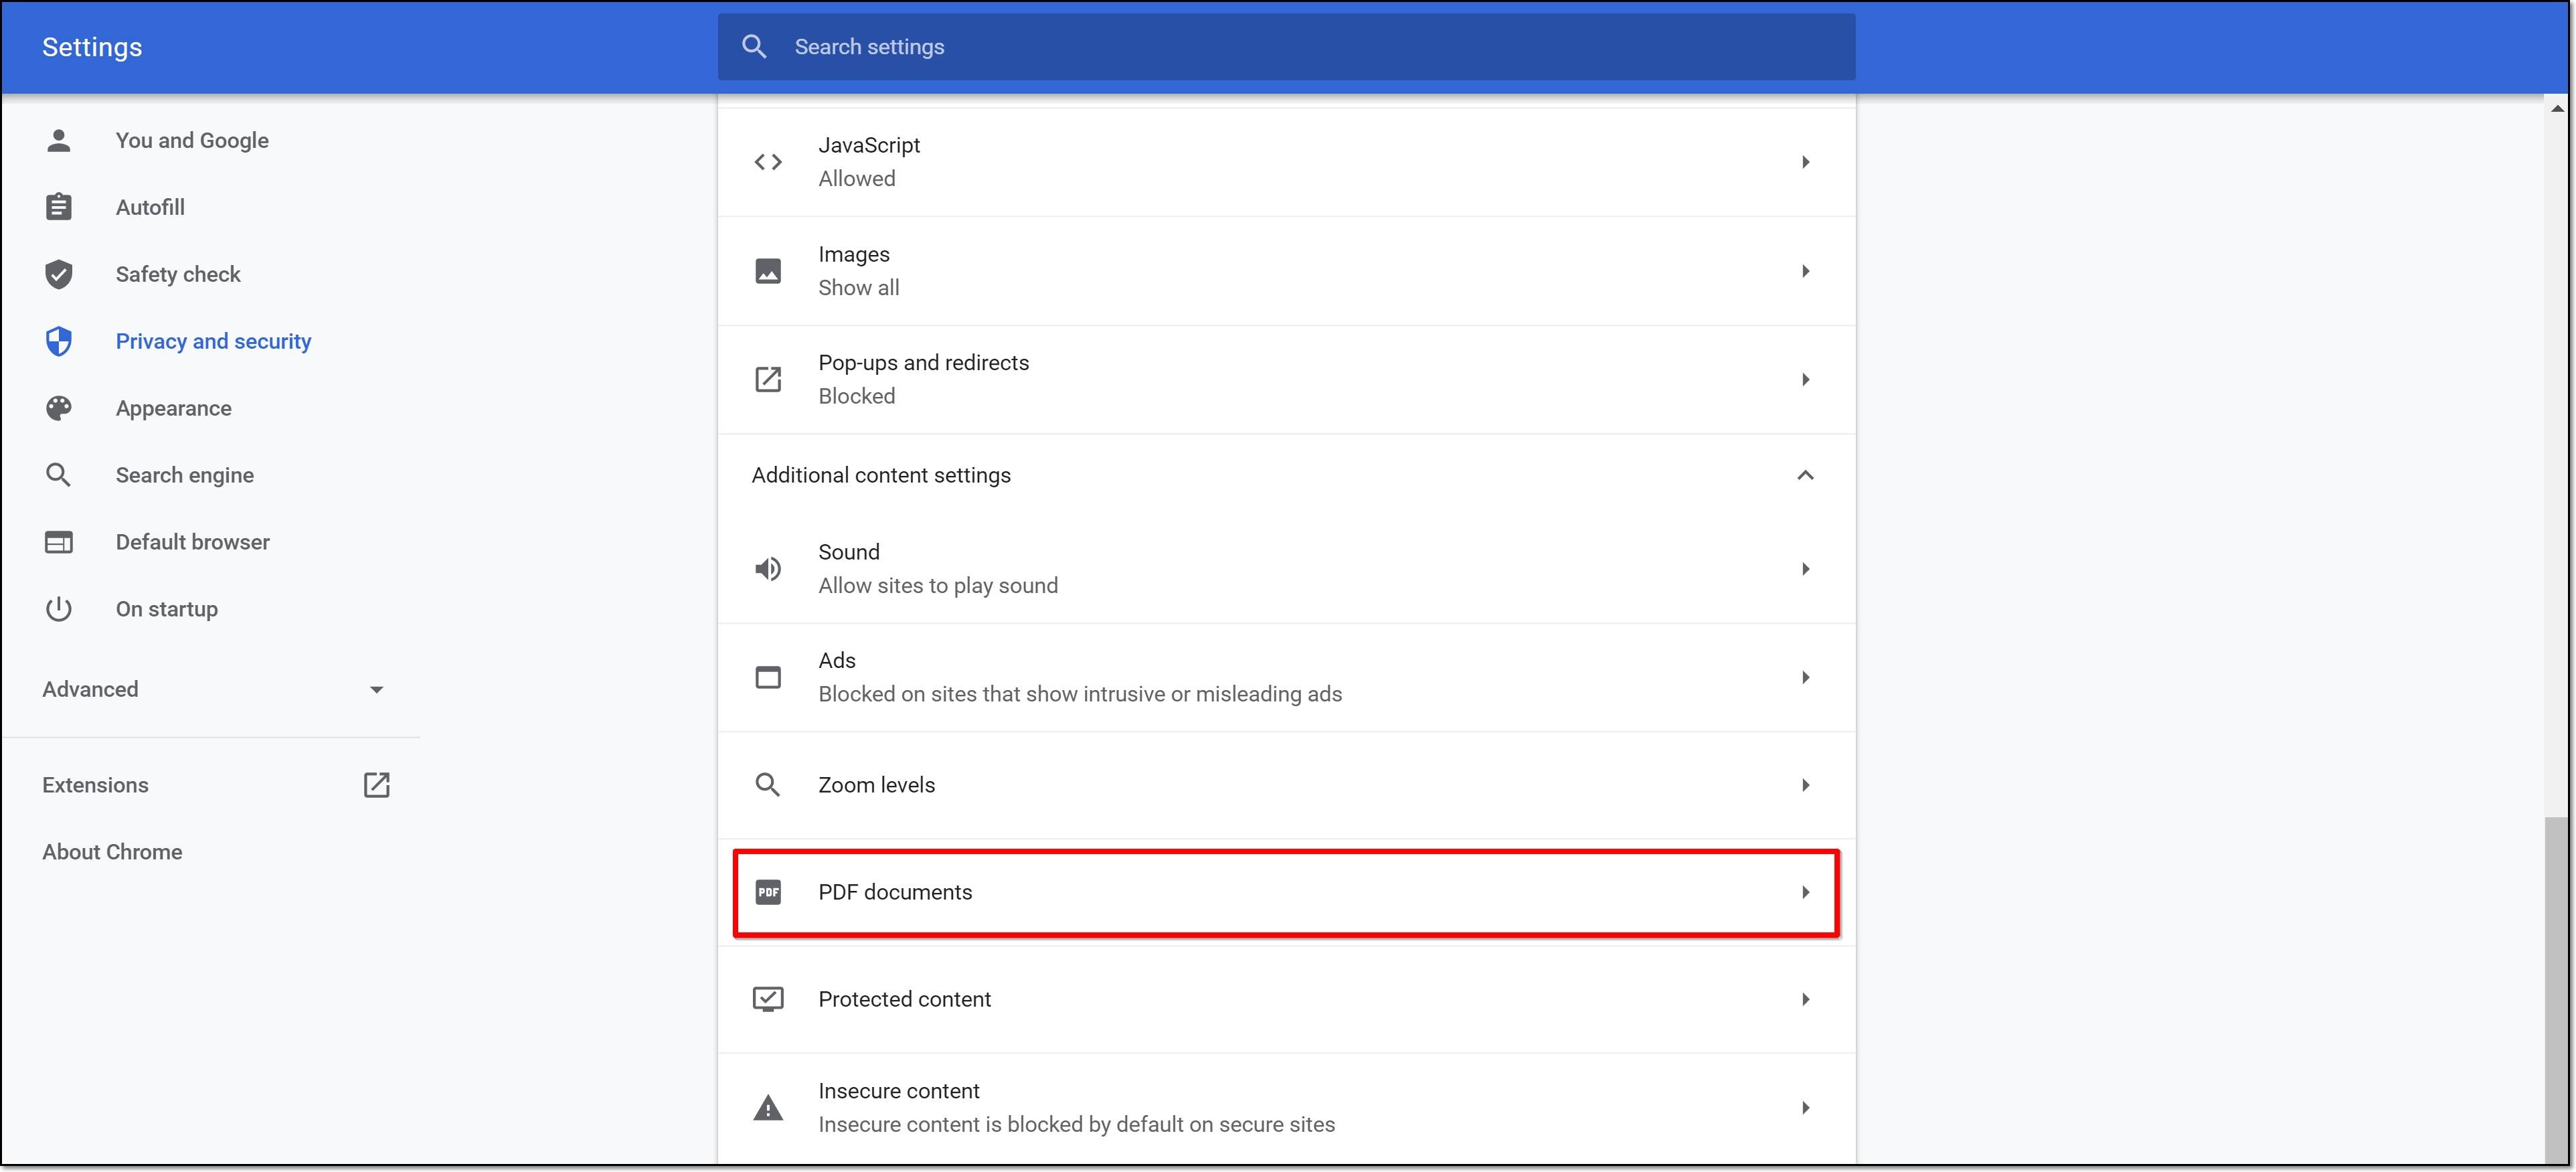
- Verify that the Download PDF files instead of automatically opening them in Chrome toggle is enabled (to the right). If it isn’t, click it to enable it.

The setting is enabled.
Adding a Validate download step
The general procedure for adding a Validate download step is the same, regardless of what file type you are downloading (e.g. csv, jpg, ppt, doc, etc.). Your code and parameters will change depending on the type of file you are downloading, and the aspect of the file you want to verify. Below is the procedure (using a csv file example), followed by sample code and parameters for the following file types: csv, image, xls, ppt, doc, and pdf.
If while recording a test you click on a link to download a file, Testim automatically creates an empty Validate download step (named untitled download validation) after the Click_step. To edit this step, double click on the step to open the _Validate Download editor, and proceed to Step 8 below.
To add a Validate download step:
- Hover over the (arrow symbol) (or + symbol after the final step) where you want to add the validation.

- Click on the “M” (Testim predefined steps).
The Predefined steps menu opens.
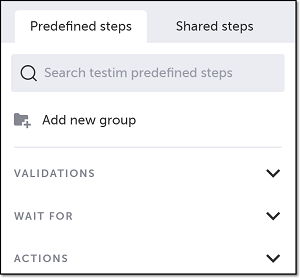
- Click on Validations.
The Validations menu expands.
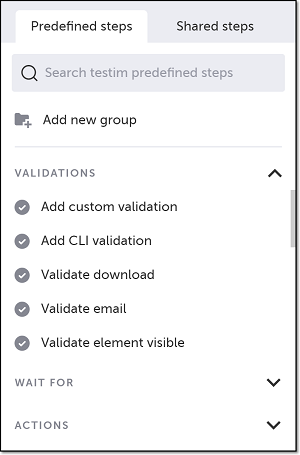
- Scroll down through the menu and select Validate download.
Alternatively, you can use the search box at the top of the menu to search for Validate download.
The Add Step window is shown.
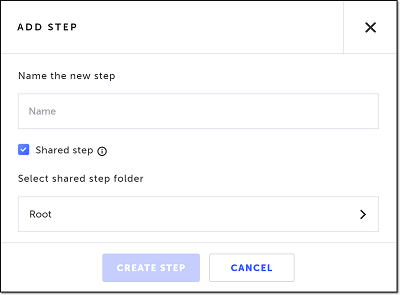
- In the Name the new step field, enter a name for this step.
- If this is a shared step to be made available to reuse in this or other tests, keep the box next to Shared step selected (default), and choose a folder from the Select shared step folder list where you want this step stored. Otherwise, deselect the checkbox.
For more information about shared steps, see Groups. - Click Create Step.
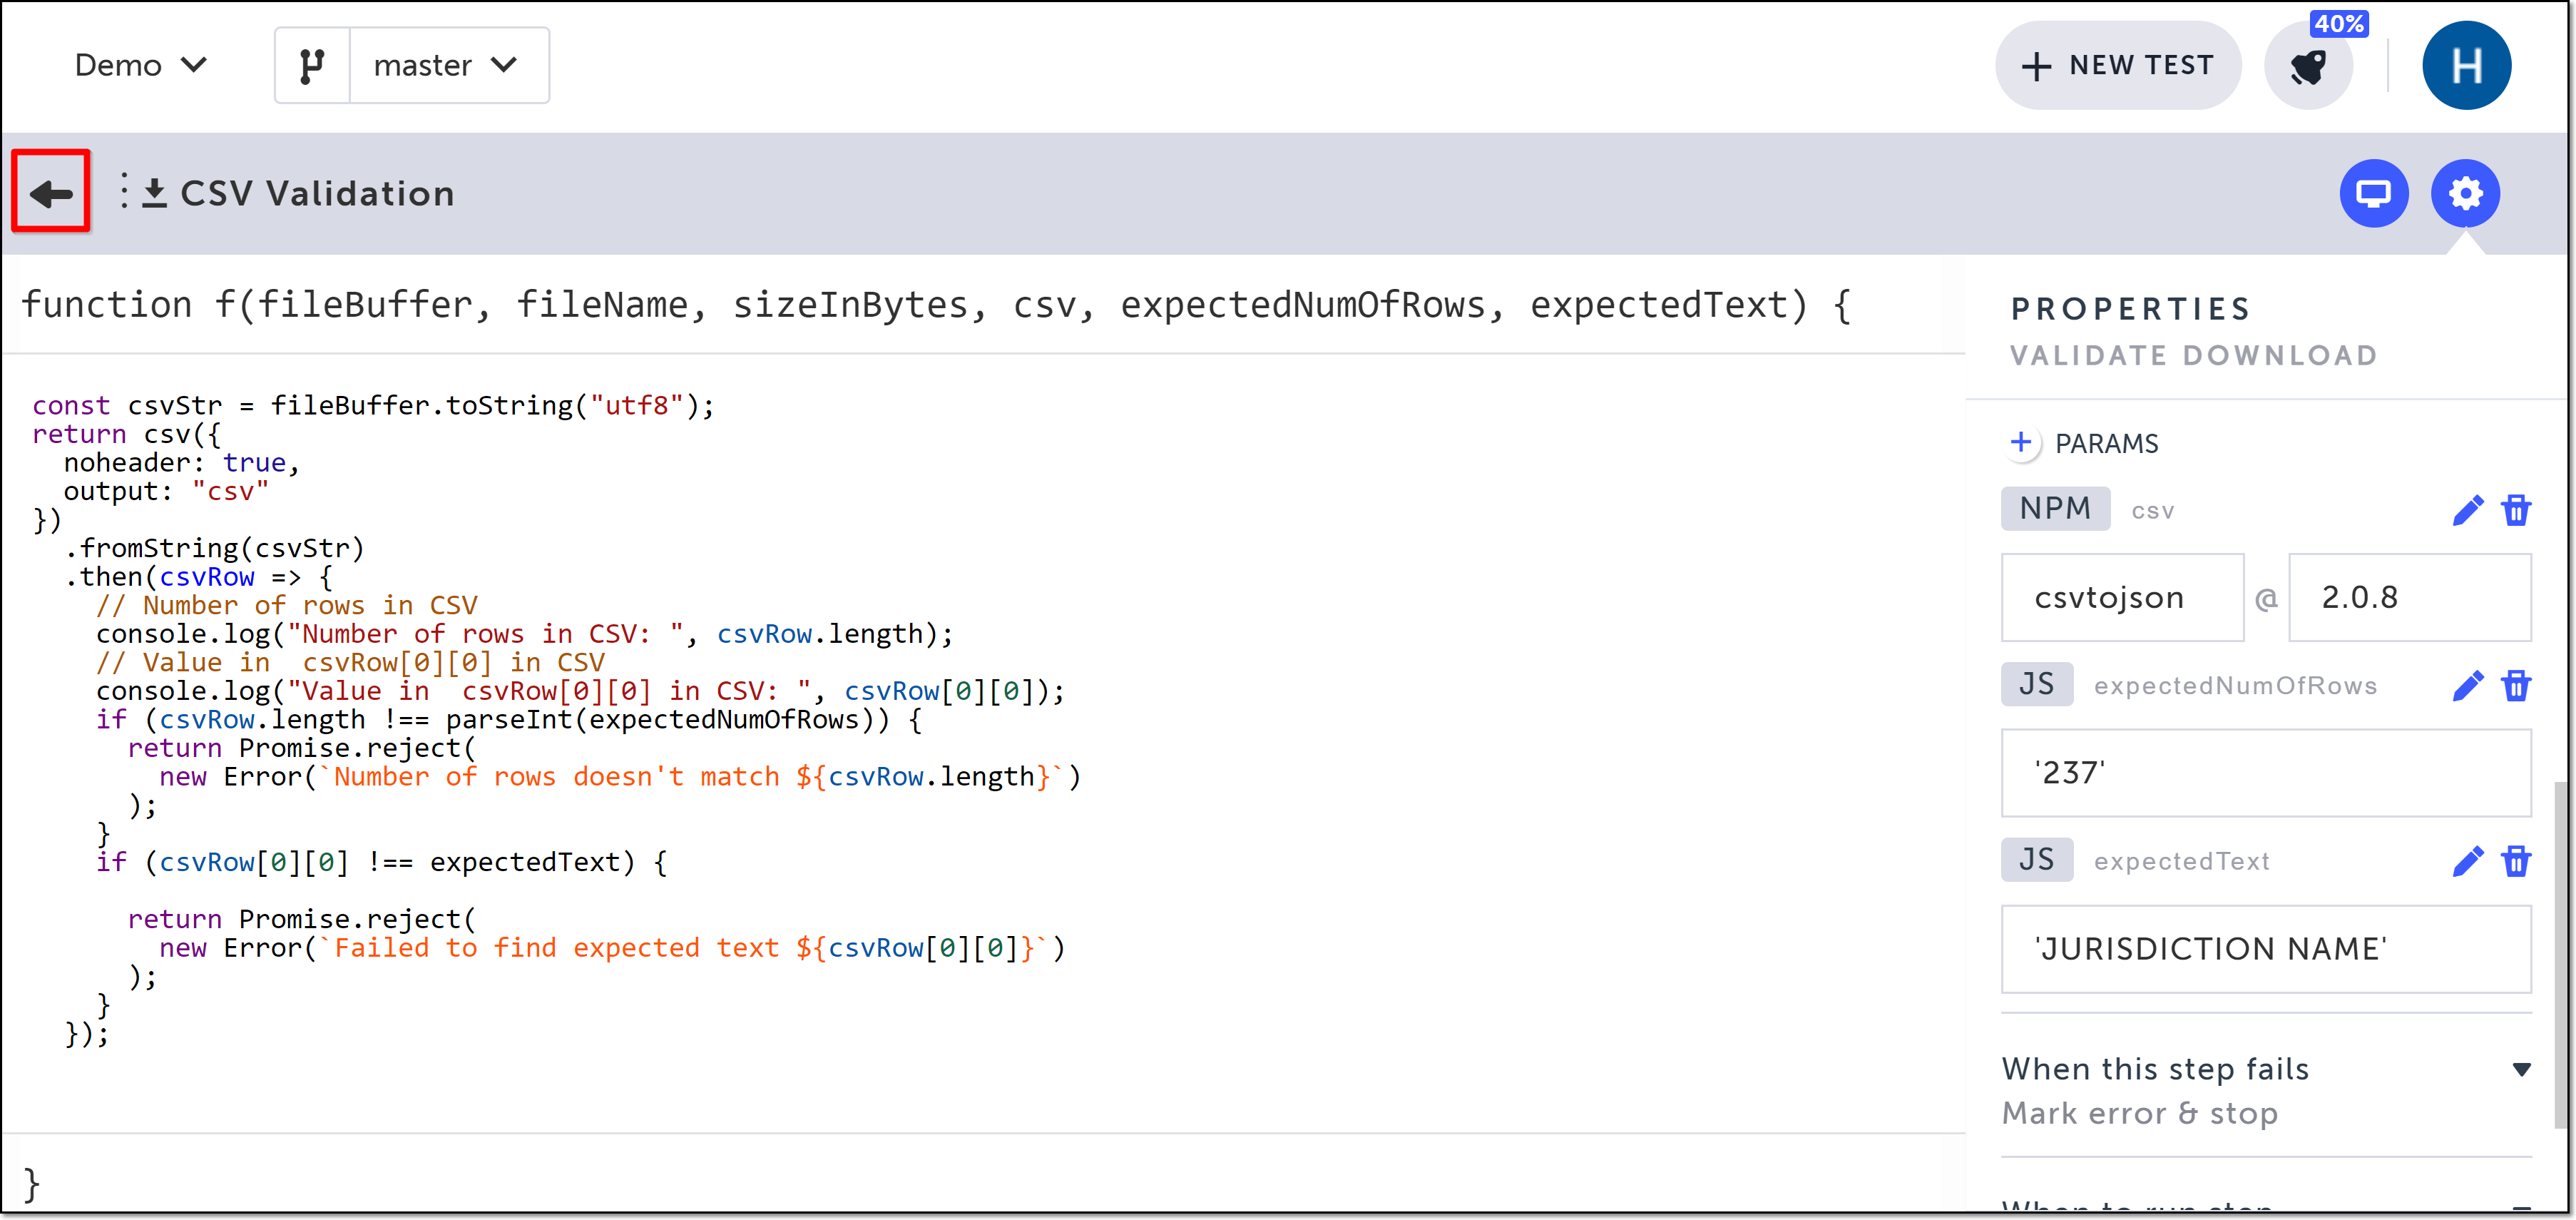
The function editor opens, and the Properties panel opens on the right-hand side.
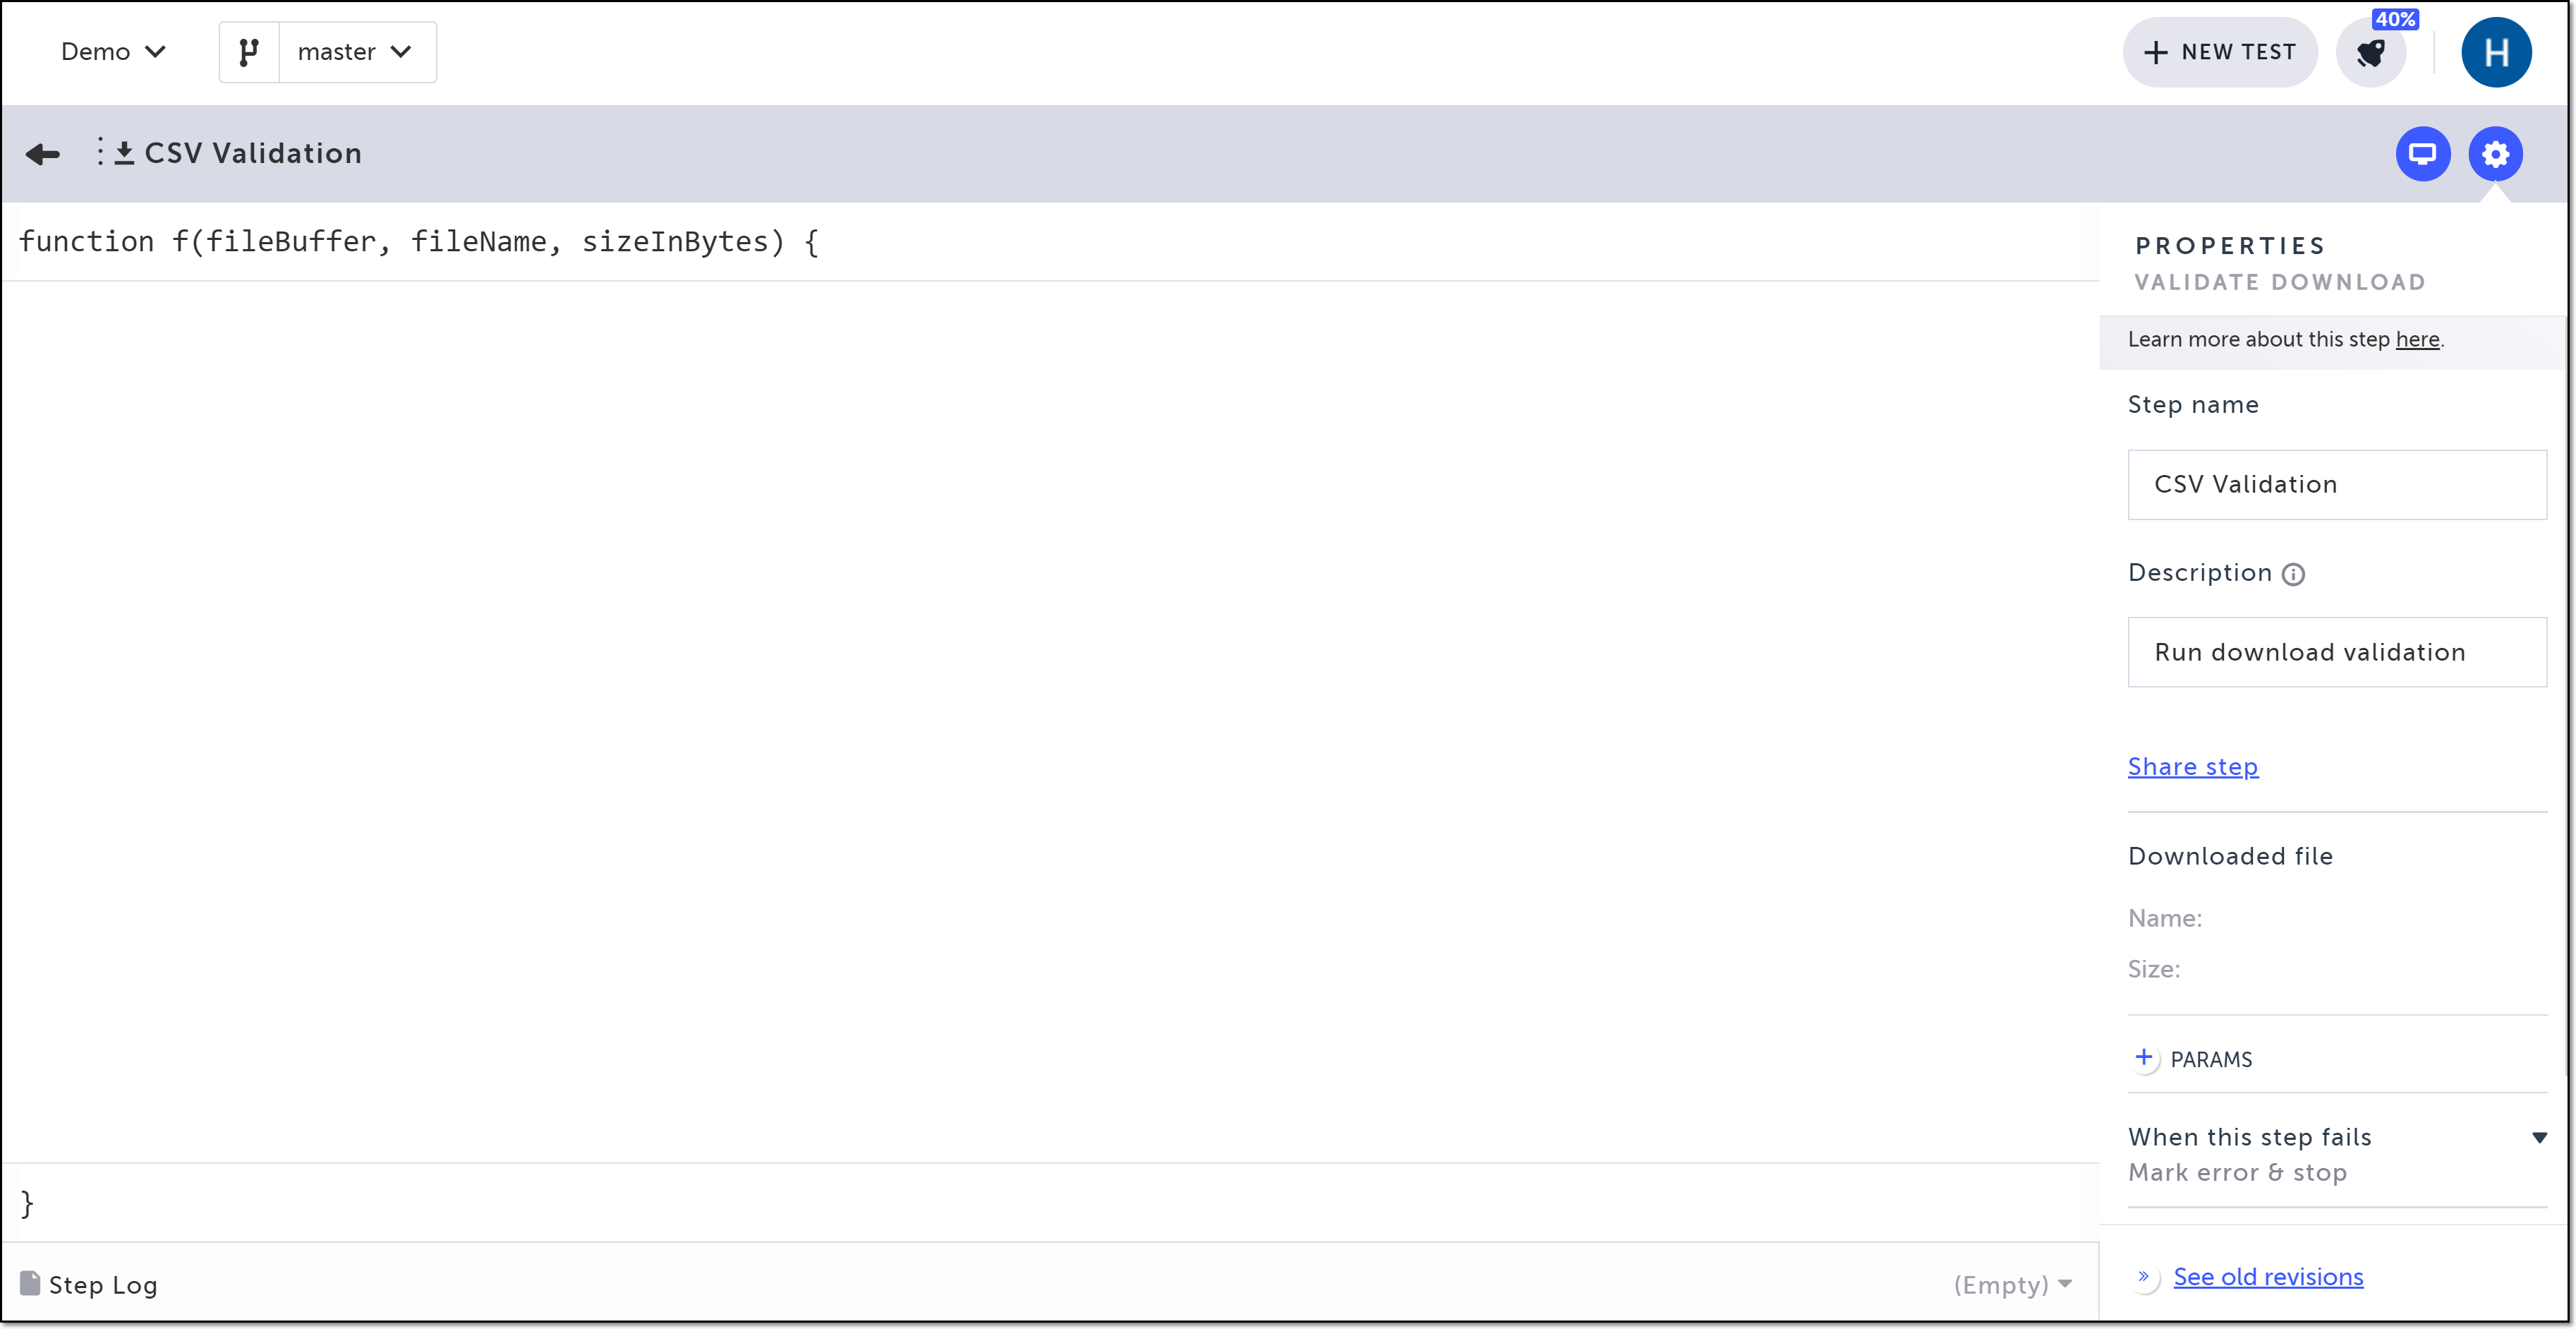
- In the Properties panel, in the Description field, optionally edit the description of this step. The default description is “Run download validation”.
- Define the parameters you will need for your step as follows:
a. In the Properties panel, click the + PARAMS button.
b. JS parameter: If you would like to add a JavaScript parameter, select JS from the dropdown list and type in the JavaScript parameter.
c. Package parameter: If you would like to add an NPM package variable, select Package from the dropdown list and type in the package variable.
In case your code uses an npm package, make sure NOT to
requireit, but rather replace therequireline with a PACKAGE parameter in the step properties.
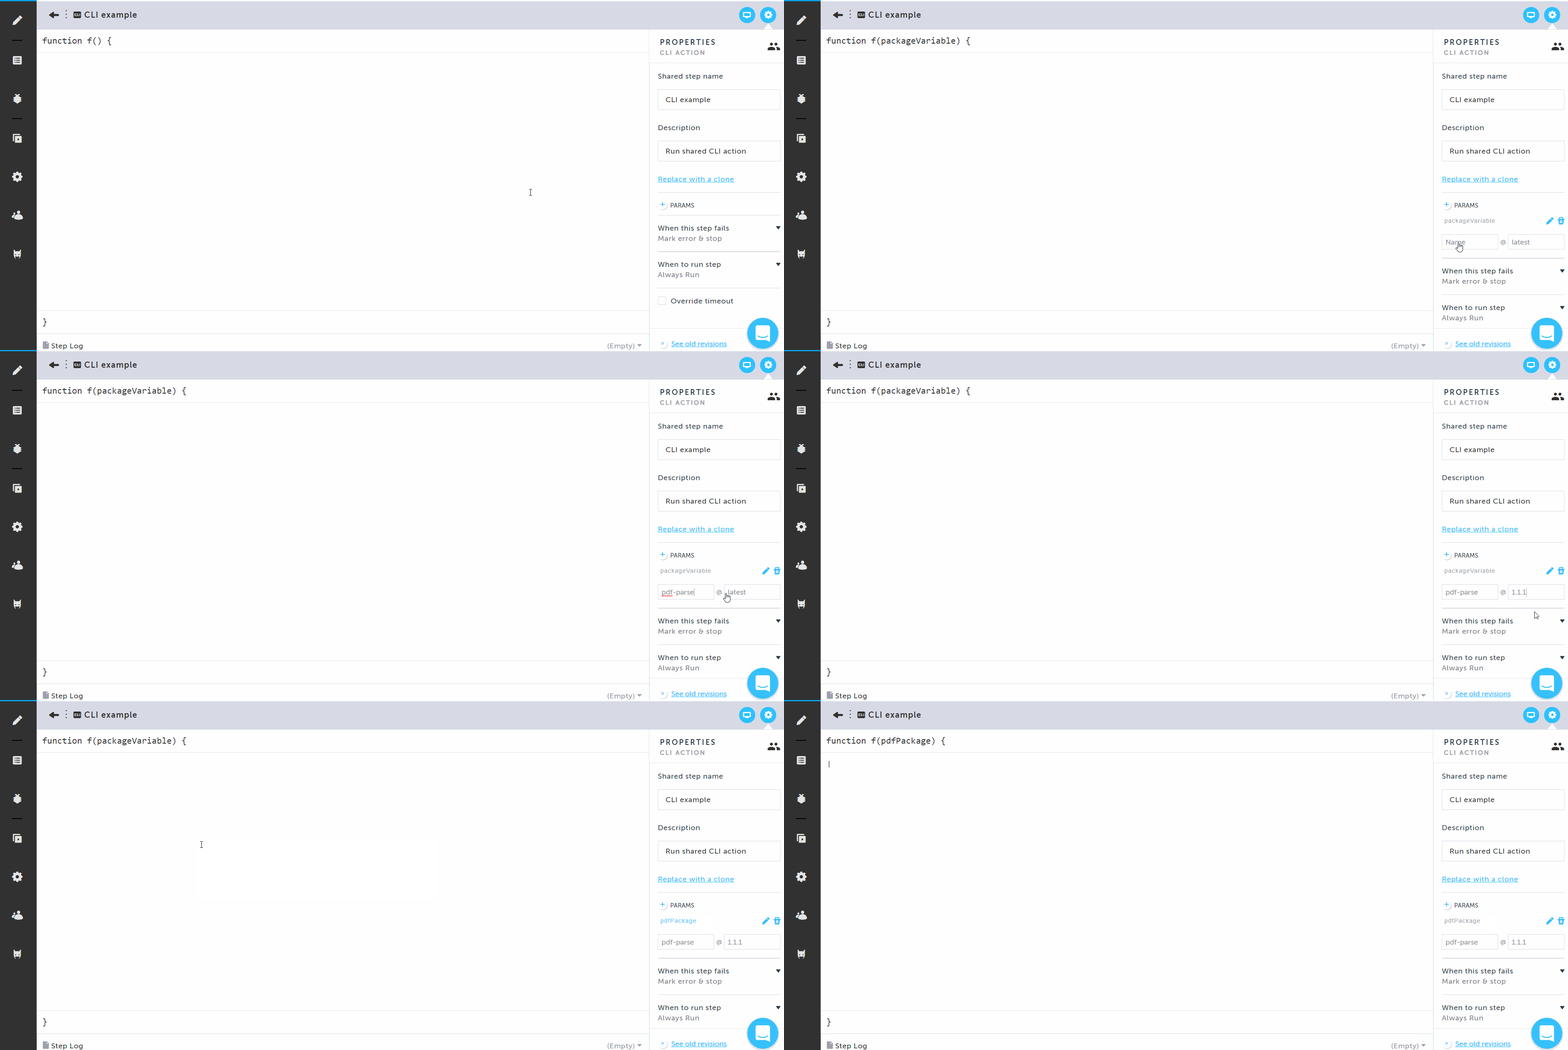
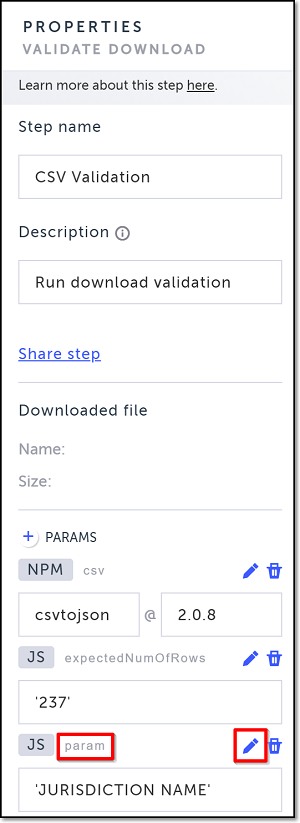
d. The selected element is automatically named “param” or “packageVariable” (depending on whether you chose a JS parameter or NPM package variable). To assign a relevant name to the parameter/variable, click on the edit icon and enter the desired name.
- In the function editor, enter your desired code. If you have defined parameters, you can refer to those parameters in your code.
To run async code in the CLI step, you have to return the promise you wish to resolve. Without returning it, the step will run synchronously and will resolve when the last line of code is executed, regardless of the expected results.
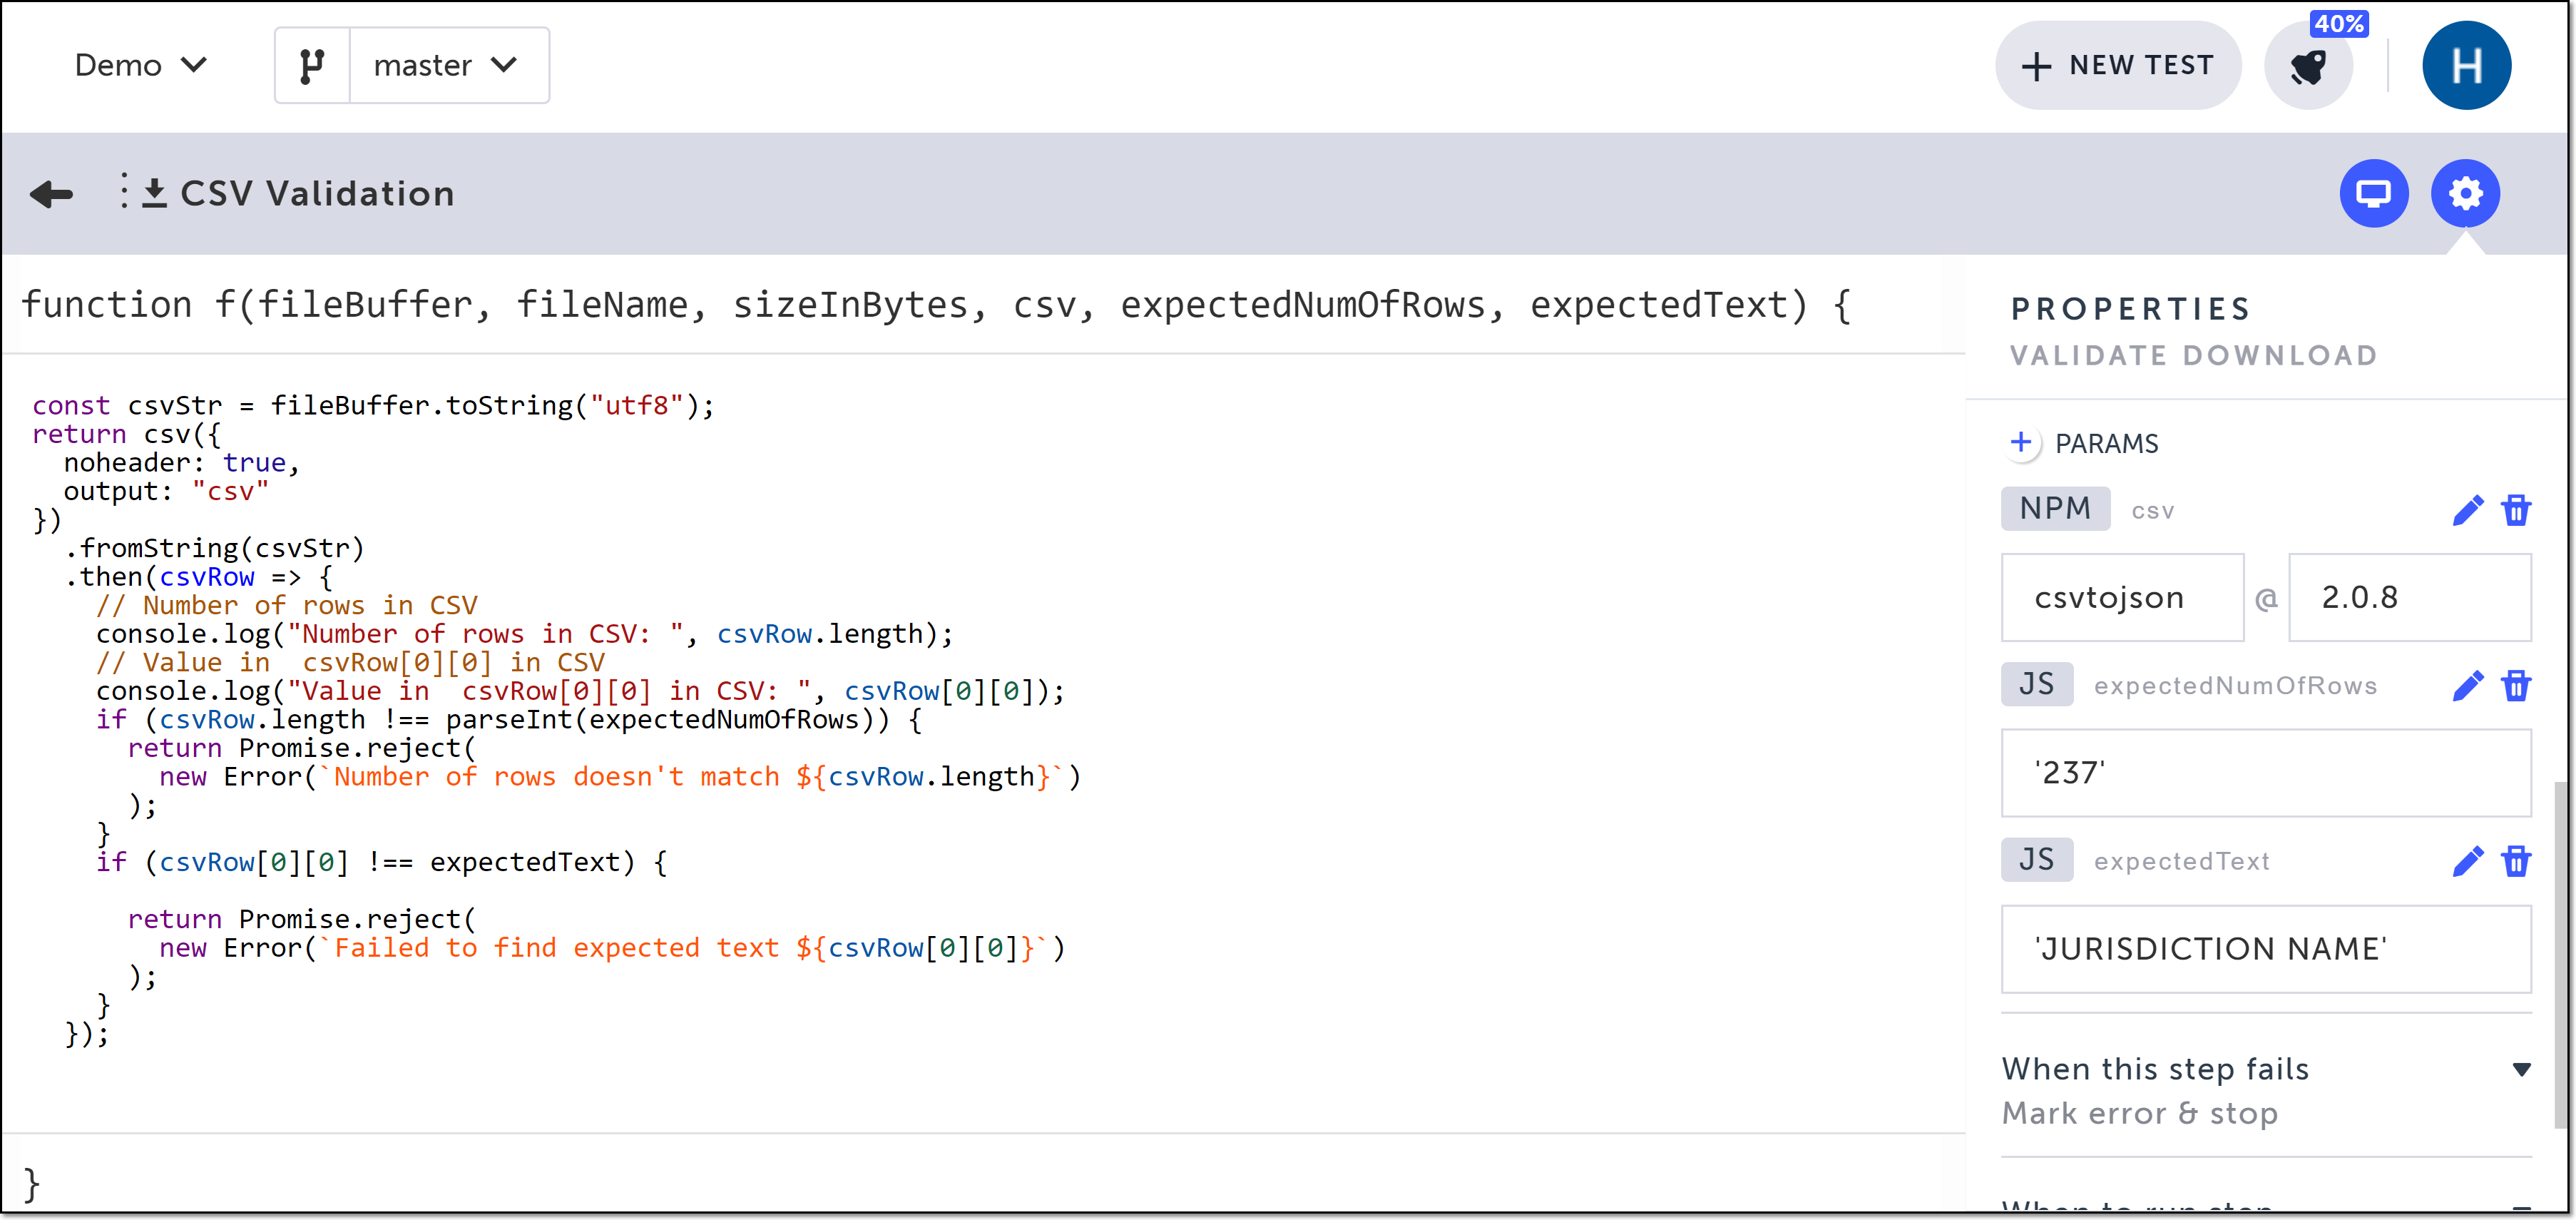
The code and parameters in the example above will check if the downloaded csv file has 237 rows and if the A1 cell contains the text JURISDICTION NAME.
- If you would like to specify what happens if the step fails, click the When this step fails down arrow in the Properties panel, and choose your desired option. Options are: Mark error & stop, Mark error & continue, and Mark warning & continue.
- If you would like to control when this step runs (or doesn’t run), click the When to run step down arrow in the Properties panel, and choose your desired option. For more information, see Conditions.
- If you would like to override the default timeout setting (30000 ms), click on the Override timeout button in the Properties panel, and enter the desired timeout limit.
- Click the back arrow to return to the main Editor window.
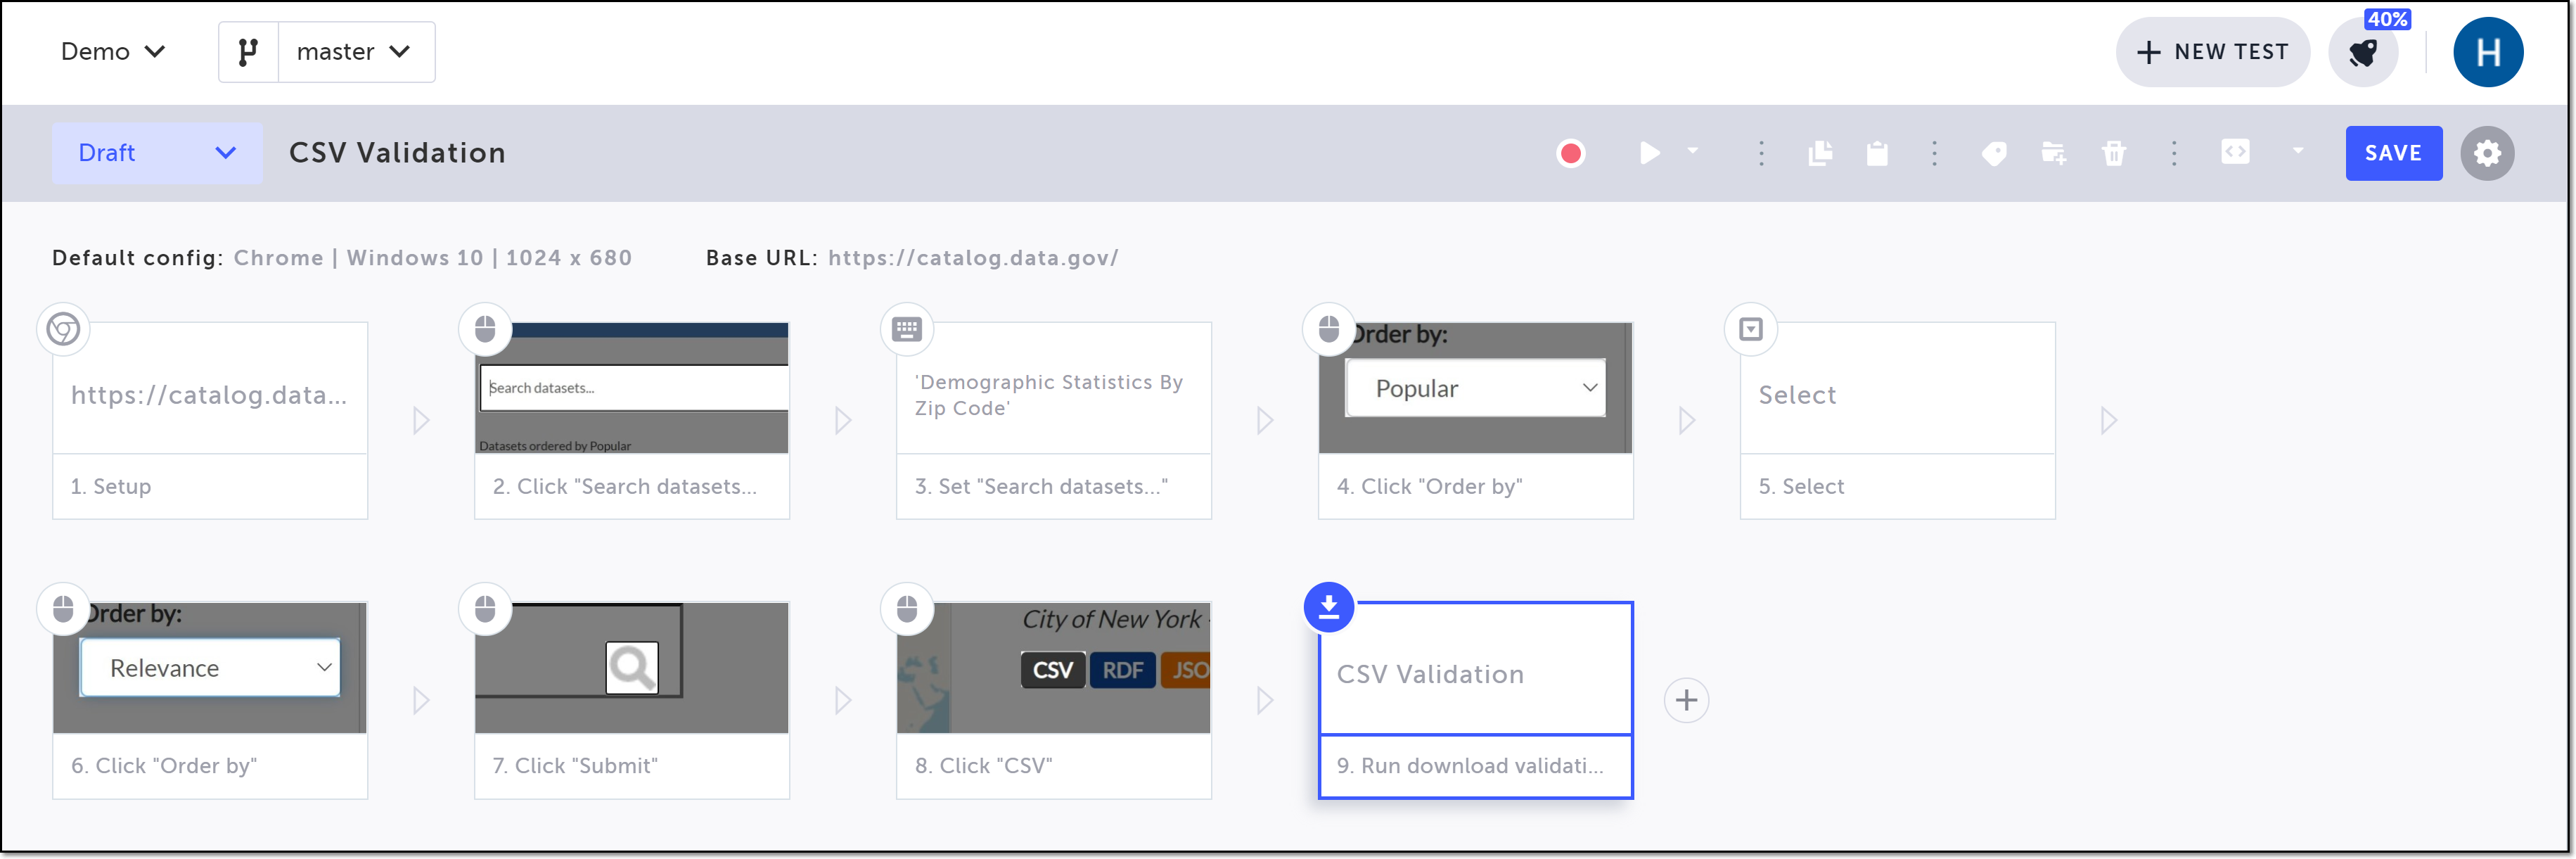
The step is created.
Validate download examples
CSV files
You can use the Validate download step to perform advanced validations of CSV files such as number of rows and content.
The code and parameters in this example check if the downloaded csv file consists of 237 rows and if the A1 cell contains the text JURISDICTION NAME.
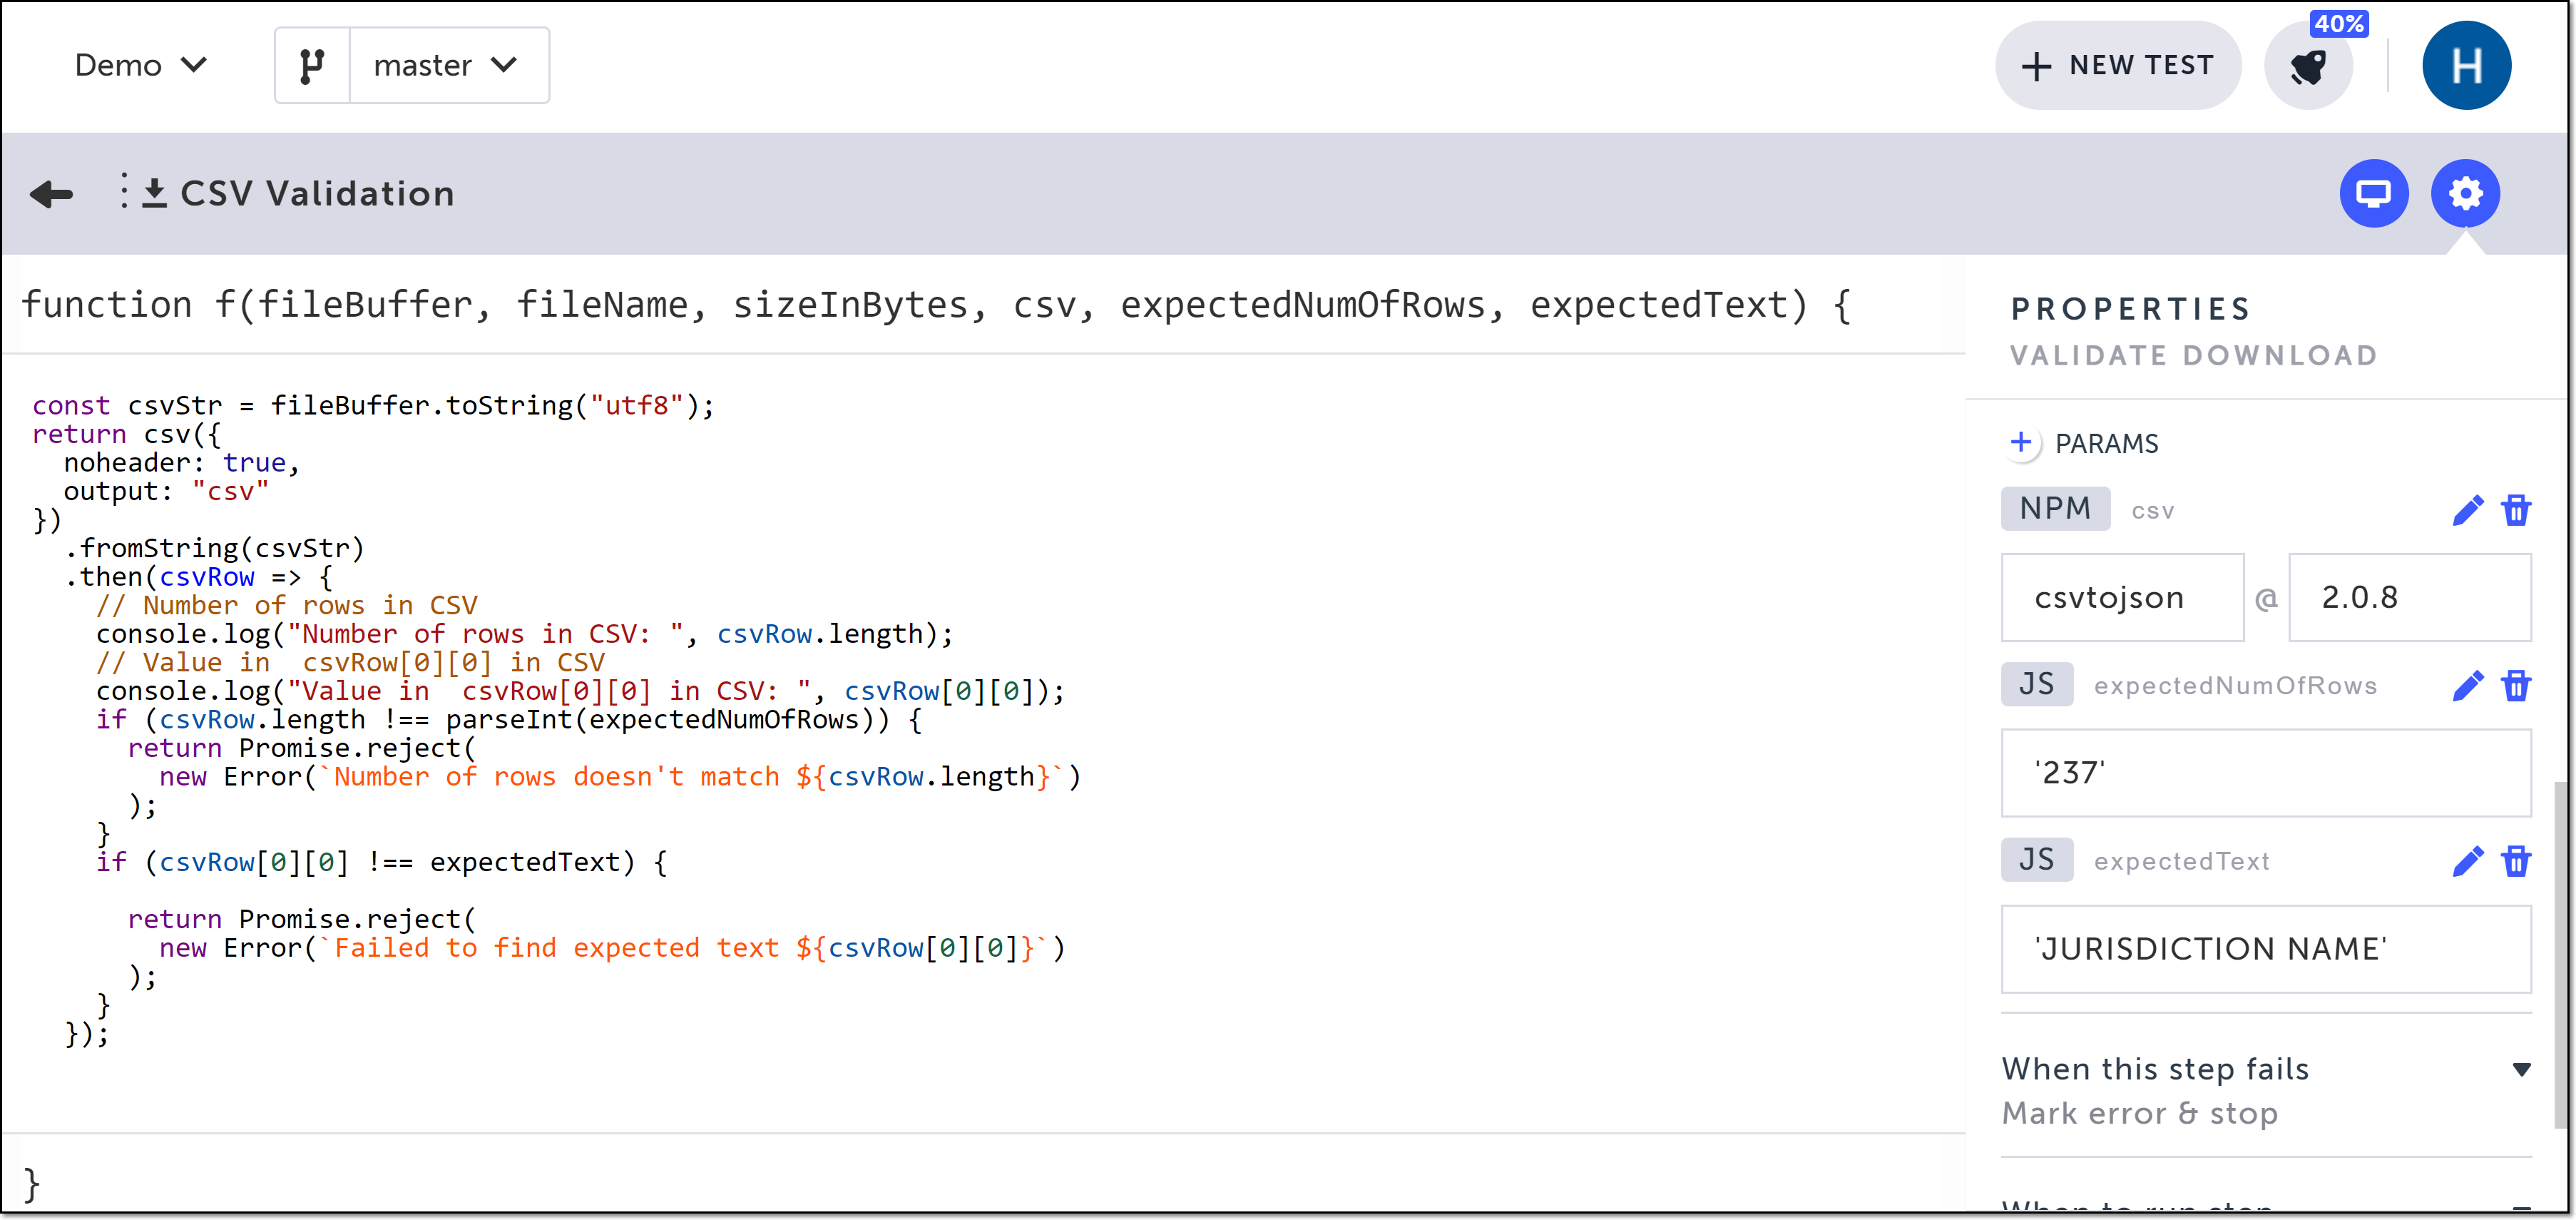
Example Code:
const csvStr = fileBuffer.toString("utf8");
return csv({
  noheader: true,
  output: "csv"
})
  .fromString(csvStr)
  .then(csvRow => {
    // Number of rows in CSV
  	console.log("Number of rows in CSV: ", csvRow.length);
    // Value in  csvRow[0][0] in CSV
  	console.log("Value in  csvRow[0][0] in CSV: ", csvRow[0][0]);
    if (csvRow.length !== parseInt(expectedNumOfRows)) {
      return Promise.reject(
        new Error(`Number of rows doesn't match ${csvRow.length}`)
      );
    }
    if (csvRow[0][0] !== expectedText) {

      return Promise.reject(
        new Error(`Failed to find expected text ${csvRow[0][0]}`)
      );
    }
  });
Example Parameters:
| Name | Type | Value |
|---|---|---|
| csv | Package | [[email protected]] |
| expectedNumOfRows | JavaScript | '237' |
| expectedText | JavaScript | 'JURISDICTION NAME' |
Image files
You can use the Validate download step to perform advanced validations of image files such as type and dimensions.
The code and parameters in this example check if the downloaded image file is named yellow-cat-cartoon-style-clipart, is a jpg_file, and has the dimensions of _573 (width) X 600 (height).
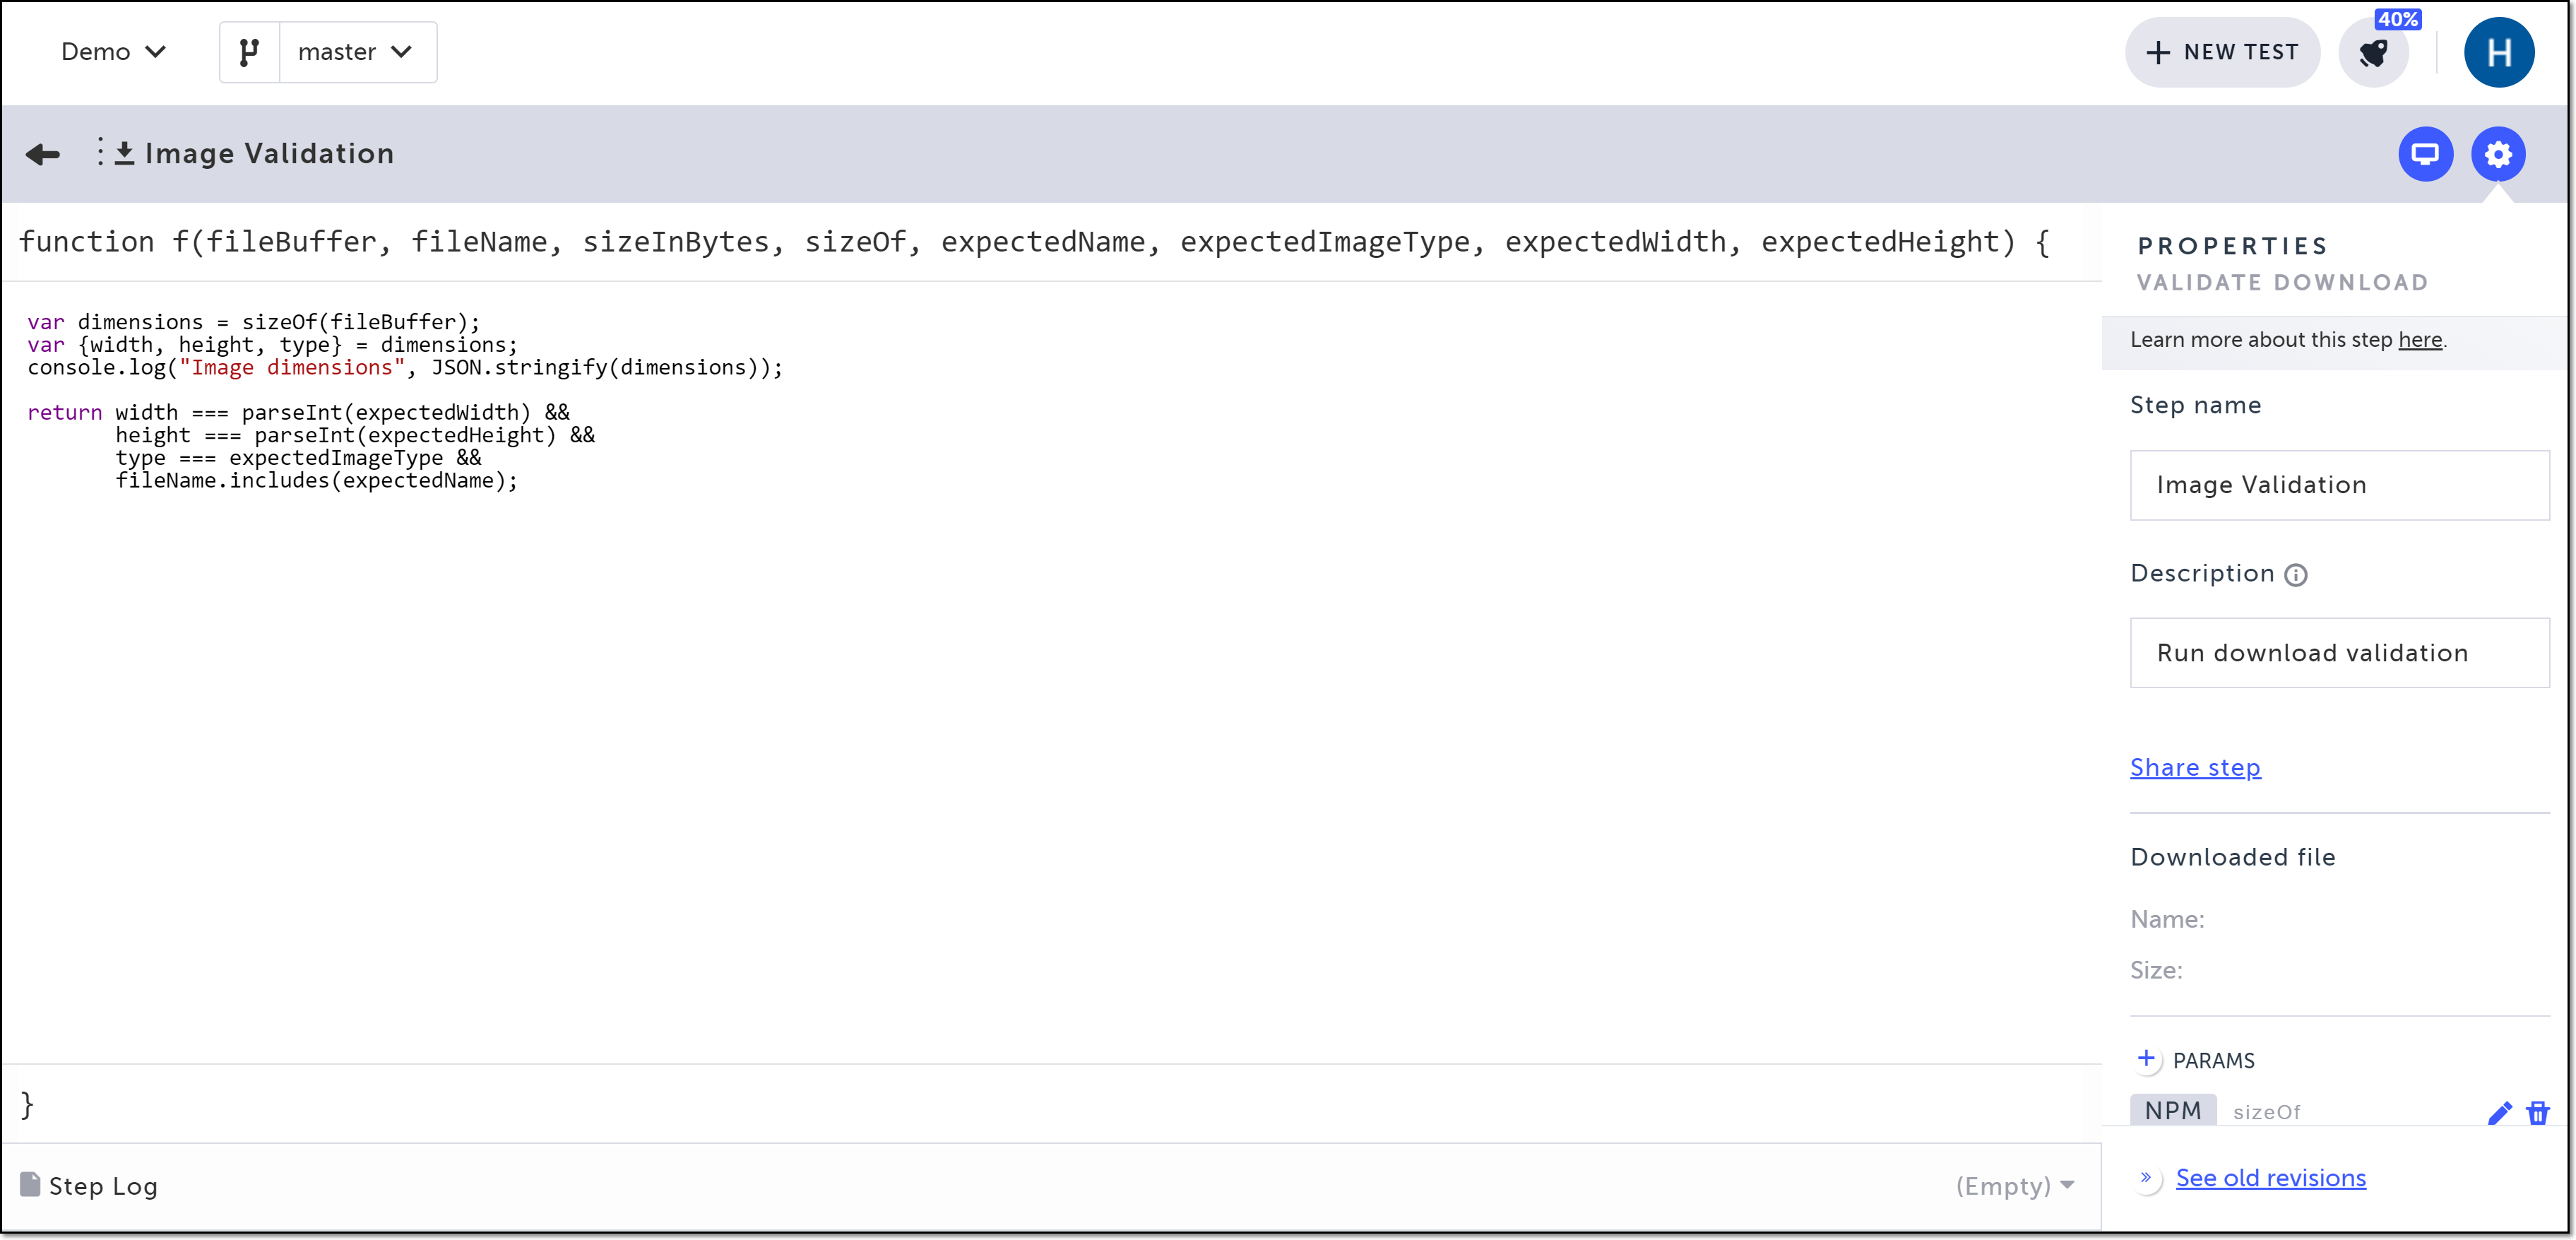
Example Code:
var dimensions = sizeOf(fileBuffer);
var {width, height, type} = dimensions;
console.log("Image dimensions", JSON.stringify(dimensions));

return width === parseInt(expectedWidth) &&
       height === parseInt(expectedHeight) &&
       type === expectedImageType &&
       fileName.includes(expectedName);
Example Parameters:
| Name | Type | Value |
|---|---|---|
| sizeOf | Package | [[email protected]] |
| expectedName | JavaScript | 'yellow-cat-cartoon-style-clipart' |
| expectedImageType | JavaScript | 'jpg' |
| expectedWidth | JavaScript | '573' |
| expectedHeight | JavaScript | '600' |
MS Excel files
You can use the Validate download step to perform advanced validations of Excel files such as number of sheets and sheet names.
The code and parameters in this example check if the downloaded MS Excel file consists of 3 sheets, with the first one named Example Test.
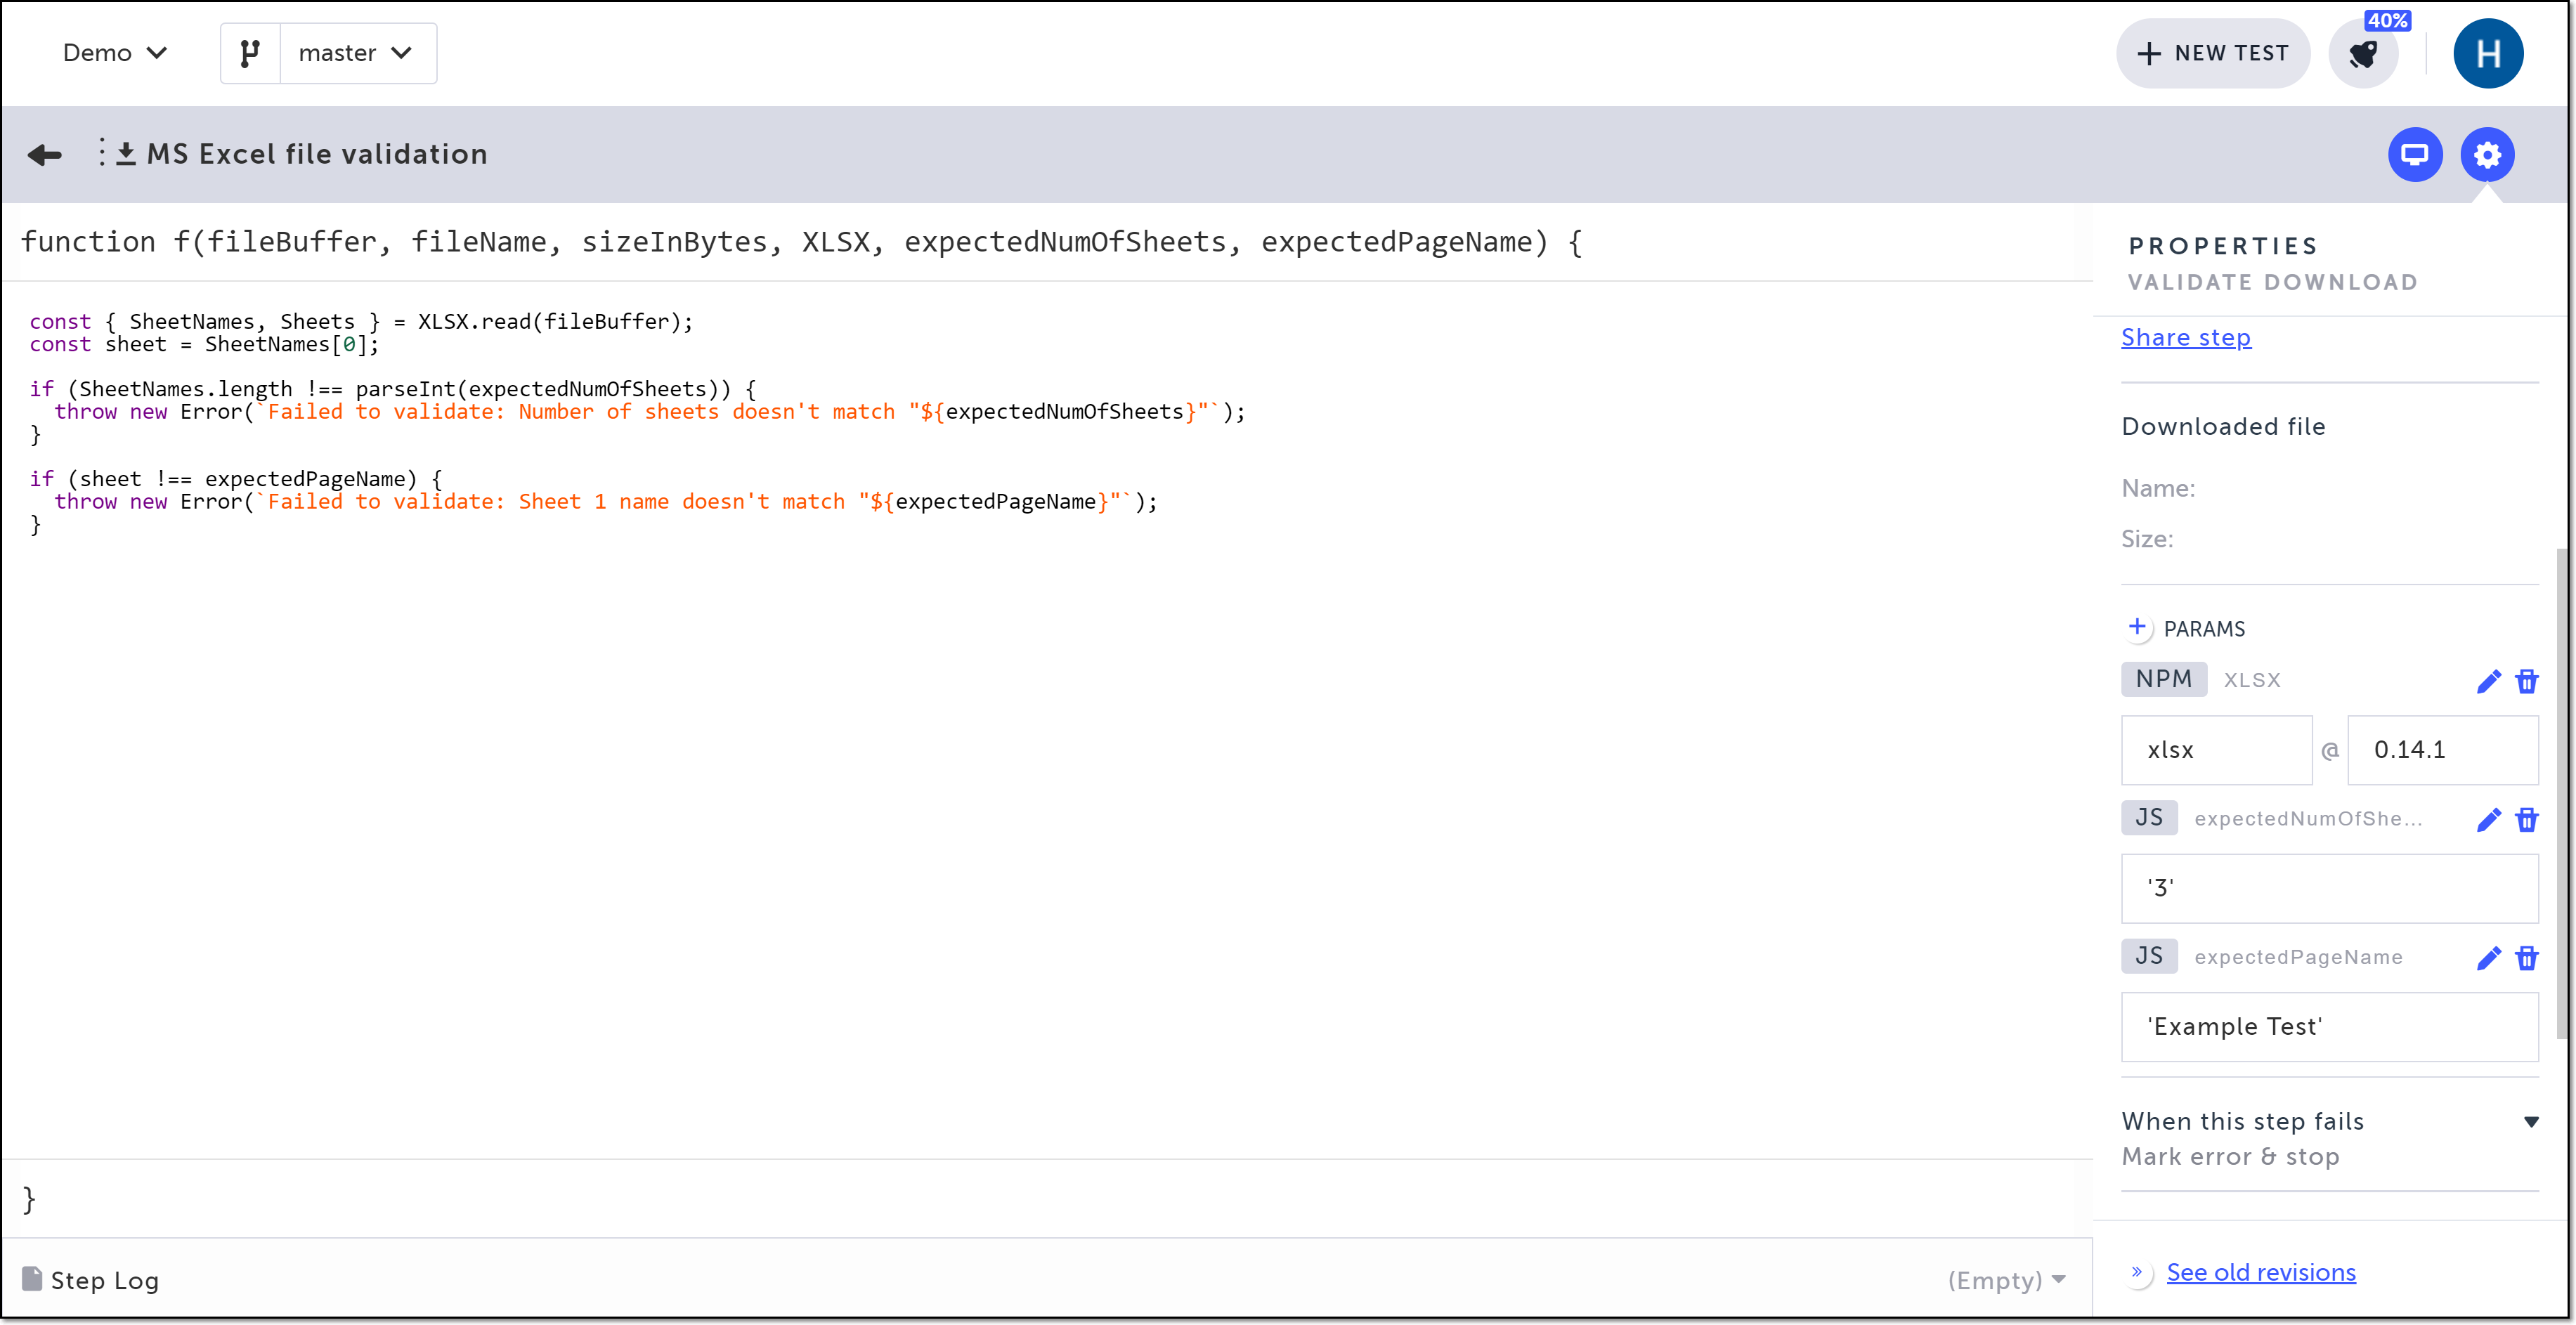
Example code:
const { SheetNames, Sheets } = XLSX.read(fileBuffer);
const sheet = SheetNames[0];

if (SheetNames.length !== parseInt(expectedNumOfSheets)) {
  throw new Error(`Failed to validate: Number of sheets doesn't match "${expectedNumOfSheets}"`);
}

if (sheet !== expectedPageName) {
  throw new Error(`Failed to validate: Sheet 1 name doesn't match "${expectedPageName}"`);
}
Example Parameters:
| Name | Type | Value |
|---|---|---|
| XLSX | Package | [[email protected]] |
| expectedNumOfSheets | JavaScript | '3' |
| expectedPageName | JavaScript | 'Example Test' |
MS PowerPoint files
You can use the Validate download step to perform advanced validations of PowerPoint files such as number of slides and content.
The code and parameters in this example check if the downloaded MS PowerPoint file consists of 9 slides, with the word _Department _on the first page and the word _Location _on the second page.
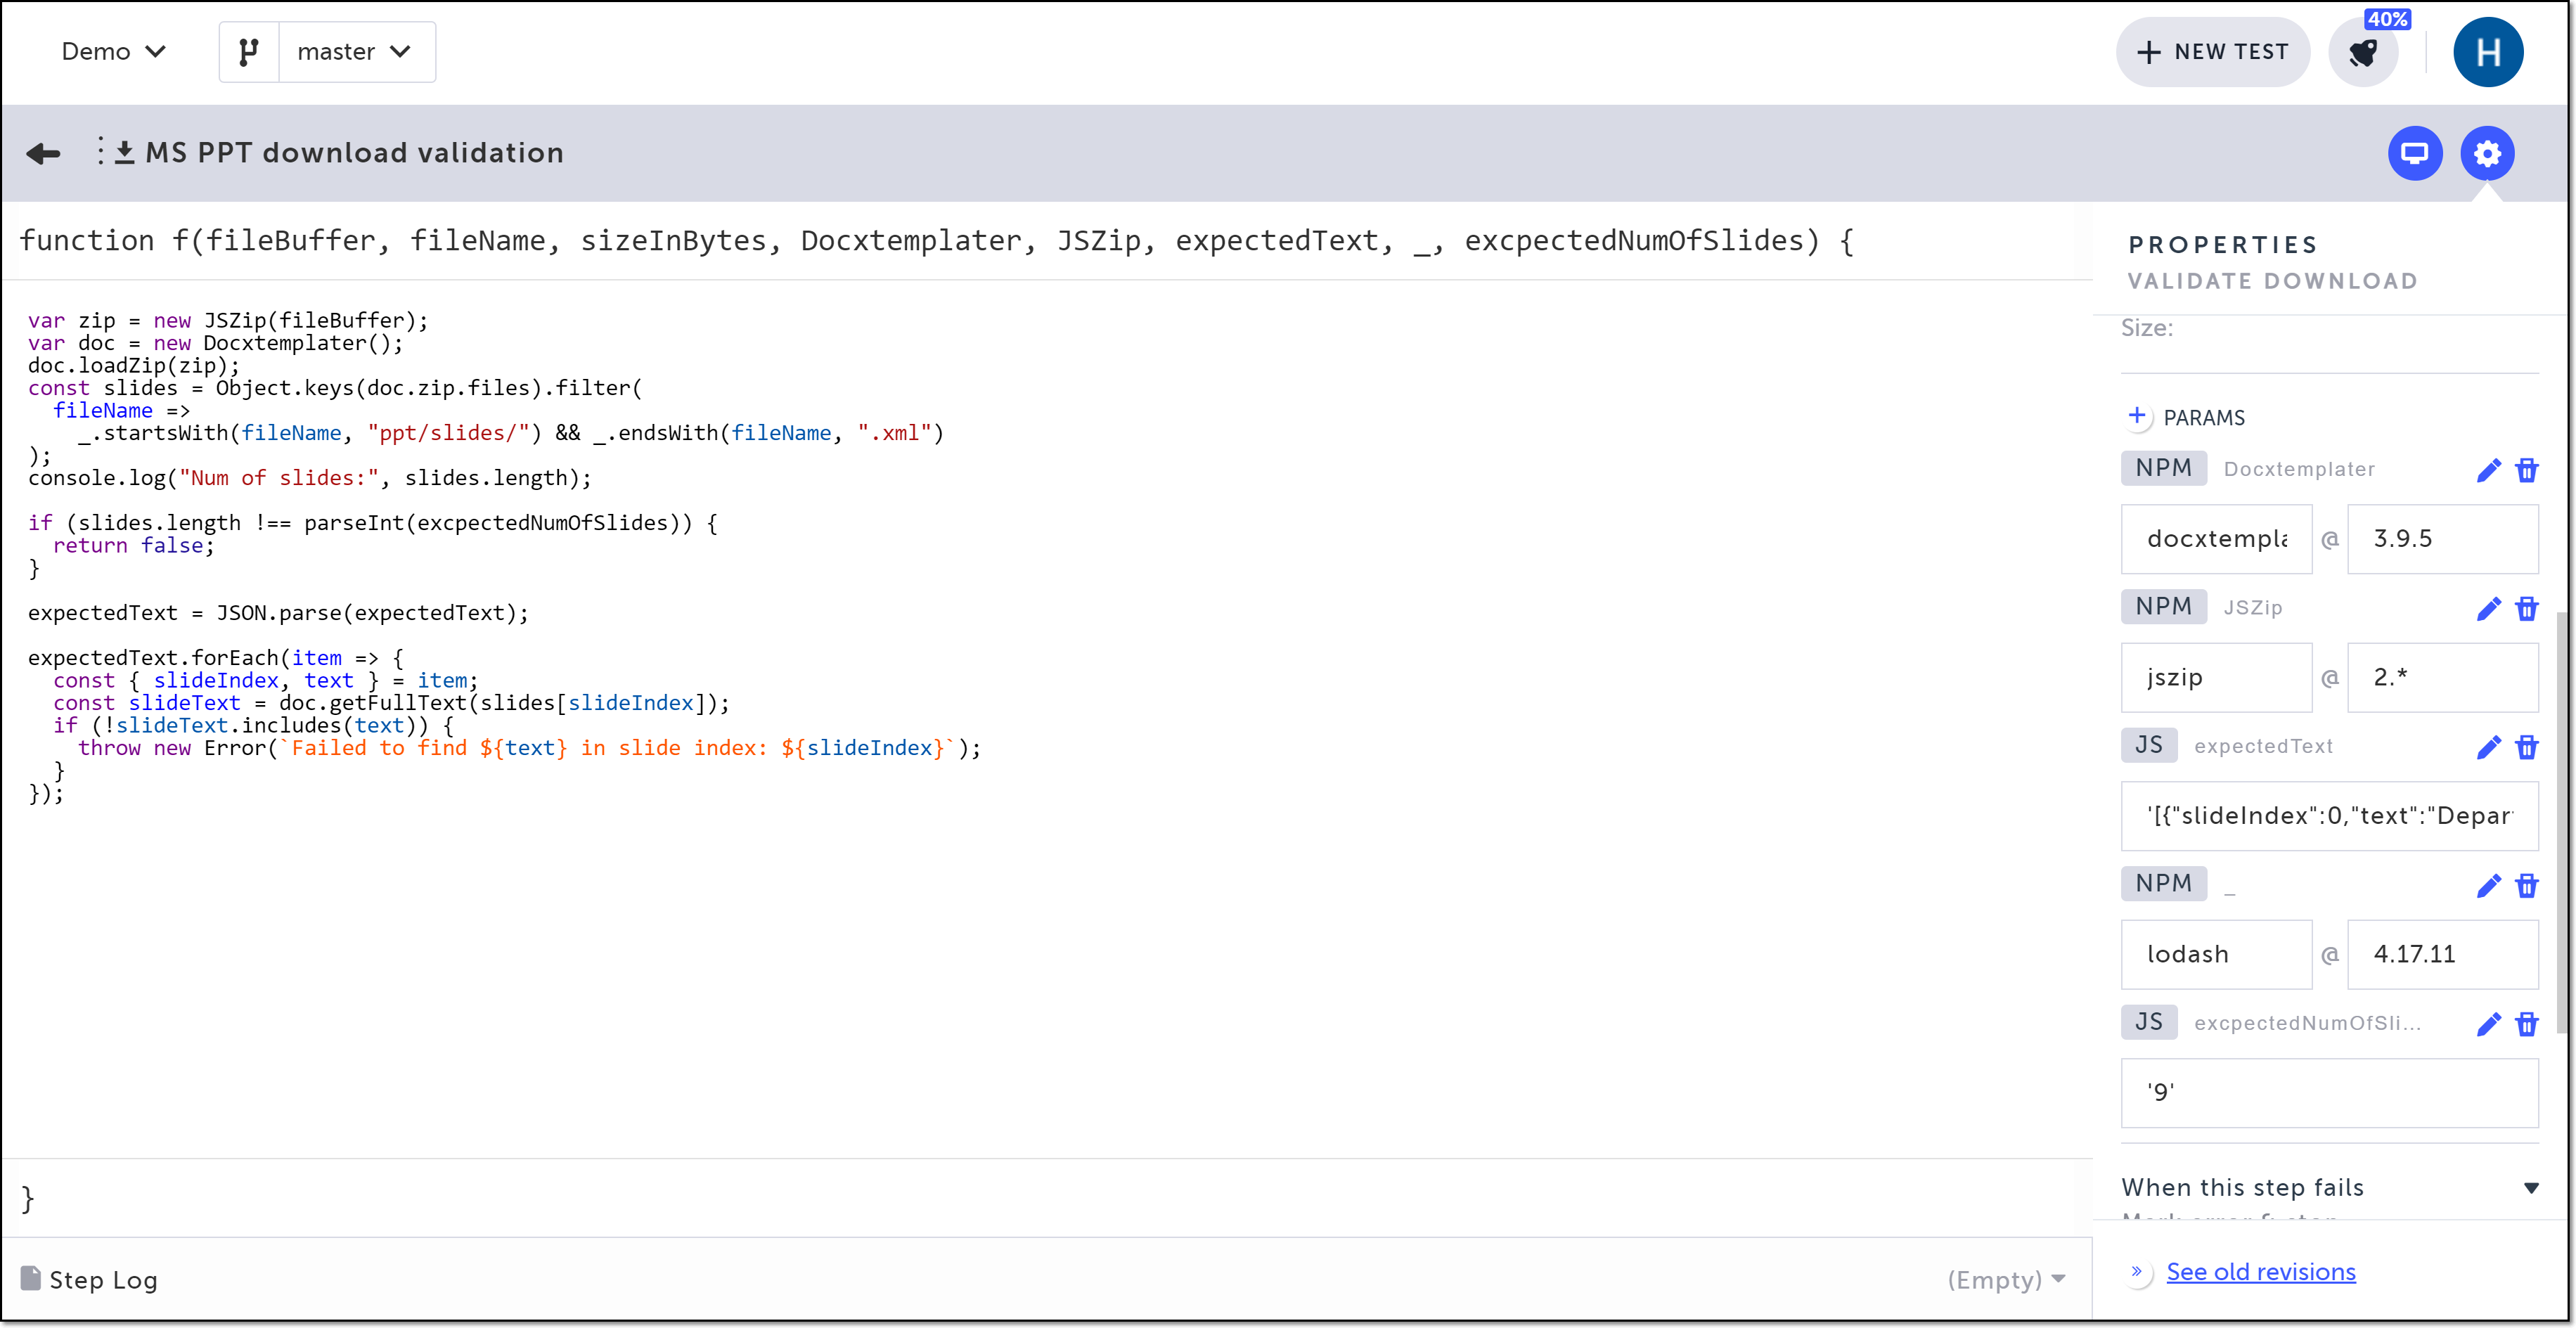
Example code:
var zip = new JSZip(fileBuffer);
var doc = new Docxtemplater();
doc.loadZip(zip);
const slides = Object.keys(doc.zip.files).filter(
  fileName =>
    _.startsWith(fileName, "ppt/slides/") && _.endsWith(fileName, ".xml")
);
console.log("Num of slides:", slides.length);

if (slides.length !== parseInt(excpectedNumOfSlides)) {
  return false;
}

expectedText = JSON.parse(expectedText);

expectedText.forEach(item => {
  const { slideIndex, text } = item;
  const slideText = doc.getFullText(slides[slideIndex]);
  if (!slideText.includes(text)) {
    throw new Error(`Failed to find ${text} in slide index: ${slideIndex}`);
  }
});
Example Parameters:
Name | Type | Value |
|---|---|---|
Docxtemplater | Package | |
JSZip | Package | [jszip@2.*] |
expectedText | JavaScript |
|
Package | ||
excpectedNumOfSlides | JavaScript | '9' |
JSZip only supports .docx files and does not work with .doc files. Ensure that you are working with the .docx format when using JSZip for download validation.
MS Word files
You can use the Validate download step to perform advanced validations of Word files such as content.
The code and parameters in this example check if the downloaded MS Word file contains the text Item A.
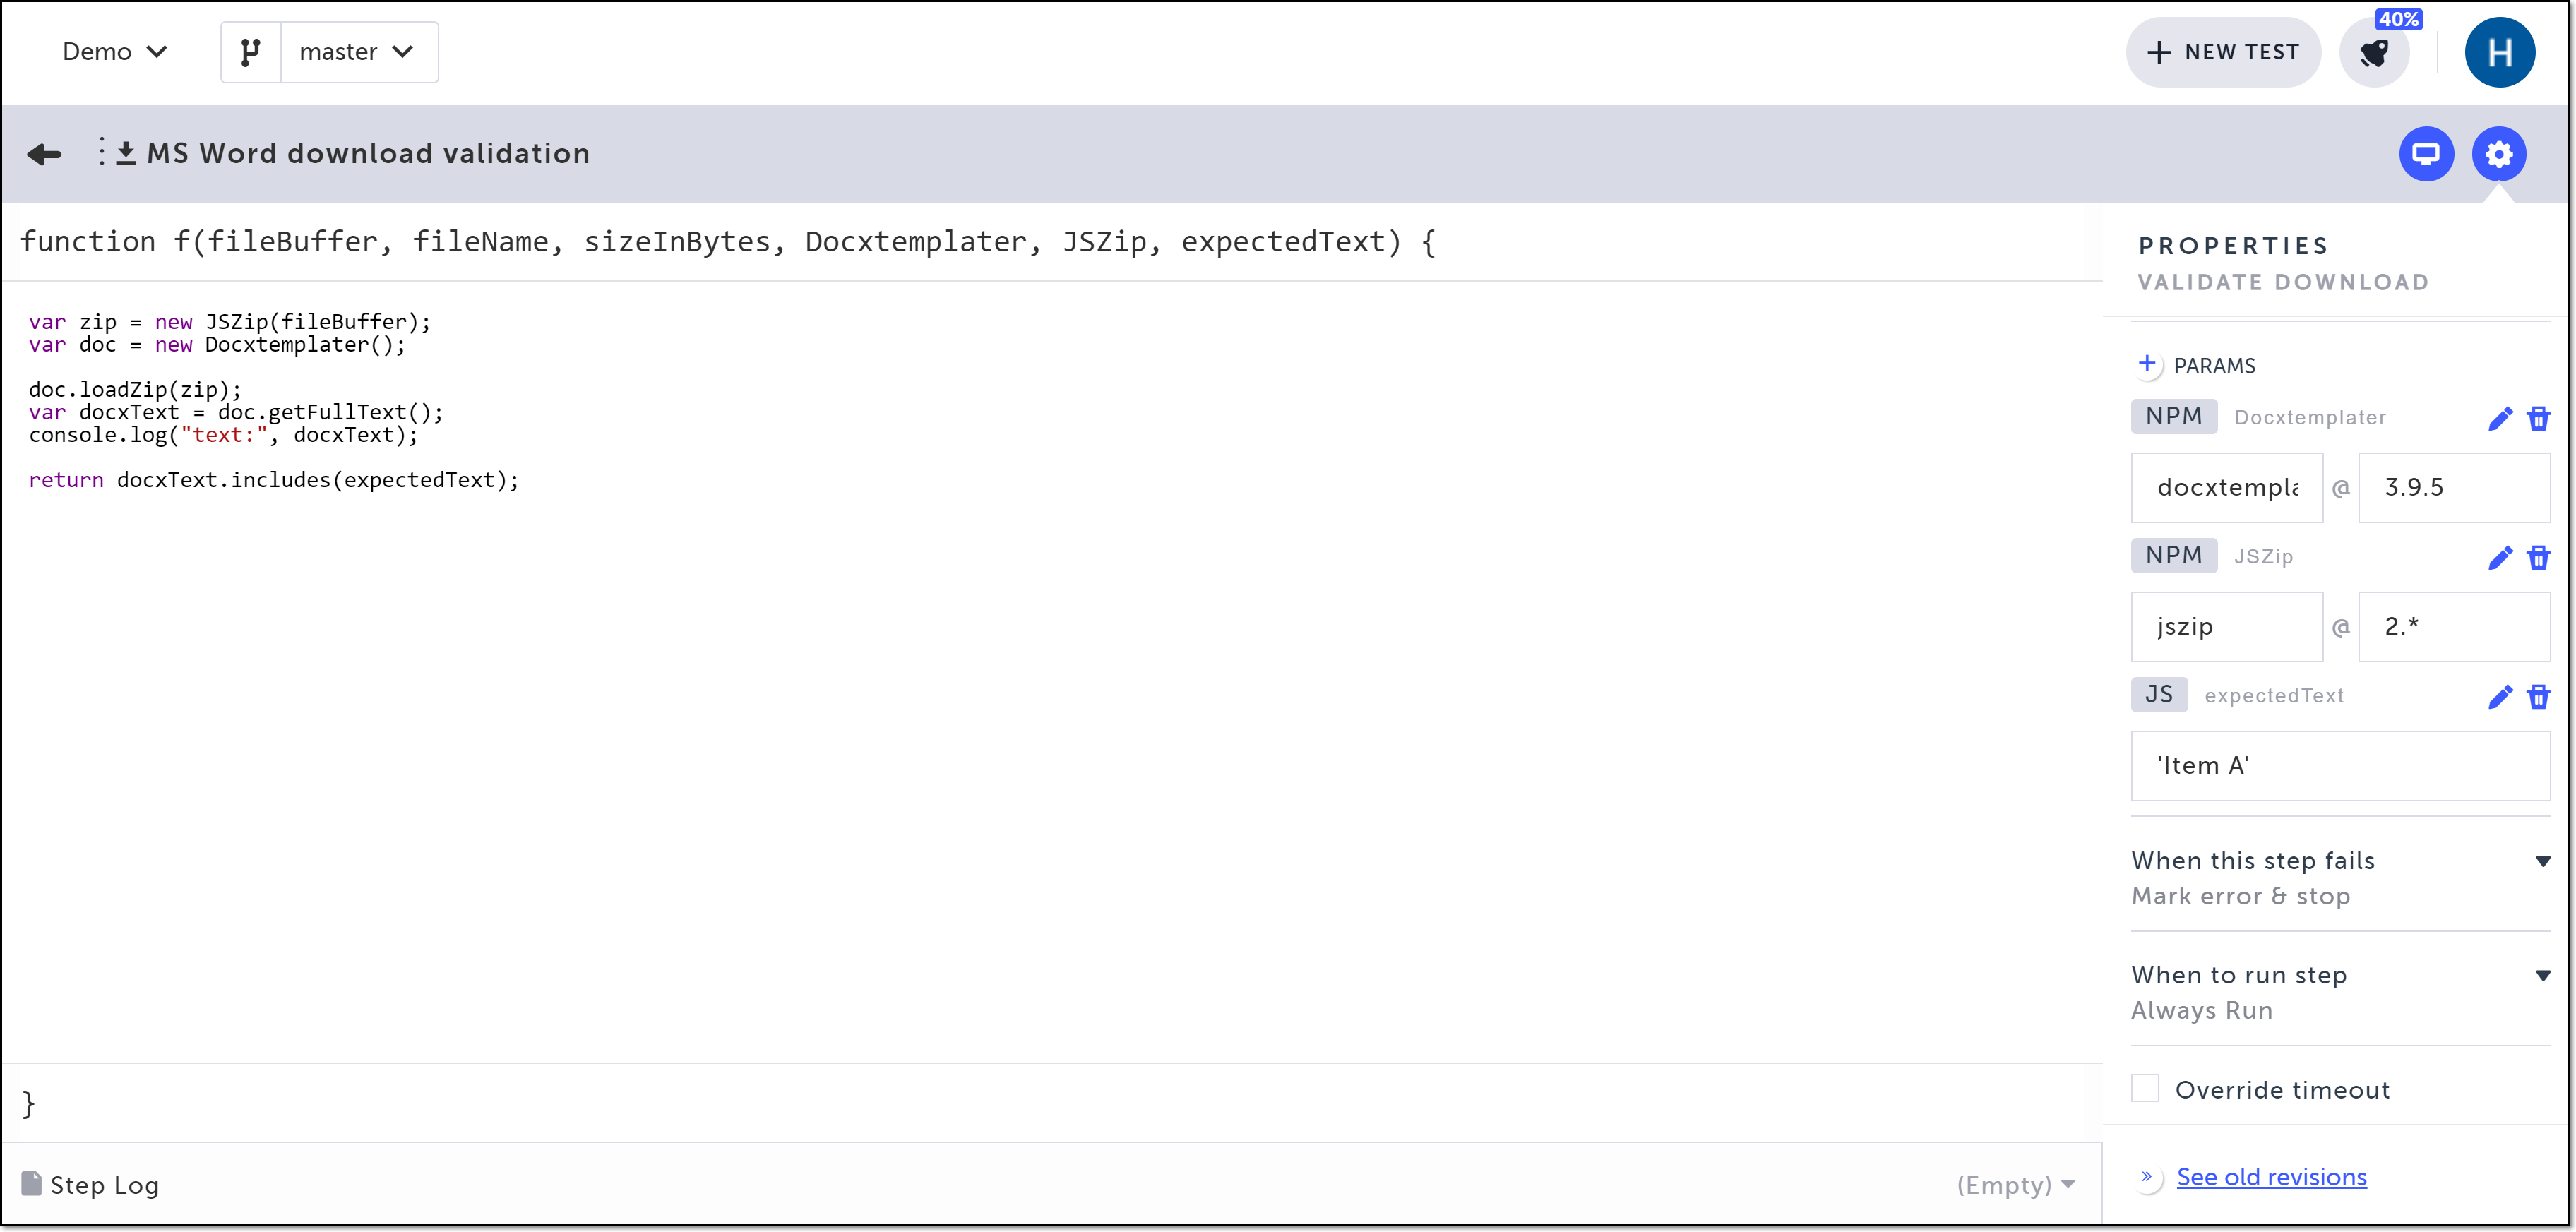
Example code:
var zip = new JSZip(fileBuffer);
var doc = new Docxtemplater();

doc.loadZip(zip);
var docxText = doc.getFullText();
console.log("text:", docxText);

return docxText.includes(expectedText);
Example Parameters:
| Name | Type | Value |
|---|---|---|
| Docxtemplater | Package | [[email protected]] |
| JSZip | Package | [jszip@2.*] |
| expectedText | JavaScript | 'Item A' |
JSZip only supports .docx files and does not work with .doc files. Ensure that you are working with the .docx format when using JSZip for download validation.
PDF files
You can use the _Validate download _step to perform advanced validations of PDF files such as number of pages and content.
Prerequisites:
- Ensure that you are running Chrome version 67 or above.
- Ensure that your Chrome browser PDF settings are set to the following: Download PDF files instead of automatically opening them in Chrome.
The code and parameters in this example check if the downloaded pdf file consists of 2 pages and contains the text A Simple PDF file.
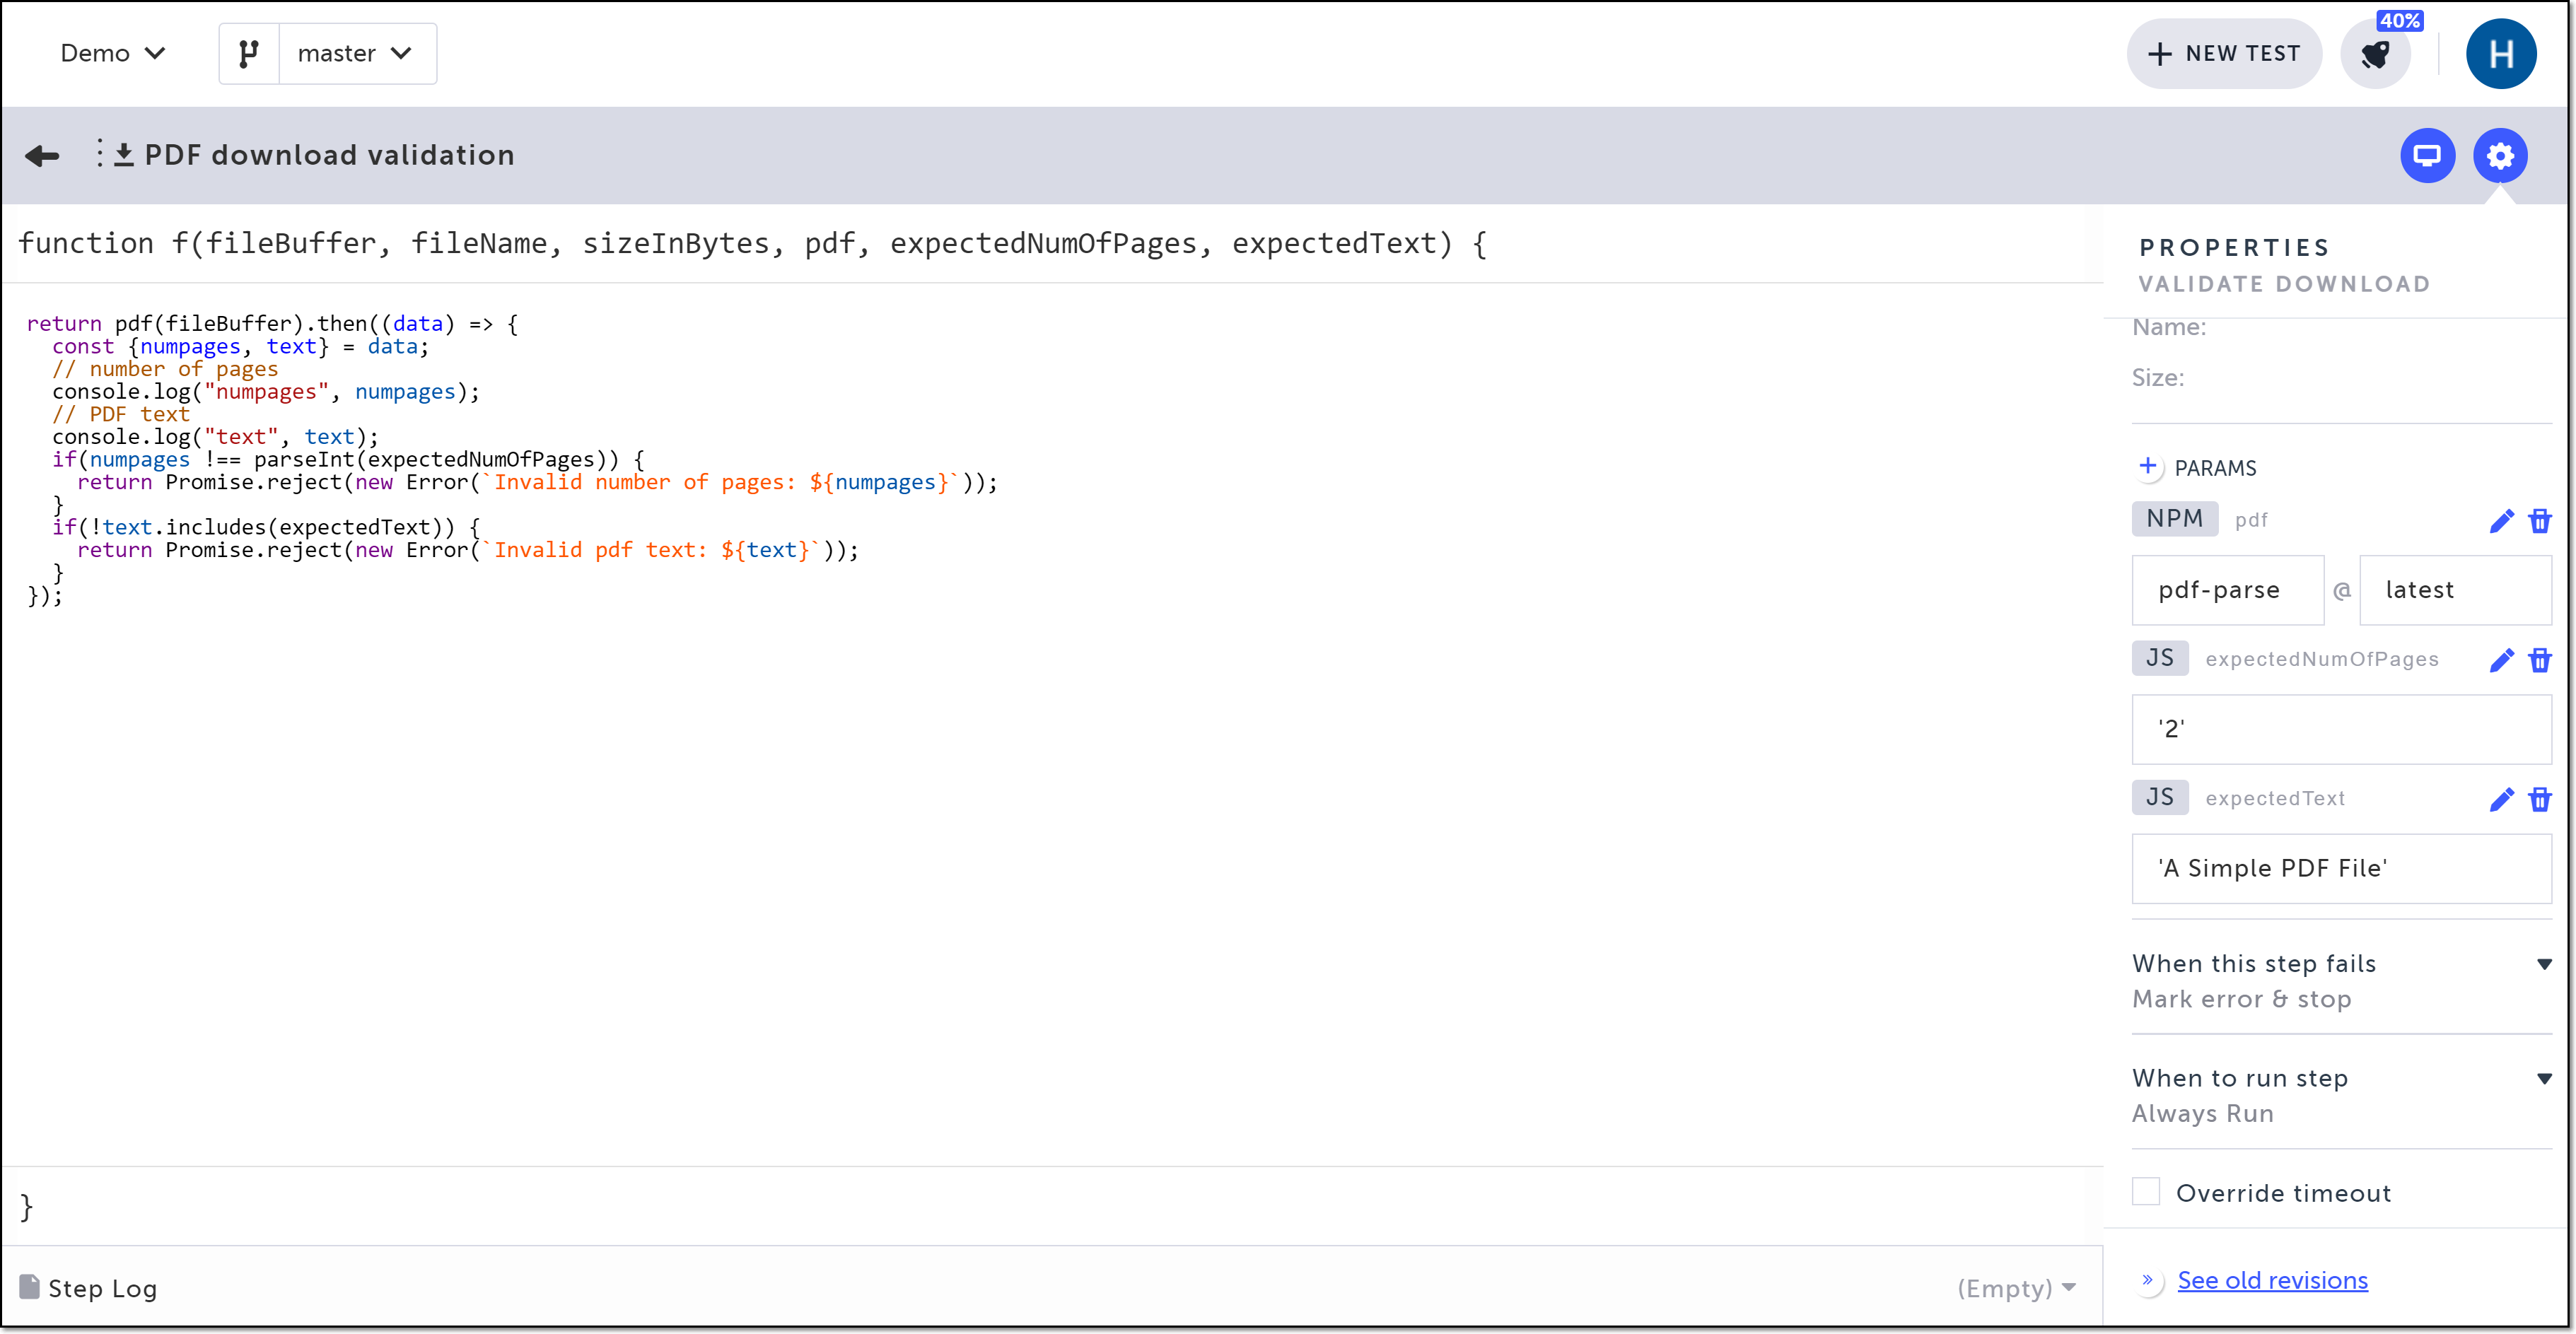
Example code:
return pdf(fileBuffer).then((data) => {
  const {numpages, text} = data;
  // number of pages
  console.log("numpages", numpages);
  // PDF text
  console.log("text", text);
  if(numpages !== parseInt(expectedNumOfPages)) {
    return Promise.reject(new Error(`Invalid number of pages: ${numpages}`));
  }
  if(!text.includes(expectedText)) {
    return Promise.reject(new Error(`Invalid pdf text: ${text}`));
  }
});
Example Parameters:
| Name | Type | Value |
|---|---|---|
| Package | [pdf-parse@latest] | |
| expectedNumOfPages | JavaScript | '2' |
| expectedText | JavaScript | 'A Simple PDF File' |
Updated 4 months ago
