Locators: Auto Improve
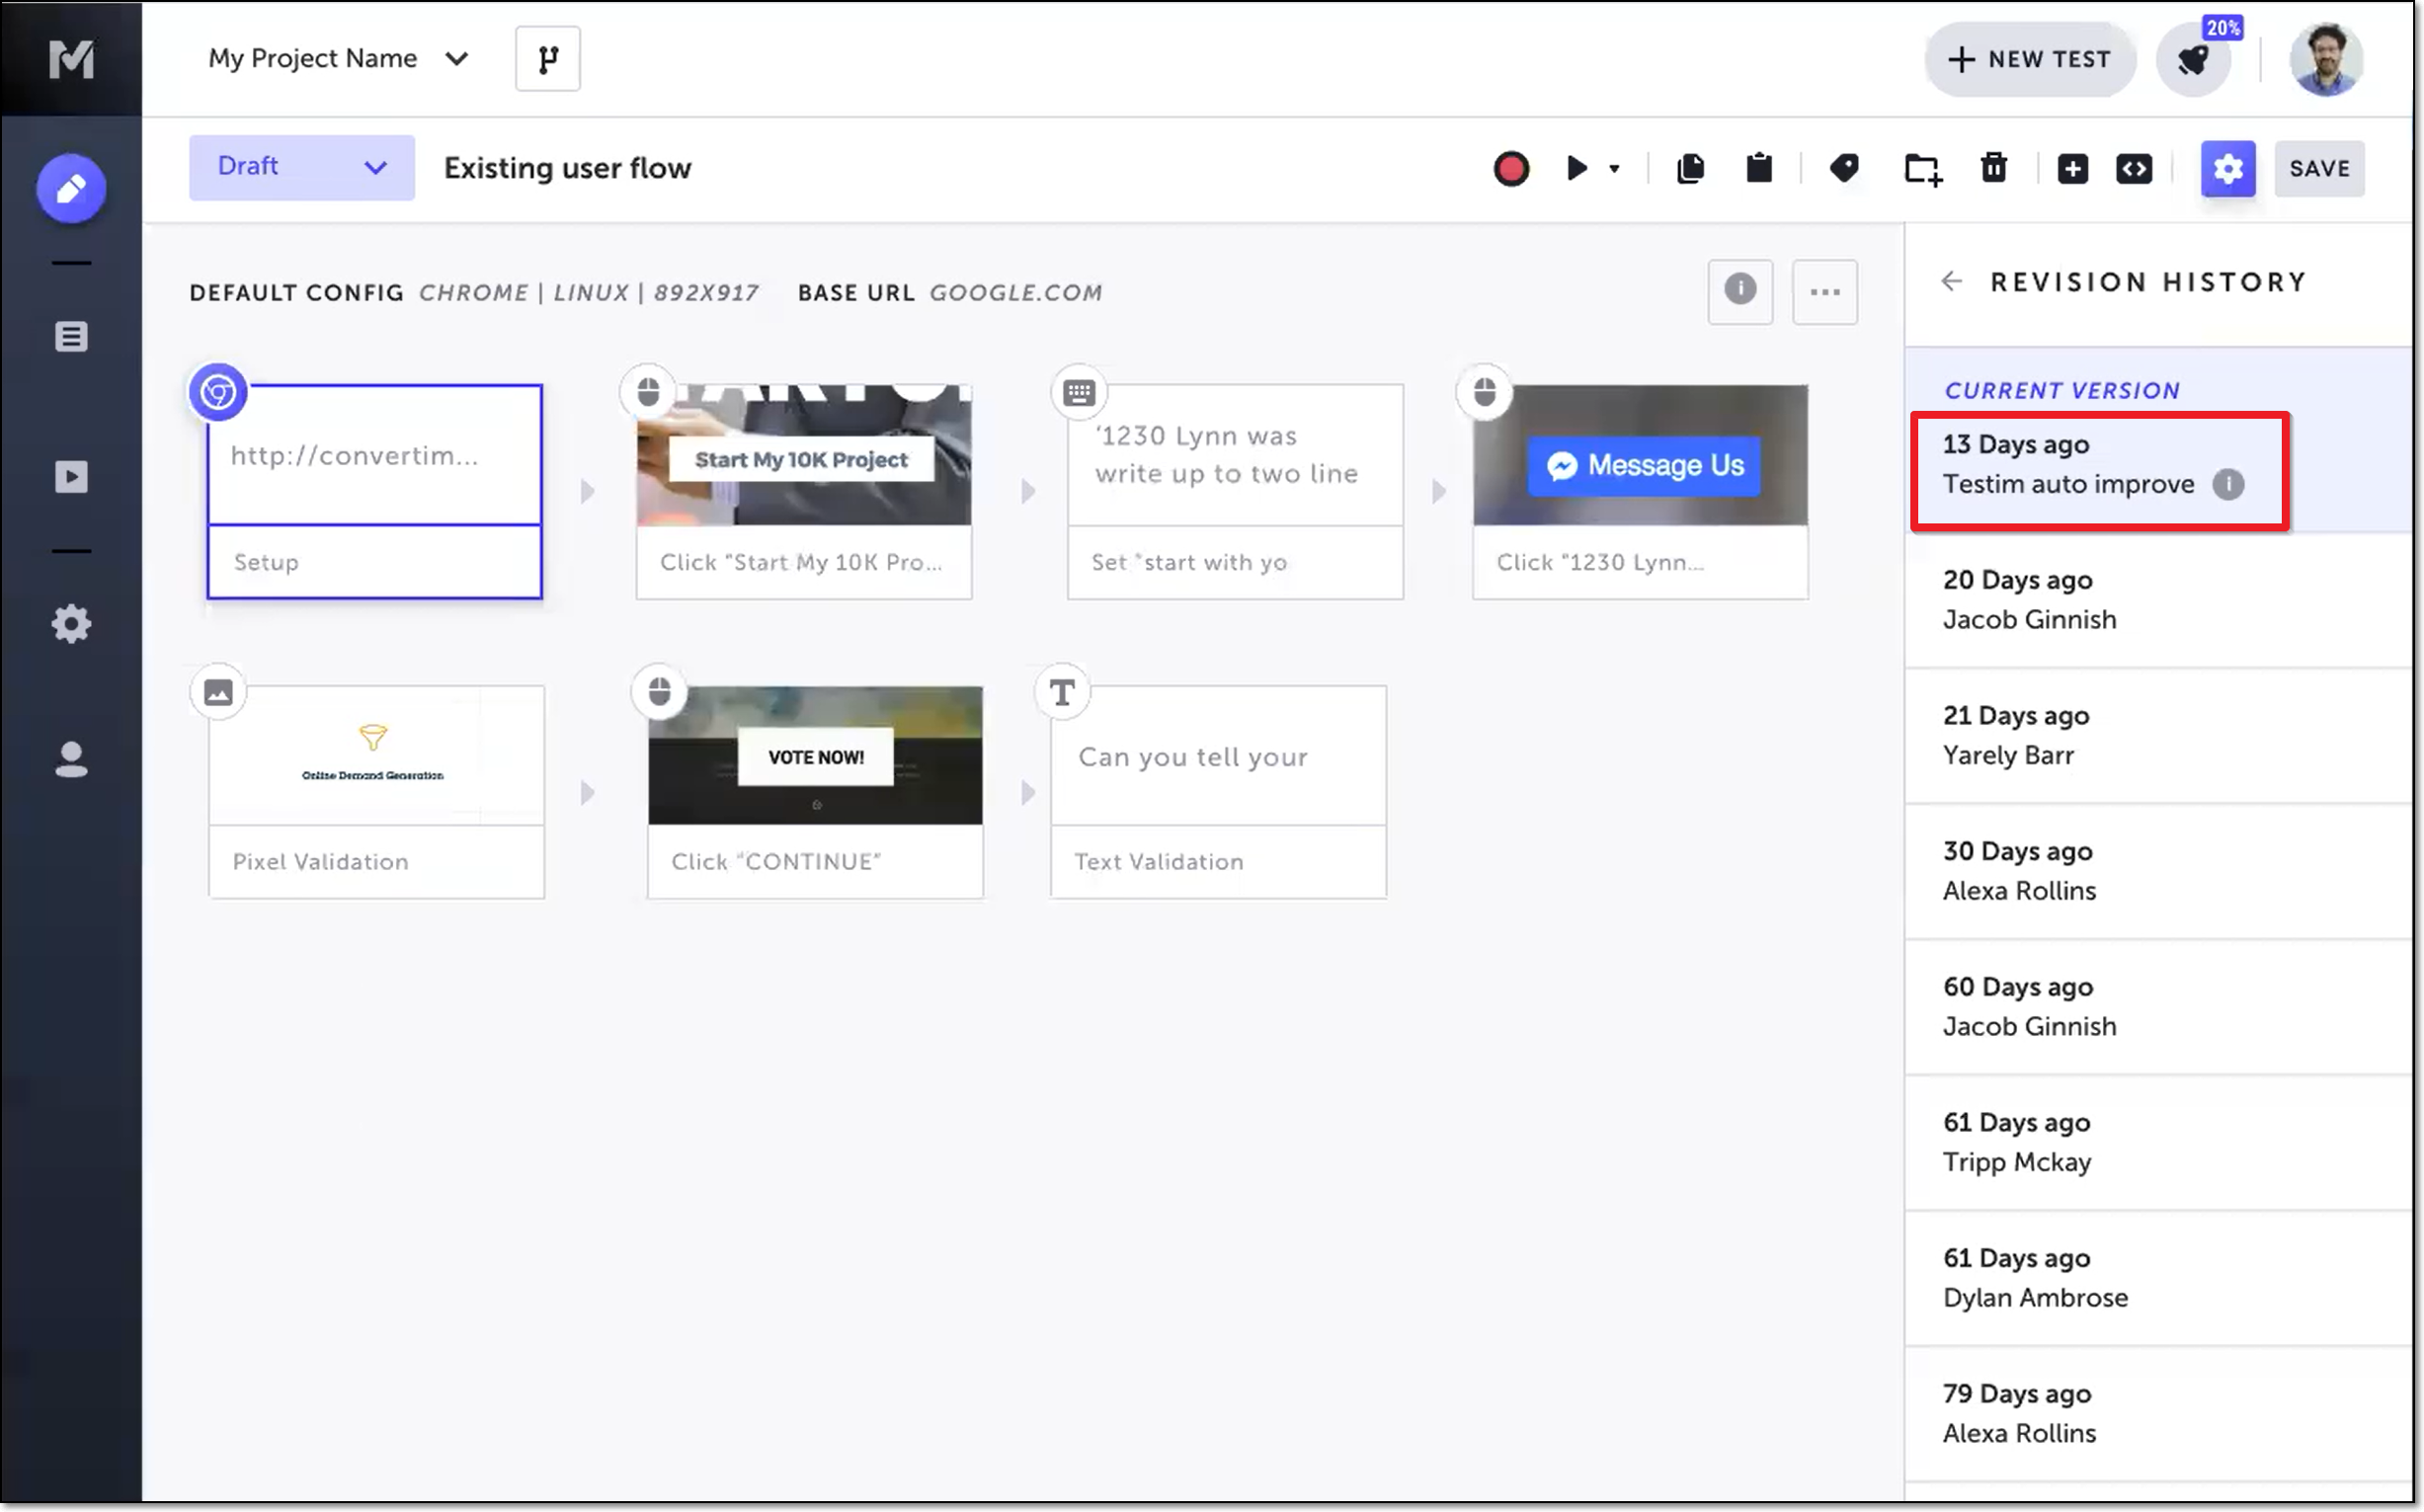
Over time, as your app changes, the locator scores of your elements can degrade. If a locator score drops below 70%, Testim automatically attempts to improve that locator in order to enhance the stability of your test. If the locator score is successfully improved, Testim replaces the degraded locator with the improved locator. This replacement is indicated in three different locations in the UI as described below: Revision History panel, Locators panel, and Test Library screen.
You can filter the tests in your Test Library by tests that have been auto-improved. Also, in the Test Editor you can view which steps have been auto-improved.
This feature is automatically applied only to tests run on the master branch (that is not a master read-only branch). Users can optionally activate this feature for master read-only branches. Tests run on other branches will not have their locators auto-improved.
Revision History Panel
Testim creates a test revision and labels it “Testim auto improve”. You can also view which steps in a test have been auto-improved.
To view which steps have been auto-improved:
- Open a test that has been auto-improved.
- Toggle the Show improved steps switch to the right.
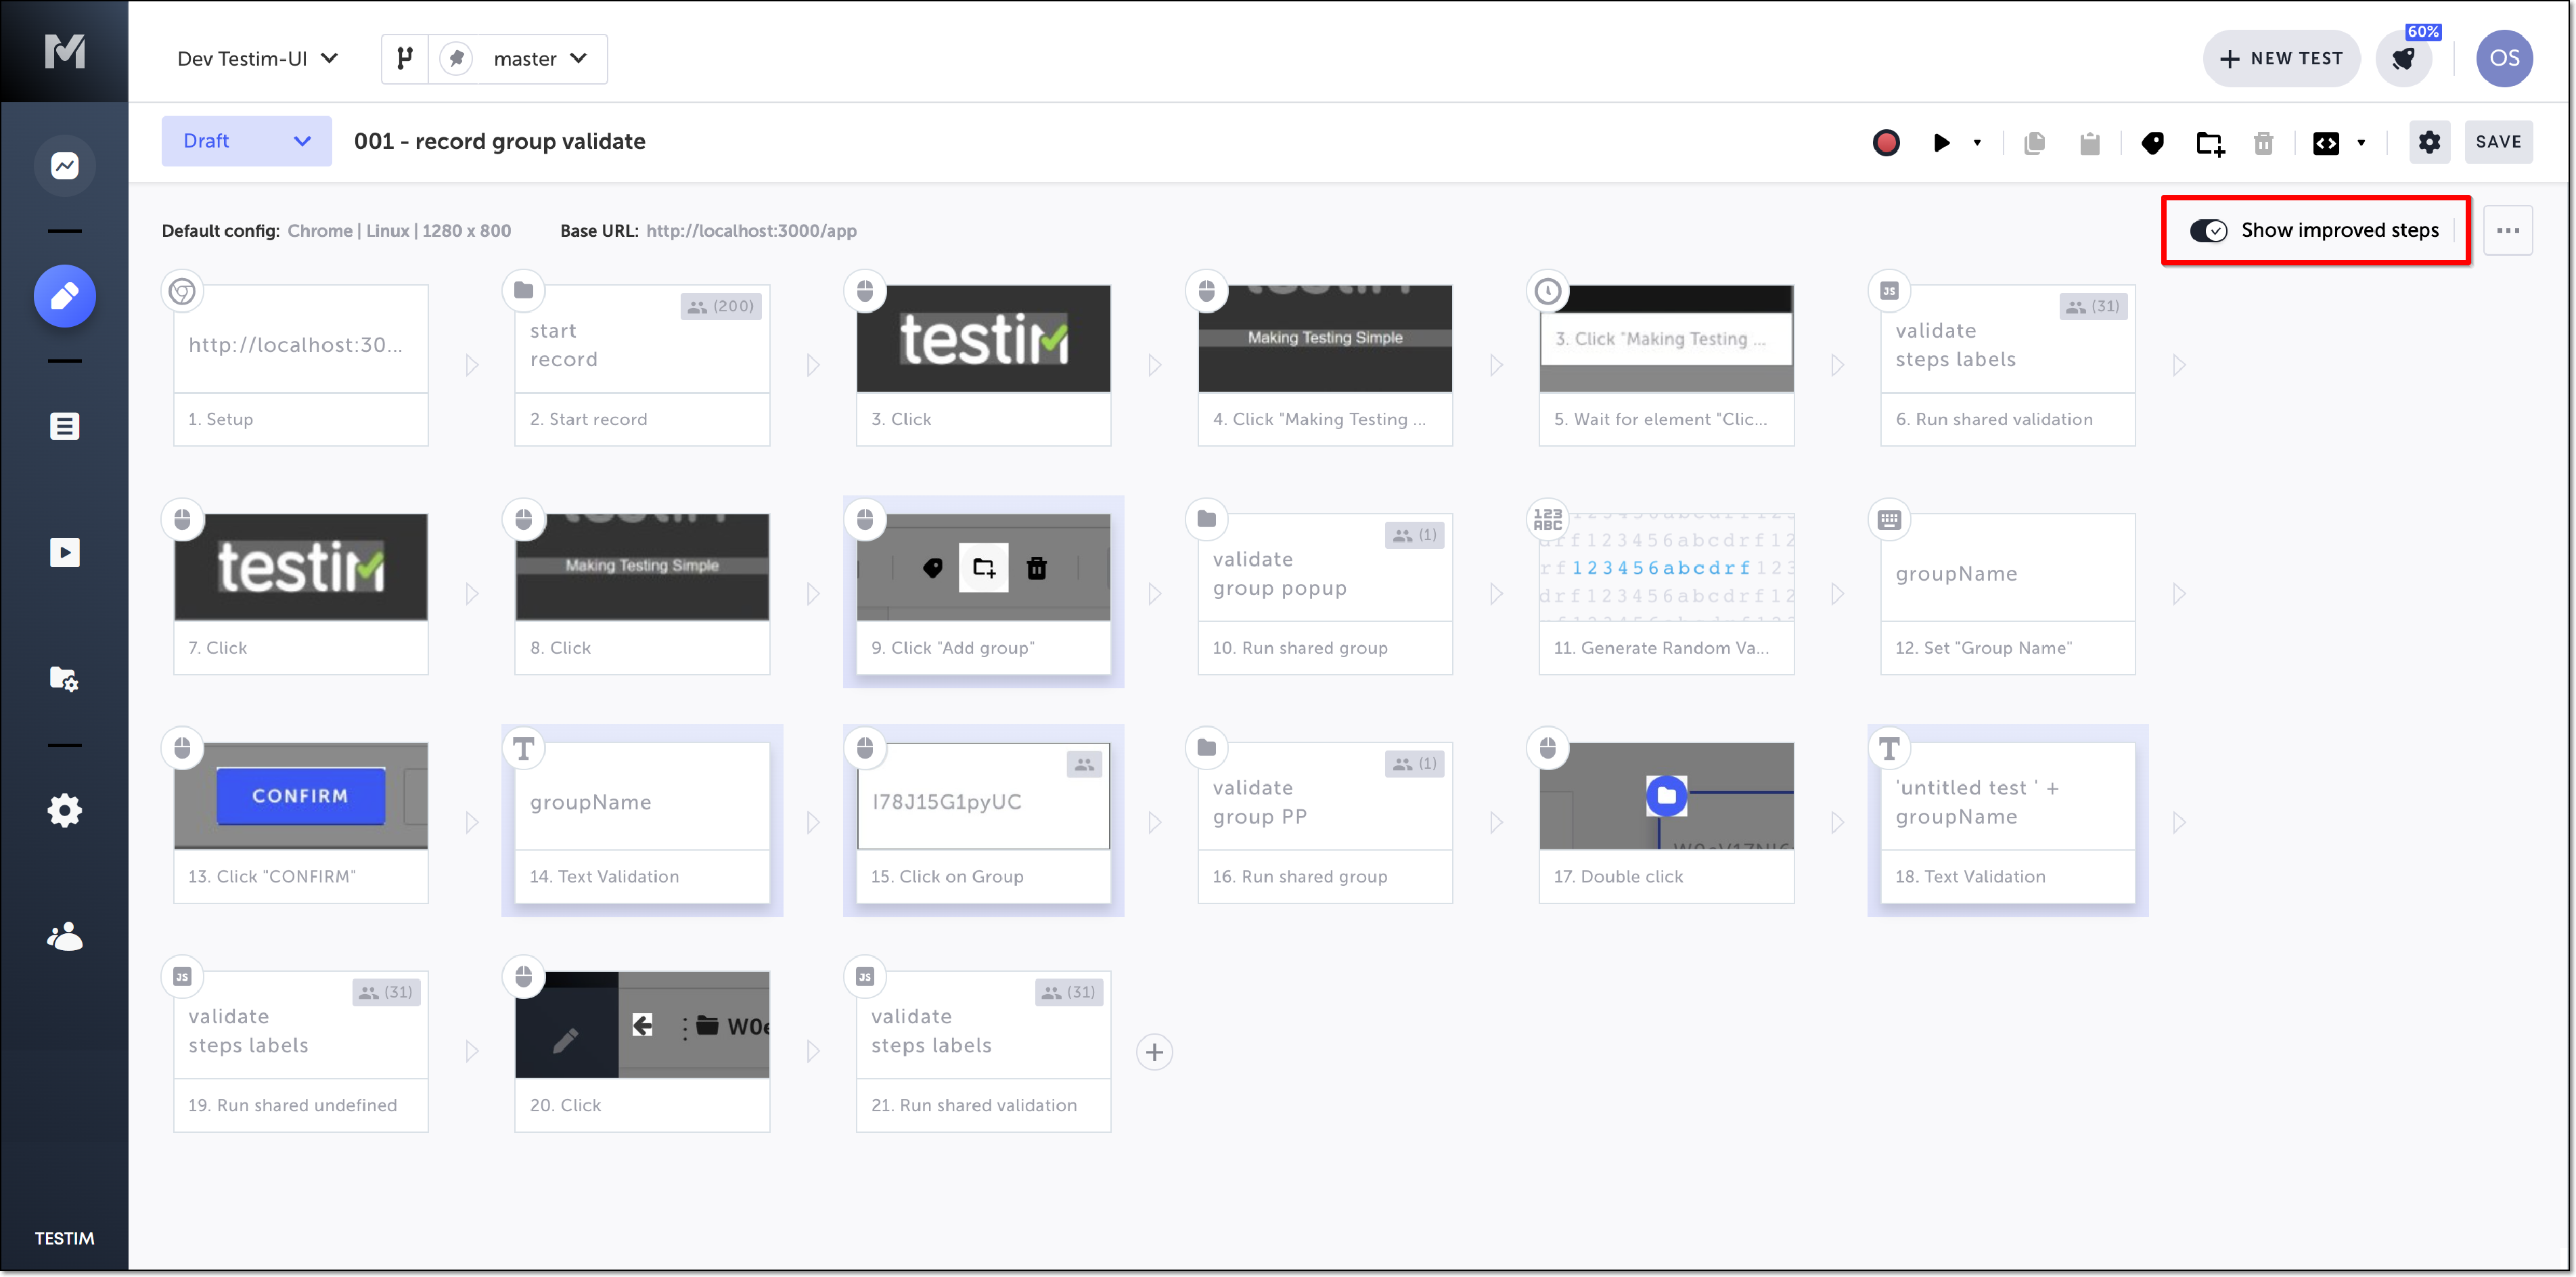
The steps that have been auto-improved are highlighted.
Locators Panel
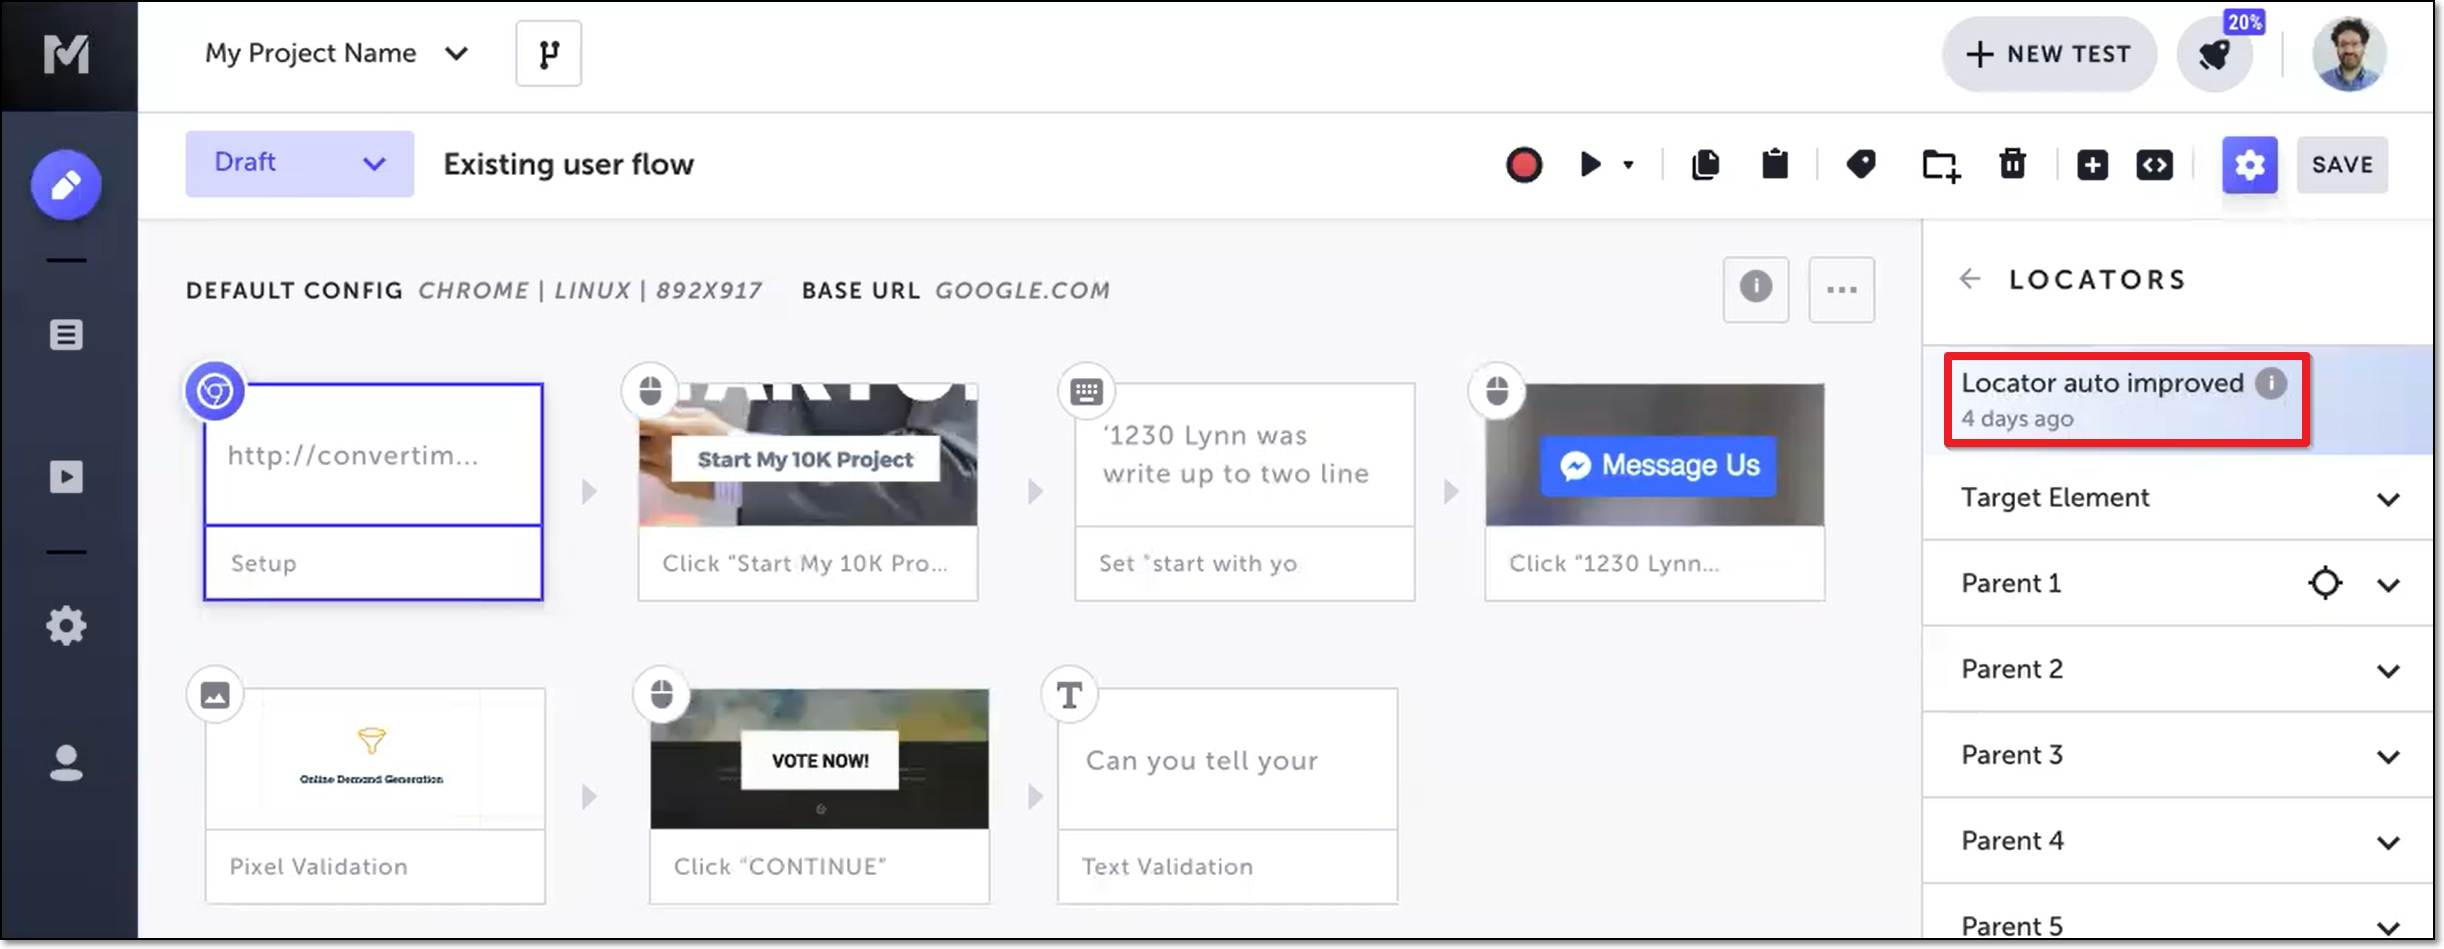
Testim inserts the “Locator auto improved” message at the top of the Locators panel for the locator that was auto-improved.
Test Library Screen
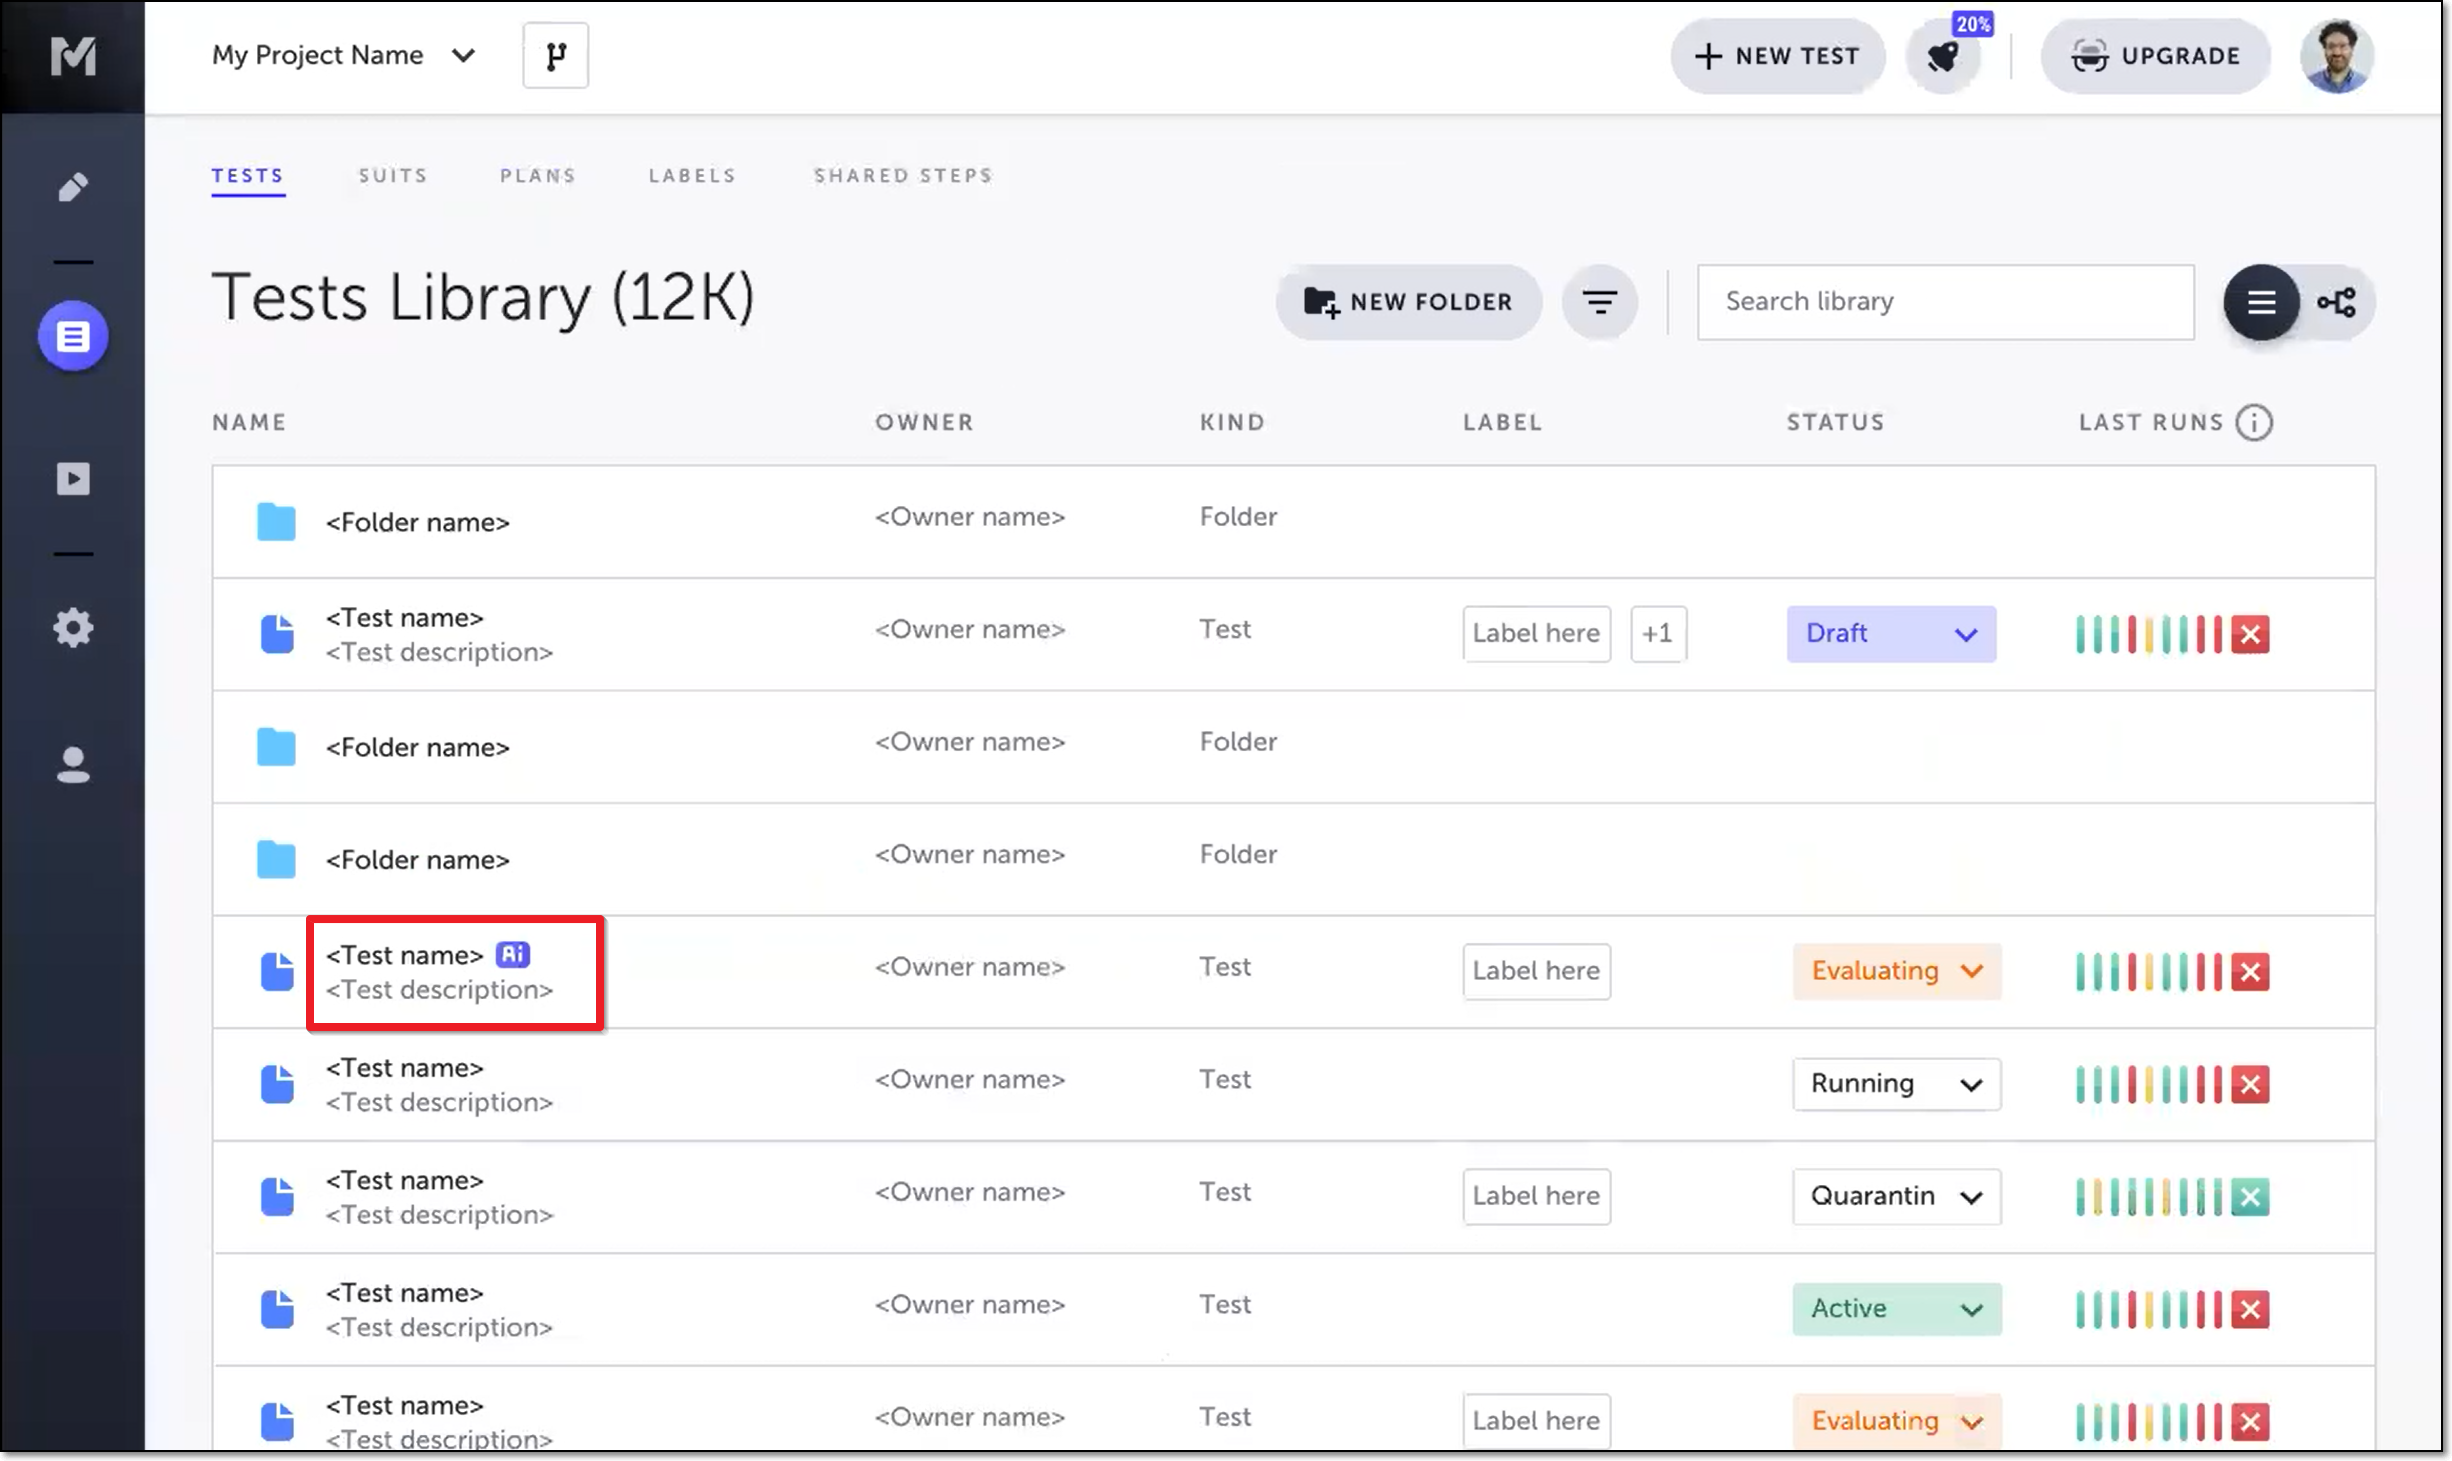
Testim inserts an “Ai” icon after the name of the test for which one or more degraded locators were replaced with auto-improved locators. The auto improve icon is shown for approximately two weeks.
Filtering the Test Library
You can filter the test list in your Test Library by tests that have been auto-improved. For more information on filtering the Test Library, see Filtering the Test Library.
To filter the Test Library by auto-improved tests:
- In the Test Library screen (Test List > Tests) click the Advanced filters icon.
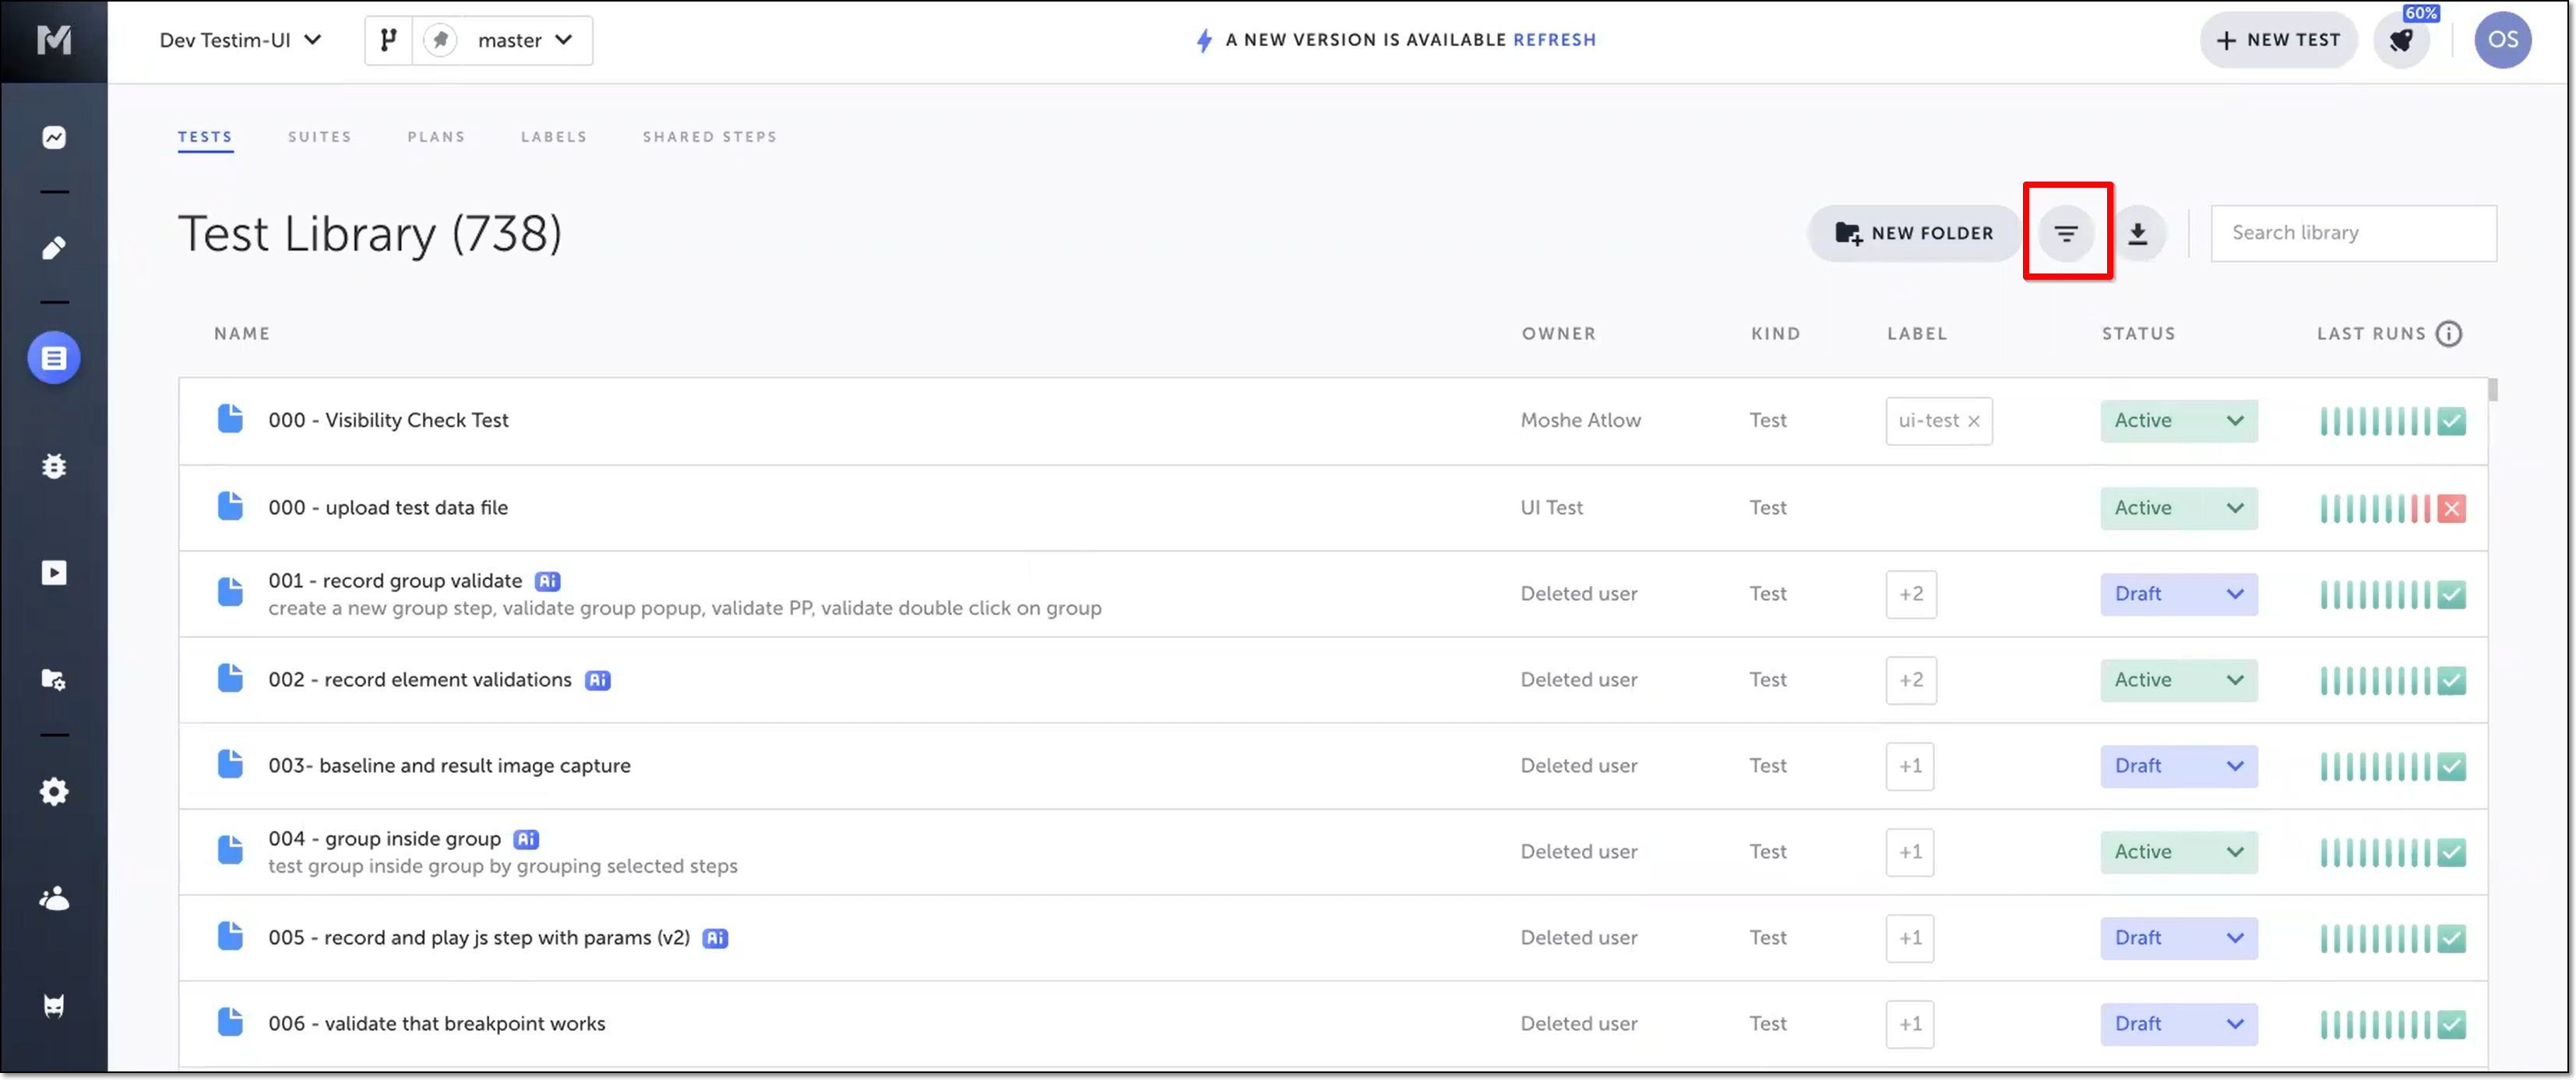
The Filter Test pane opens on the right hand side.
2. In the Filter Test pane, scroll to the bottom and select the Auto Improved toggle.

- Click Apply.
The filter is applied, and only those tests that have been auto-improved are shown. - Click the "X" in the upper right of the Filter Test pane to close it.
Closing the Filter Test pane without resetting the filters will not reset them, and only the tests that meet the filter criteria will be shown. To view all of your tests and folders again, you will need to reopen the Filter Test pane and click Reset filters.
Allowing Auto Improve on a Master Read Only Branch
By default, the auto-improve feature only runs on master branches that are not set as read-only. You can modify the settings to allow the auto-improve feature to run on master read-only branches.
To configure the auto-improve feature to run on master read-only branches:
- On the Settings > Project page of your master read-only branch, click Pull Requests.
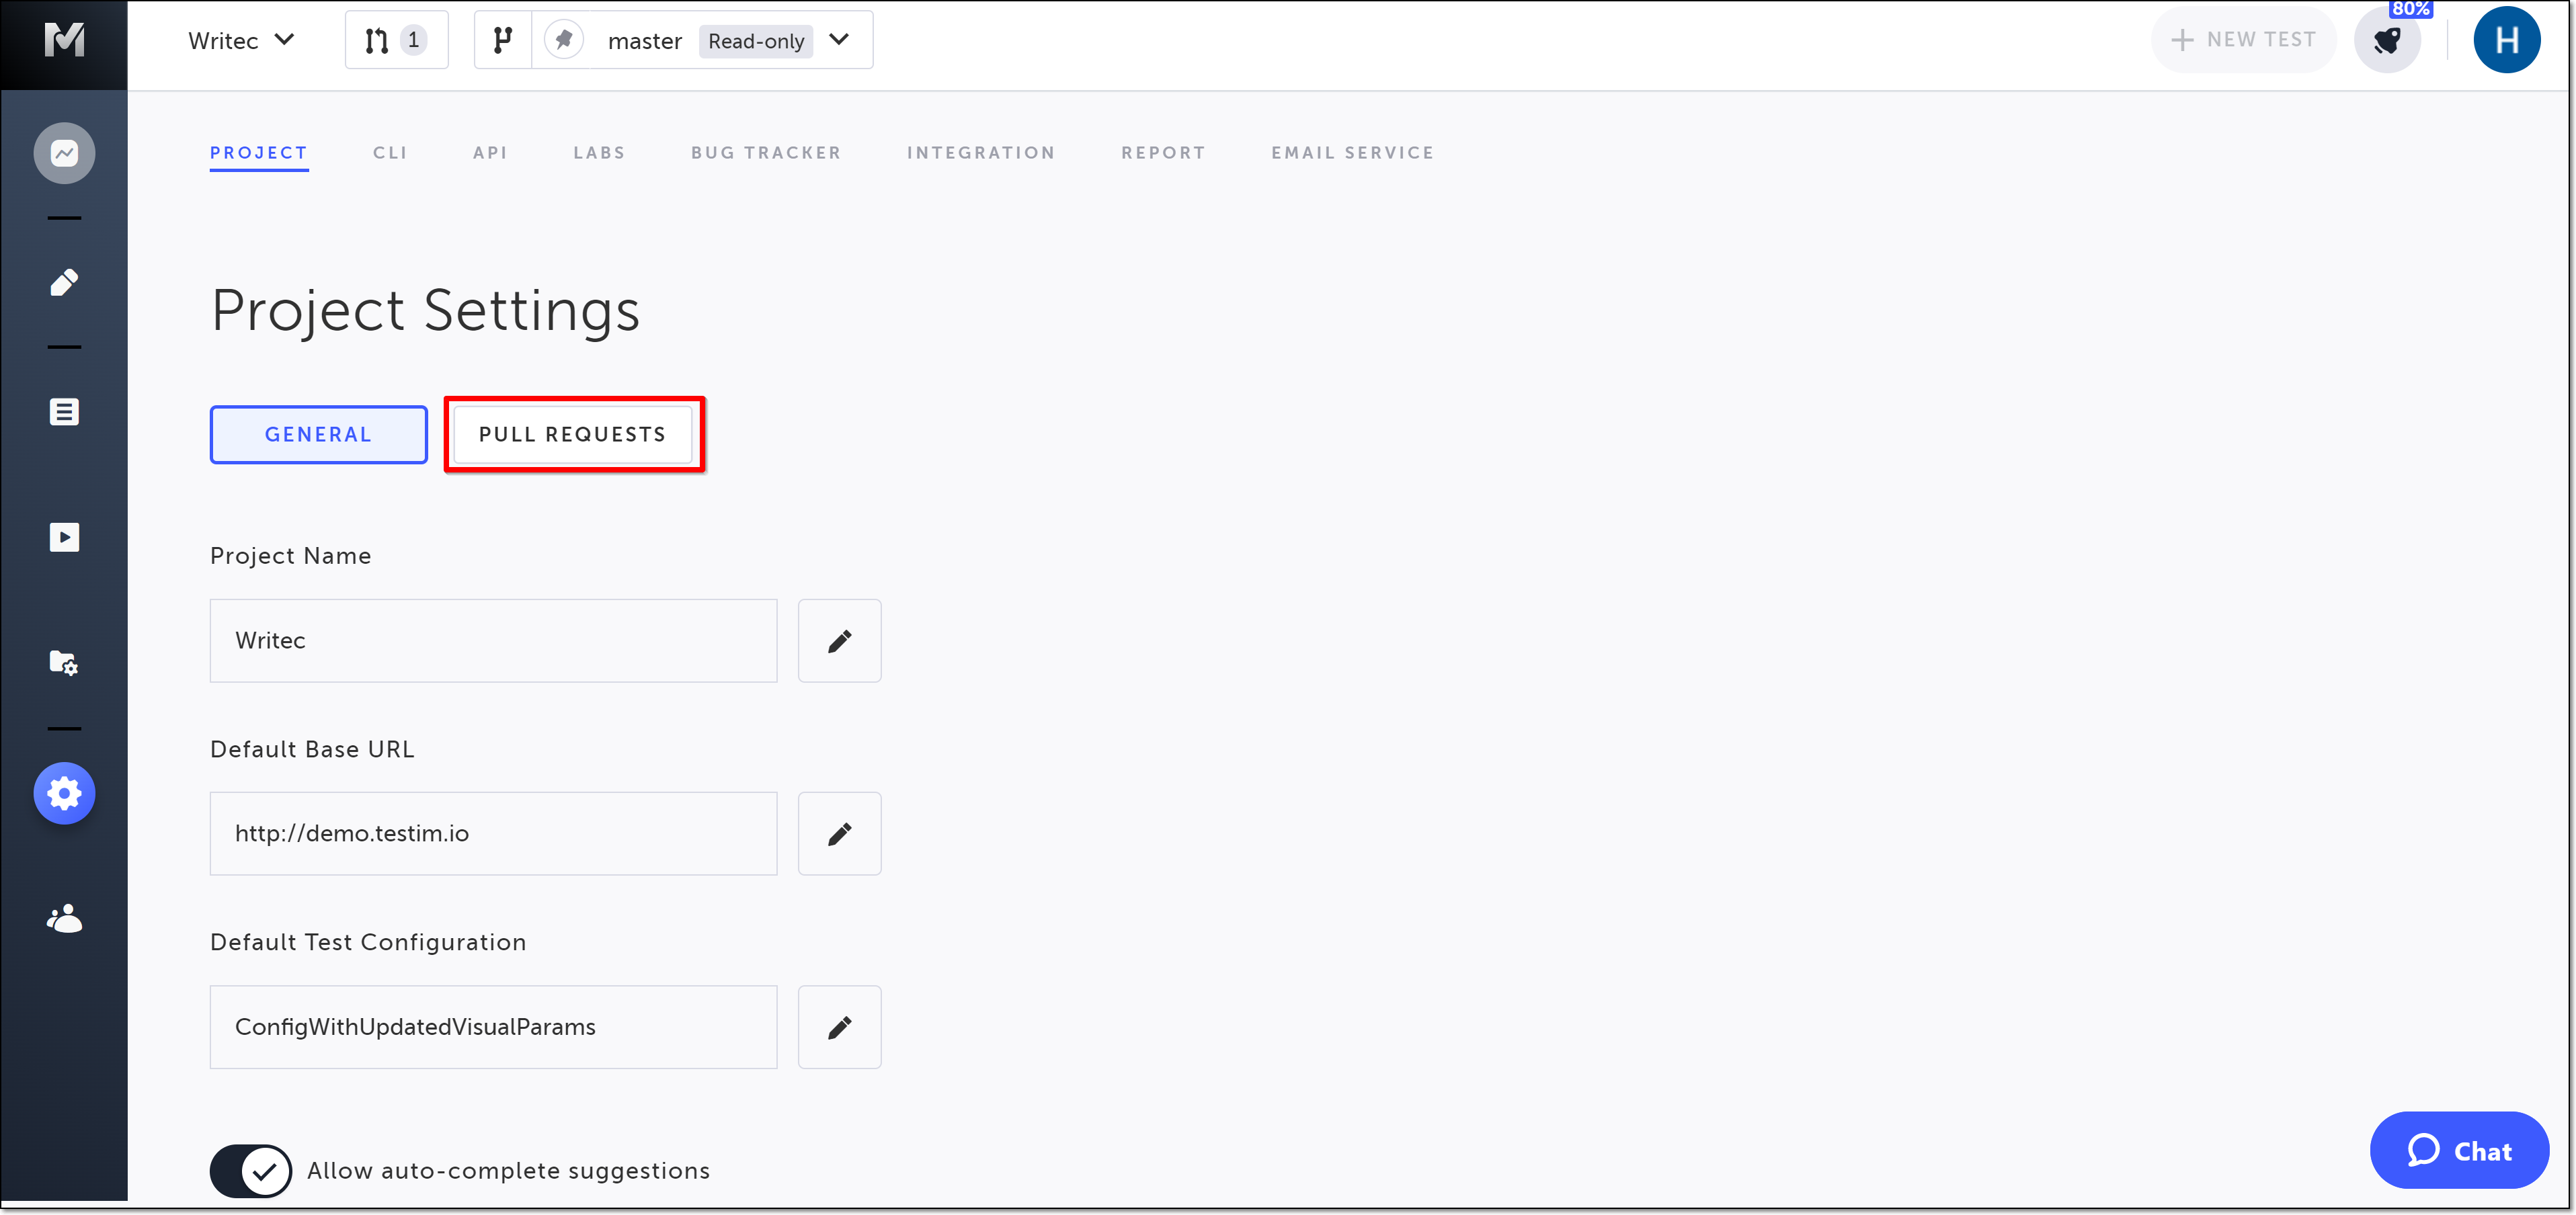
The Pull Requests tab is shown.
2. Toggle the Allow Auto-Improve on master switch to the right.

The auto-improve feature is now enabled for this master read-only branch.
Updated 5 months ago
