Bamboo integration

In order to integrate your tests with Bamboo, first you need to have Node.js (version >= 6.0.0) installed on the Bamboo server or one of its agent machines.
Now, just follow these steps:
1. Create a New plan in Bamboo:

1.1. Enter plan name (e.g. "Testim Tests"), choose repository host "None" and click "Configurate plan":
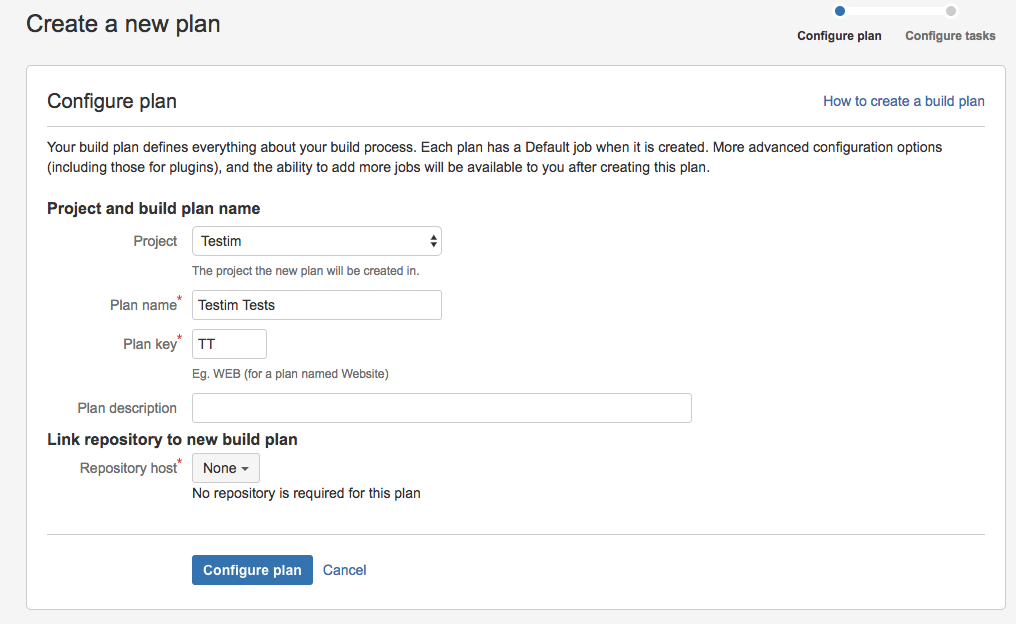
1.2. Select "Yes please!" checkbox under "Enable this plan?" section:

2. Add install Testim CLI task:
2.1. Click on "Add task":
2.2. Choose "npm" task:
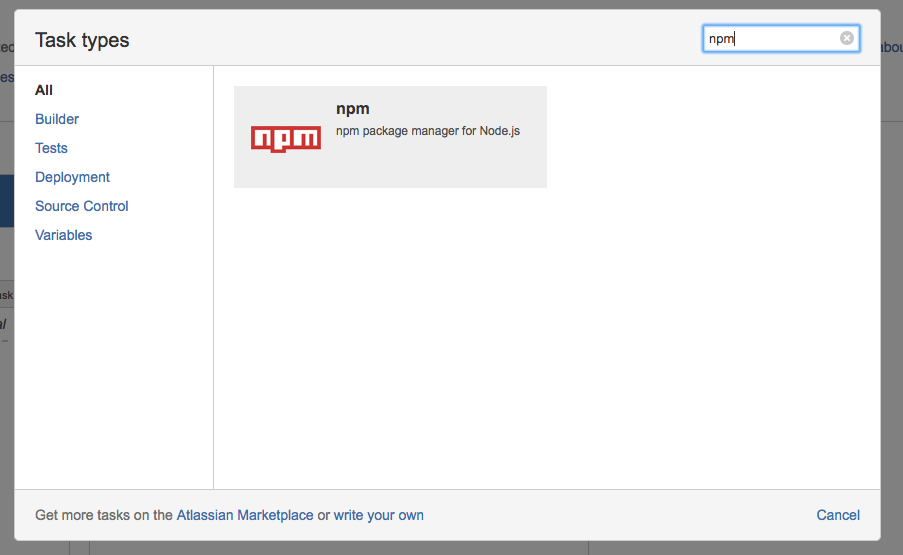
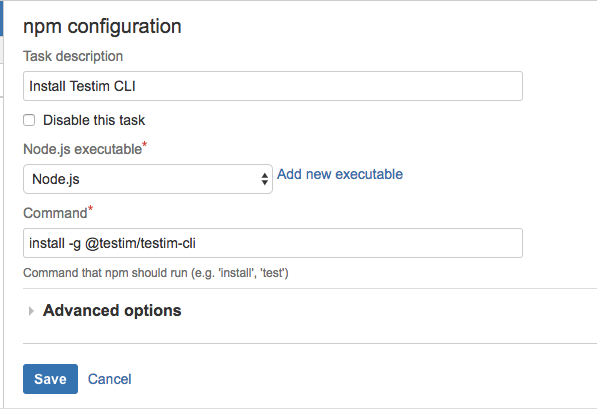
2.3. Enter task description (e.g "Install Testim CLI")
2.4. Choose existing Node.Js executable or add new with Node.Js path
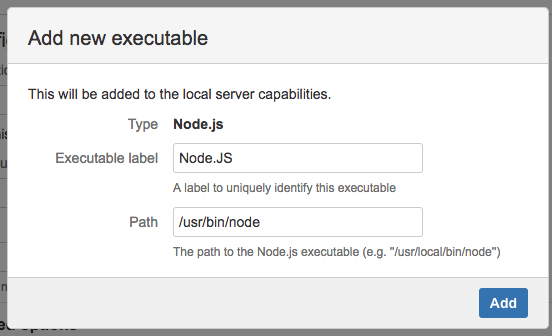
2.5. Insert Command:
install -g @testim/testim-cli2.6. Click "Save":
3. Add run Testim CLI task:
3.1. Click on "Add task":
3.2. Choose "Command" task:
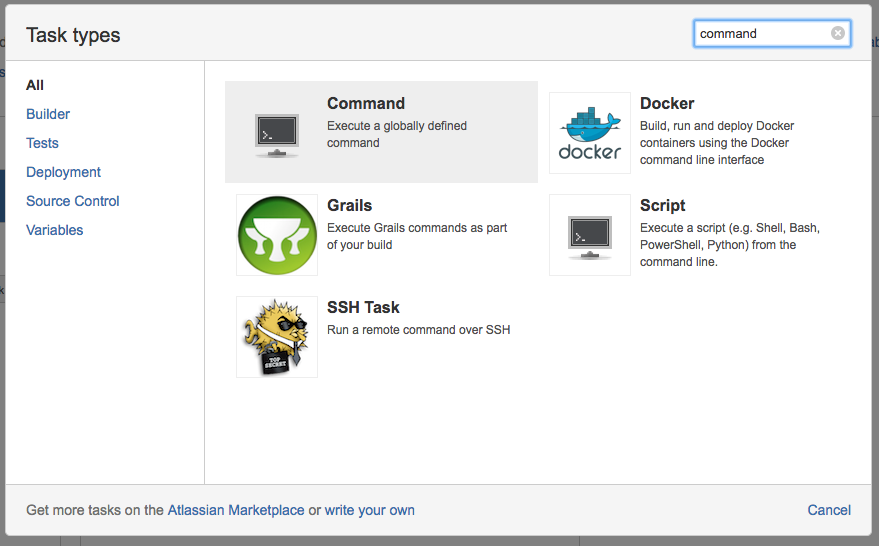
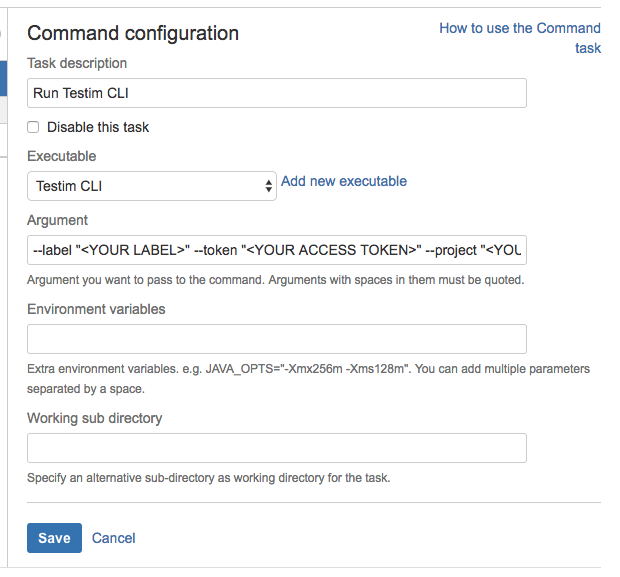
3.3. Enter task description (e.g "Run Testim CLI")
3.4. Choose existing "Testim CLI" executable or add a new "Testim CLI" executable:
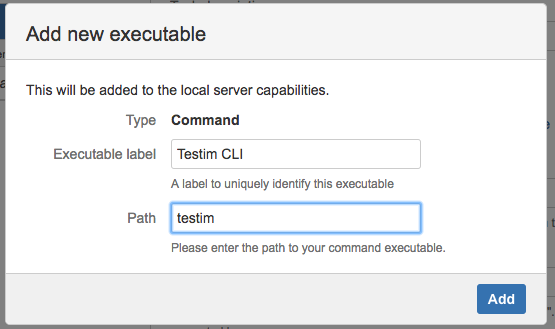
3.5. Insert argument:
--label "<YOUR LABEL>" --token "<YOUR ACCESS TOKEN>" --project "<YOUR PROJECT ID>" --grid "<Your grid name>" --report-file ${bamboo.build.working.directory}/testim-tests-${bamboo.buildNumber}-report.xmlNote: For the grid name, read here how to set up your grid.
3.6. Click "Save":
4. Add collect test results task
4.1. Click on "Add task":
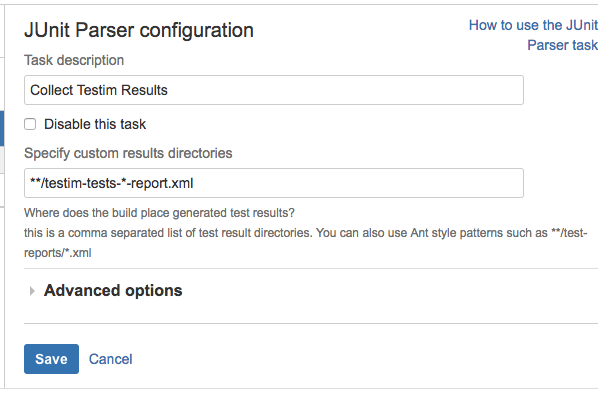
4.2. Choose "JUnit Parser" task:
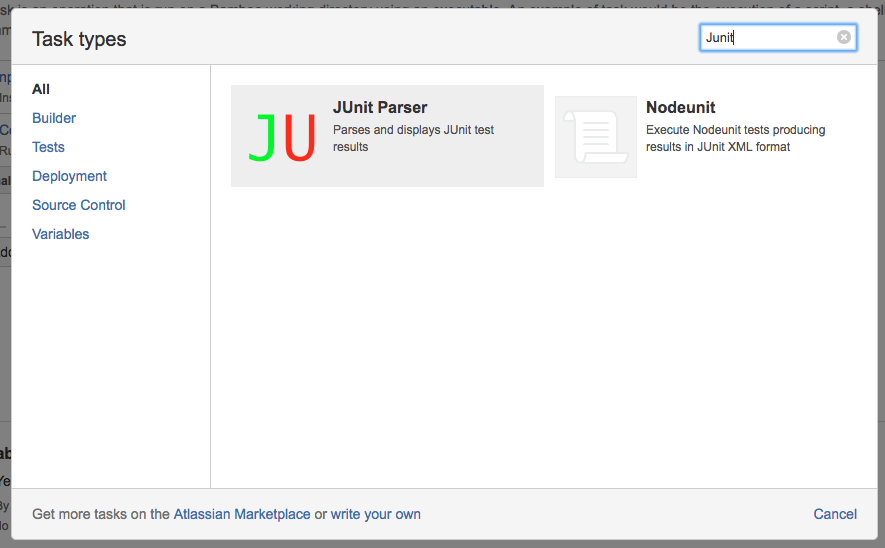
4.3. Enter task description (e.g "Collect Testim Results")
4.4. Insert "Specify custom results directories":
**/testim-tests-*-report.xml4.5. Click "Save":
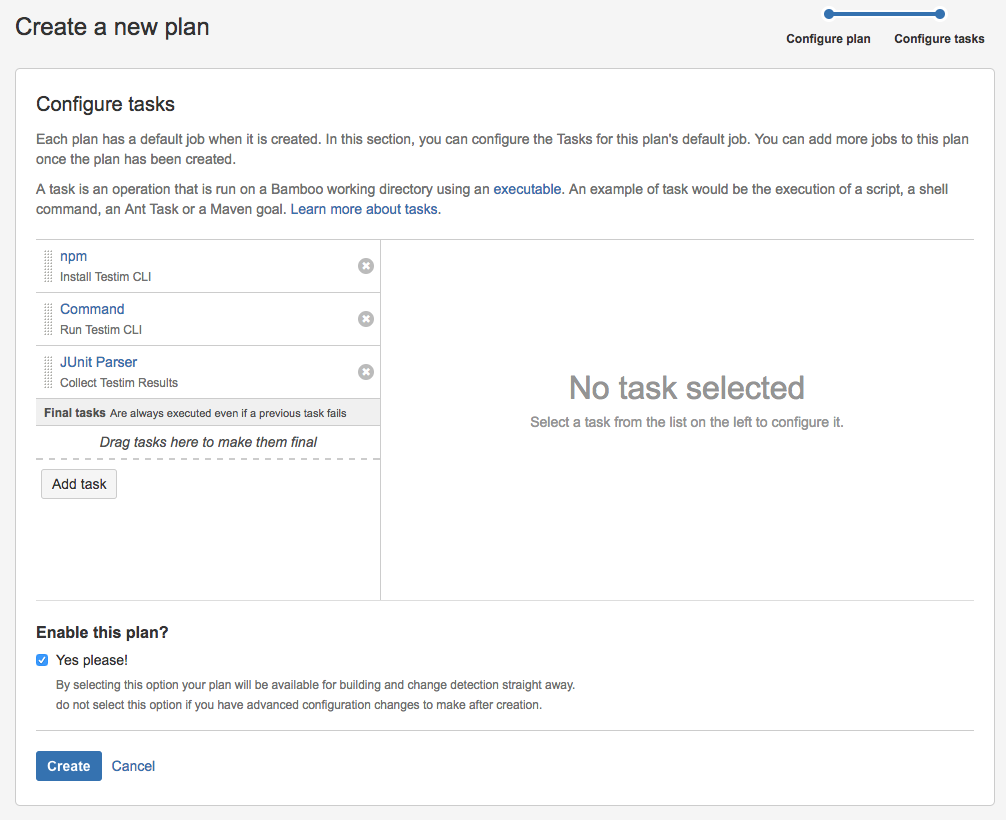
5. Click on "Create"

6. Run Plan
6.1. Click on Run button

6.2. Wait until plan finished
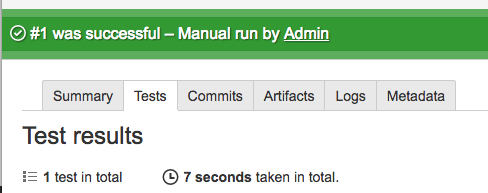
6.2. Check Tests results
Updated 5 months ago
