Mobile Test Editor Screen
The Mobile Test Editor screen displays the current mobile test and the Application Under Test (AUT) Viewer.
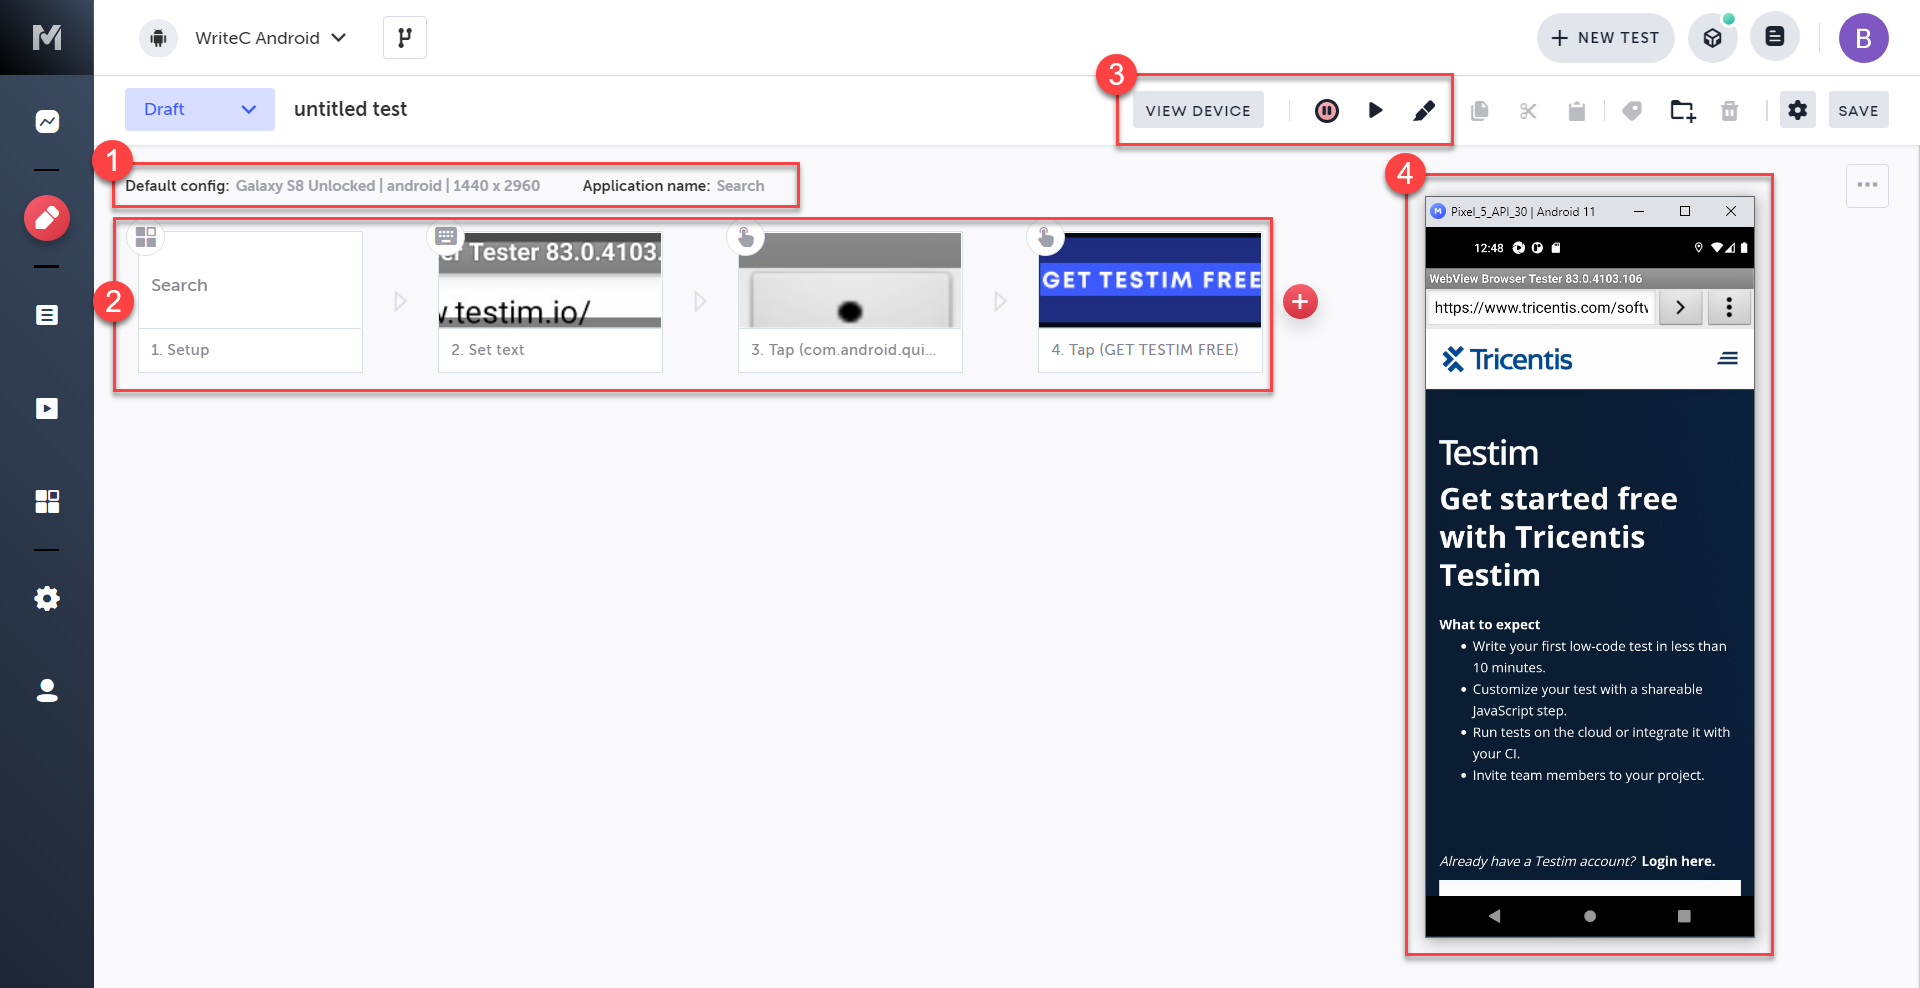
The Mobile Test Editor screen has the following sections, as displayed in the image above:
- Device and Mobile Application Information - displays information about the physical or virtual device and mobile application used for the test.
- Mobile Test Steps - displays the recorded steps for the mobile test.
- Mobile Test Action Panel - displays actions you can take to interact with your mobile test.
- Application Under Test (AUT) Viewer - a viewport that allows you to interact with a physical or virtual device connected to Testim.
Device and Mobile Application Information

The Device and Mobile Application Information section of the test editor displays the following information:
- Target Device: displays the configuration information of the device that is currently used for the recording/playback session, including information about the target mobile device, operating system, and display resolution.
- Application Name: displays which mobile application is being used for the test.
Note:To add virtual devices for use with Testim, you can use the following software:
- Android Devices: Android Studio with Virtual Device Manager
- Apple Devices: XCode iOS Simulator
Change Mobile App Used for the Test
The mobile test can only test one application at a time. You can change the application being tested at any time.
To change the mobile app used for the test:
- Click the Edit icon next to the current Application Name.

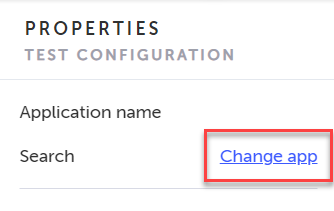
- From the Properties panel, click the Change app link.
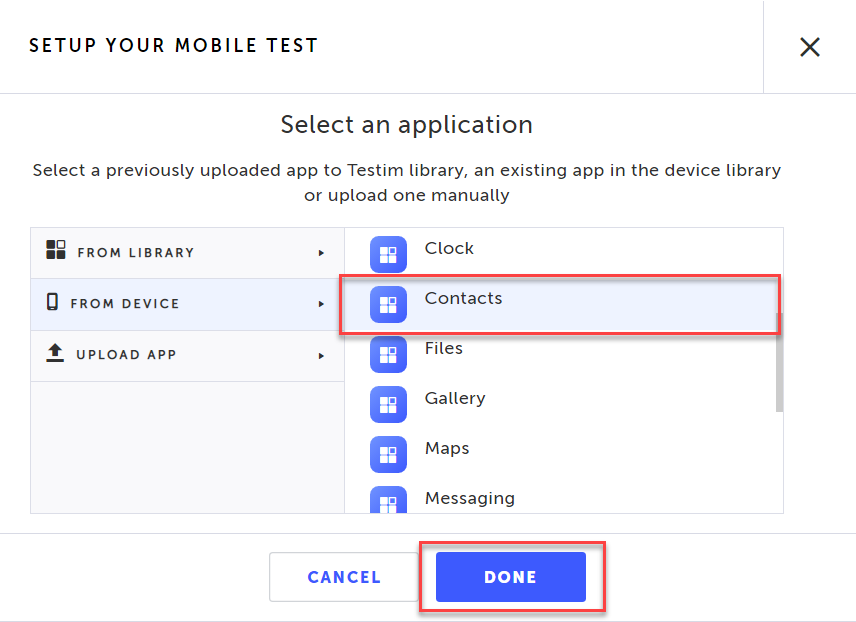
- Select or upload a New App and click the Done button.
Note:Changing to a completely different app after recording a test is not recommended. Changing apps is helpful when you want to test a new version of the same app.
Mobile Test Steps

After you have recorded a test, the test steps will be displayed in sequence in the editor. The following information is displayed for each test step:
- Step Number
- Step Type
- Thumbnail of the element interacted with (button, image, text, etc.)
View Test Step Properties
After a test step has been recorded, you can view the test step properties.
To view the test step properties:
- Click the Show Properties icon for the step.
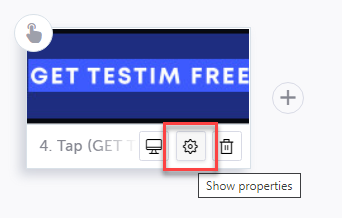
The step Properties panel is displayed.
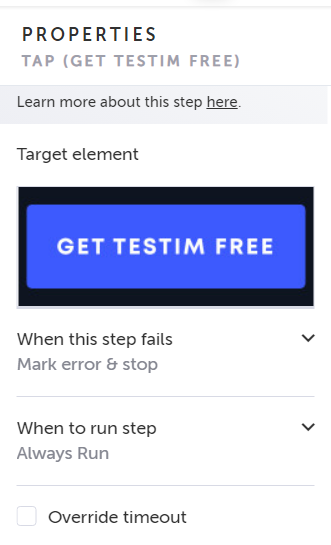
The following information is displayed in the step Properties panel:
- Test Step Name: name automatically assigned to the step by Testim.
- Target Element: the element interacted with by the user during the test (button, image, text, etc.).
- When this step fails: instructions for how Testim should respond when a step has an error during a test run:
- Mark error & stop: add an error indicator to the step and stop running the test.
- Mark error & continue: add an error indicator to the step and continue running the test.
- Mark warning & continue: add a warning indicator to the step and continue running the test.
- When to run step: lets you control when a step in your test runs or doesn’t run. The following options can be applied:
- Always Run - The step will run whenever you run the test.
- Element - The step will run if the specified element exists (or does not exist) on the page.
- Element text - The step will run if the specified text exists within a specific element.
- Custom - The step will run if an element has a specific value.
- Never (skip) - The step will not run.
- Override timeout: The “step timeout” is the time lapse (in milliseconds) which causes Testim to register a fail for a test step. The default time lapse for each step is initially set in the Setup step configuration. Selecting this checkbox allows you to override the default setting for this step and specify a different time lapse value (in milliseconds).
Mobile Test Action Panel
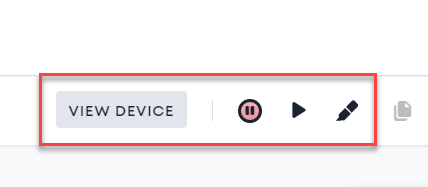
The Test Action Panel allows you to
- View Device: while recording a test, this button forces the AUT Viewer to move to the top of all windows.
- Record/Pause: when not recording a test, this will display as a record button to start recording. During recording this will display as a pause button to pause recording.
- Play: when this button is pressed Testim will automatically run your test.
- Turn On/Off Element Highlighting: when interacting with the AUT Viewer to record mobile test steps, Testim highlights the element being interacted with in the viewer. You can turn this highlighting off.
Application Under Test (AUT) Viewer
When you start recording a mobile test, the AUT Viewer is a separate window that displays an interface between your physical or virtual device. This viewer allows Testim to capture the actions taken on the device as test steps.

The AUT Viewer displays the following information:
- Title Bar: displays the connected device and device's operating system.
- Display Window: displays an interface between the physical or virtual device that allows the user to interact with the device as if holding the device.
- Recording Indication: displays an indication that the screen is being recorded
Note:You can drag the corners of the AUT Viewer window to resize the viewer. Testim will maintain the display ratio specific to the connected device.
Note:Closing the AUT Viewer window will stop the test recording and in playback, it will stop and fail the test.
Updated 5 months ago
