Salesforce Auto-Login Step
The Salesforce auto-login step allows the test to login to the Salesforce environment (or sandbox) without the need to record login or logout steps. After you add the login step and enter the details of the environment you are testing, you can start recording your test.
If your Salesforce environment is protected with 2-factor authentication, you will need your organization’s Salesforce administrator to whitelist the IP for the machine from which you are running your tests in order for the auto login step to pass.
Copying a shared login stepIf you copy and paste a login step, if this step is a shared step, editing the values of the "SF environment" will cause a change in all the used instances of this shared step. However, if its not a shared step and its copied and pasted inside the test, it is possible to edit the step’s values and it will not affect the other copies of the login step.
MFA Authentication
As of Feb 1 2022 Salesforce announced it will enforce multifactor authentication (MFA) when logging in to their environment. To support automatic login using MFA, Testim has implemented a software-based authenticator that will perform MFA when the Salesforce Auto-login step is executed. To enable this feature, follow the instructions in the Setting up MFA section below.
Adding a Salesforce Auto-Login Step
To add a Salesforce auto-login step:
- Hover over the (arrow symbol) where you want to add the step.
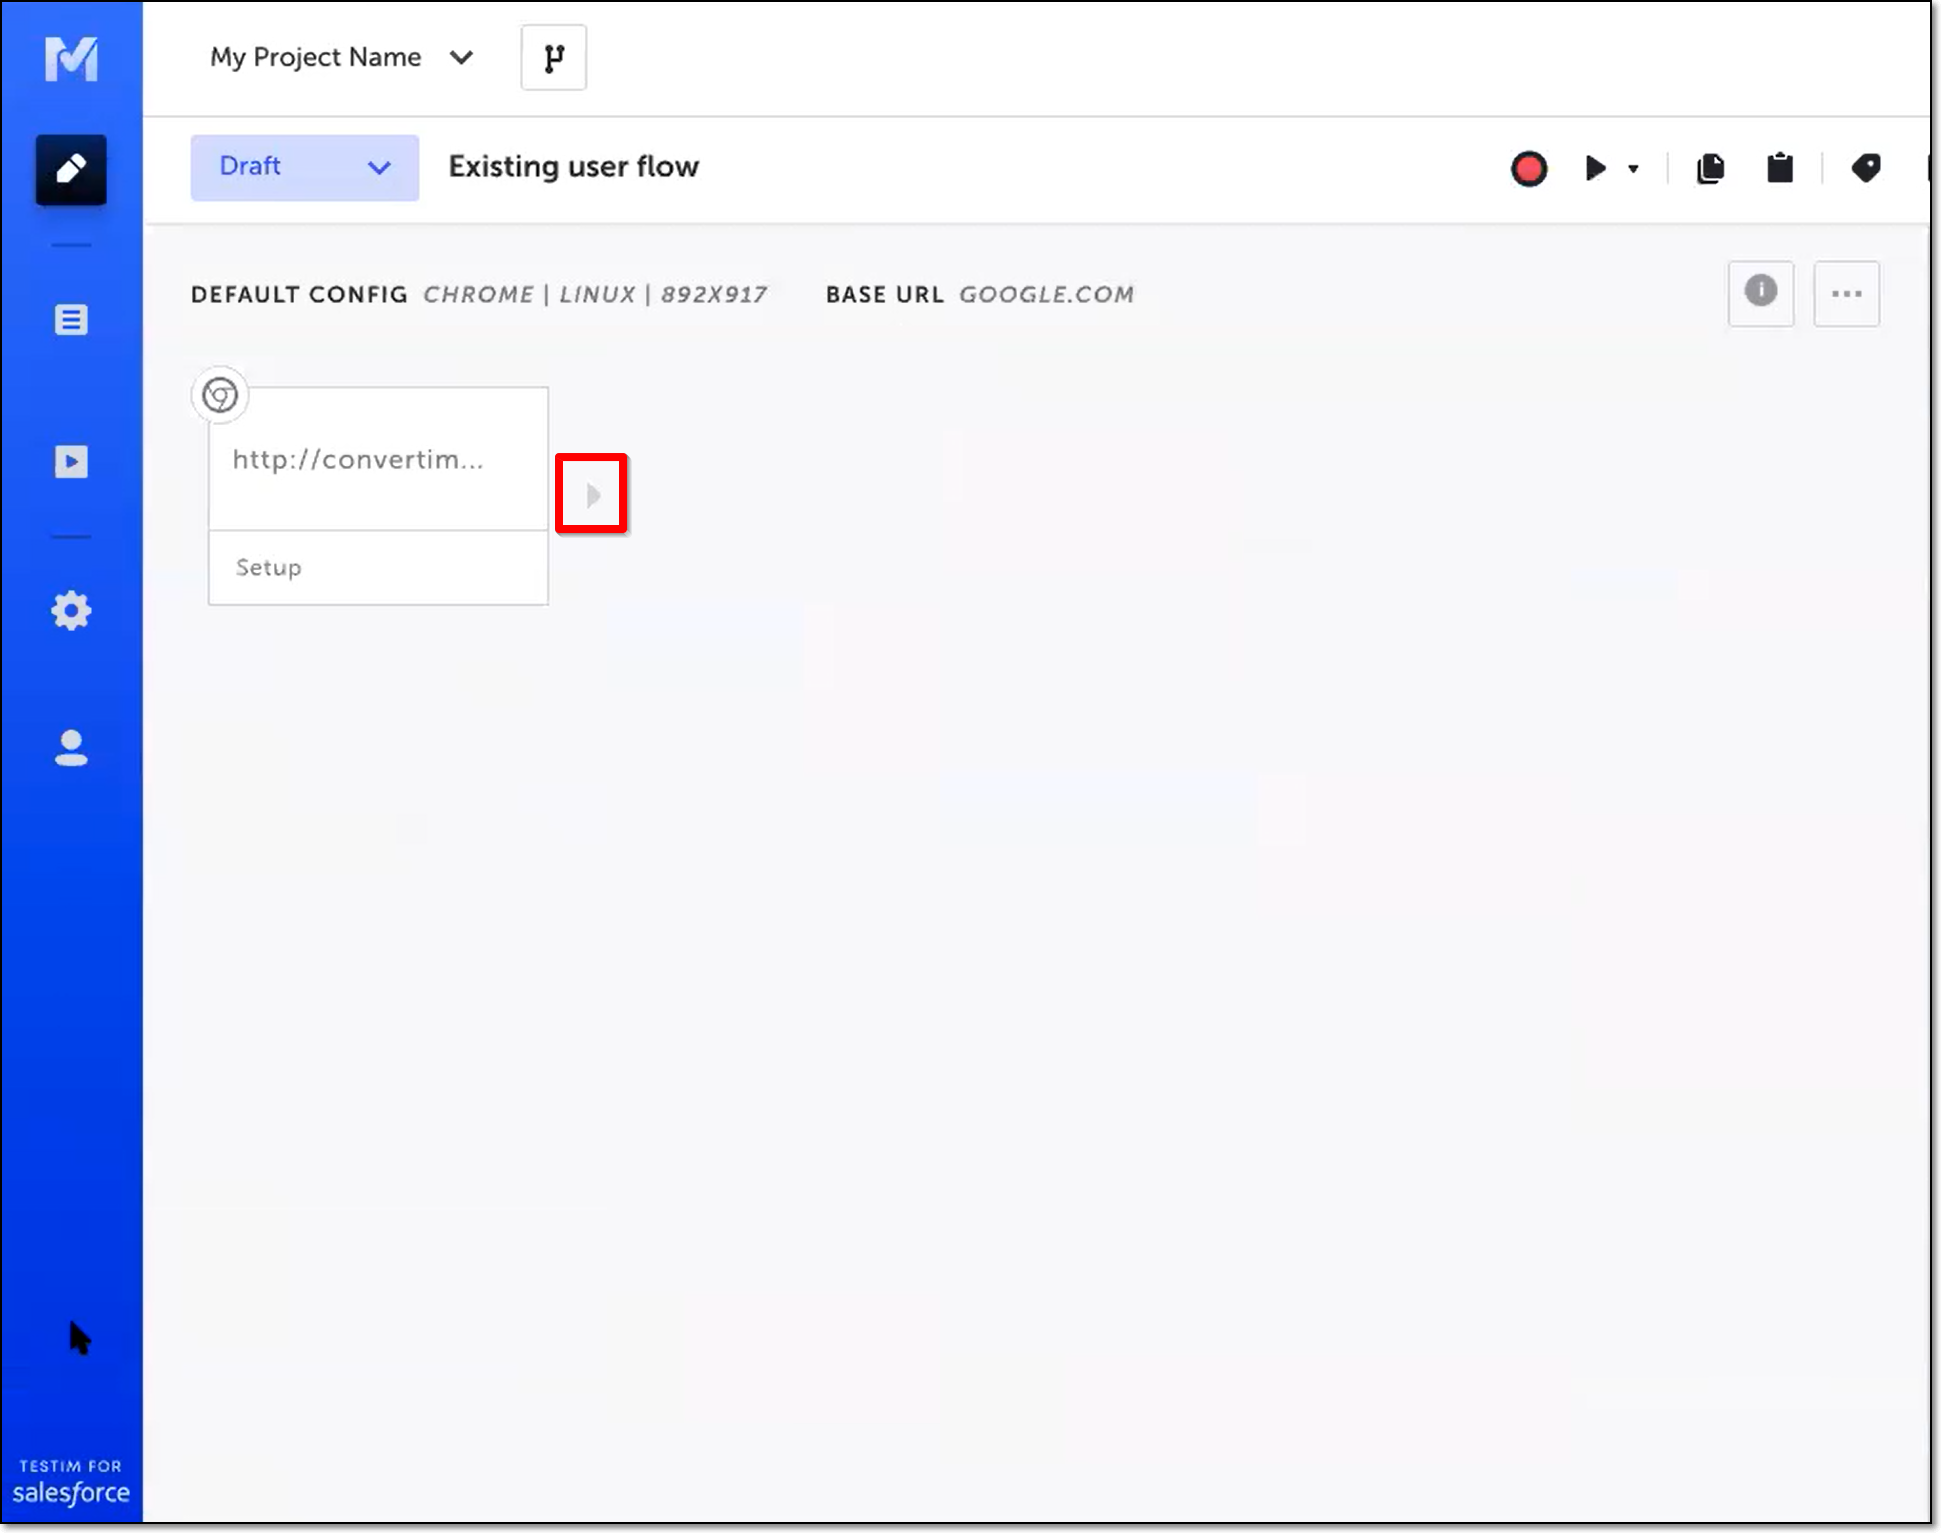
The action items are displayed.
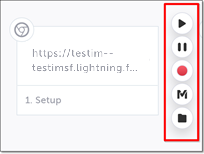
- Click on the “M” (Testim predefined steps).
The Predefined steps menu opens.
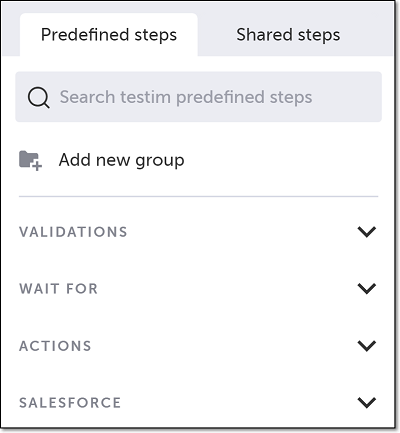
- Click on Salesforce.
The Salesforce menu expands.
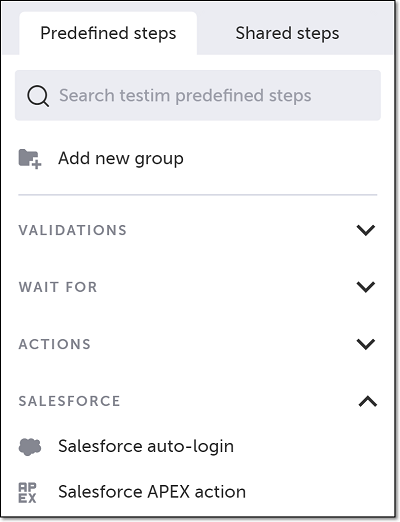
- Scroll down through the menu and select Salesforce auto-login.
Alternatively, you can use the search box at the top of the menu to search for Salesforce auto-login.
The Add Step window is shown.
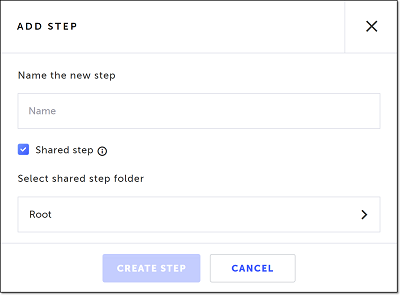
- In the Name the new step field, enter a (meaningful) name for this step.
- If this is a shared step to be made available to reuse in this or other tests, keep the box next to Shared step selected (default), and choose a folder from the Select shared step folder list where you want this step stored. Otherwise, deselect the checkbox.
For more information about shared steps, see Groups. - Click Create Step.
- Hover over the step and click on the Show Properties (:fa-cog:) icon. The step is added in the Editor, and the Properties panel opens on the right-hand side.
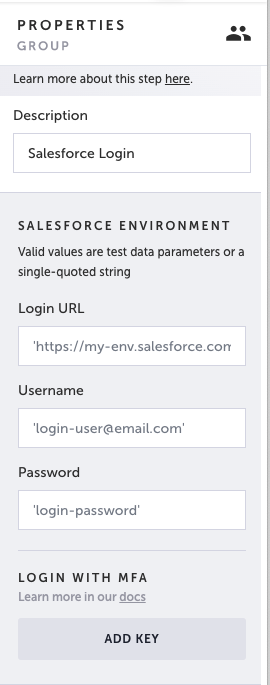
- In the Login URL field, enter the login of your Salesforce environment.
- In the Username and Password fields, enter your login credentials.
- If you need to use MFA, follow the steps in the Setting up MFA section).
The Salesforce auto-login step is configured.
Using parameters
You can use parameters which were defined in the test or suite level, in the config file, or in another step to enter your connection properties for your Salesforce environment.
When using MFA, the value of the MFA secret key cannot be used as a parameter.
To use parameters to enter your connection properties:
- Define parameters in one of the following ways:
- Add a parameter to the test data – You can define a parameter by adding Test Data to the Setup step (the first step of the test). For detailed instructions, see Configuring a data driven test from the visual editor.
- Add a parameter to the config file – You can add a parameter to the Configuration file. For detailed instructions, see Configuring Data Driven Tests using the Config file.
- Add a parameter to a Custom step – You can create a Custom step and then add a parameter to this Custom Step. For detailed instructions, see Parameters in custom JavaScript steps.
You then need to pass the parameter to the Salesforce auto-login step or to the test level, by exporting the parameter. For detailed instructions, see Exports Parameters.
- In your Salesforce auto-login step, add the parameters to the URL, Username, and Password fields.
Setting up MFA
The setup process requires obtaining the secret key from Salesforce and entering the key into the Secret Key field in the Properties panel in Testim.
To setup MFA:
- Login to Salesforce and Navigate to Setup > Users > Users > and select the user for which you want to set up MFA.
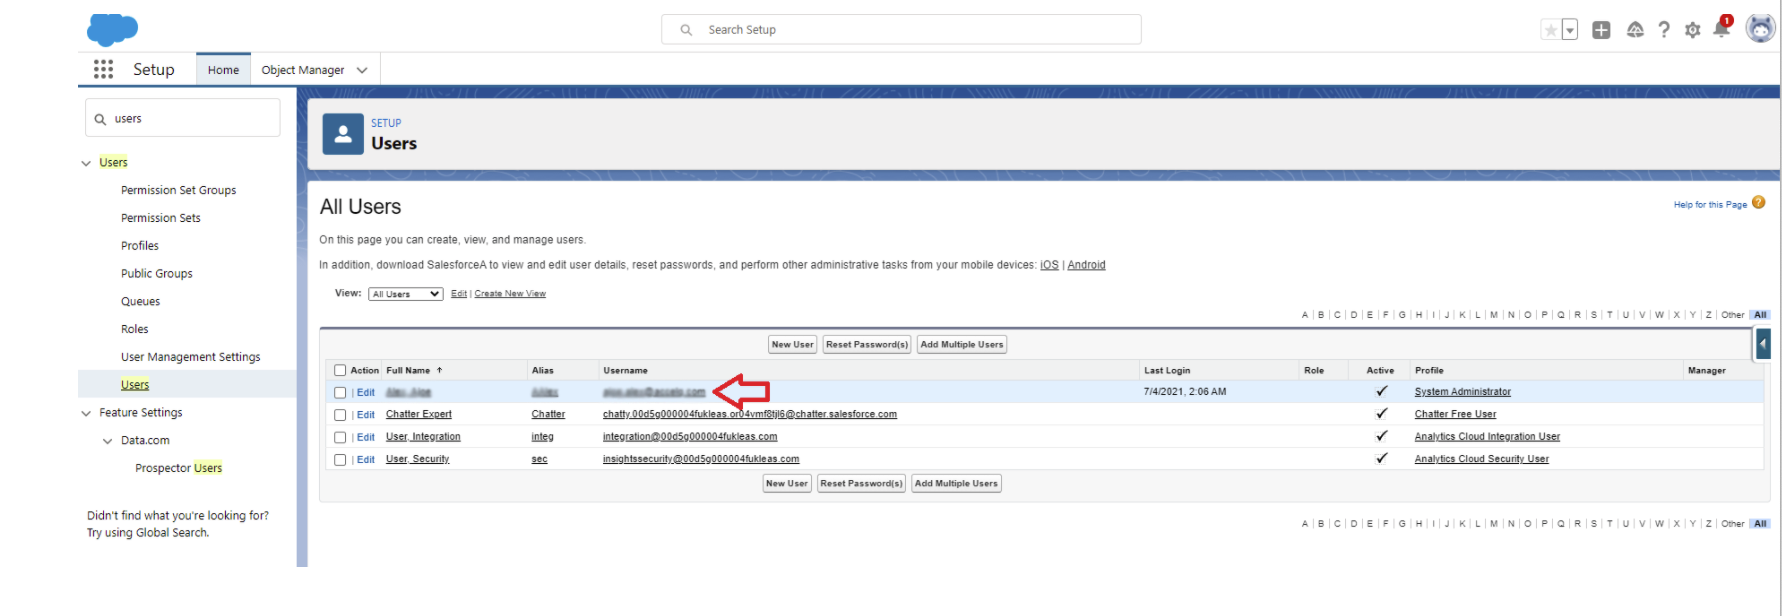
- If you have already registered a 3rd party Authenticator app (Google Authenticator, Microsoft Authenticator etc.) under App Registration: One-Time Password Authenticator, you will need to disconnect it and then reconnect in order to obtain the secret key.
- Under User Details, in the App Registration - One-Time Password Authenticator setting, click Disconnect.
- If you have never registered a 3rd party Authenticator App, proceed to the next step.
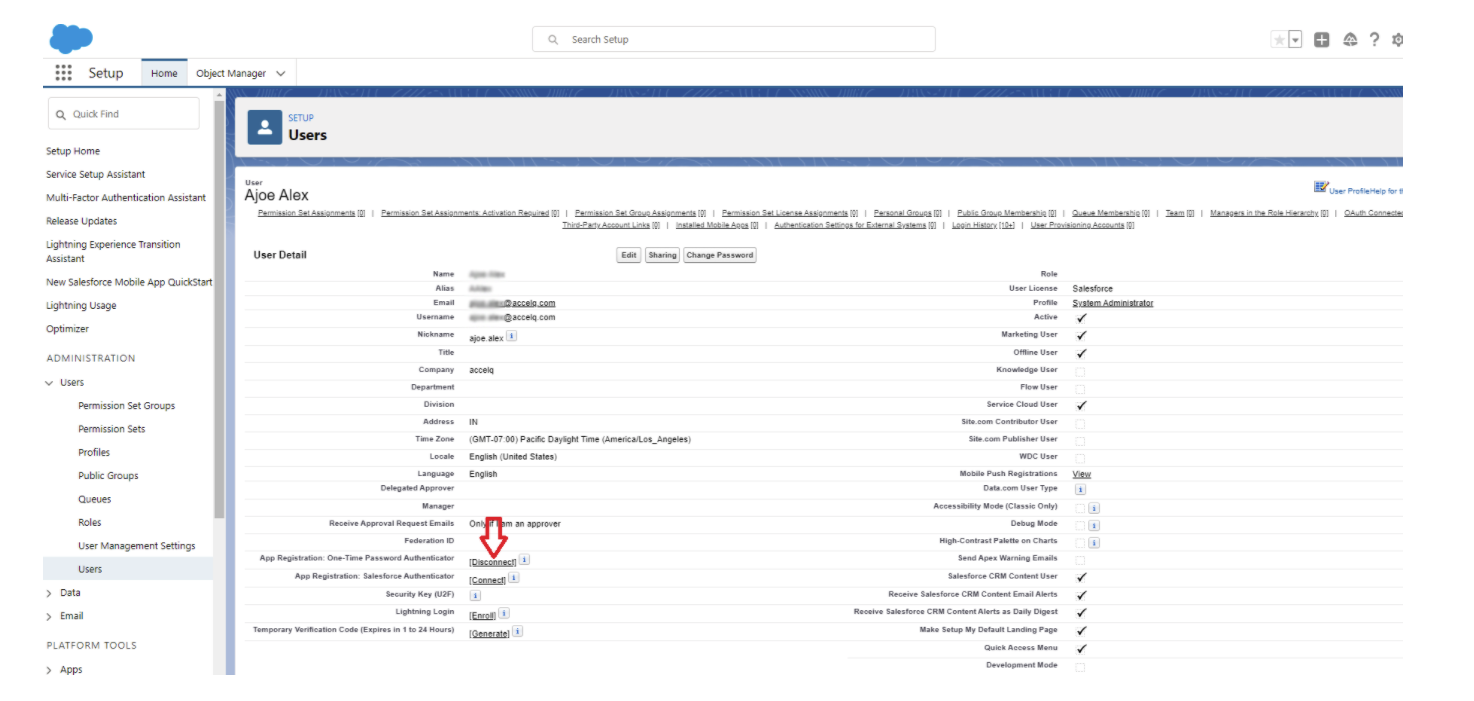
- Under User Details, in the App Registration - One-Time Password Authenticator setting, click Connect.
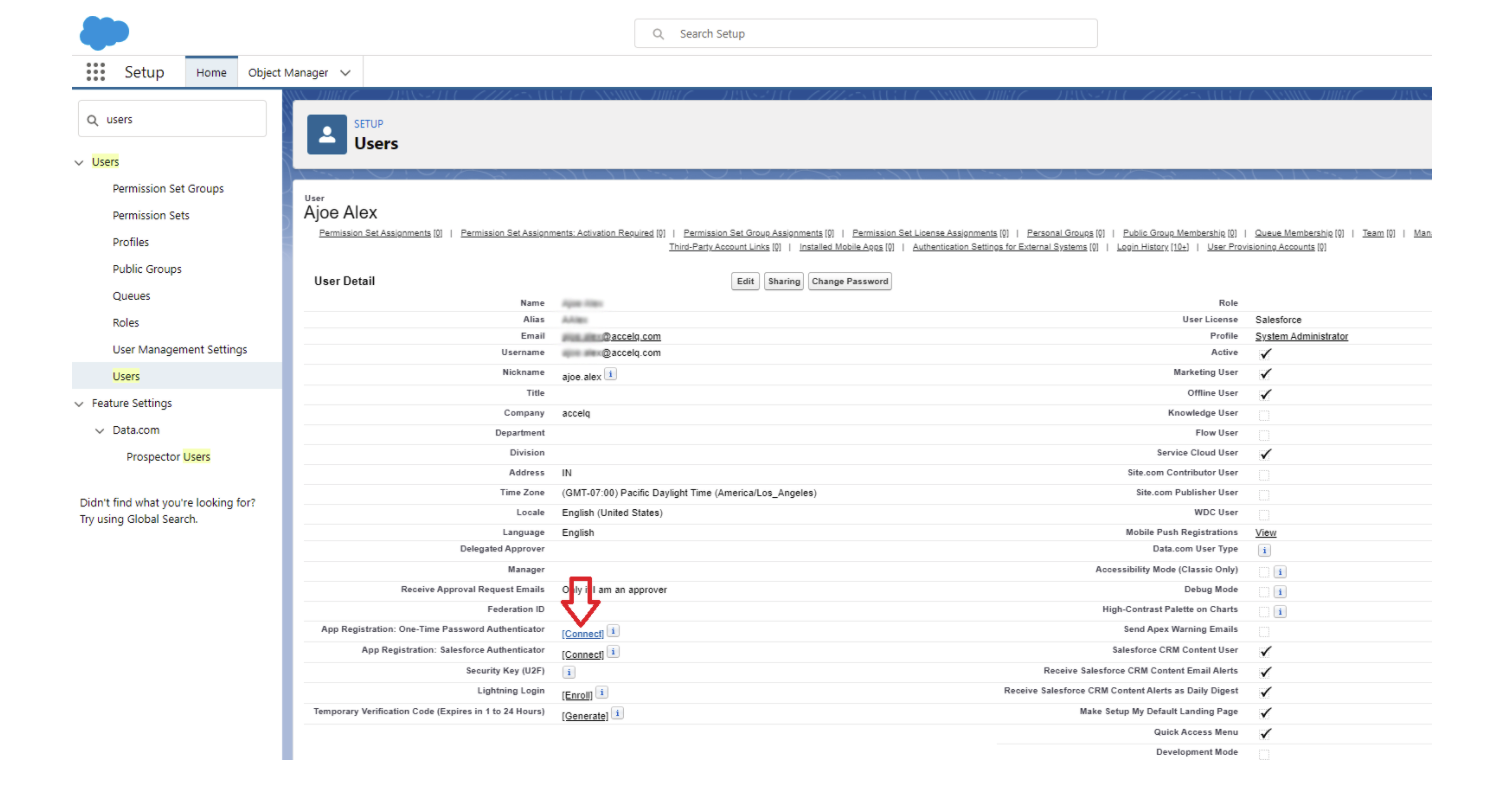
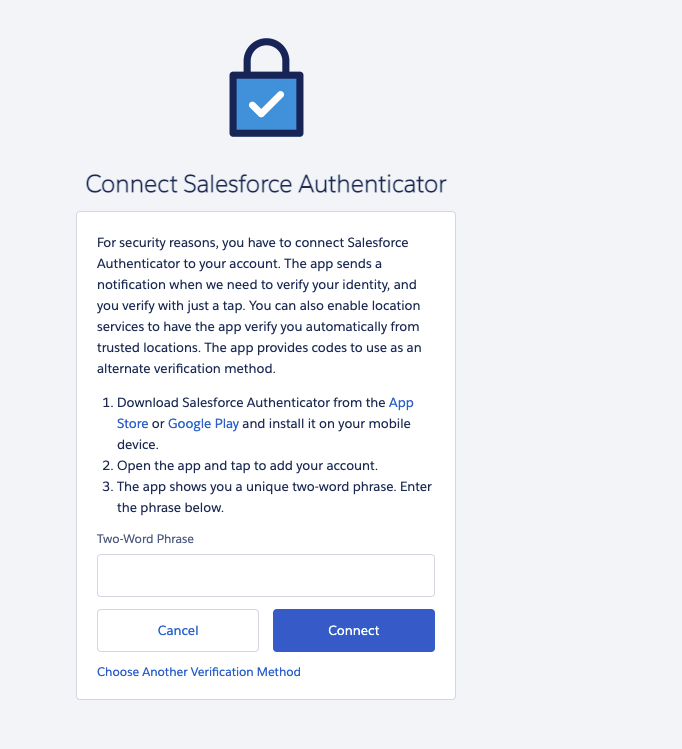
- Login into Salesforce with your user name and password, when prompted with the following notice, select Choose another verification method.
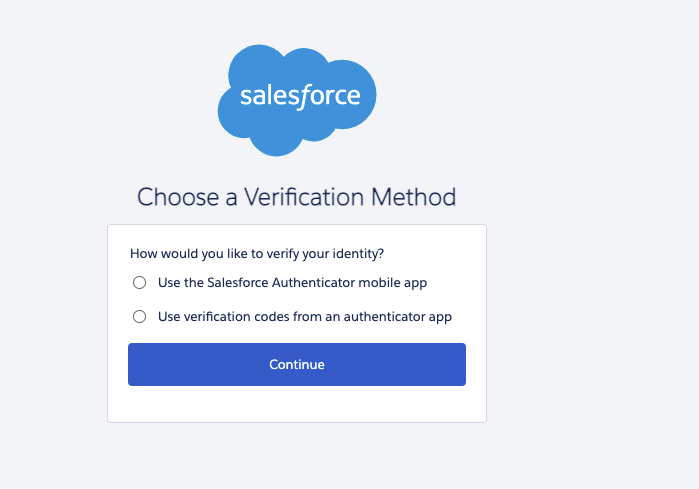
- In the Choose a verification method screen, select Use verification codes from an authenticator app and click Continue.
- In the Connect an authenticator app screen, click I cant scan the QR code.
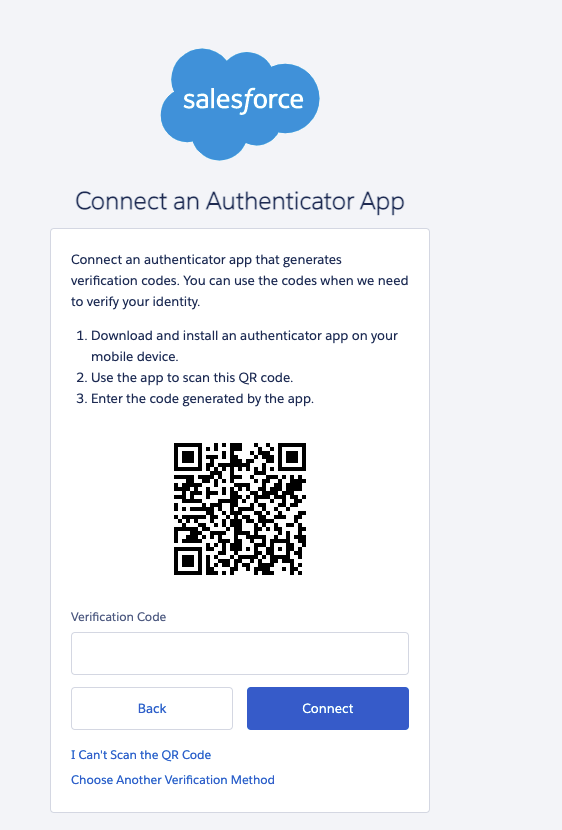
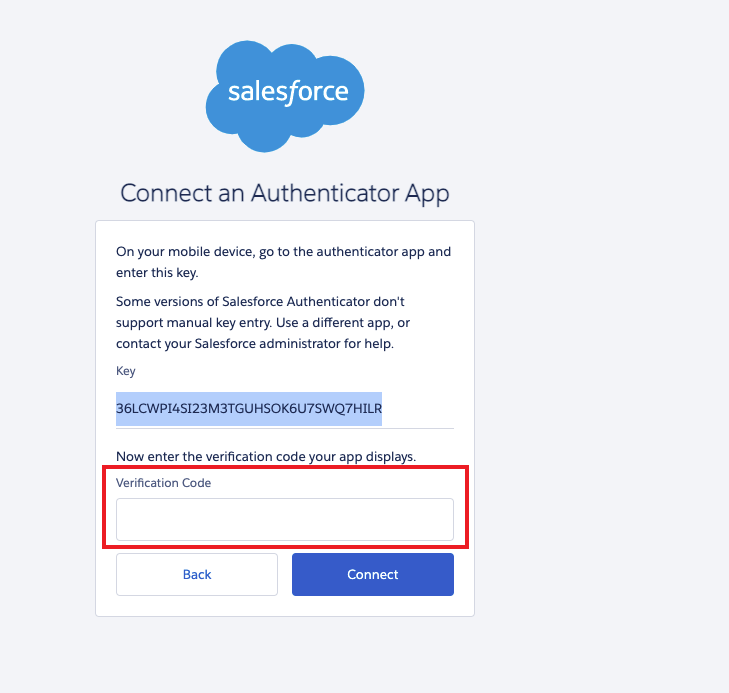
- A secret key is displayed. Copy the secret key.
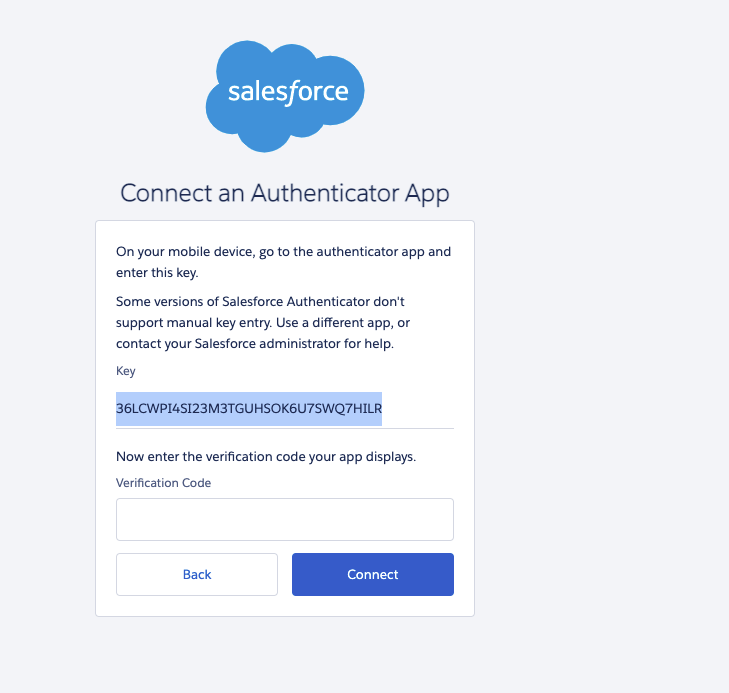
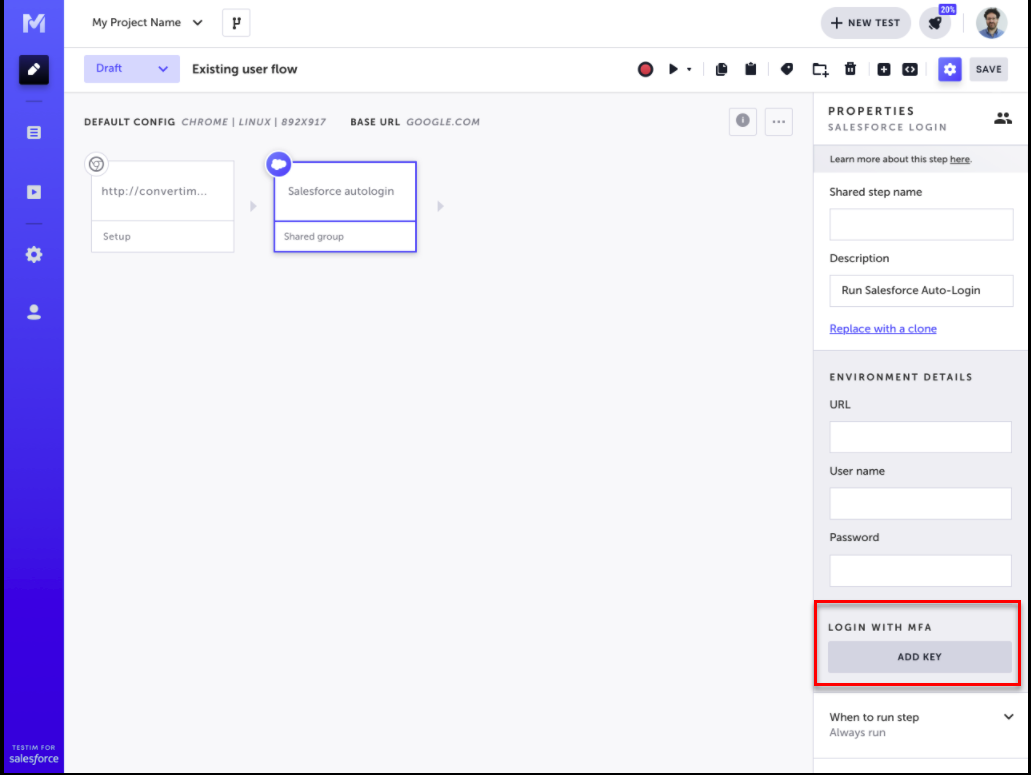
- When adding the Salesforce Auto-Login step (see - Adding a Salesforce Login Step, in the step's Properties Panel, under Login with MFA, click the ADD KEY button.
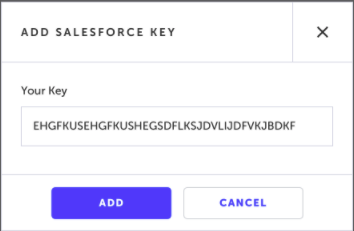
- Paste the key that you have copied from Salesforce into the Your Key field and click Add.
A verification code is displayed:
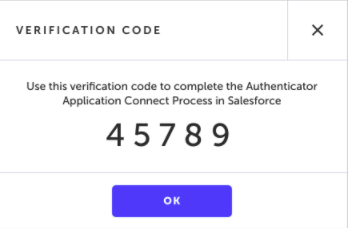
- Go back to Salesforce and enter the verification code that was displayed into the Verification Code and click Connect.
Updated 5 months ago
