Add custom validations and actions
Create complex validations using custom scripts
There may be times when you want your test to perform an action or validation that is not included in the predefined steps menu. Using an Add custom validation step or an Add custom action step, you can create custom steps where you input your own parameters and JavaScript code. Custom action steps should be written without a return value. Custom validation steps are meant to return a boolean value. Returning true causes the validation to succeed, while returning false causes it to fail. (See examples below.)
Adding an Add custom validation step or an Add custom action step
The general procedure for adding an Add custom validation step or an Add custom action step is the same, regardless of the details of your validation or action. Your code and parameters change depending on your specific validation or action. Below is the general procedure followed by sample code and parameters for a few different examples.
To add anAdd custom validation step or an Add custom action step:
- Hover over the (arrow symbol) where you want to add the validation.

The action options are displayed.
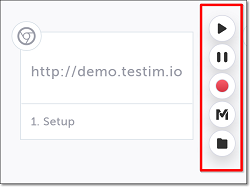
- Click on the “M” (Testim predefined steps).
The Predefined steps menu opens.
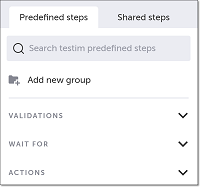
- Click on Validations (or Actions).
The Validations (or Actions) menu expands.
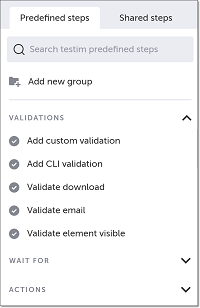
- Scroll down through the menu and select Add custom validation (or Add custom action).
Alternatively, you can use the search box at the top of the menu to search for Add custom validation (or Add custom action).
The Add Step window is shown.
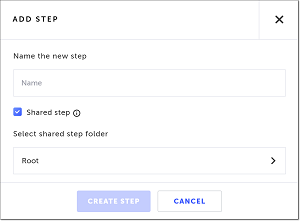
- In the Name the new step field, enter a (meaningful) name for this step.
- If this is a shared step to be made available to reuse in this or other tests, keep the box next to Shared step selected (default), and choose a folder from the Select shared step folder list where you want this step stored. Otherwise, deselect the checkbox.
For more information about shared steps, see Groups. - Click Create Step.
The function editor opens, and the Properties panel opens on the right-hand side.
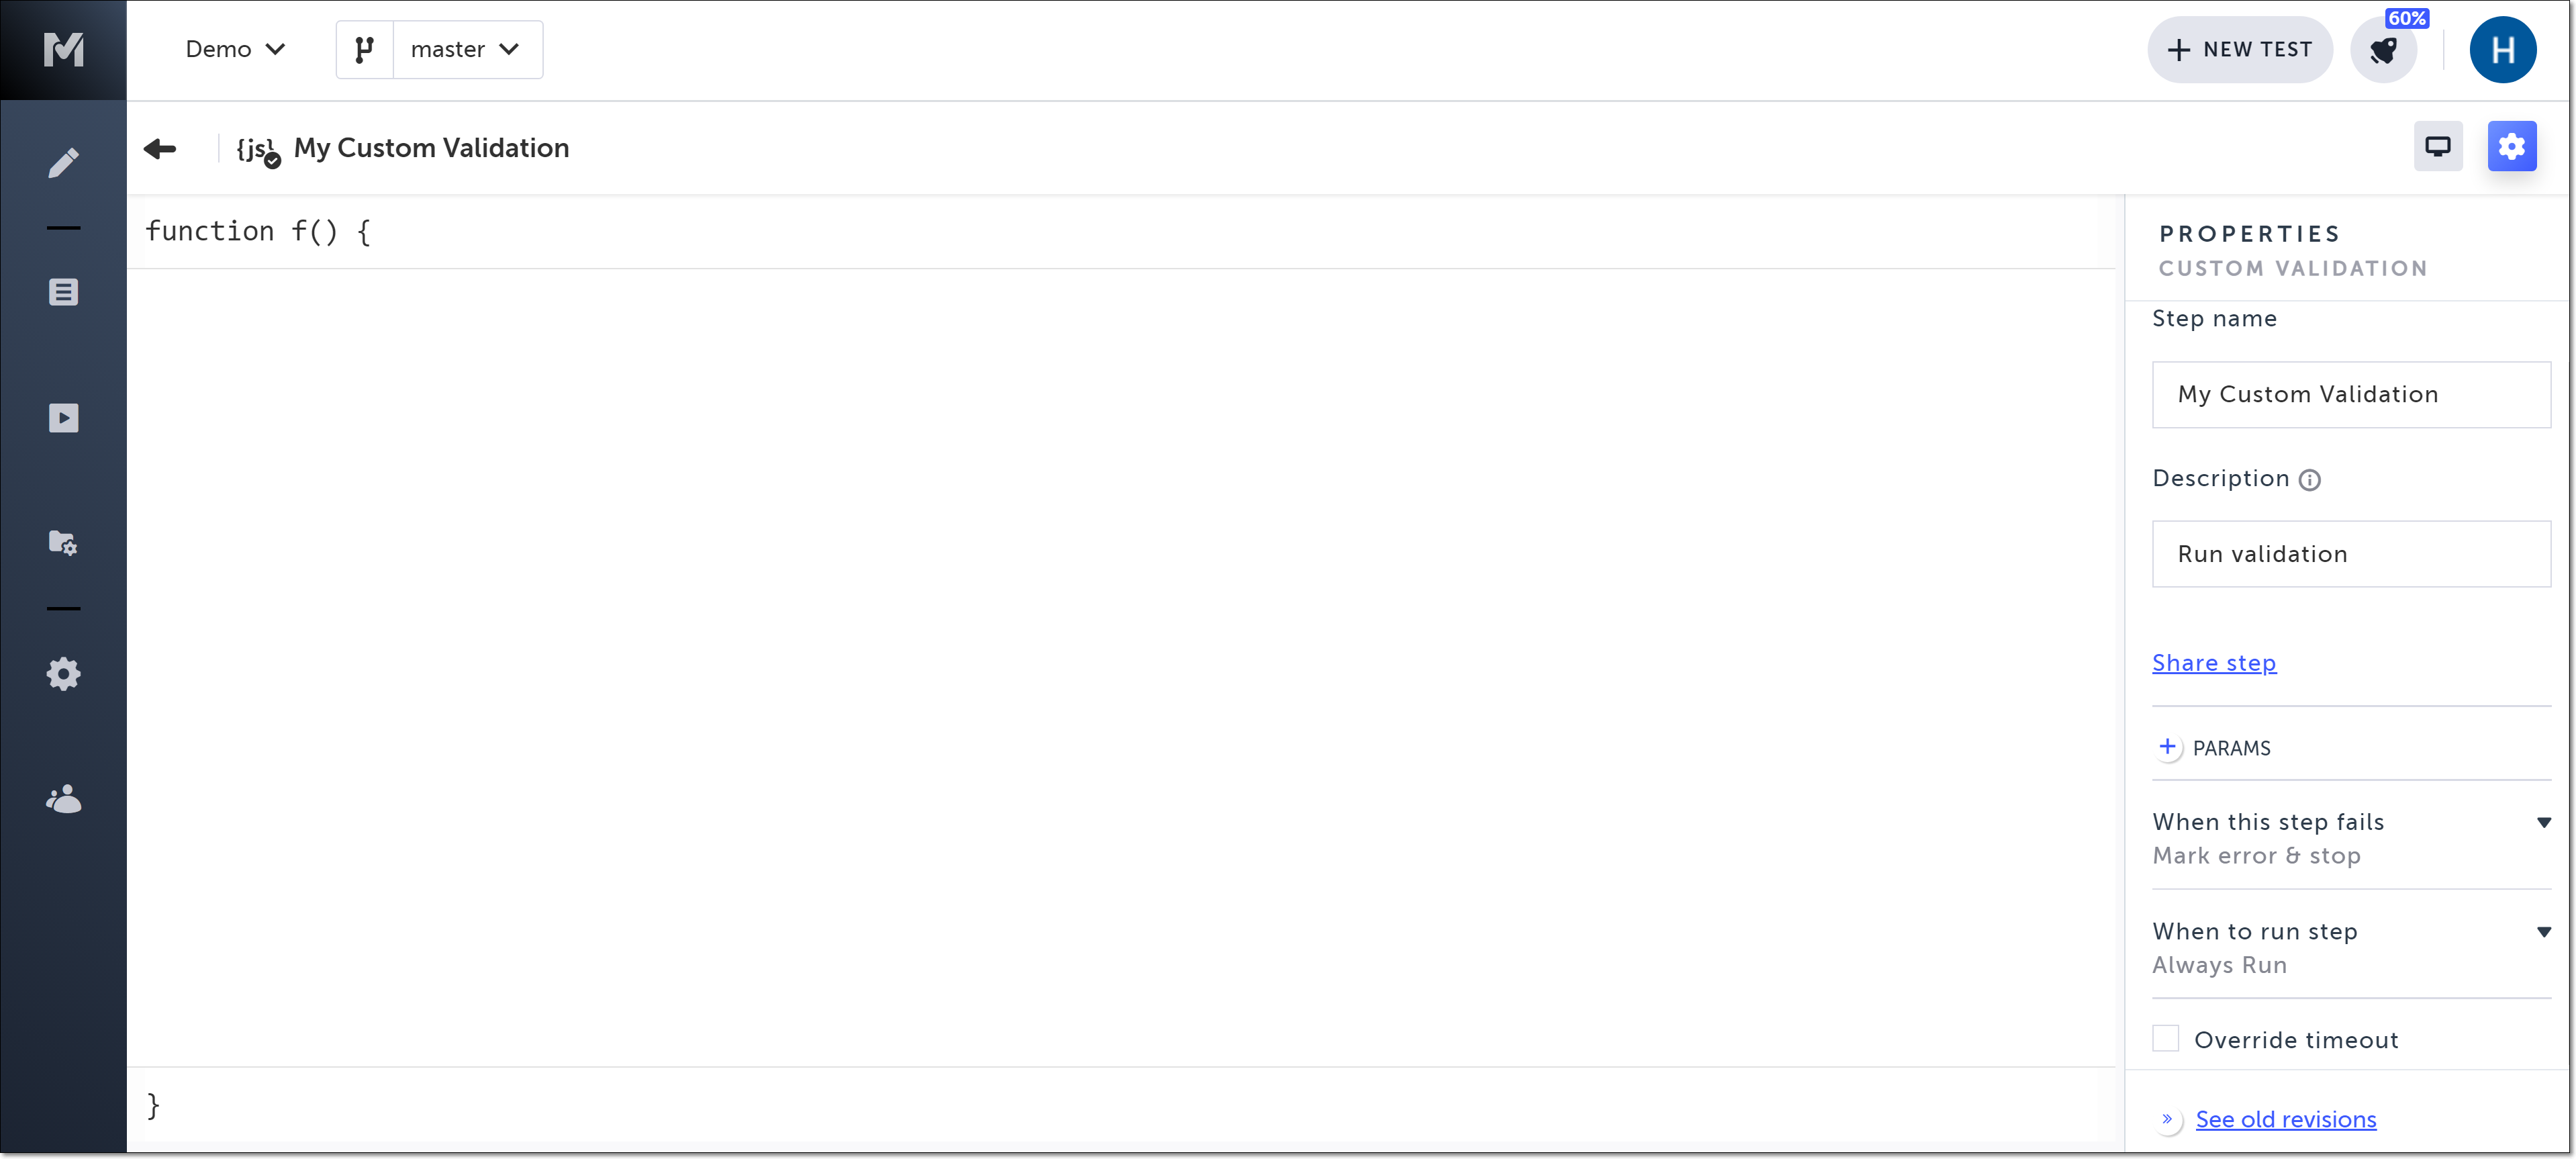
- In the Properties panel, in the Description field, optionally edit the description of this step. The default description is “Run validation” (or “Run action”).
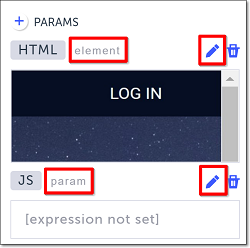
- Define the parameters you will need for your step as follows:
a. In the Properties panel, click the + PARAMS button.
b. JS parameter: If you would like to add a JavaScript parameter, select JS from the dropdown list and type in the JavaScript parameter.
c. HTML parameter: If you would like to define an HTML element as a parameter, select HTML from the dropdown list. The browser opens, displaying the relevant webpage for this step. Do the following:- In the AUT window, hover your mouse on the relevant element and then click on it to select it. The selected element is shown in the Target Element box in the Properties pane. If you would like to view, replace or adjust the settings for the selected element, use the procedures described in Editing Target Element Properties.
d. The selected element is automatically named “param” or “element” (depending on whether you chose a JS parameter or HTML element). To assign a relevant name to the parameter/element, click on the edit icon and enter the desired name.
- Optionally fill in the following Properties:
- When this step fails – Specify what to do if this step fails.
- When to run step – Specify conditions for when to run the step. For more information, see Conditions.
- Override timeout – Allows you to override the default time lapse setting which causes Testim to register a fail for a test step, and specify a different time lapse value (in milliseconds).
- In the function text box, type in the desired JavaScript code. If you have defined parameters, you can refer to those parameters in your JavaScript code.
If you are using DOM selectors other than HTML parameters (e.g. jQuery), then empty arrays are truthy, so you need to use$(<query>).lengthinstead of$(<query>).
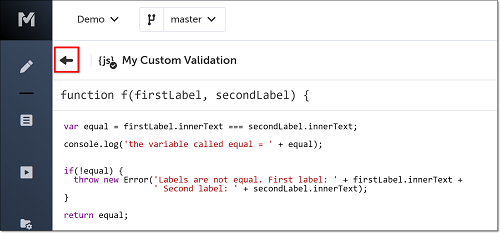
- Click the back arrow to return to the main Editor window.
If you opened your AUT to define an HTML element as a parameter, click on the Toggle Breakpoint button to remove the breakpoint.
The step is created.

Custom validation and action examples
Validating a numeric value (Custom validation)
You can use the Add custom validation step to validate the value of a number in your app. This example checks to see if the numeric value of an HTML element is less than 1,000. We first remove the non-numeric characters from the string, and then convert the string to a number.

Example Code:
// Remove  string chars (e.g "$") and turn the price label to a number:
var amount = Number(amountLabel.innerText.replace(/[^\-0-9\.]+/g,""));


// Validate if the number is bigger than 1000:
if(amount > 1000) {
  throw new Error('Amount should not be over 1000! Actual value: ' + amount);
} else {
  return true;
}
Example Parameters:
Name | Type | Value |
|---|---|---|
amountLabel | HTML | {an HTML element containing a numeral} |
Comparing text elements (Custom validation)
This example uses the Add custom validation step to compare the text of two elements in your app. When the innerText value of the two elements is the same, the step passes. If the values are different from each other, the step fails.
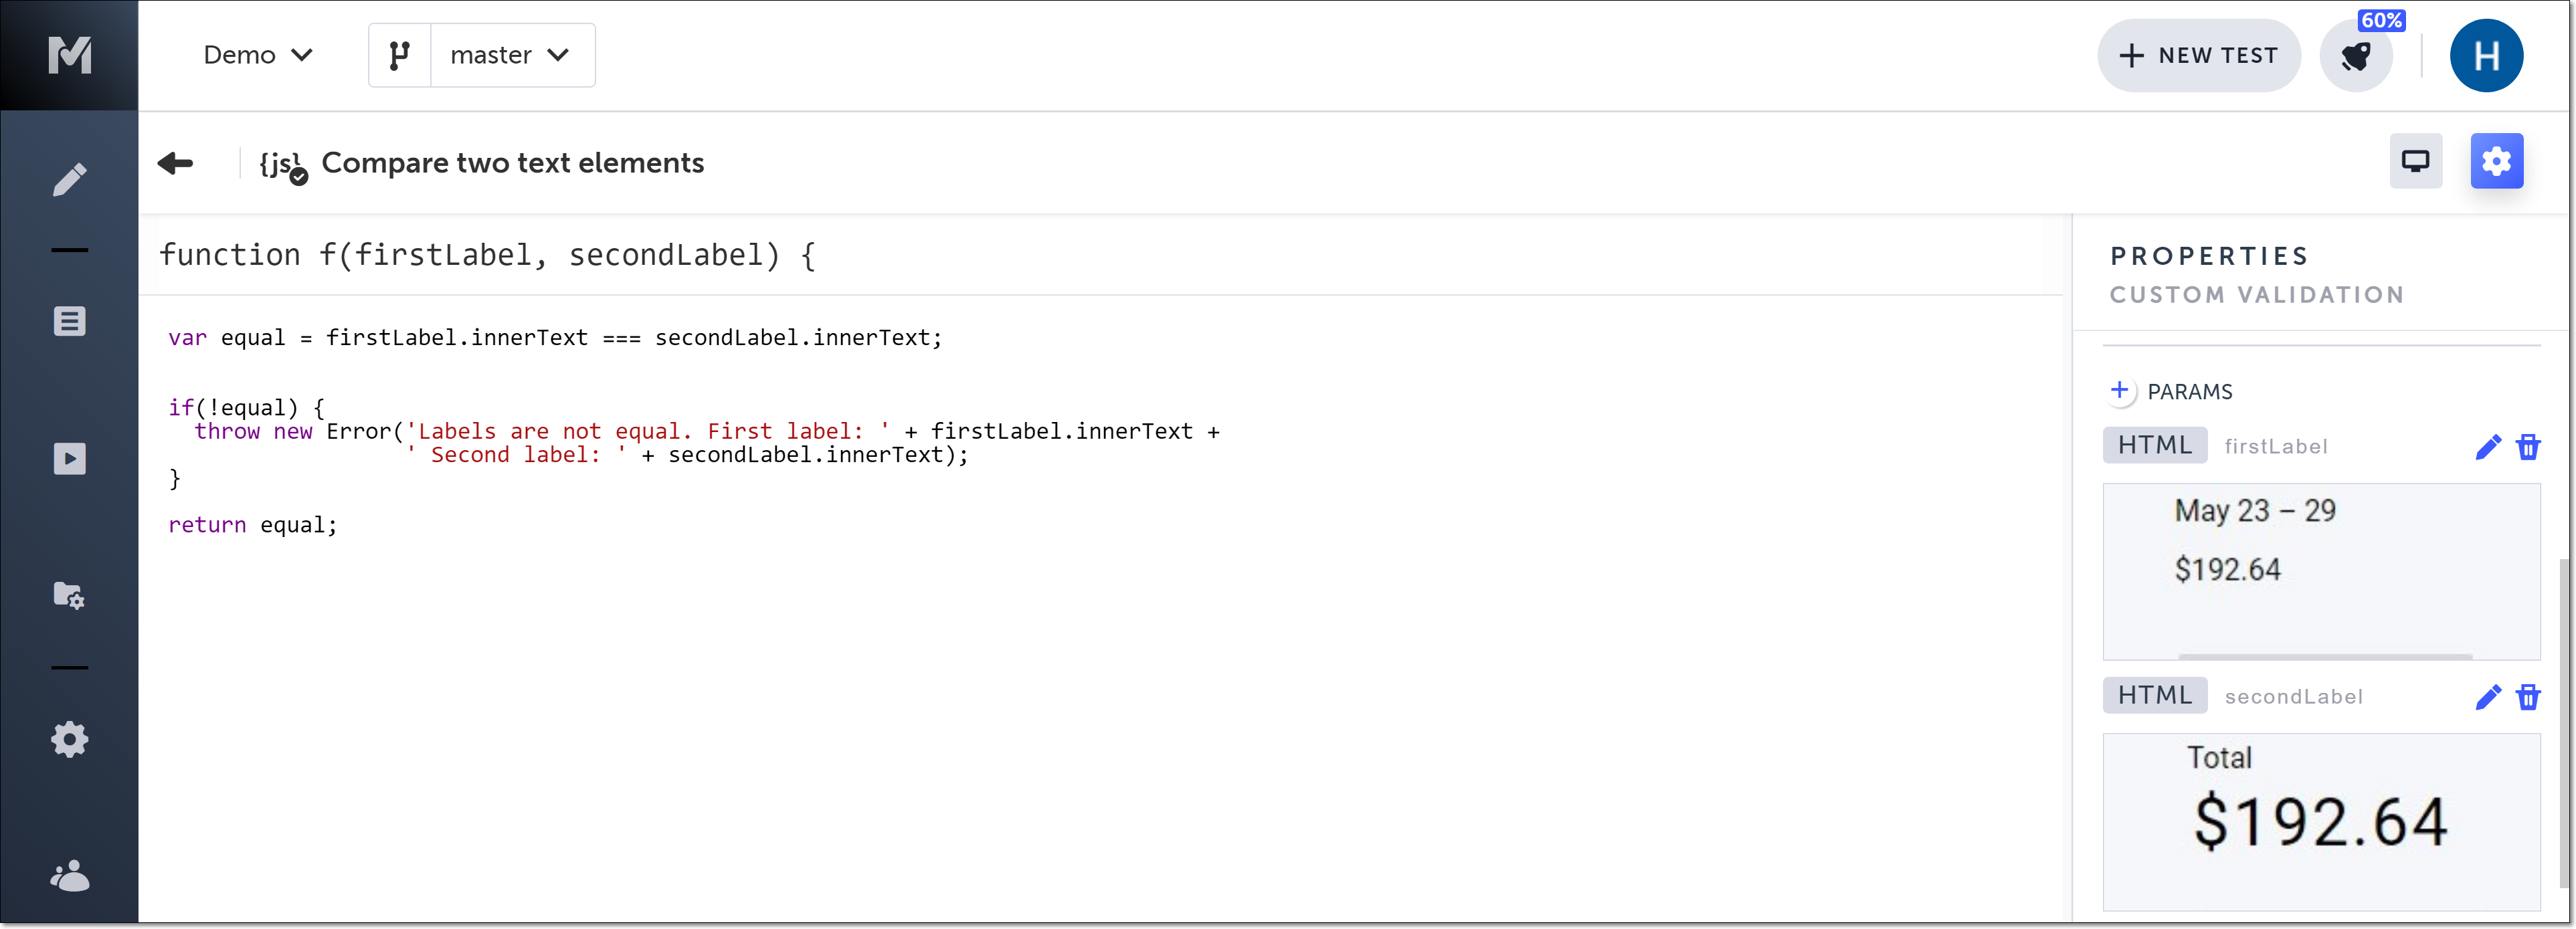
Example Code:
var equal = firstLabel.innerText === secondLabel.innerText;

if(!equal) {
  throw new Error('Labels are not equal. First label: ' + firstLabel.innerText +
                  ' Second label: ' + secondLabel.innerText);
}

return equal;
Example Parameters:
Name | Type | Value |
|---|---|---|
firstLabel | HTML | {an HTML element containing text} |
secondLabel | HTML | {an HTML element containing text} |
Asynchronous Validation via Promise (Custom validation)
A JavaScript Promise allows you to cause a function to wait for a specified amount of time (in ms) before resolving or rejecting some specific code. If the boolean value of the code is true, it is resolved, and the step passes. If it is false, the code is rejected, and the step fails. The simple example below is just for demonstration purposes and doesn’t use any parameters. (This test should pass after the 10 second timeout.)
If the validation fails, any text you include in thereject( )function invocation is displayed in the step’s property panel.

Example Code:
return new Promise(function(resolve, reject) {
  setTimeout(function() {
    if(7 === 7) {
      resolve();
    } else {
      reject('');
    }
  }, 10000);
});
Navigating to a different website (Custom action)
This example uses the Add custom action step to navigate away from your test’s base URL in the Setup step and navigate to Testim’s homepage. This example does not use any parameters.

Example Code:
window.location.href = 'https://testim.io/';
Chrome DevTools debuggerYou can use the Chrome DevTools debugger to help you debug your code during a local test run. See Chrome DevTools debugger.
See custom code examples created by Testim to solve customer testing challenges. The complete list is available at https://github.com/testimio/custom-actions-examples.Testim users can contribute their own custom examples to this GitHub Repository following the guidelines set there.
Examples of passing and failing synchronous validations
Passing validations
// This  validation will always succeed.
return true;// This validation will always succeed.
return 5 === 5;Failing validations
// This validation will always fail after it times out.
return 5 === 6;// This validation will always fail after it times out.
throw new Error('Validation failed!!!');When a step fails, an error message is displayed in the step’s result panel and in the Properties panel as in the example below.

Updated 5 months ago
