
TTM for Jira Integration
Show Tests run results in your TTM for Jira project
What is TTM for Jira?
Tricentis Test Management (TTM) for Jira is an end-to-end test management inside Jira that keeps QA and development aligned, which allows you to collaborate and build quality into your software from idea to production.
TTM for Jira is in the Atlassian Marketplace, designed specifically for organizations who want to place test management directly within Jira. With TTM for Jira, QA, development, and the business can collaborate closely to deliver quality software together.
- To setup TTM for Jira please follow the instructions here.
- To view TTM for Jira documentation see here.
Why do I need a TTM for Jira integration?
The TTM for Jira integration allows you to link a test in Testim to a test case in TTM for Jira. After running the test in Testim, the test results will be automatically displayed in TTM for Jira execution results, giving you a single view of the tests that were executed in Testim and in TTM for Jira.
You can map Testim tests to TTM for Jira in two ways:
- Manually map a single Testim test to TTM for Jira
- Bulk create & map Testim test groups/folders to TTM for Jira
Setting up TTM for Jira Integration
Before using the TTM for Jira and Testim integration, you will need to connect Testim to the desired TTM for Jira project(s). This process is required only once.
To connect Testim to TTM for Jira:
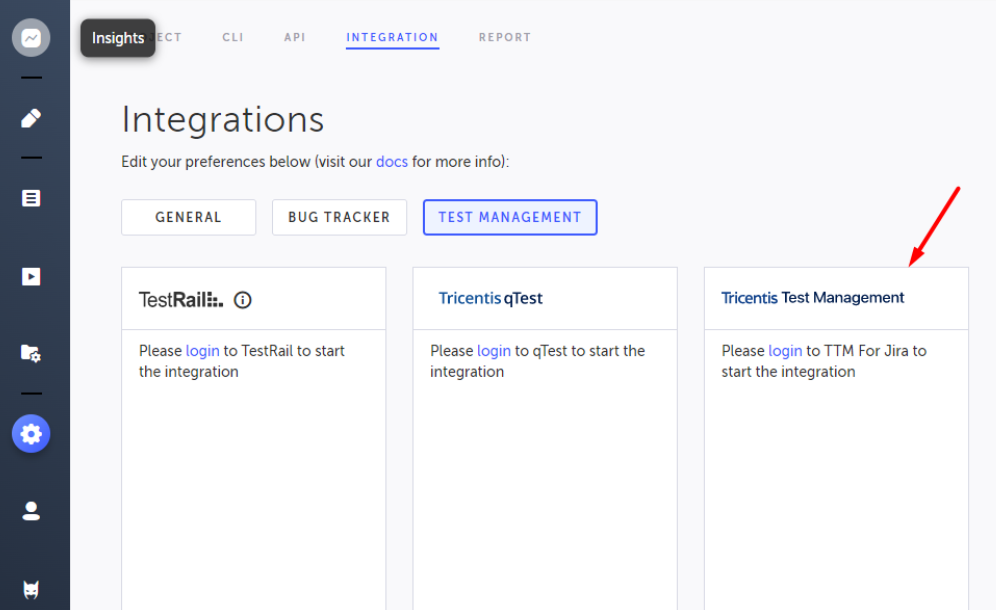
- Go to Settings > Integrations tab. Under Test Management you will find various integration
modules. - In the TTM for Jira integration module, click login.
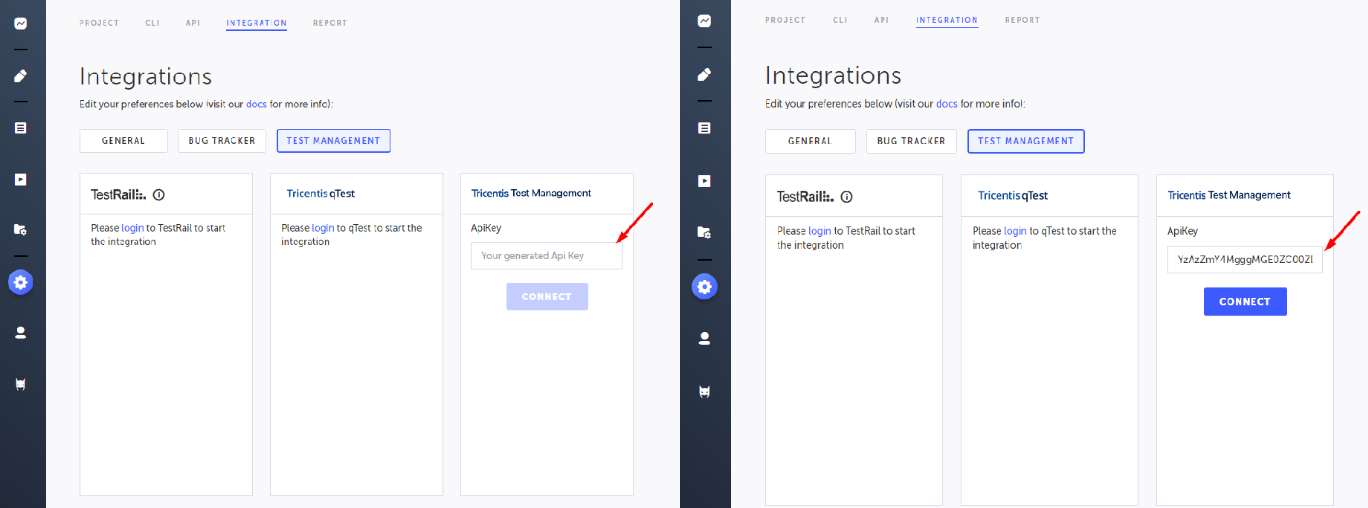
- Open TTM for Jira and create an API key and copy it – see Configure Tricentis Test Management for Jira for more information.
- Paste it in the API Key field in Testim.
- In Testim, click Connect
- In Testim, select the TTM for Jira project(s) from the list that you would like to associate.
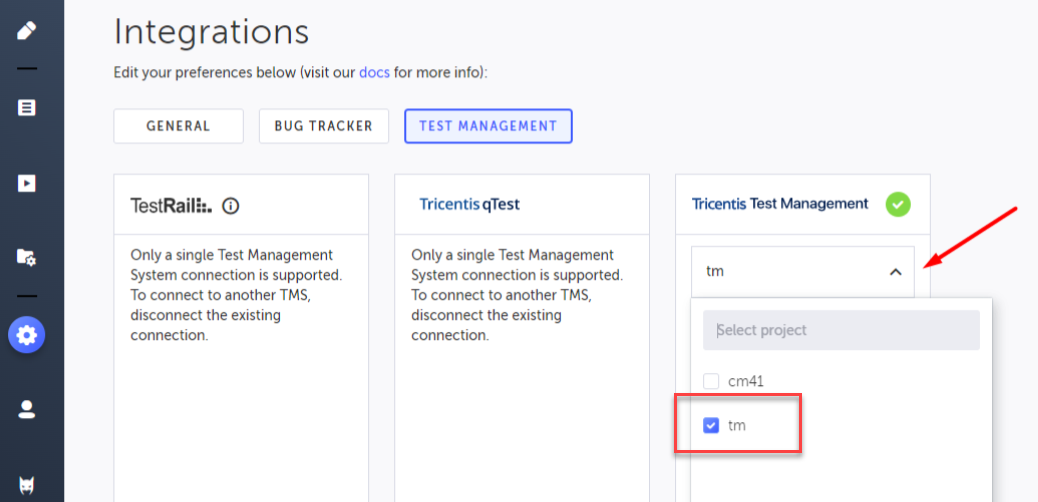
At this point Testim is associated to a project in TTM for Jira, but not mapped to a specific test.
Note:You may connect one TMS (Test Management System) at a time. So, if your Testim system is already connected to another TMS, you will need to disconnect this TMS first and only then connect TTM for Jira. Note that by disconnecting the TMS, you will remove the connections between the tests. So, if you want to connect to the previous TMS again you will have to recreate the connections as well.
Manually Map a test in Testim to TTM for Jira
After setting up the integration between Testim and TTM for Jira, you are ready to map a specific test in Testim to a test in TTM for Jira.
To map a test in Testim to a test in TTM for Jira:
- In Testim, open the test that you would like to be mapped.
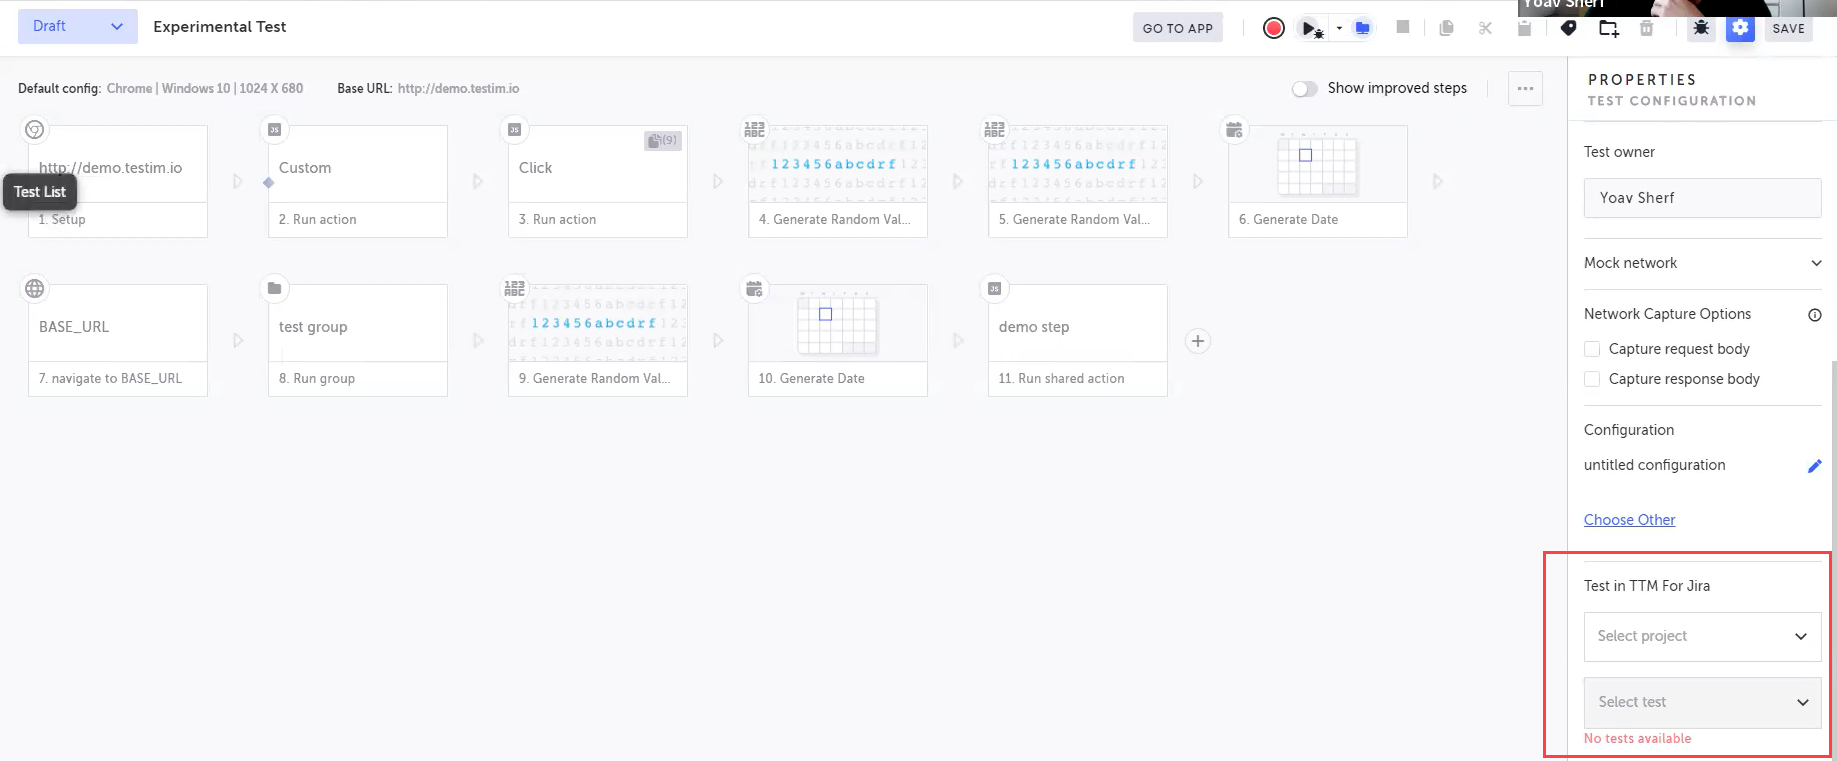
- Inside the test in Testim, click the Properties icon on the Setup step (the first step).

- In the setup step's Properties panel, under Test in TTM for Jira, select the TTM for Jira project from the first drop-down menu and then the specific test from the second drop-down menu. There can be multiple mapped test cases
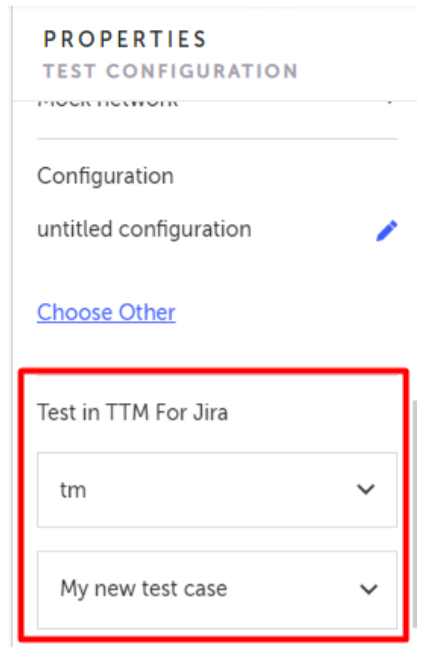
- Click Test Save.
Bulk Create & Map Test Cases to TTM for Jira
For customers who have an existing Testim app with a large number of tests and wish to start working
with TTM for Jira, our bulk creation and mapping feature offers a convenient solution. Customers can select a group of tests from the Testim test library and Testim will automatically create test cases in TTM for Jira and map Testim test cases to the newly created Jira test cases.
Note:
- This bulk mapping options is best suited for customers that don't currently have any tests in TTM for Jira, but this is not a requirement to use the bulk mapping feature.
- If you have already manually mapped any tests to TTM for Jira, this bulk mapping feature will skip any tests already mapped. You can manually unmap a test if you want to include it in the bulk mapping process.
To automatically bulk map Testim test cases to TTM for Jira:
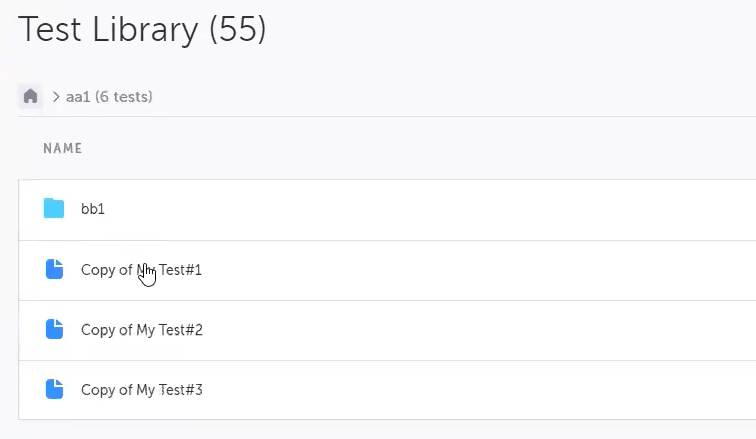
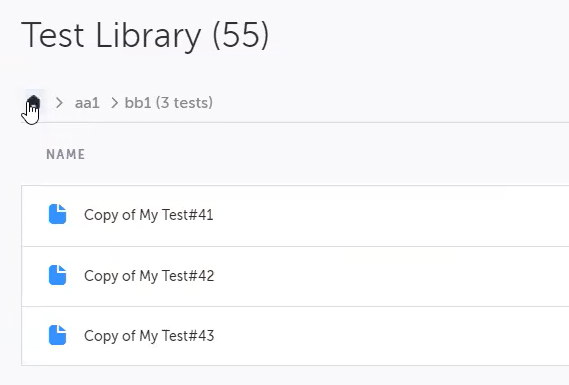
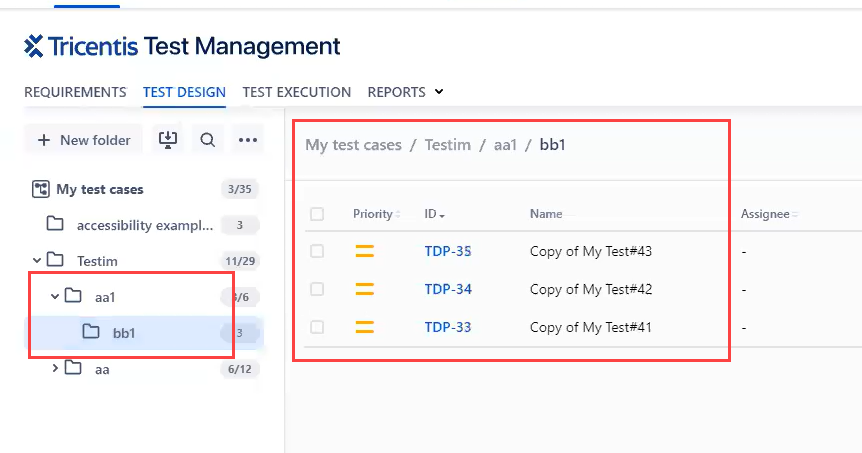
- Navigate to the Test Library and select one or more groups of tests or test folders. In the example below, the customer has selected folder "aa1" which contains 3 tests. Within "aa1" is a subfolder "bb1" that contains 3 additional tests. With folder "aa1" selected, Testim will map all 6 tests to TTM for Jira.
- Click the Create & map TTM for Jira tests button in the quick navigation menu.

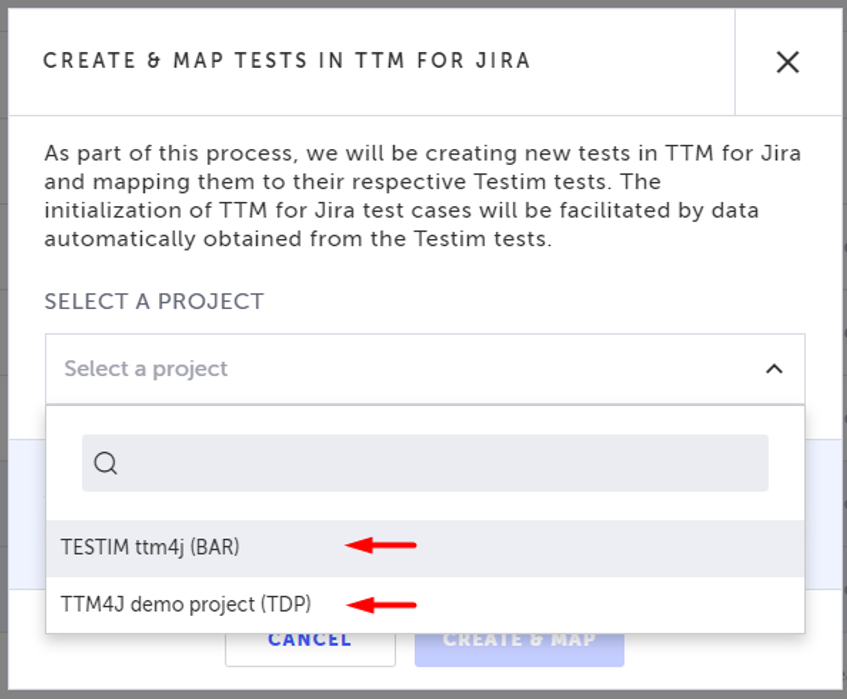
- Select the TTM for Jira Project where the test cases will be created.
- In the Folder Path in TTM for Jira section, select the folder paths option you want Testim to create in TTM for Jira.
- Create the same Testim folder path: your test cases in Jira will use the same names and hierarchy as your test cases in Testim.
- Create all test caes in My test cases folder: all test cases in Jira will be added to a single "My Test Cases" folder.
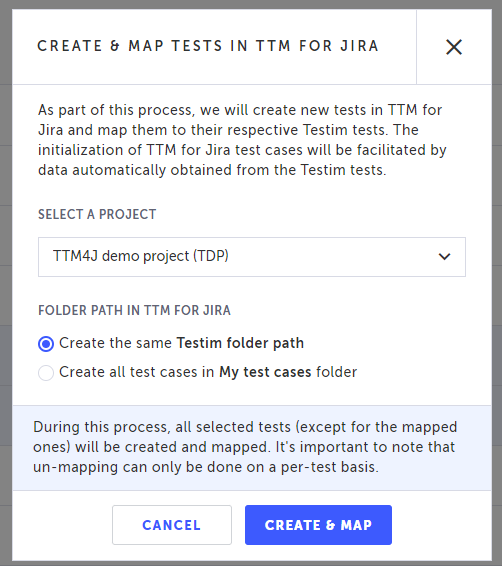
- Click the Create & Map button. Testim will display a progress bar.

- Testim will iterate through the selected Testim tests and create test cases in TTM for Jira using the Testim test case names and your selected folder structure.
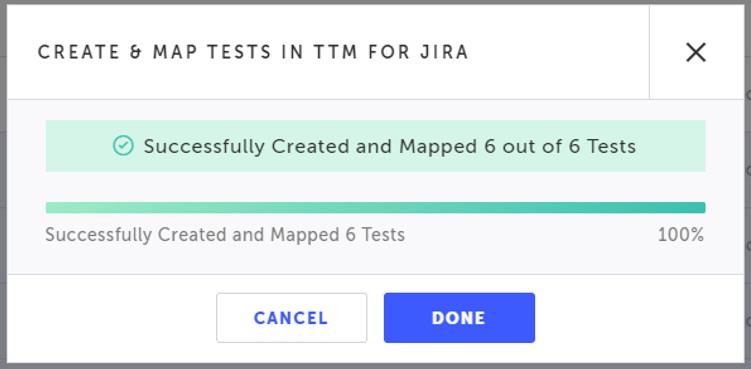
- At the end of the operation, Testim will display the mapping results. If all tests were mapped successfully, you will see a 100% completion message.
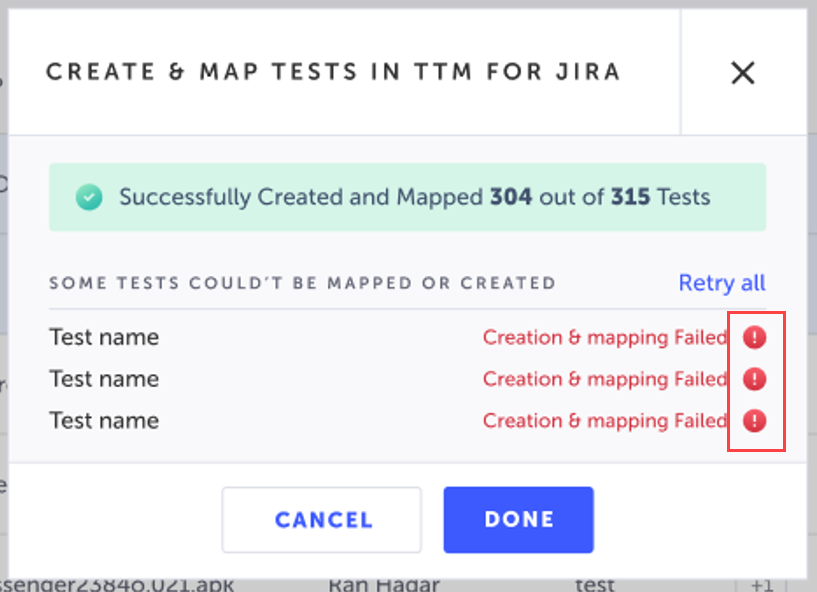
- If any tests failed to map, you will see a message containing the total number of successful tests mapped and the names of any failed mappings. You can hover over the ❗icon to view additional details about the failure.
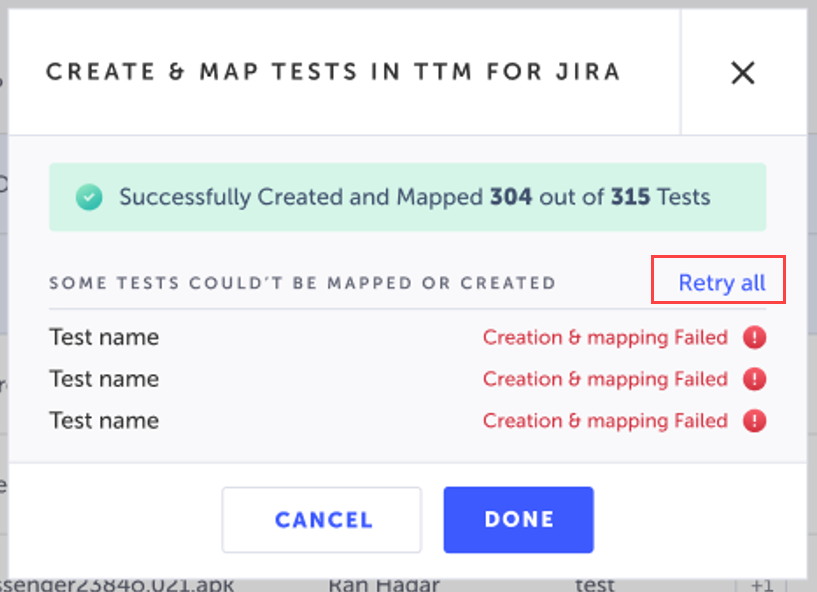
- After making any adjustments to your tests or TTM for Jira settings, click the Retry all link and Testim will attempt to map only the failed tests to TTM for Jira again.
How to Know if a Test is Already Mapped to TTM for Jira
You can identify if a test has already been mapped to TTM for Jira in the Testim test properties.
To see if a test has already been mapped to TTM for Jira:
- Navigate to the test and open the Test Properties panel.
- Navigate to the Test in TTM for Jira section. If this section has a selected Jira project and Test Name, this test has already been mapped to TTM for Jira.

Unmap a Test Already Mapped to TTM for Jira
You can manually unmap a test from TTM for Jira in the Testim test properties.
- Navigate to the test and open the Test Properties panel.
- Navigate to the Test in TTM for Jira section. Clear the values from the Jira Project and Test Name fields.
Running a test and viewing the Testim test results in TTM for Jira
To view the result of a test execution in TTM for Jira, you will need to run the mapped test in Testim using a Remote Grid only. After running a mapped test in Testim, the test result will be displayed in the relevant TTM for Jira relevant project under the ‘Test Execution’ tab (see here).

The names of Testim-originated test runs will use the following naming convention:
- “Testim.io
<branchName> : <executionName>" **<YYYY-MM-DD>**or - “Testim.io
<branchName>” **<YYYY-MM-DD>**(If there is no execution name)
NoteData will reflect the UTC date.
To view a test execution in TTM for Jira:
- Click on the relevant execution and get execution details (see here).
Upon Testim test run execution end
The following details are pushed from testim to TTM for Jira:
- Name - the name of the test in Testim.
- Status - the status of the execution. The status displayed is the TTM for Jira status, which was translated from the Testim status as follows (Testim > TTM for Jira):
| Testim | TTM for Jira |
|---|---|
| ABORTED | Unexecuted |
| SKIPPED (When test is in "Quarantine" status) | Blocked |
| TIMEOUT | Failed |
| PASSED | Passed |
| FAILED | Failed |
Note:Changing these statuses in TTM for JIRA may cause interruption in the integration
Note:Mandatory custom fields in TTM for Jira are not supported. Making a custom field on TTM for Jira
mandatory may cause the integration to stop working.
Updated 6 months ago