Okta SSO Integration
Okta is an identity and access management service provider. Testim integrates with Okta, allowing users of Okta to authenticate once in Okta and then access Testim without authenticating again.
SSO is a premium feature. Make sure the SSO feature is enabled for your deployment. If it is not, contact your Testim CSM.
To setup the Testim Okta integration:
- Login to the Okta Admin account.
- Go to Applications > Applications.
- Click Create App Integration.
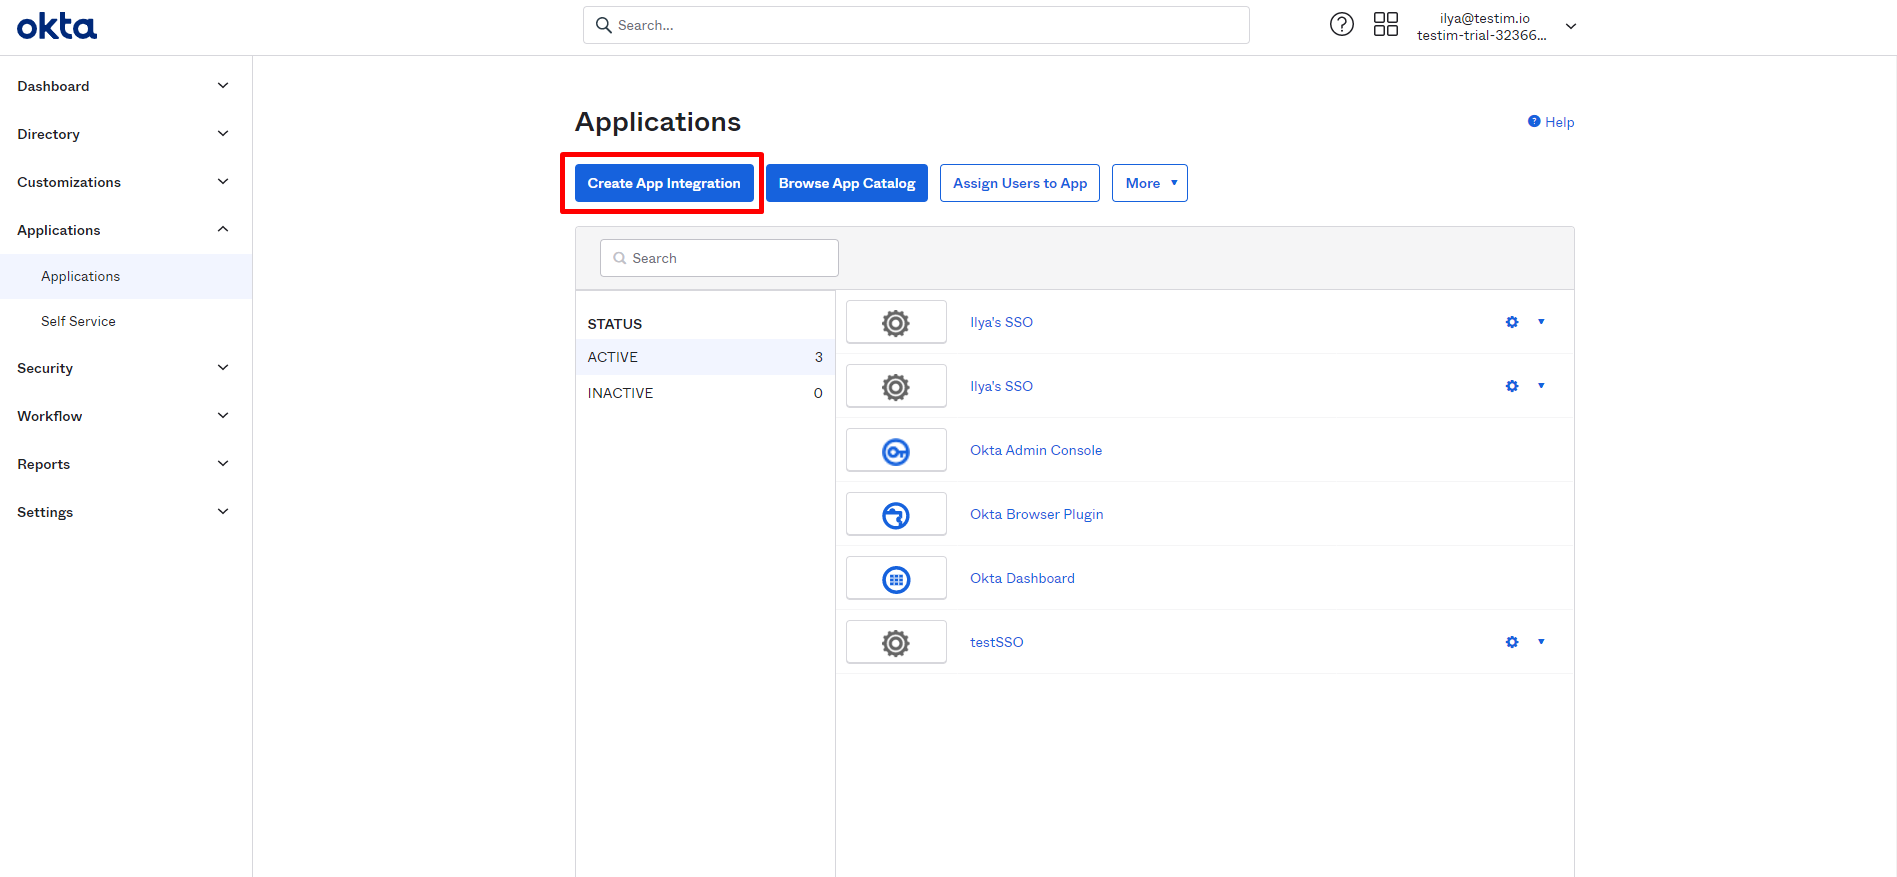
- Select the 'SAML 2.0 option.
- Click Next.
The General Settings screen is displayed.
- In the App Name field, enter a name for the connector app, such as 'Testim SSO'..
- Click Browse to select the Testim logo and then Upload Logo to upload it (optional).
- You can optionally add a description that will help your users know more about Testim.
- Click Next.
The Configure SAML screen is displayed. At this point the connector has been created. Now you need to connect it to Testim. - In another tab open Testim Automate, and click the user icon, located in the top-right corner.
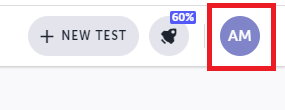
- In the drop-down menu, click Settings and click the SSO tab.
- Under Testim Service Provider Details, under Assertion Consumer Service URL, click the Copy button.
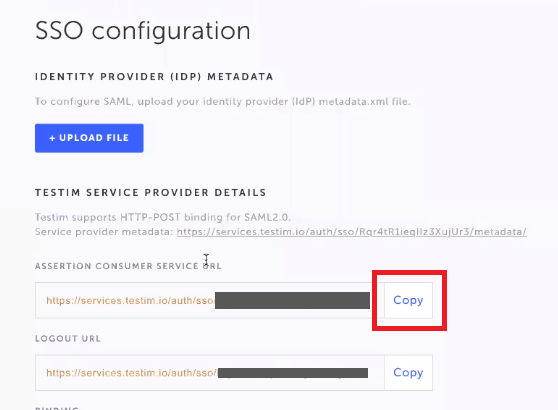
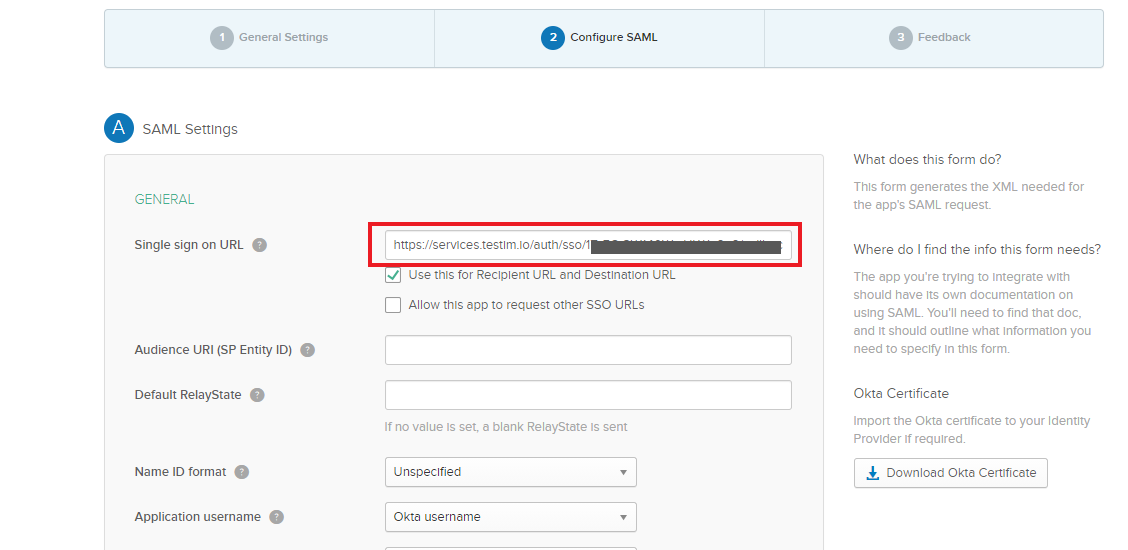
- Go back to the tab where you have Okta open and paste the copied Assertion Consumer Service URL into the Single sign on URL field.
- Go back to the Testim Automate tab and copy the SERVICE PROVIDER ENTITY ID/AUDIENCE code.
- In the Okta tab, paste this code into the Audience URI (SP Entity ID) field.
- Still in Okta, in the Name ID format field, select EmailAddress.
- In the Application username field, select Email.
- Under the the Name field, enter email.
- Under Value , select user.email. This maps the
emailfield in Testim to theuser.emailfield in Okta.
- Click Add Another.
- Repeat steps 20 – 22 for the following field combinations:
firstName(mapped touser.firstName)lastName(mapped touser.lastName)profilePictureis not mapped – this is optional.
- Click Next.
- Complete the feedback and click Finish.
- In the newly created application's page, scroll down to SAML Signing Certificates section.
- Click on Actions > View IdP metadata.
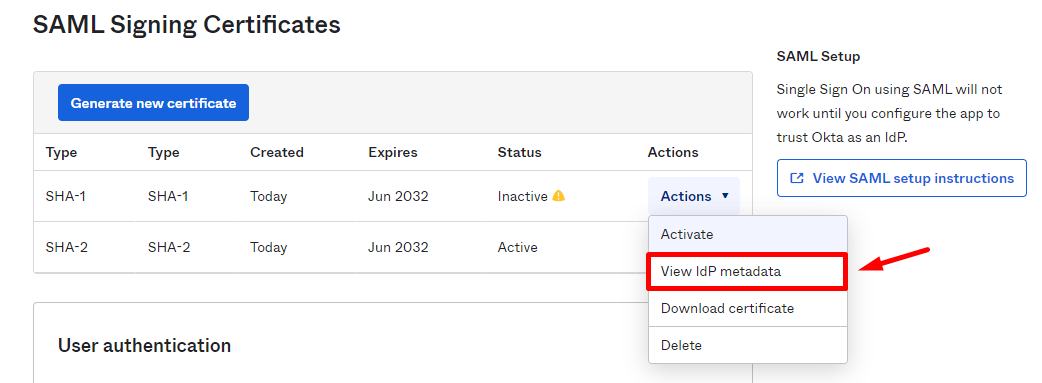
- Right-click and choose "Save As".
- Go back to the Testim tab, click the Upload File button and select the metadata.xml file that you have just saved.
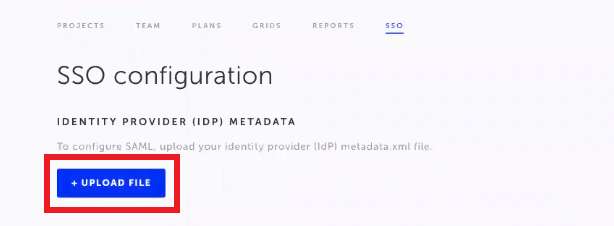
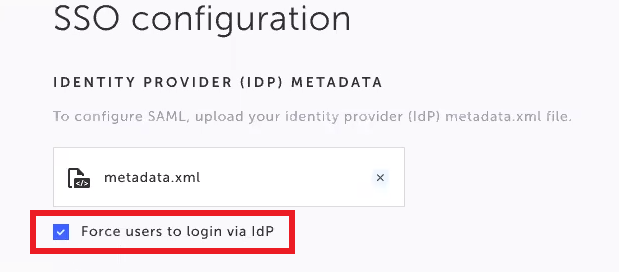
- In the same screen, enable the Enable SSO toggle.

- To ensure all users are only able to login through Okta, and not through the regular Testim login page, select the Force users to login via idP checkbox.
- Go back to the Okta tab and associate the newly created Testim SSO connector application to the relevant Users, Groups, or Roles. In this example we will show how to add a User, but the same applies to Groups and Roles.
- Navigate to Applications > Applications. The new Testim SSO connector will be displayed.
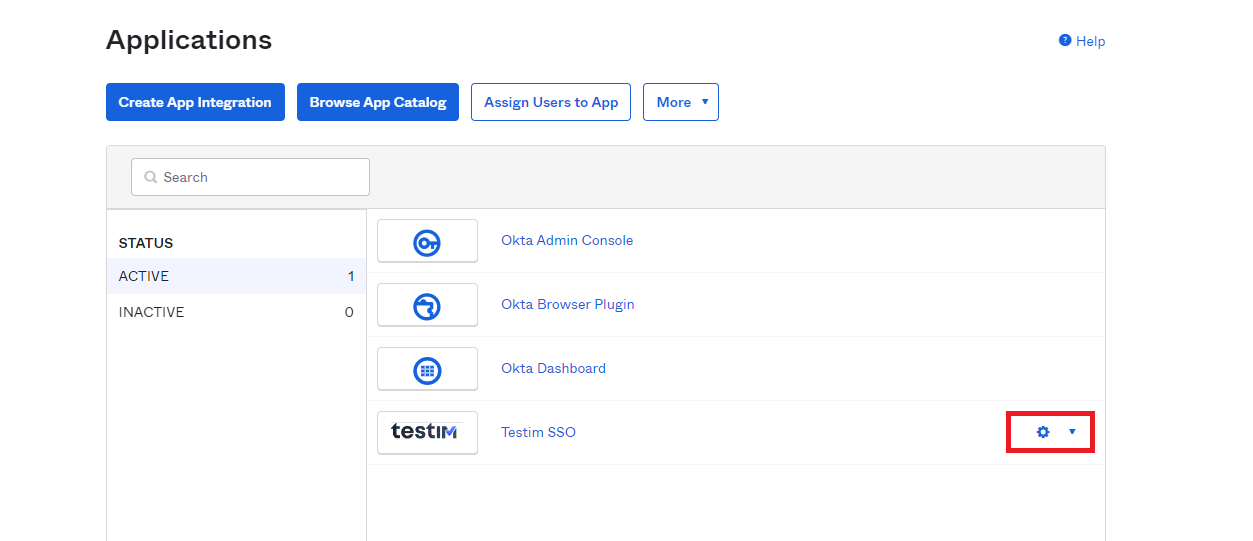
- Click the Settings (:fa-cog:) drop-down and select Assign to Users.
- Assign it to the relevant user(s).
The newly created app is created and will appear in the Okta portal of the specified users/groups/roles. From now these user(s) will be able to login to Testim from Okta SSO.
Updated 5 months ago
