
Step Properties Panel Parameters
Defining parameters through the step's properties panel (JavaScript/HTML)
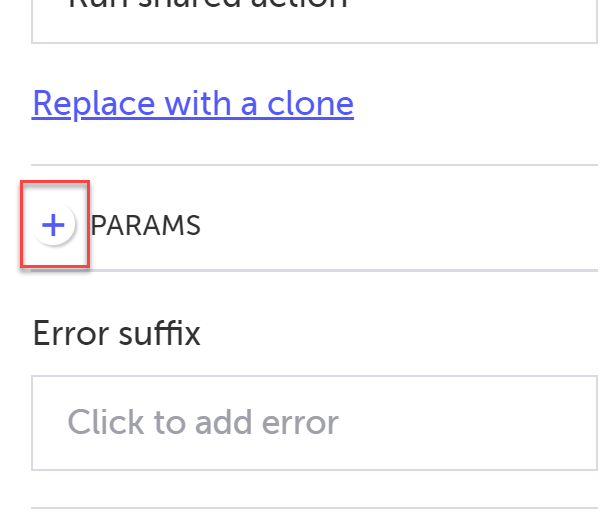
Most step types include the ability to define a parameter in PARAMS field, located in the Properties panel.
There are 2 types of parameters:
- HTML: Allows you to refer to HTML Elements in your app.
- JS (JavaScript): Allows you do define any JS expression.
Parameter Scope
The scope of the defined parameter is within the step itself. For example, if you defined the parameter in the Add custom action step, this parameter will be available to the JS function defined in the same step.
Defining an HTML parameter in a step's Properties panel
The following procedure uses the Custom Action step as an example, but it applies to all steps that include the PARAMS field in the Properties panel.
Shared parameterIf its a shared group/step, the JS/HTML parameters themselves will be shared across tests, but not their inner values, so the parameters can be reused in other tests with other values. Deleting a parameter from a shared step or group will have a cascading effect on all instances of that step or group, and this action cannot be undone.
To define an HTML parameter:
- In a new or existing test, add a step for which you want to define the parameter. For example, add an Add Custom Action step ('+' ⇒ Testim predefined steps ⇒ Actions ⇒ Add Custom Action) .
- In the Add Step dialog, enter a name for the step. For example, 'Click'.
- Click Create Step.
The Function editor pane is displayed on the left and the Properties pane on the right.

- Click on the '+' icon next to the PARAMS field, and select HTML.

- In the AUT, select an element for which you want to assign the parameter. For example, the Twitter icon at the bottom of the page.

A snippet of the selected element is displayed in the PARAMS section.

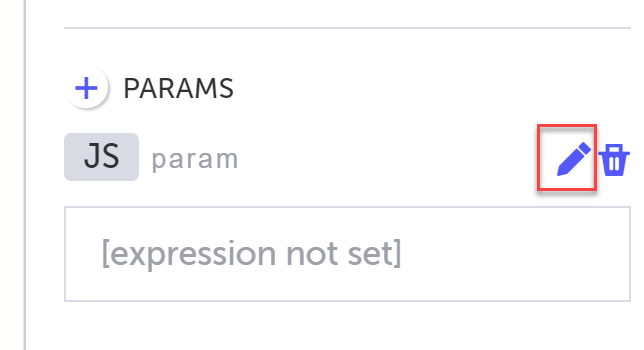
- Double-click the name next to the HTML title and type a new name.

At this stage the HTML parameter is defined and ready to be used.
Using the parameter in the step
The defined parameter can be used within the step itself.
For example, you can define a function that uses the parameter.
In the Function pane, type a function that uses the parameter:
twitter.click()Run the test and see that the element is clicked.
In order to use Jquery in your custom validations and actions, your site needs to have Jquery installed.
Reusing the step and assigning a different parameter
The scope of the parameter that we have defined is within the step itself, but it is possible to reuse this step to create another step of the same type (e.g. Custom Action) and then simply reassign the parameter to another element (e.g., instead of the Twitter icon, we will now assign the LinkedIn icon).
To reuse the step and assign a different parameter:
- In the same test, add the shared step that we have previously created from the Shared Steps menu. For example, '+' ⇒ Shared steps ⇒ Click

The shared step is duplicated.

- Double-click the new step to edit it.
- The previous parameter still exists, but you are required to assign a new HTML element, by clicking the Assign HTML button.

- Choose another element. For example, the LinkedIn icon at the bottom of the page.

When you will run the test both buttons will be clicked.
Adding JavaScript parameter in the step's Properties panel
JavaScript parameters are commonly used for constants and variables.
We will mainly use those when we want to forward values to a group or to other reusable steps.
You can find examples for using JS params here.
To add a JavaScript parameter:
-
In the Properties Panel, click the + button next to Params and then click JS.
-
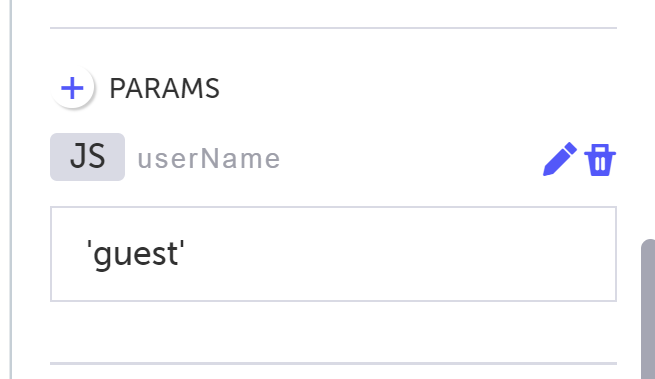
Enter a name for the first parameter, by clicking the Edit icon and then replace the "param" text with the new name.
-
Enter a value in the field below the parameter name. If the value is a constant string value use ' ' around it. For example, 'guest'. This value will be available in this test only (i.e., the value will not be shared across tests.
- Repeat steps 1-3 to add additional parameters.
- Click Save and then OK.
Updated 6 months ago