File upload step validation
Record file upload interaction using your OS file browser or by drag and drop.
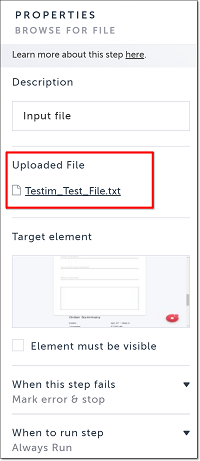
A file upload step (either “File Drop” or “Browse For File”) allows you to ensure that the file(s) you wish to upload when you run your test are always available regardless of where the test runs. When you record your test, the file(s) are uploaded to the Testim server. When you run your test, the file(s) are downloaded from the server to your local machine, and then uploaded to the AUT. You can view which file(s) have been uploaded to the Testim server for a step by opening the step’s properties.
The upload action can work only on native input elements.
Common Use Cases
- to upload a file in order to test a flow
- to validate that only specific file types can be uploaded
- to validate that only one file (instead of multiple) can be uploaded
Prerequisites
- Ensure Chrome Dev Tools is closed. File upload steps cannot run if Dev Tools is open.
- Ensure the Chrome settings option "Ask where to save each file before downloading" is disabled. If the option is enabled you won’t be able to record file upload steps. (See below.)
- The recommended file size to upload is up to 2 MB. If you need to test your app while uploading a bigger file, please contact your Testim representative.
There may be times when this step fails with an "Element not visible" error because the upload file element is not visible to the user. In this case, uncheck the "Element must be visible" setting in the properties of the upload step and run the test again. (See below.)
To disable the “Ask where to save each file before downloading” setting in Chrome:
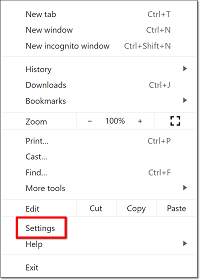
- In the Chrome browser, click on the Chrome menu (three dots at the top right).

The Chrome menu options are shown.
- Click on Settings.
The Chrome Settings page opens.
- Click on Advanced.
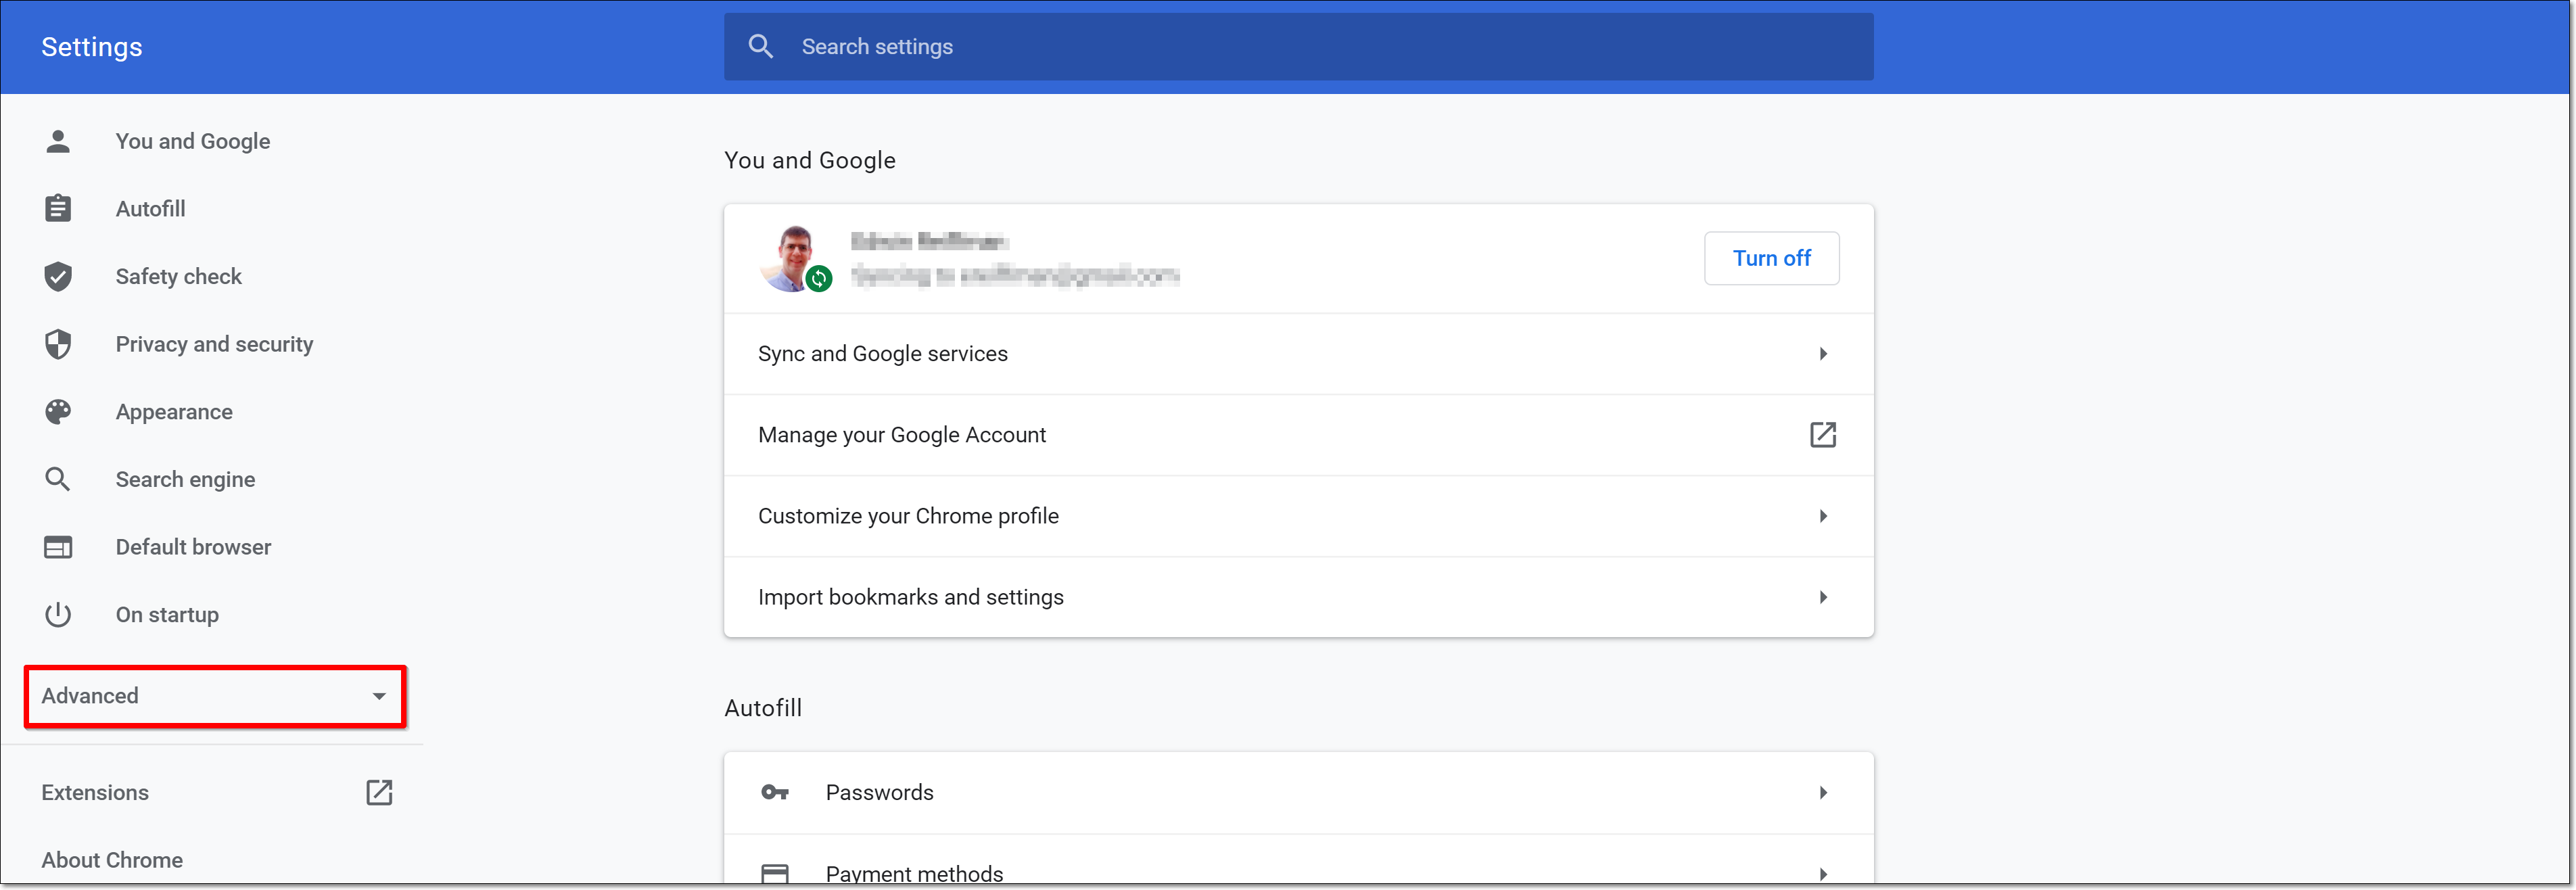
The Advanced menu expands.
- Click on Downloads.
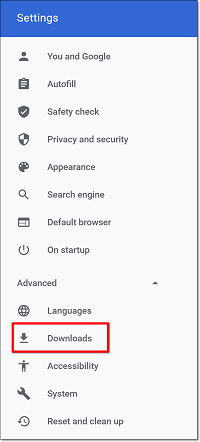
The Downloads settings page is shown.
- Ensure the Ask where to save each file before downloading toggle is disabled (to the left). Click on it to toggle between enabled (right) and disabled (left).

To uncheck the "Element must be visible" setting:
- Hover over the desired upload step and click on the Show Properties (:fa-cog:) icon.

The Properties panel opens on the right-hand side.
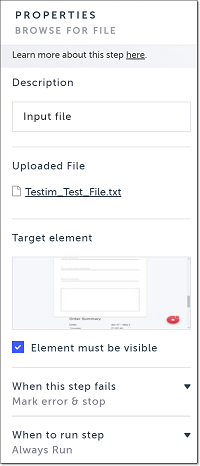
- Click the Element must be visible checkbox to deselect it.
Adding a file upload step
The file upload step is an automatic step that is added by recording the action of uploading a file to the AUT (not a predefined step). During the recording, the uploaded file that is uploaded to the AUT is also uploaded to the grid so it is available during the execution of the test.
To create a “File Drop” or “Browse For File” step:
- In the flow of recording your test, navigate to a location in your app to upload a file. This may be a drag and drop box in your app, or a link which opens your local file browser.
- Drag and drop your file(s) or follow the prompts in your local file browser to select your file(s).
The file is uploaded to the Testim server, and a File Drop step or a Browse For File step is created.

When your run your test, the file is downloaded from the server to your local machine, and then uploaded to the AUT.
To view the lists of files in a “File Drop” or “Browse For File” step:
- Hover over the upload step for which you want to view the files and click on the Show Properties (:fa-cog:) icon.

The Properties panel opens on the right-hand side showing the uploaded file(s).
Updated 5 months ago
