PCloudy integration
Run tests you create with Testim on PCloudy browsers and mobile devices
This article will review how to set PCloudy as a grid proivider on Testim and how to run your tests.
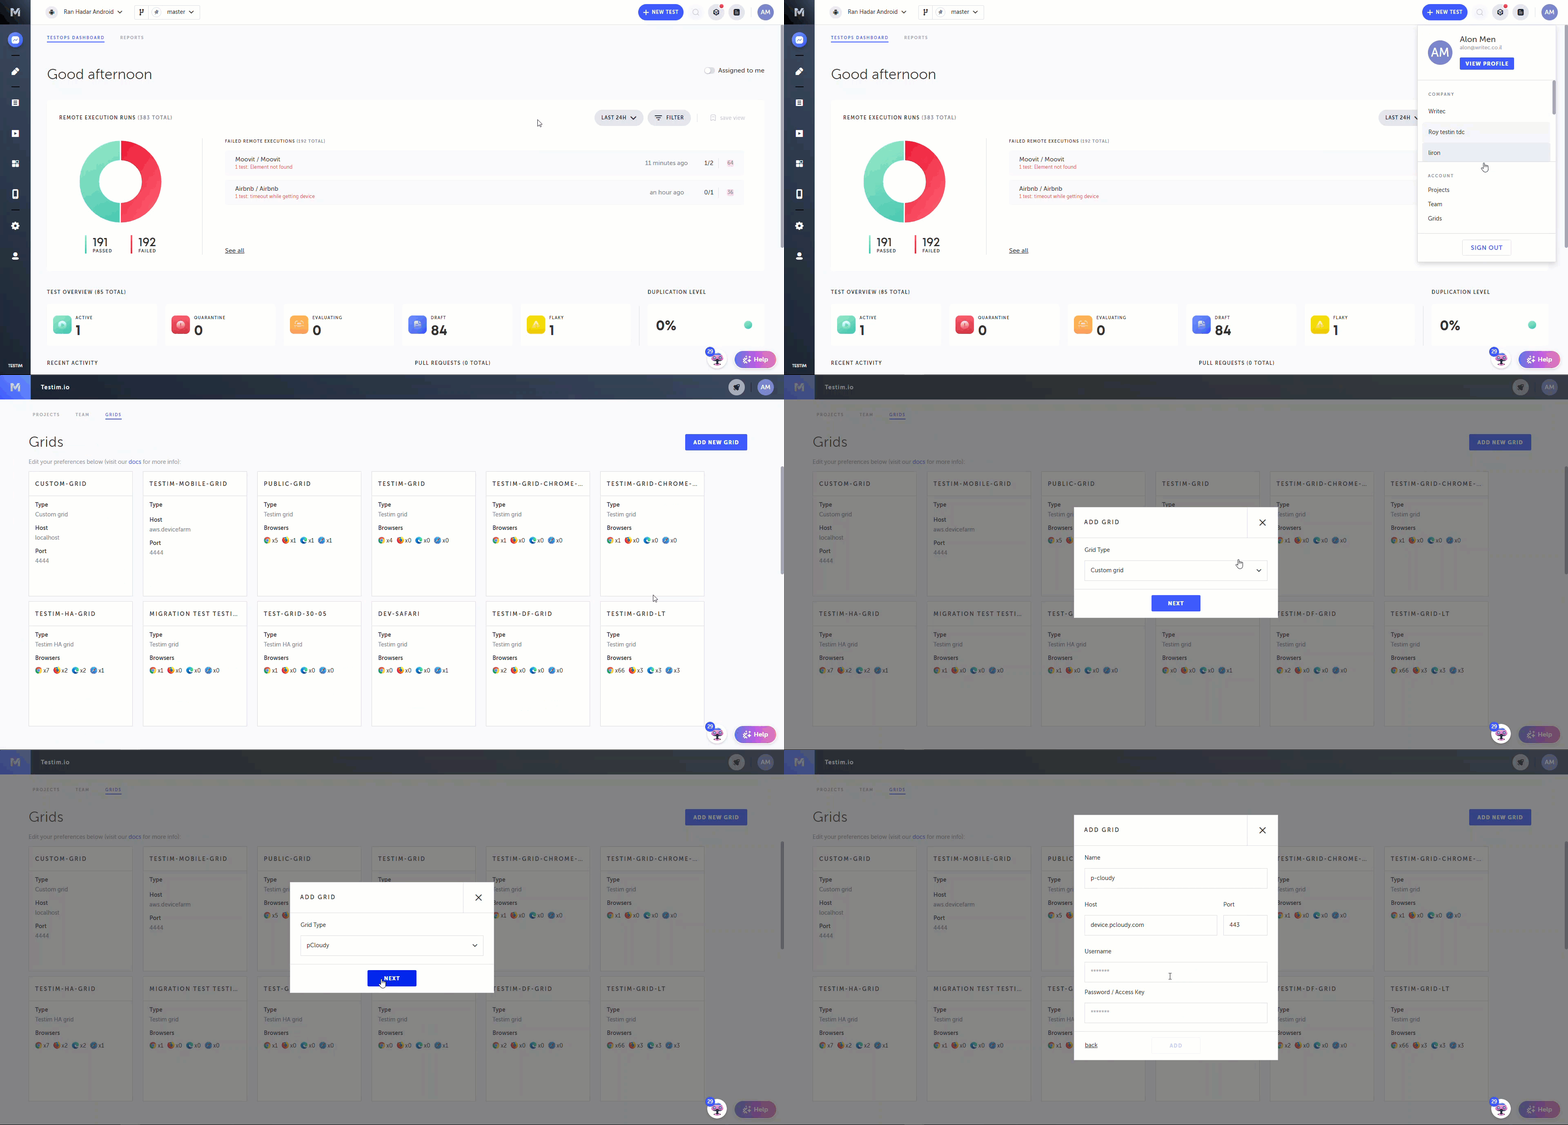
How to add a PCloudy grid
To add a PCloudy Grid:
- Follow the instructions in the Adding a grid section, while selecting the PCloudy option as the Grid Type.
- Click Next.
- Update the following fields:
- Name: The grid name to use at run time.
- Host: PCloudy host name.
- Port: The port to connect to on the PCloudy side.
- Username: PCloudy username that will be used to connect.
- Password/Access key: PCloudy password or key that will be used to connect.
- Click Add.

How to run on the grid
You can run your tests remotely using one of the following methods:
Add --grid parameter with the grid name.
Use Grid field to choose on which grid to run your tests.
Use Grid field to choose on which grid to run your tests.
From the Editor
You can run your test on the grid directly from the test editor.
- Click on the options arrow next to the "Run" button
- Click on "Run on a grid".
To change the configuration/grid/base url for that run click on "Edit".
Updated 4 months ago
