qTest Integration
Show Tests run results in your qTest project
What is qTest?
Tricentis' qTest test management platform provides Agile teams with a suite of software testing tools designed to improve speed, efficiency and collaboration throughout the software testing lifecycle. The platform's flagship product, qTest Manager transforms the test case management process, helping enterprise teams get faster and more efficient. Additionally, qTest Insights offers the testing team a self-service business intelligence tool to consolidate, manage and analyze all your test metrics.
Why do I need qTest integration?
The qTest integration allows you to link a test in qTest to a test in Testim. After running the test in Testim, the test results will be automatically displayed in qTest's execution results, giving you a single view of the tests that were executed in Testim and in qTest.
Setting qTest integration
Before using the qTest and Testim integration, you will need to connect Testim to the desired qTest project. This process is required only once.
To connect Testim to qTest:
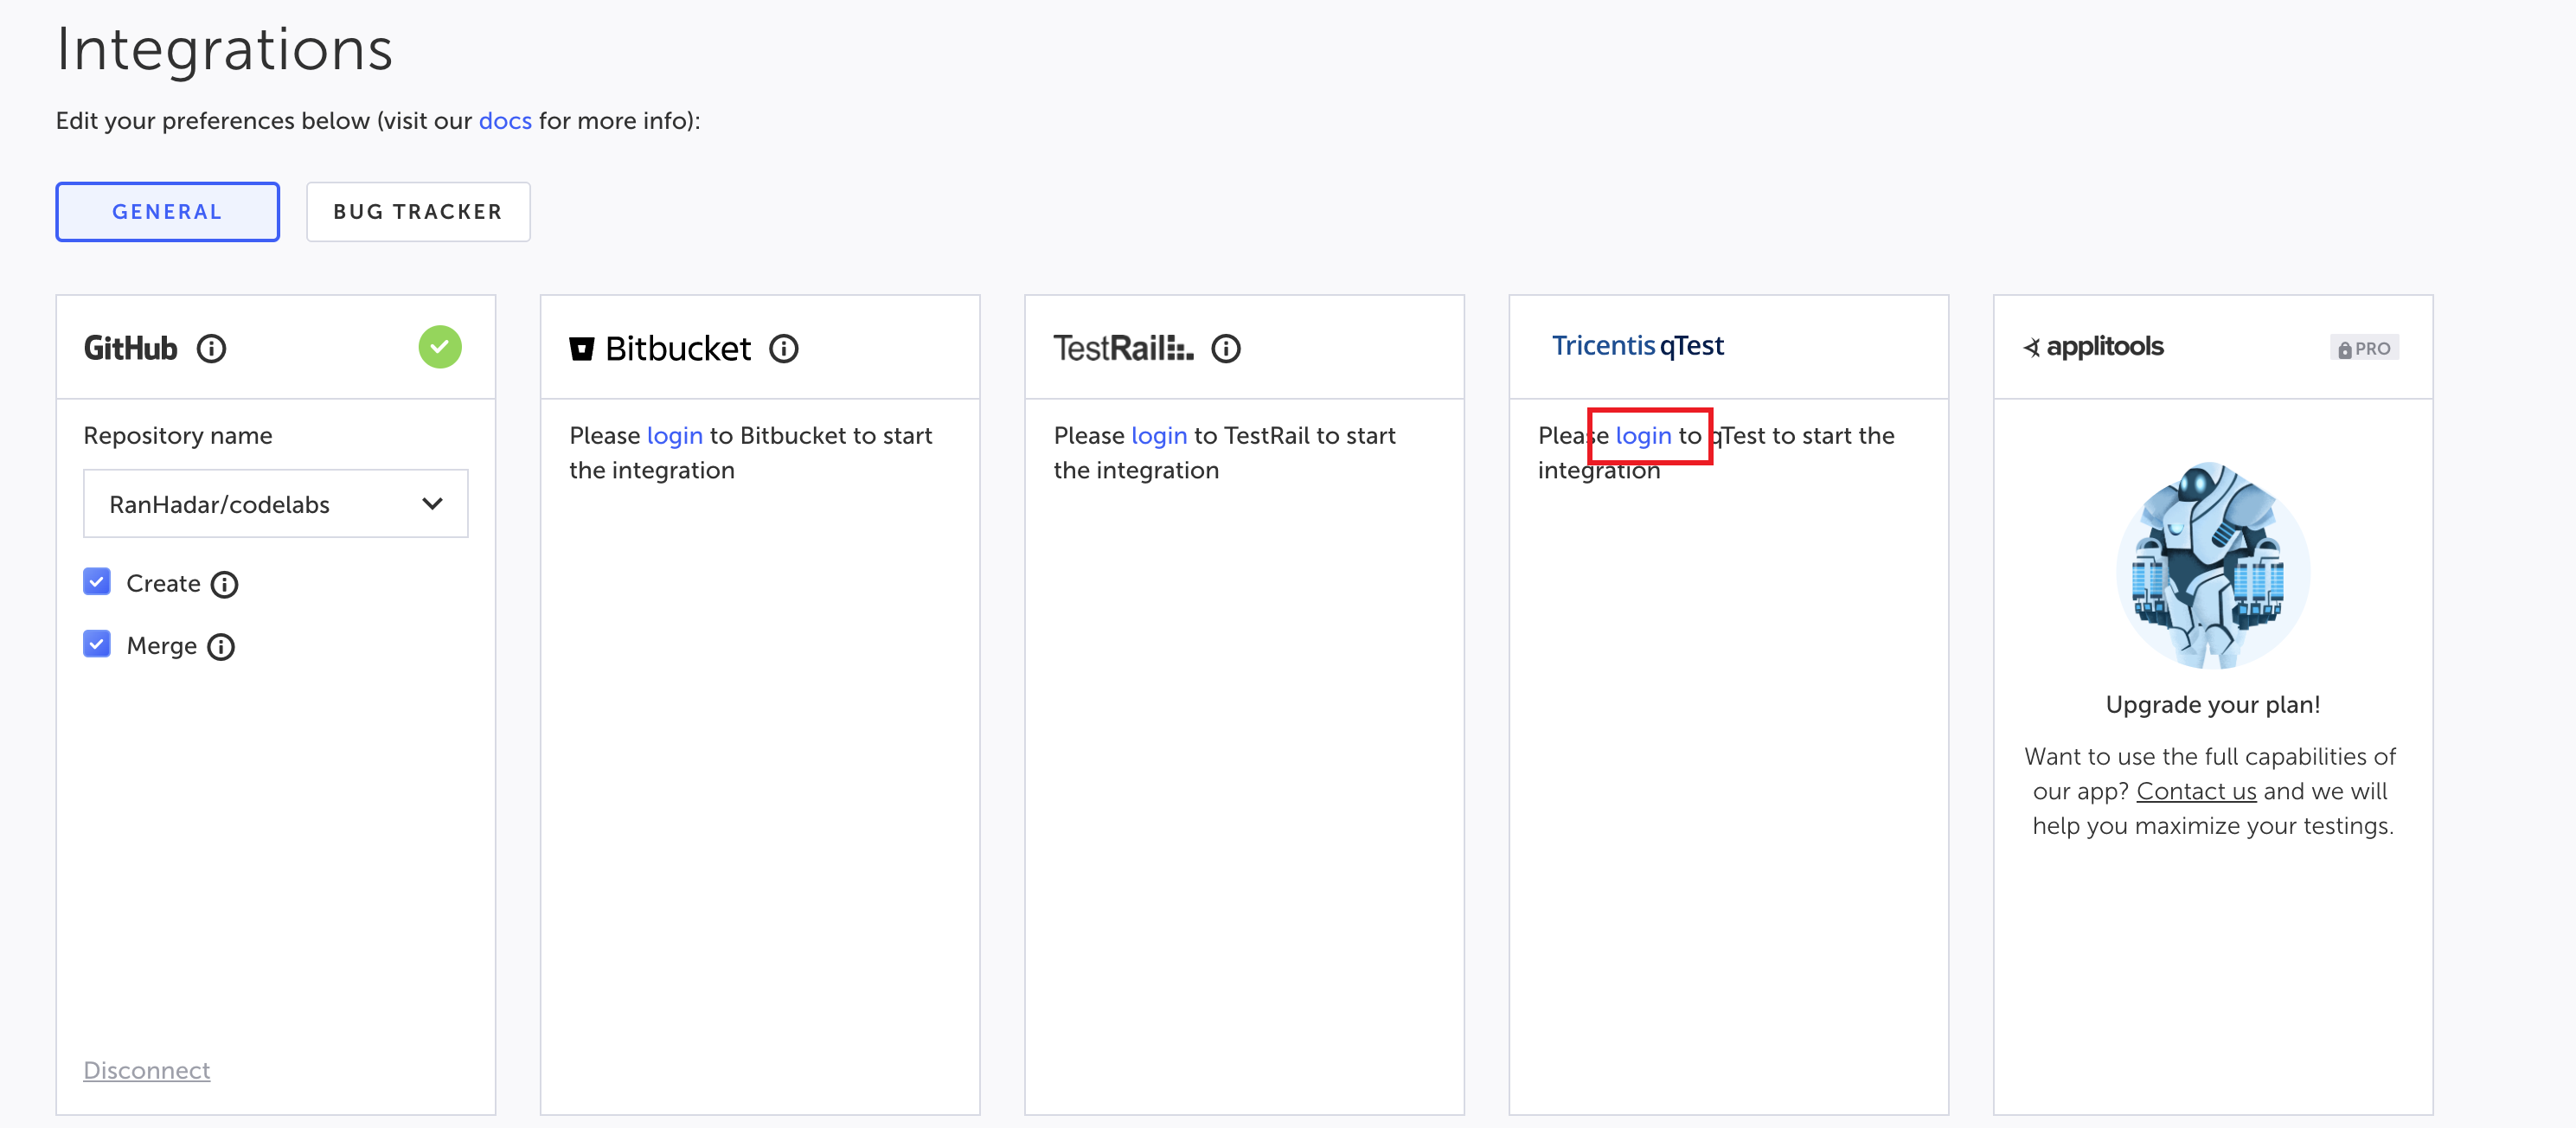
- Go to Settings > Integration tab. Under General you will find various integration modules.
- In the qTest integration module, click Login.
- Open qTest, copy the domain from the URL (make sure you are logged in and in the designated project) and paste it into the URL field in Testim. The URL structure should be
https://<projectName>.qtestnet.com/. ReplaceprojectNamewith the name of the project. For example, theprojectNamein the account below is myProject.

- In Testim, the Username field, enter your qTest username.
- Login to qTest as an Admin user, click Resources (downwards arrow).

- In the Resources screen, open the API &SDK menu.

- Copy the Bearer Token from qTest and paste it in the ApiKey field in Testim.
- In Testim, click Connect
- In Testim, select the qTest project(s) that you would like to connect to from the list.
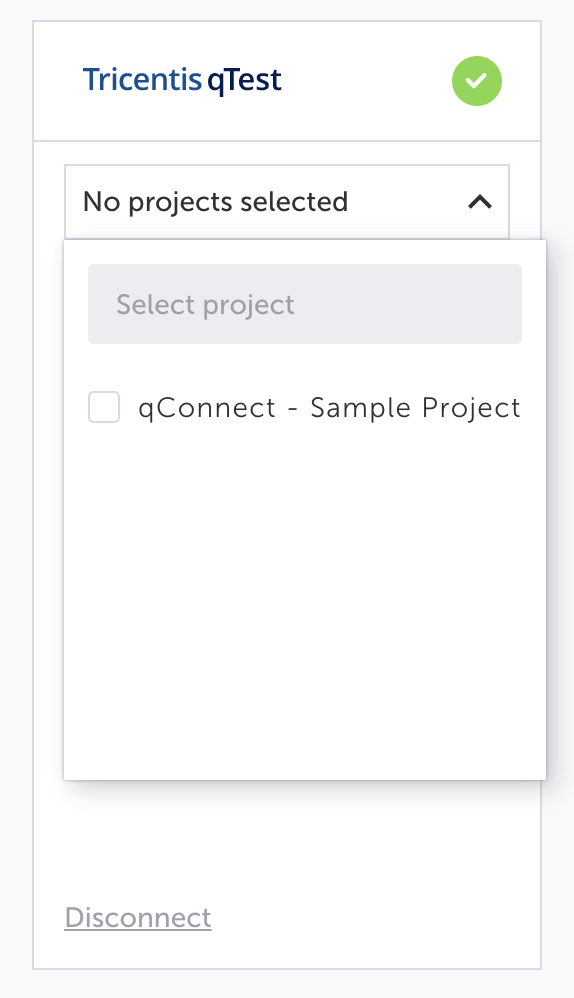
At this point Testim is connected to a project in qTest, but not to a specific test.
You may connect one TMS (Test Management System) at a time. So if your Testim system is already connected another TMS, you will need to disconnect this TMS first and only then connect qTest. Note that by disconnecting the TMS, you will remove the connections between the tests. So, if you want to connect the previous TMS again you will have to recreate the connections as well.
Connecting a test in Testim to a qTest test
After setting up the integration between Testim and qTest, you are ready to connect a specific test in Testim to a test in qTest.
To connect a test in Testim to a test in qTest:
- In Testim, open the test that you would to be connected.
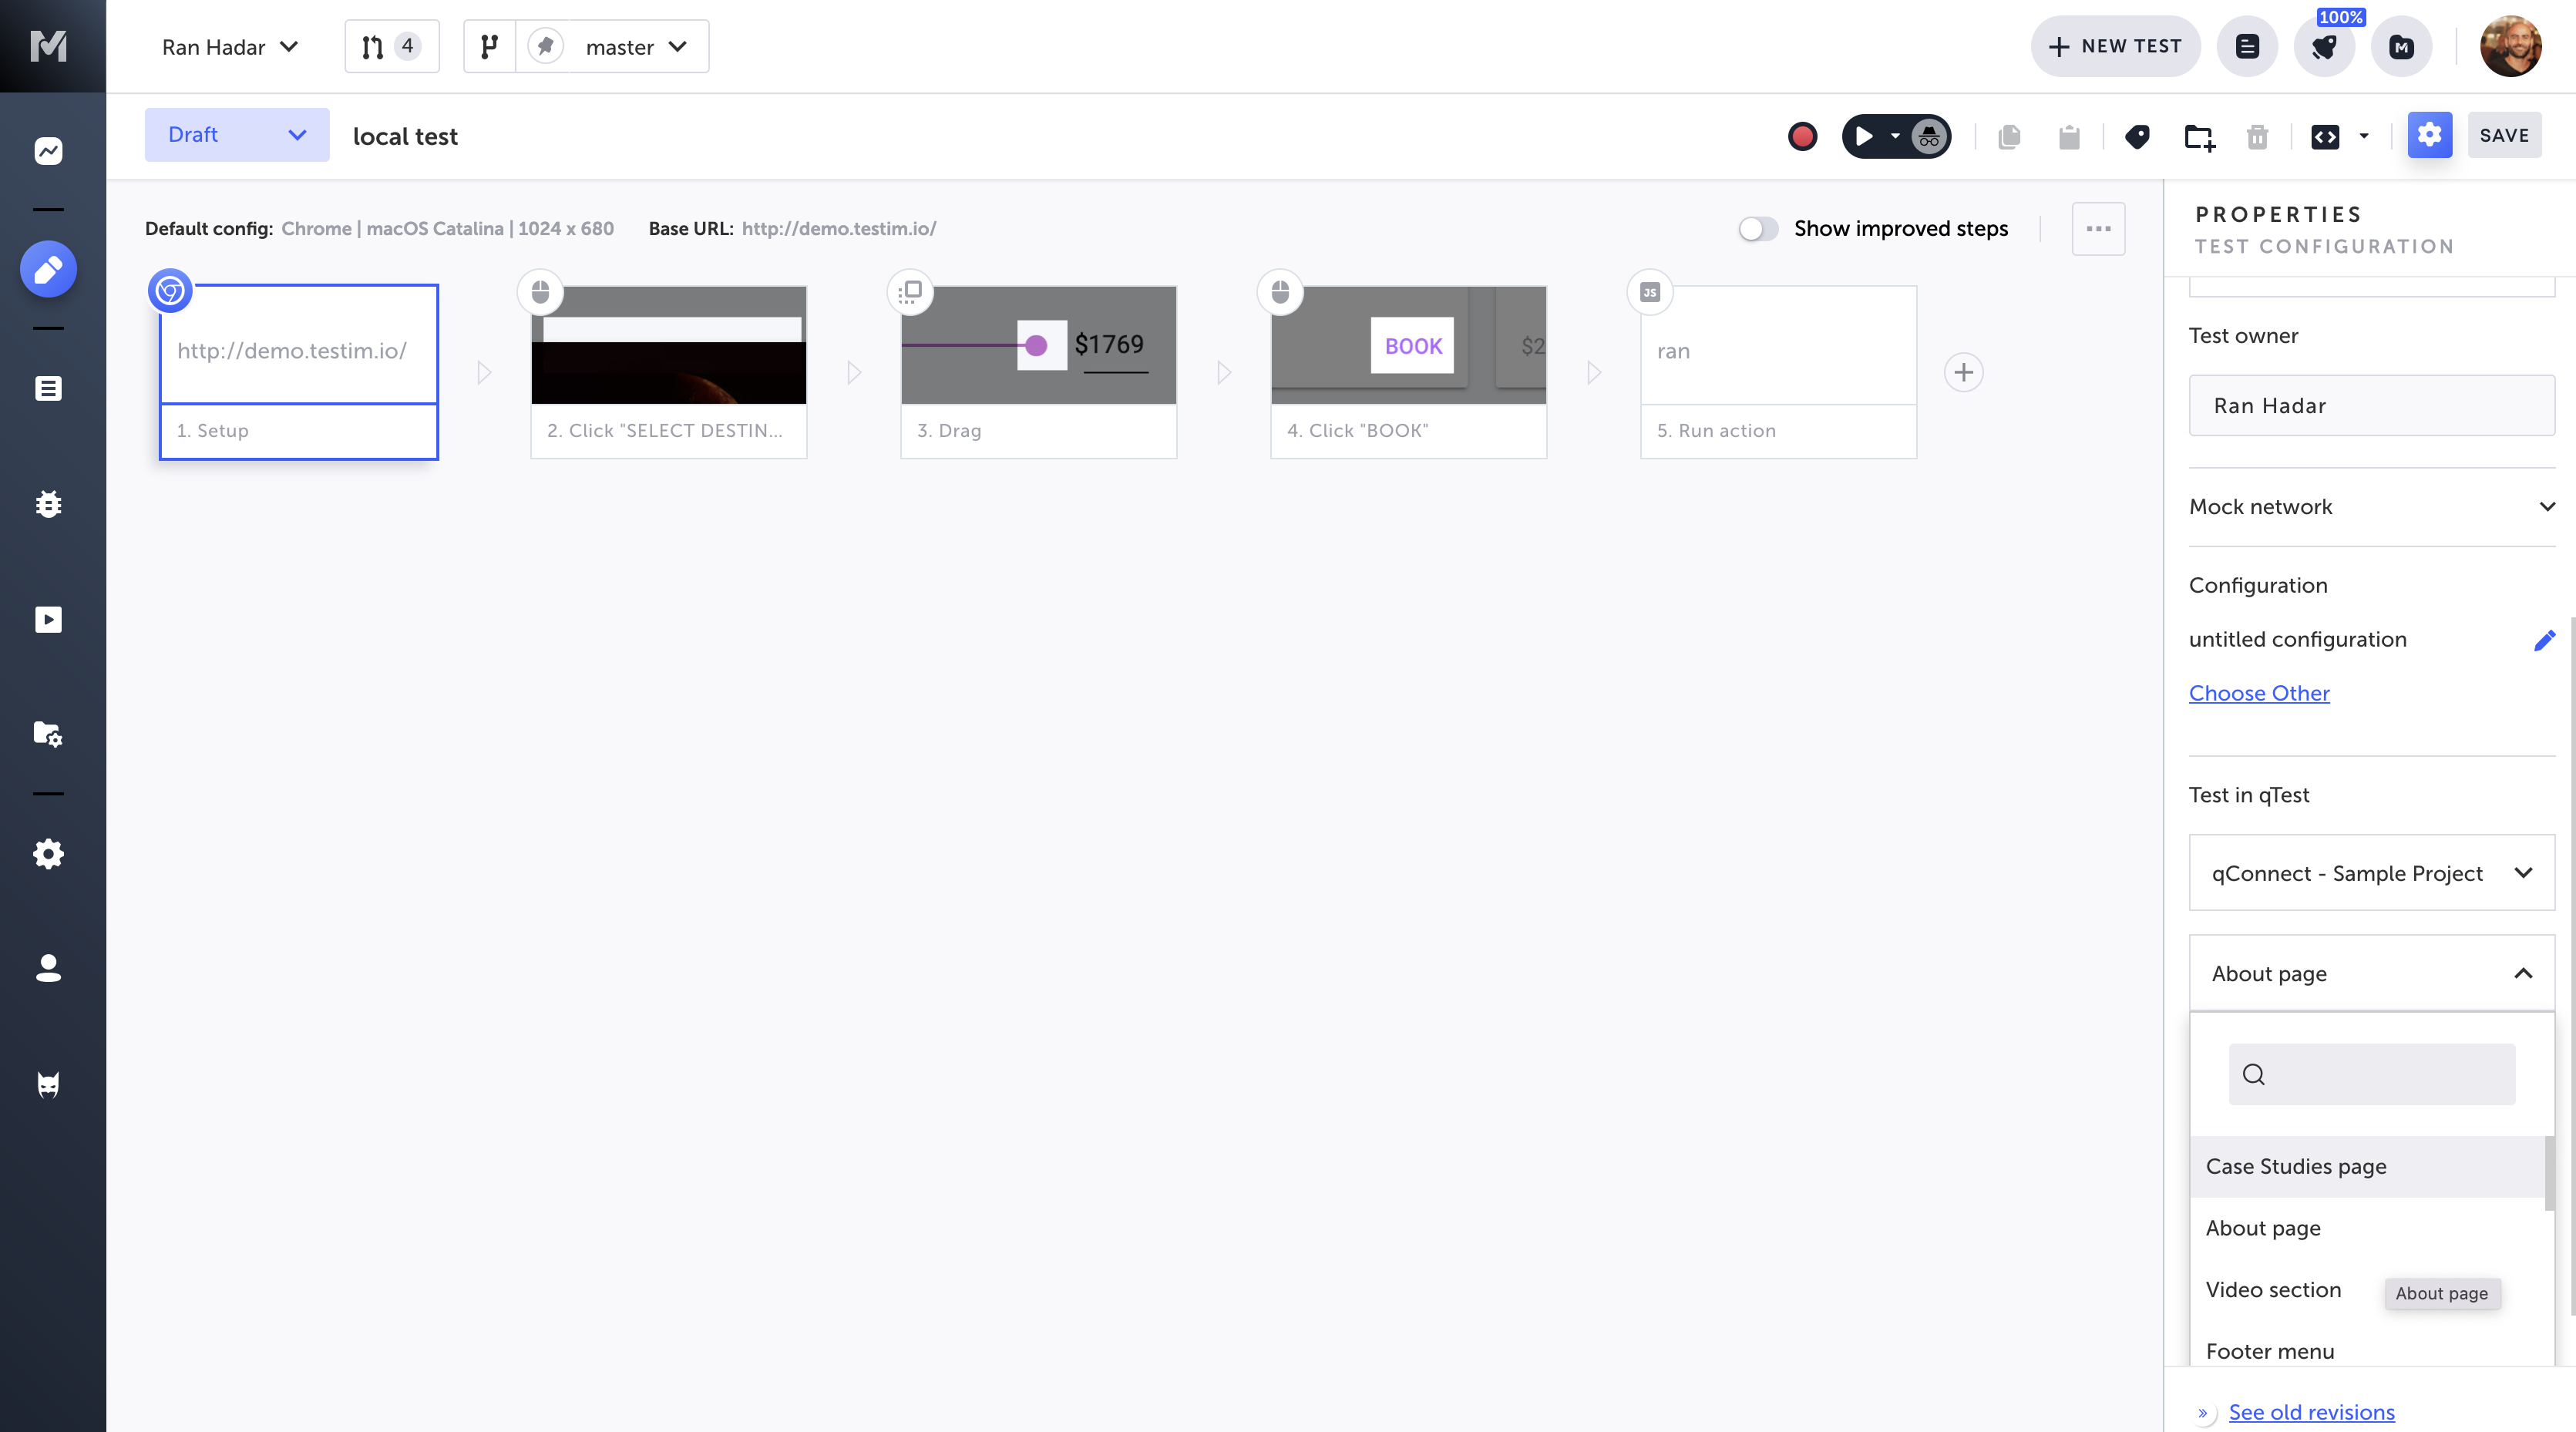
- Inside the test in Testim, click the Properties icon () on the Setup step (the first step).
- In the setup steps' Properties panel, under Test in qTest, select the qTest project from the first drop-down menu and then the specific test from the second drop-down menu.
- Click Save.
qTest test case has to be "approved" upon first connection

Running a test and viewing the Testim test results in qTest
To view the result of a test execution in qTest, you will need to run the connected test in Testim using a Remote Grid only. After running a connected test in Testim, the test result will be displayed in the relevant qTest project under the Test Execution tab. The names of Testim-originated executions will use the following naming convention: "<Testim.io branch name> - ".
If the test in qTest has been modified (new version number), only the approved version of the test will be executed in Testim. This means that if you only clicked Save, the previous approved version will run, and it will be reflected in qTest as status: "unexecuted" from the execution report. If you clicked Save and then Approve, the new approved version will run.
To view a test execution in qTest:
- In qTest Manager, go to Test Executions.
- In the navigation pane, click on the relevant execution.
The following screen is displayed:
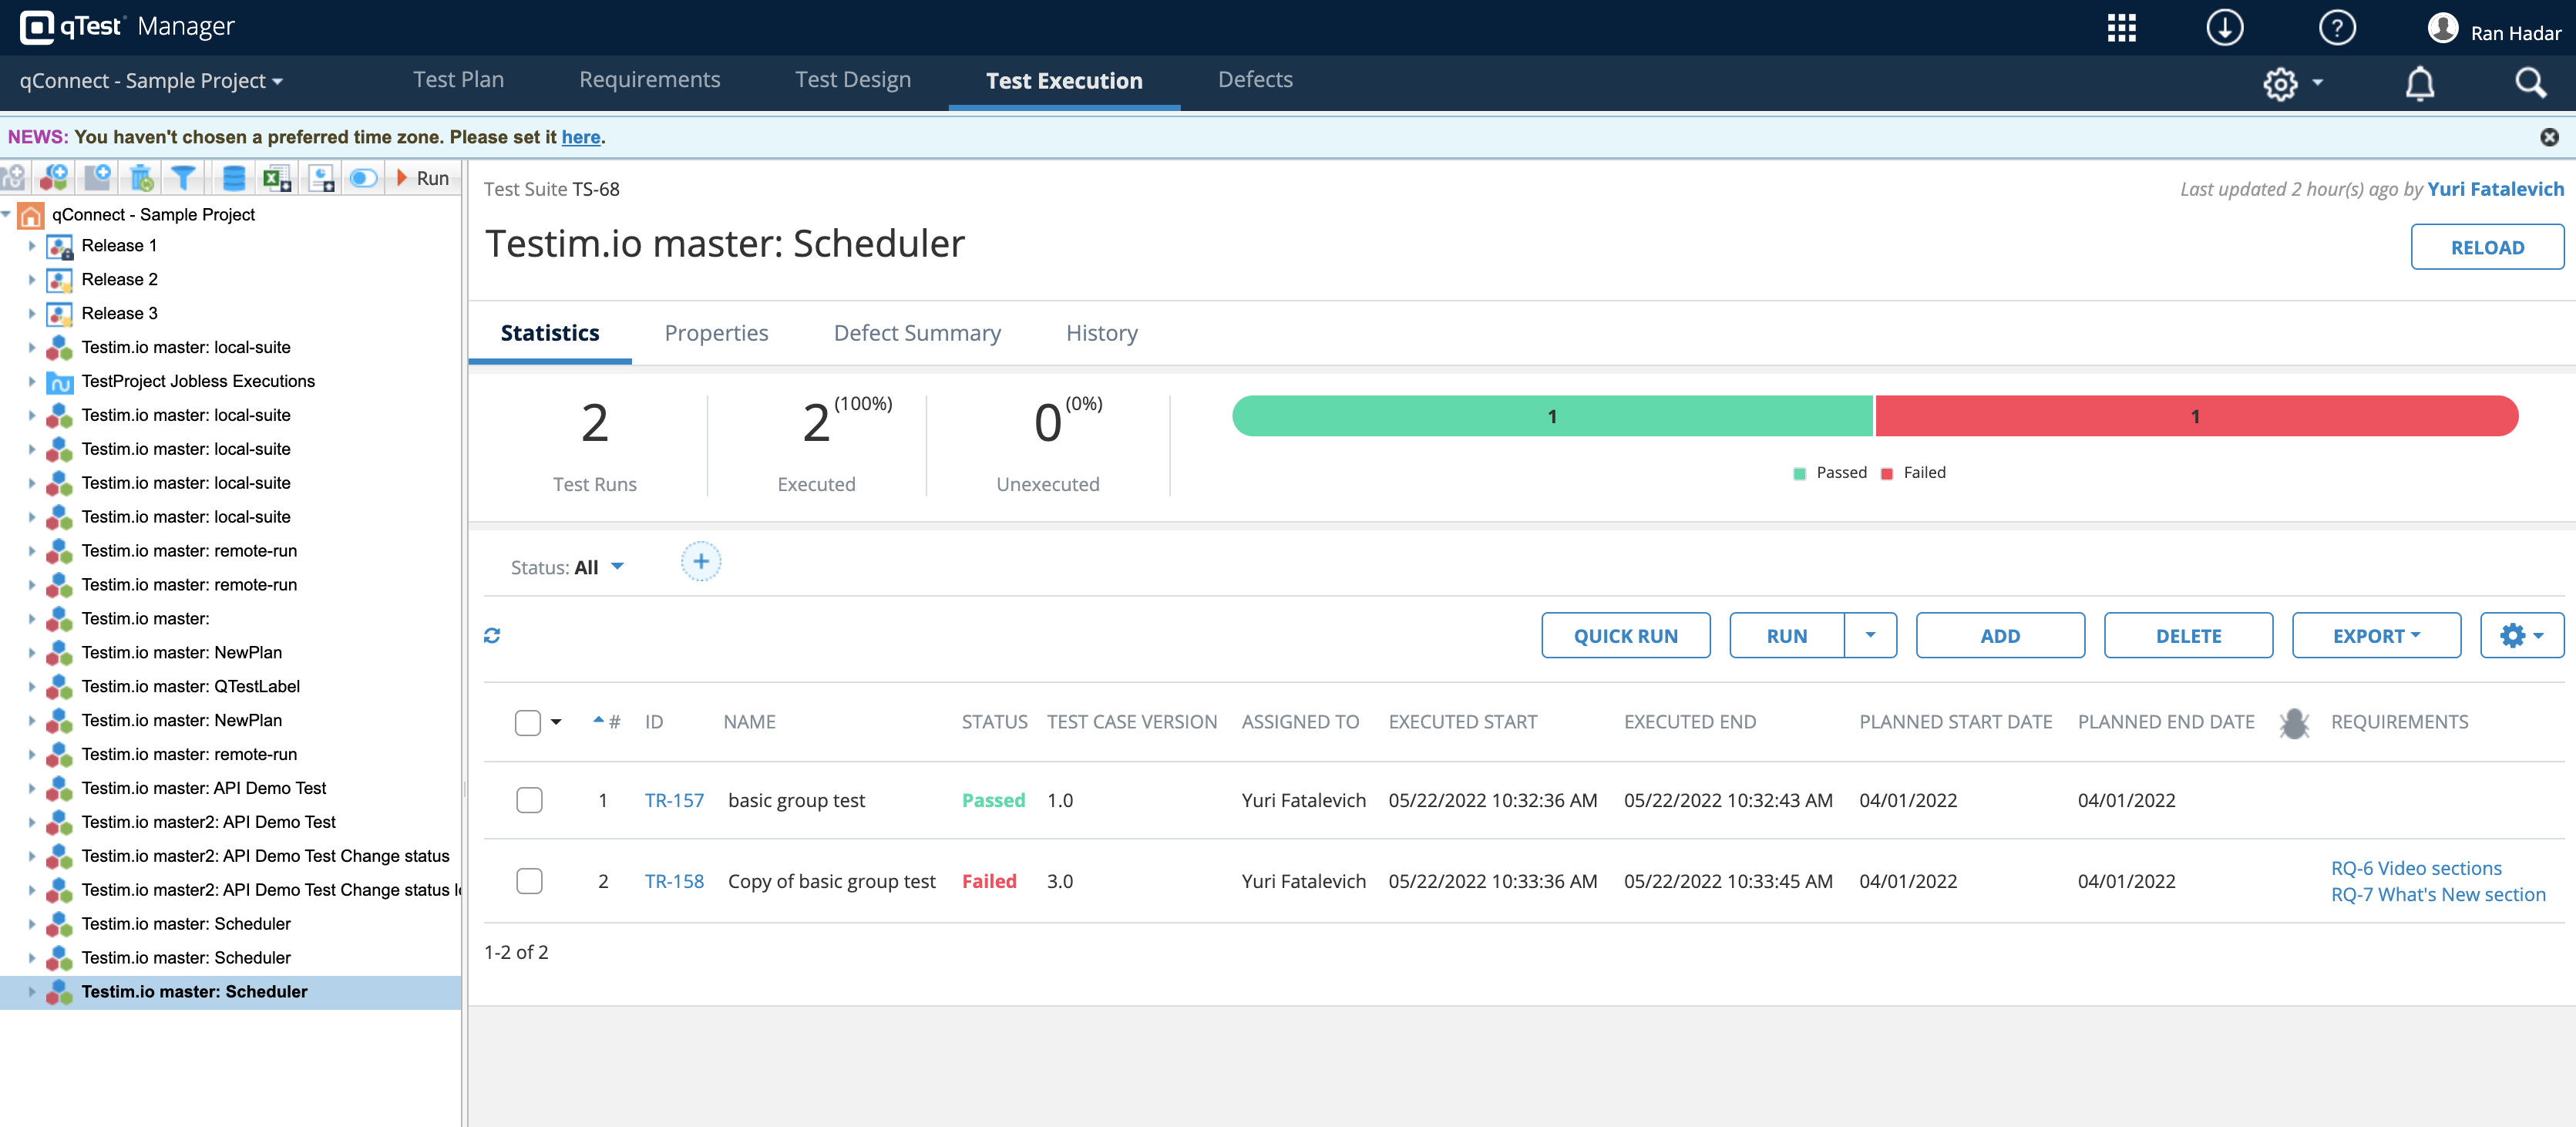
In the bottom-right pane, a list of executions is displayed. The ID column represents the test ID in qTest. The Status column displays the test run results coming from Testim.
3. Click the ID to view the test details.
The following screen is displayed:
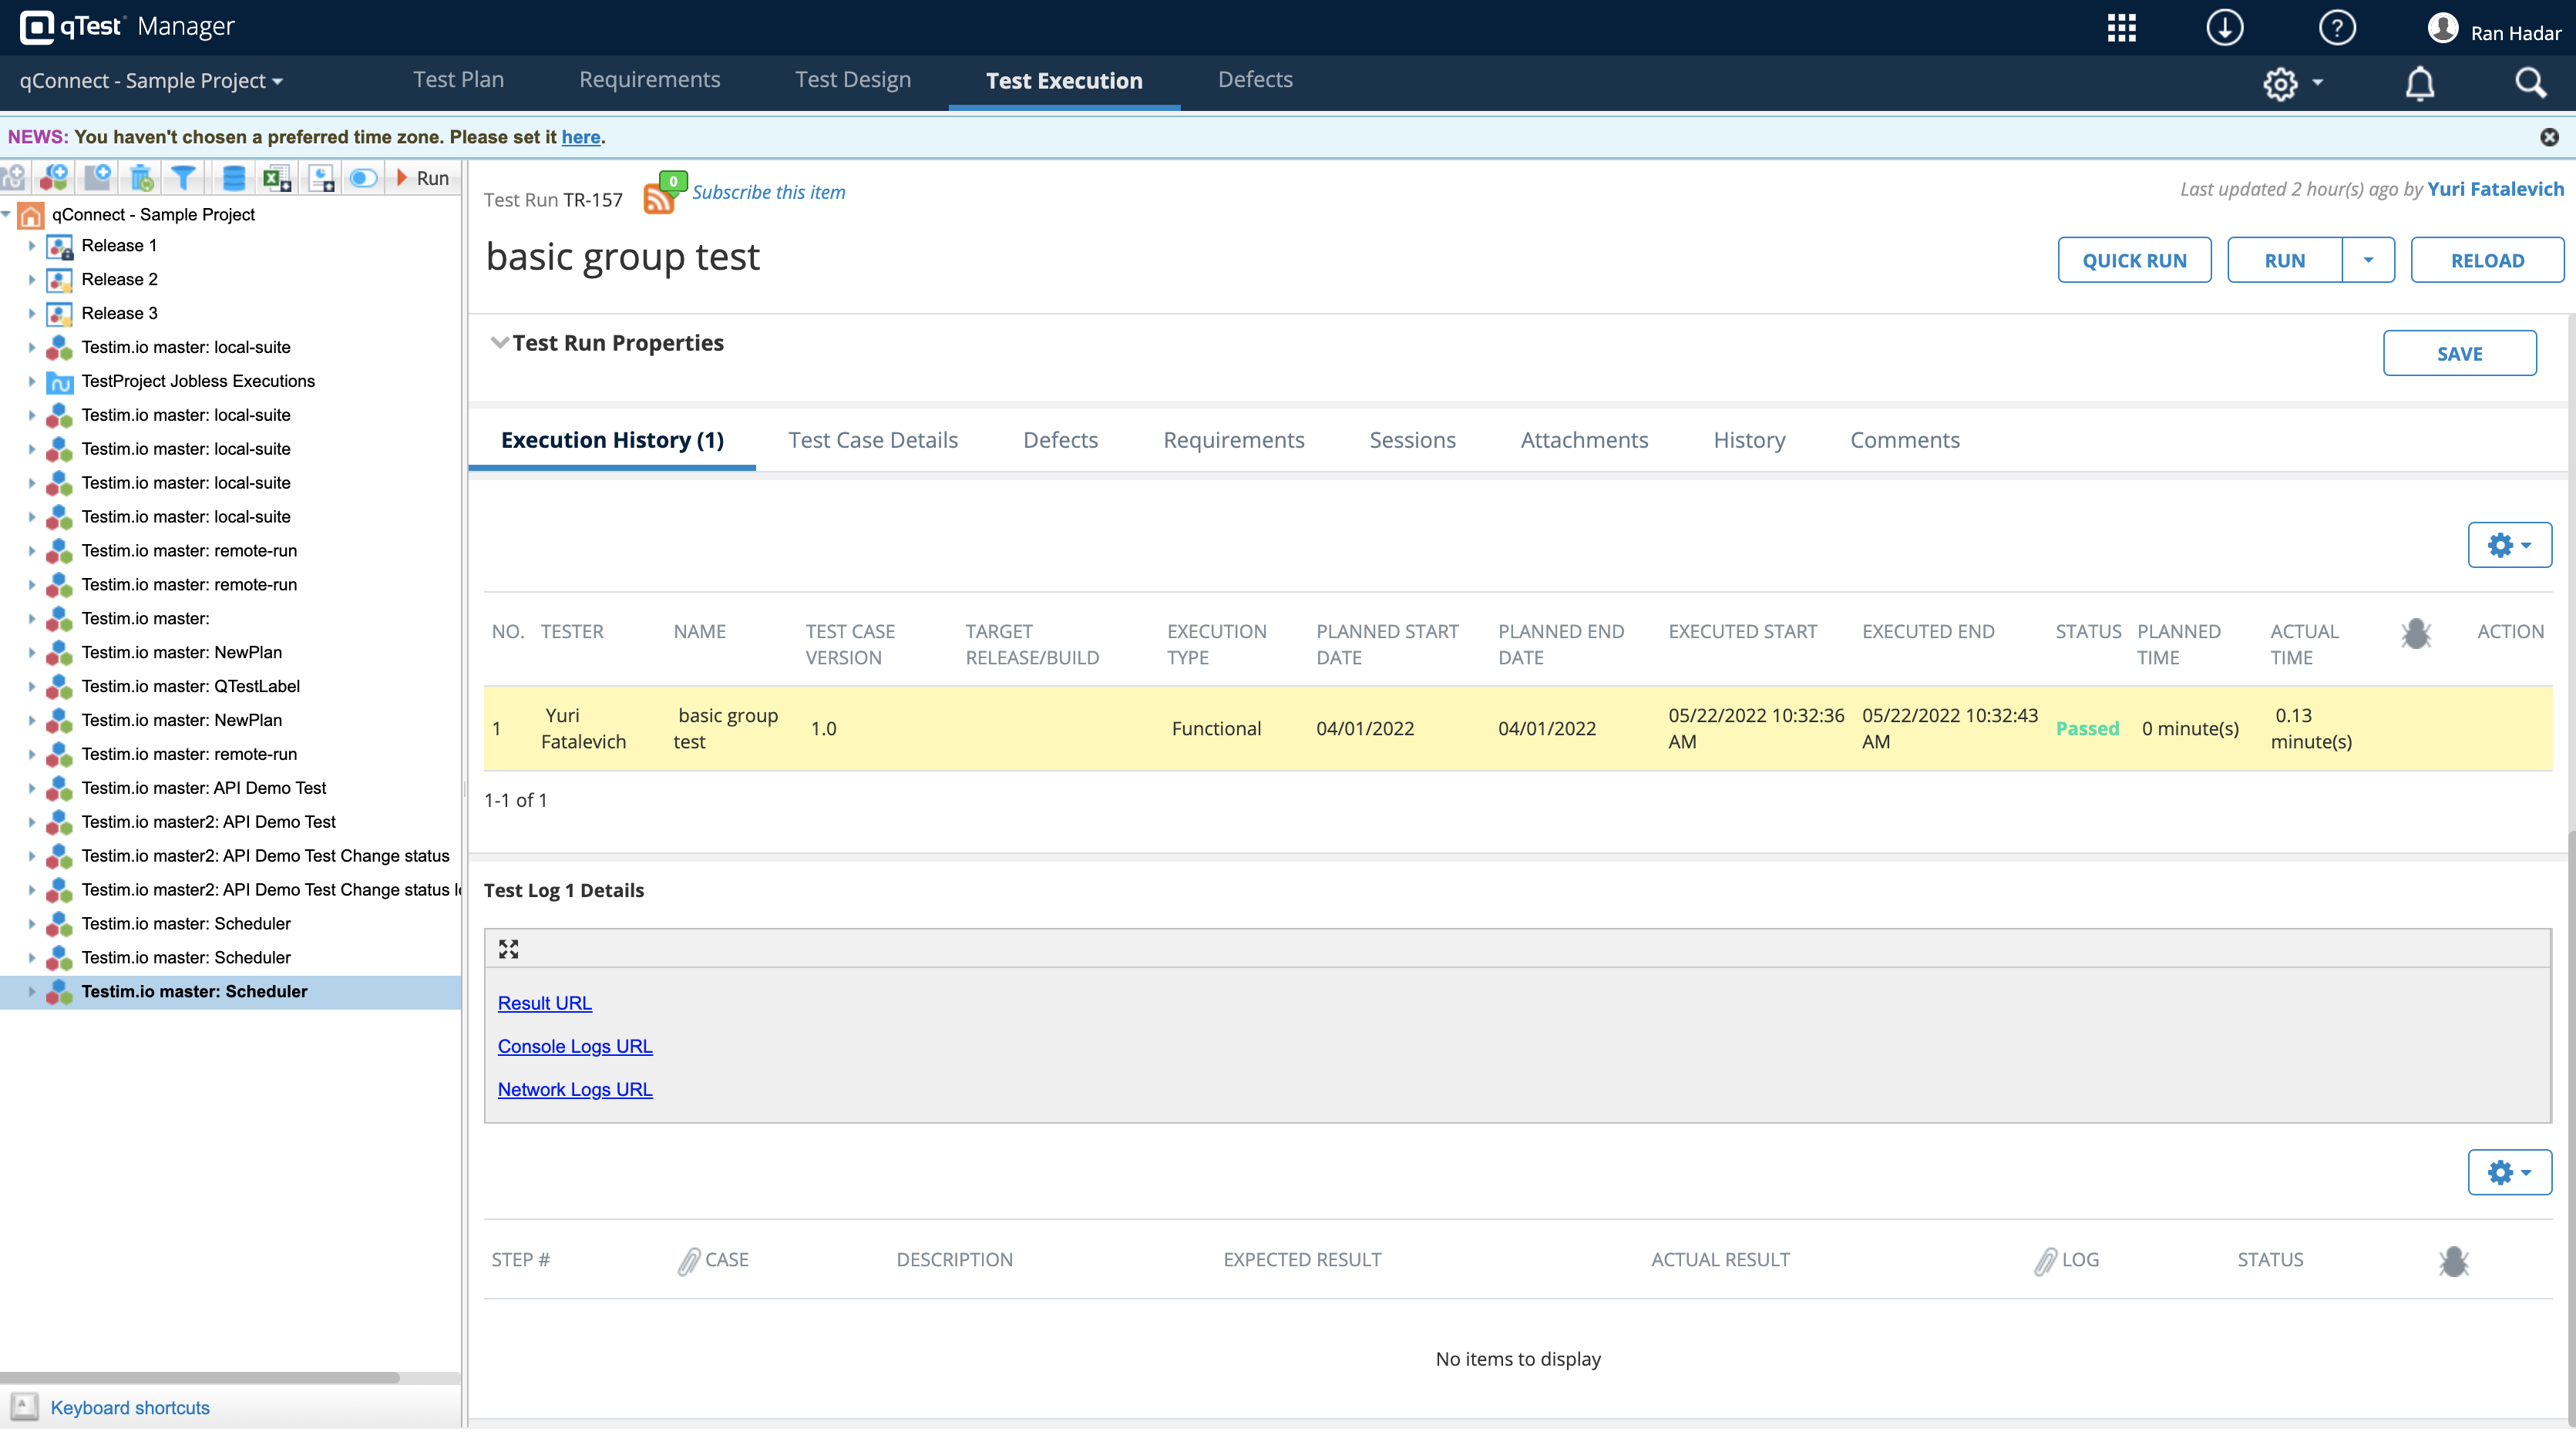
The following details are pushed to qTest from Testim:
- Name - the name of the test in Testim.
- Status - the status of the execution. The status displayed is the qTest status, which was translated from the Testim status as follows (Testim -> qTest):
- ABORTED - Unexecuted
- SKIPPED (quarantine status in Testim) - Blocked
- TIMEOUT - Failed
- PASSED - Passed
- FAILED - Failed
- Within the Execution History there is a Test Log Details pane with the following information:
- Result URL - opens the test result in Testim (i.e. displaying the result at the top).
- Console Logs URL - opens the console log in Testim.
- Network Logs URL - opens the network logs in Testim.
Suite runs will be presented as one run in qTest, click the certain run in order to see the results of all tests in the suite.
Mandatory custom fields in qTest are not supported. Making a custom field on qTest mandatory may cause the integration to stop working.
Updated about 3 years ago
